How to install and configure Invoice Ninja on CentOS 7
How to install and configure Invoice Ninja on CentOS 7
Linux has a limited number of invoice application that are user-friendly and a good GUI. Invoice Ninja is a popular, open source application for invoicing, tracking time, expenses and accepting payments from customers. It supports 45 integrated payment gateways to send invoices to customers within seconds. It also sets invoice payment due dates, alerts when invoices are paid and easier tax settings. This article will explain the installation and configuration procedure of Invoice Ninja on CentOS 7.
Pre-Requisite
- LEMP SETUP
- Nginx
- MySQL database
- PHP 7 or above
- OPEN SSL CERTIFICATE
NGINX Configuration procedure
To start with the configuration procedure, Create a conf.d file using vim editor and put the configuration contents inside it. Save and exit from the file.
[root@linuxhelp1 ~]# vim /etc/nginx/conf.d/ninja.conf
server {
listen           443 default
   server_name 192.168.7.231
   ssl on
   ssl_certificate     /etc/nginx/ssl/ininja.crt
   ssl_certificate_key /etc/nginx/ssl/ininja.key
   ssl_session_timeout 5m
   ssl_ciphers               ' AES128+EECDH:AES128+EDH:!aNULL'
   ssl_protocols              TLSv1 TLSv1.1 TLSv1.2
   ssl_prefer_server_ciphers on
   root /var/www/ninja/public
   index index.html index.htm index.php
   charset utf-8
   location / {
       try_files $uri $uri/ /index.php?$query_string
   }
location = /favicon.ico { access_log off  log_not_found off  }
   location = /robots.txt  { access_log off  log_not_found off  }
   access_log  /var/log/nginx/ininja.access.log
   error_log   /var/log/nginx/ininja.error.log
   sendfile off

location ~ .php$ {
       fastcgi_split_path_info ^(.+.php)(/.+)$
       fastcgi_pass unix:/var/run/php71-fpm-ninja.sock
       fastcgi_index index.php
       include fastcgi_params
       fastcgi_param SCRIPT_FILENAME $document_root$fastcgi_script_name
       fastcgi_intercept_errors off
       fastcgi_buffer_size 16k
       fastcgi_buffers 4 16k
}
   location ~ /.ht {
       deny all
   }
}

server {
   listen      80
   server_name 192.168.7.231
   add_header Strict-Transport-Security max-age=2592000
   rewrite ^ https://$server_name$request_uri? permanent
}
The configuration file is completed. Next, install the composer, it is used for the easy installation of web dependencies of Invoice Ninja.
[root@linuxhelp1 ~]# curl -sS https://getcomposer.org/installer | php
All settings correct for using Composer
Downloading...
Composer (version 1.4.2) successfully installed to: /root/composer.phar
Use it: php composer.phar
[root@linuxhelp1 ~]# mv composer.phar /usr/bin/composer
The composer is installed in the system. Download the self-hosted version of Invoice Ninja from their official website to configure it.
[root@linuxhelp1 ~] wget https://download.invoiceninja.com/ninja-v3.0.5.zip
--2017-07-17 17:44:12--  https://download.invoiceninja.com/ninja-v3.0.5.zip
Resolving download.invoiceninja.com (download.invoiceninja.com)... 104.18.36.134, 104.18.37.134, 2400:cb00:2048:1::6812:2586, ...
Connecting to download.invoiceninja.com (download.invoiceninja.com)|104.18.36.134|:443... connected.
HTTP request sent, awaiting response... 200 OK
Length: 101046640 (96M) [application/zip]
Saving to: ninja-v3.0.5.zip
100%[=====================================> ] 10,10,46,640  545KB/s   in 3m 39s
2017-07-17 17:47:53 (450 KB/s) - ninja-v3.0.5.zip saved [101046640/101046640]
Next, create a directory that can be used as the webroot of our Invoice Ninja.
[root@linuxhelp1 ~]# mkdir -p /var/www
Now extract the zip file you previously downloaded to our new directory by running the unzip command.
[root@linuxhelp1 ~] unzip -d /var/www ninja-v3.0.5.zip
nflating: /var/www/ninja/vendor/phpunit/phpunit/tests/TextUI/test-suffix-single.phpt
 inflating: /var/www/ninja/vendor/phpunit/phpunit/tests/TextUI/filter-class.phpt
 inflating: /var/www/ninja/vendor/phpunit/phpunit/tests/TextUI/filter-dataprovider-by-regexp.phpt
 inflating: /var/www/ninja/vendor/phpunit/phpunit/tests/TextUI/help2.phpt
 inflating: /var/www/ninja/vendor/phpunit/phpunit/tests/TextUI/default-isolation.phpt
 inflating: /var/www/ninja/vendor/phpunit/phpunit/tests/TextUI/report-useless-tests-isolation.phpt
 inflating: /var/www/ninja/vendor/phpunit/phpunit/tests/TextUI/failure.phpt
 inflating: /var/www/ninja/vendor/phpunit/phpunit/tests/TextUI/filter-method-case-insensitive.phpt
 inflating: /var/www/ninja/vendor/phpunit/phpu

.
.
.
inflating: /var/www/ninja/tests/data/Demo/demo.response.json
 inflating: /var/www/ninja/tests/TestCase.php
  creating: /var/www/ninja/tests/_support/
 inflating: /var/www/ninja/tests/_support/UnitTester.php
 inflating: /var/www/ninja/tests/_support/AcceptanceTester.php
 inflating: /var/www/ninja/tests/_support/FunctionalTester.php
  creating: /var/www/ninja/tests/_support/Helper/
 inflating: /var/www/ninja/tests/_support/Helper/Acceptance.php
 inflating: /var/www/ninja/tests/_support/Helper/Functional.php
 inflating: /var/www/ninja/tests/_support/Helper/Unit.php
 inflating: /var/www/ninja/tests/unit.suite.yml
  creating: /var/www/ninja/tests/functional/
 inflating: /var/www/ninja/tests/functional/_bootstrap.php
 inflating: /var/www/ninja/tests/functional/SettingsCest.php
 inflating: /var/www/ninja/tests/acceptance.suite.yml
  creating: /var/www/ninja/tests/unit/
 inflating: /var/www/ninja/tests/unit/_bootstrap.php
 inflating: /var/www/ninja/tests/unit/PaymentGatewayPayPalTest.php
 inflating: /var/www/ninja/tests/_bootstrap.php.default
  creating: /var/www/ninja/tests/_data/
extracting: /var/www/ninja/tests/_data/dump.sql
 inflating: /var/www/ninja/composer.lock
 inflating: /var/www/ninja/composer.json
You need to navigate to the Invoice Ninja webroot and install the dependencies using composer.
[root@linuxhelp1 ~] cd /var/www/ninja
Now you have to configure the Invoice Ninja to use our MariaDB named invoiceninja database. To do that, run the following command.
[root@linuxhelp1 ~]cp -v .env.example .env
Go to the database configuration and edit the following lines with your database details.
[root@linuxhelp1 ~] vim config/database.php
' mysql'  =>  [
           ' driver'     =>  ' mysql' ,
           ' host'       =>  env(' DB_HOST' , ' localhost' ),
           ' database'   =>  env(' DB_DATABASE' , ' invoiceninja' ),
           ' username'   =>  env(' DB_USERNAME' , ' ninja' ),
           ' password'   =>  env(' DB_PASSWORD' , ' 123' ),
           ' charset'    =>  ' utf8' ,
           ' collation'  =>  ' utf8_unicode_ci' ,
           ' prefix'     =>  ' ' ,
           ' strict'     =>  env(' DB_STRICT' , false),
],
Next, create the database tables for Invoice Ninja. To do that, run the following php artisan commands one by one and answer [yes] to the prompts. A PHP artisan key is generated successfully.
[root@linuxhelp1 ninja] php artisan migrate
**************************************
*     Application In Production!     *
**************************************
 Do you really wish to run this command? (yes/no) [no]:
 >  yes

[root@linuxhelp1 ninja] php artisan db:seed
**************************************
*     Application In Production!     *
**************************************
Do you really wish to run this command? (yes/no) [no]:
 >  yes
Running DatabaseSeeder

[root@linuxhelp1 ninja ]  php artisan key:generate
Application key [base64:S2bz9aXJcQFaPMs7LQqMWRm47I+F1x3GwP8MUaJfAC4=] set successfully.
You need to create a user account that will be associated with the installed Invoice Ninja. Run the following command to add the user.
[root@linuxhelp1 ninja ] useradd ninja
Configure the php-fpm module to run as the user ninja. To do that, create a new file named ninja.conf. Add the following lines in the configuration file. Save and exit from the file.
[root@linuxhelp1 ~] vim /etc/opt/remi/php71/php-fpm.d/ninja.conf
[ninja]
user = ninja
group = ninja
listen = /var/run/php71-fpm-ninja.sock
listen.owner = ninja
listen.group = ninja
listen.mode = 0666
pm = ondemand
pm.max_children = 5
pm.process_idle_timeout = 10s
pm.max_requests = 200
chdir = /
~
Change the directory permission to the user you’ ve created earlier by executing the following command.
[root@linuxhelp1 ninja] chown -R ninja:ninja /var/www/ninja
And finally, start the php-fpm and Nginx by running the following commands.
[root@linuxhelp1 ninja ]systemctl start php71-php-fpm
[root@linuxhelp1 ninja]systemctl start nginx
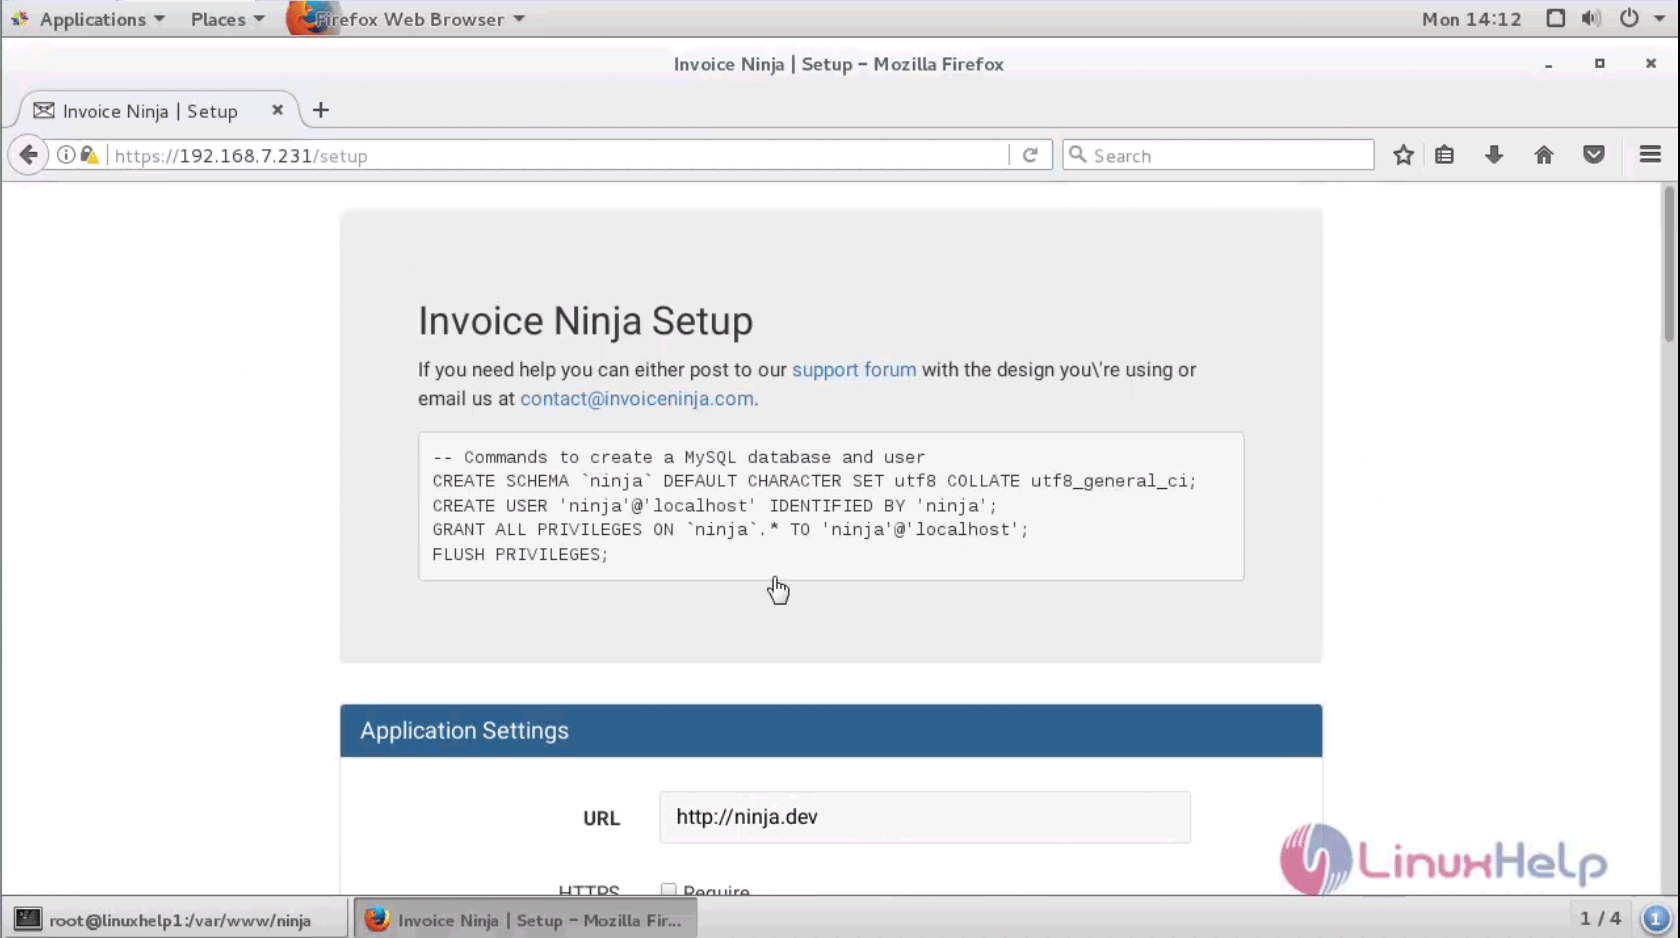
Now switch over to the browser and enter your machine IP. Finish the Invoice Ninja setup via the web GUI. You should get something similar to the following page.
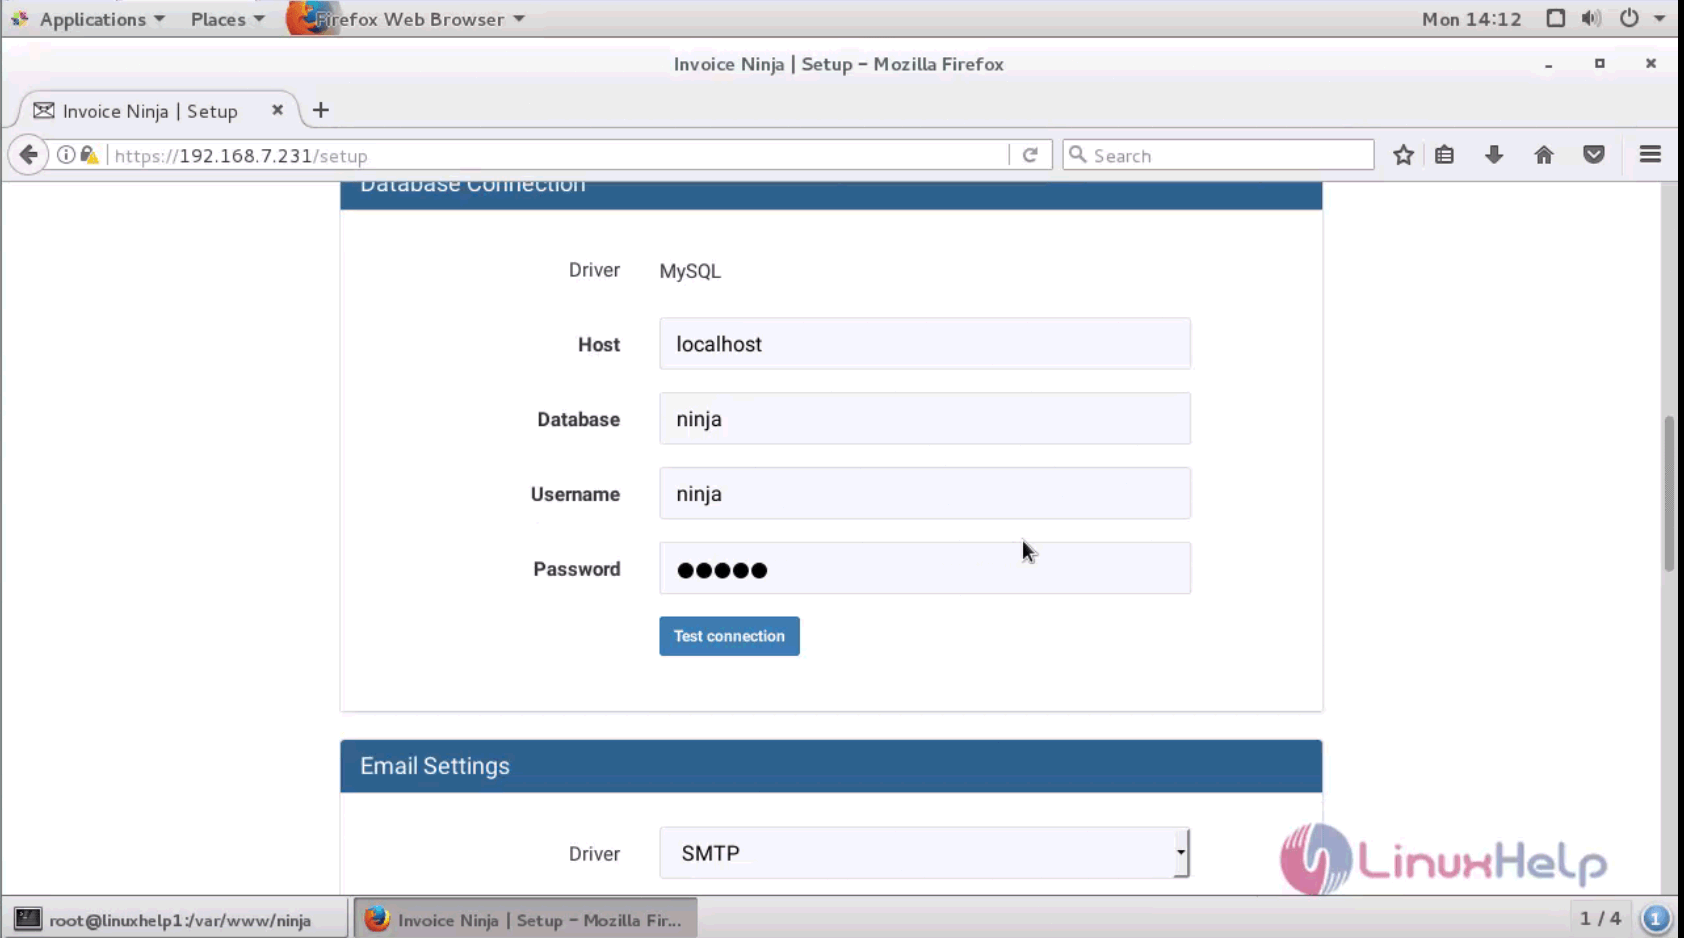
Provide your database details and test your connection.
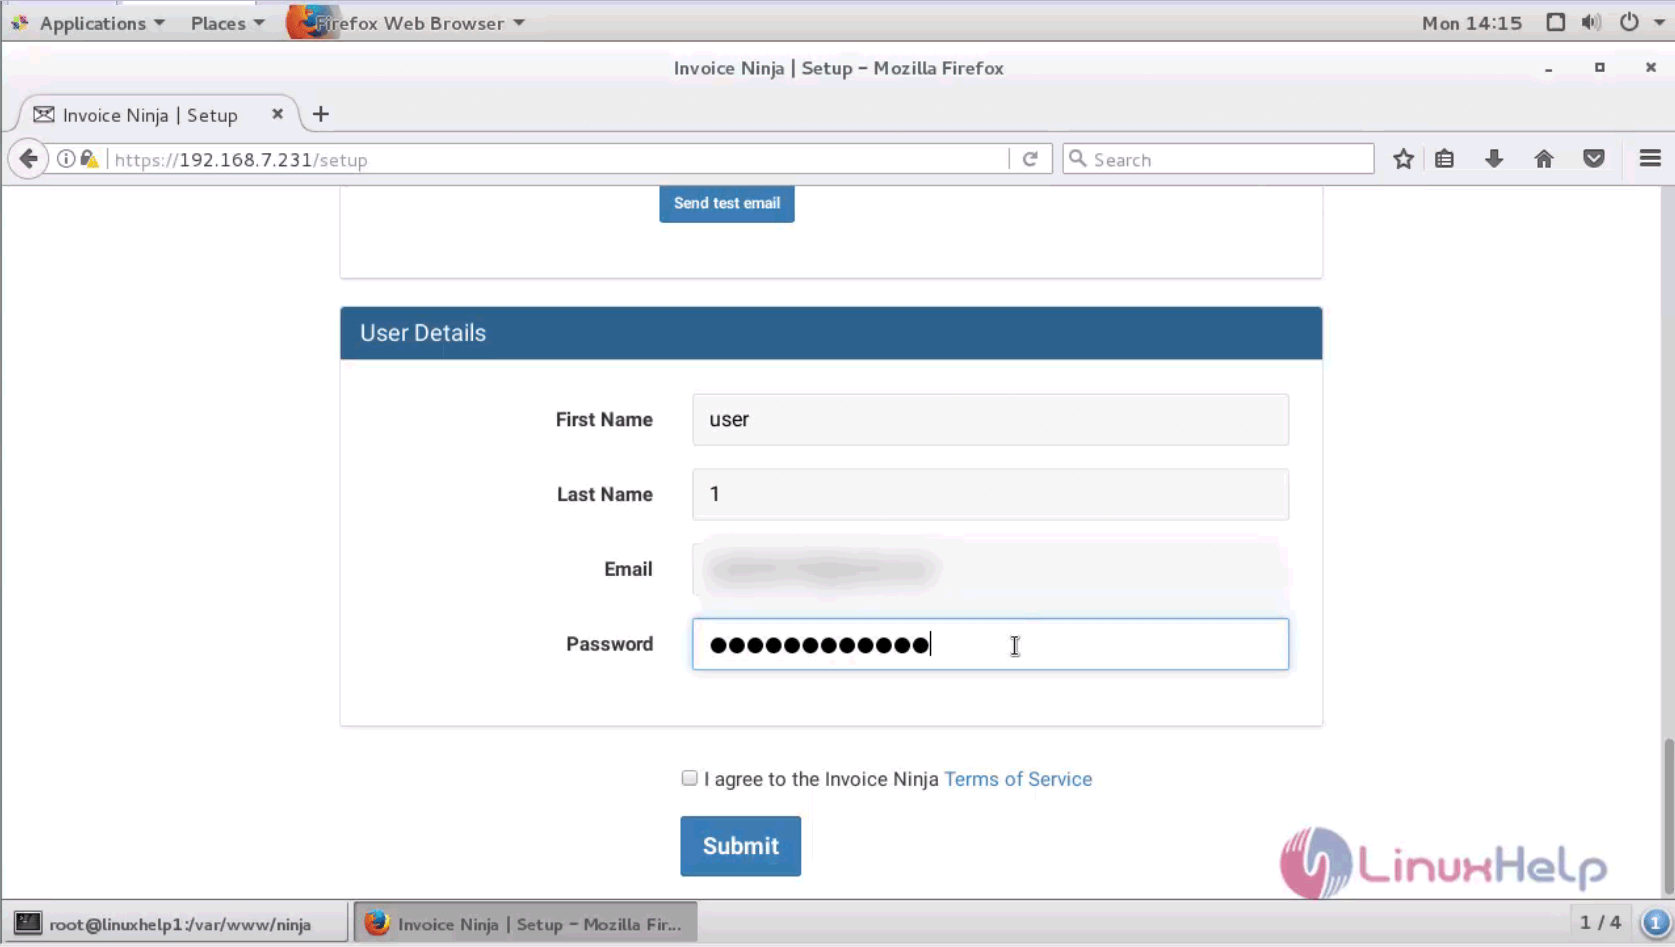
Provide a user name and followed by Email ID and Password credentials.
After entering the user details, you will see a page where you should be able to provide the Email Id and Password and login to your account.
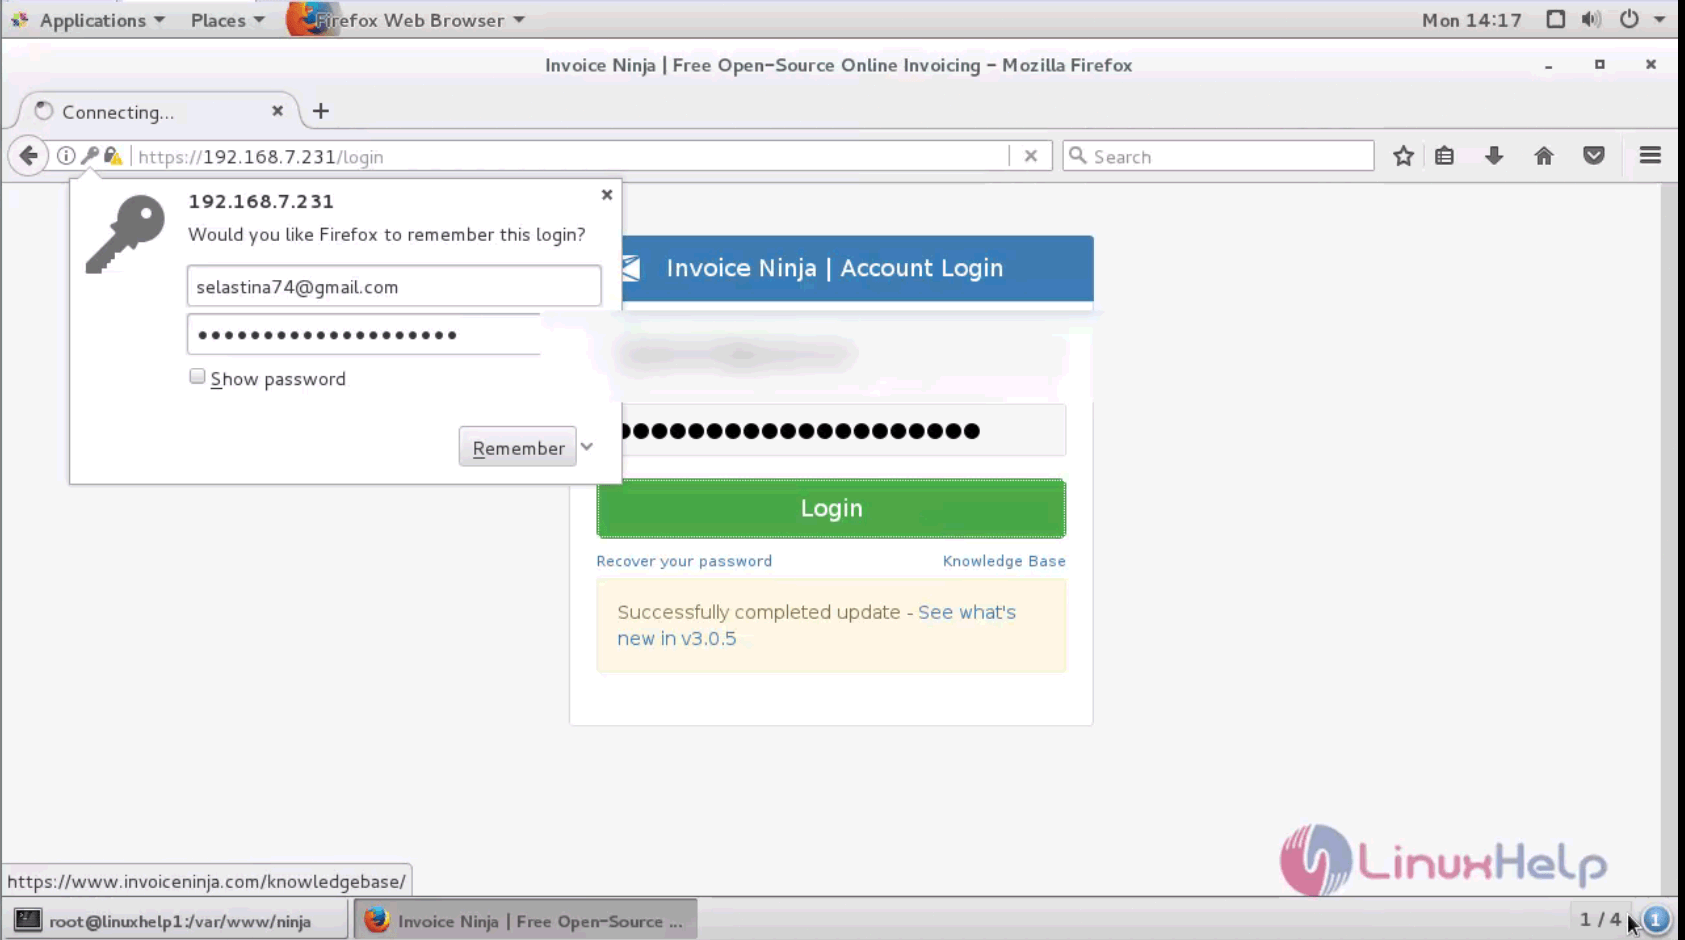
The setup is complete. Now you can use Invoice Ninja for various functionalities.
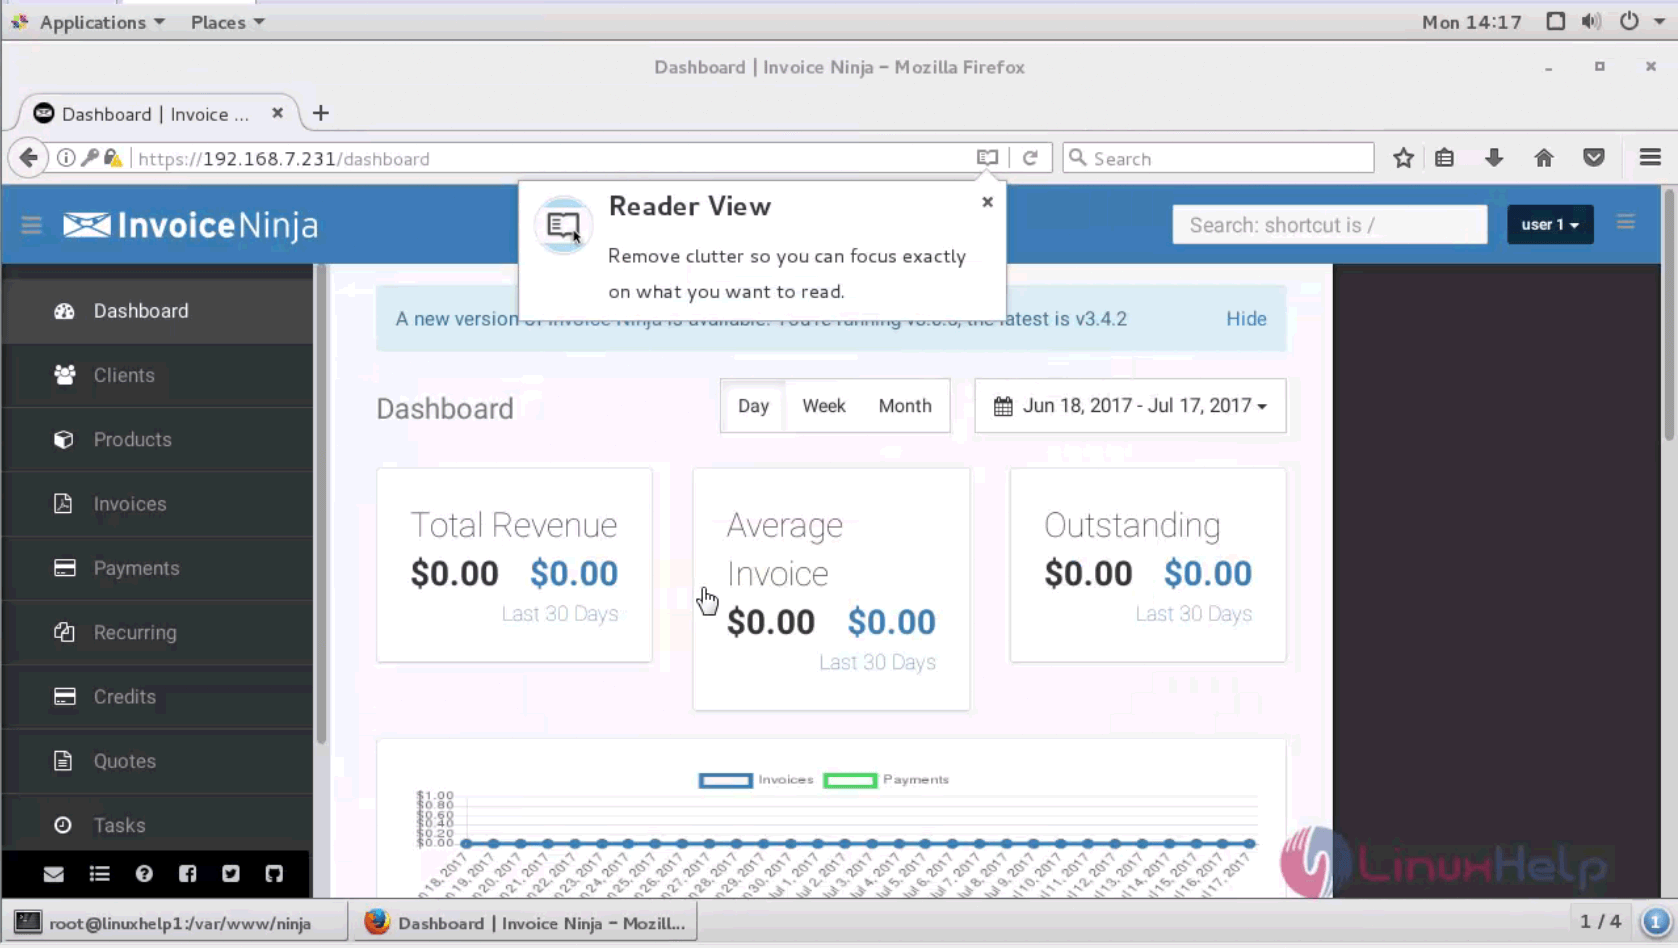
The installation and configuration procedure of Invoice Ninja is complete. Invoice Ninja can easily convert quotations to invoices and also does automatic billing of products.
Comments ( 0 )
No comments available