How to install and configure Linux-dash in Linux
Steps to Install ' linux-dash' using Web Browser
Linux Dash is an open-source dashboard to monitor Linux servers. Provides a detailed overview of all vital aspects of your server, including RAM and disk usage, network, installed software, users, and running processes. All information is organized into sections, and you can easily monitor the specific section.
Features:
- It supports broad range of Linux server flavors.
- Easy to install for servers with Nginx or Apache + PHP.
- Select and drag to re-organize widgets.
- A real-time monitoring of CPU, Load, Up time, RAM, Disk Usage, Users and many more system statistics.
- A web based dash board to monitor various information about the server.
List of Current Widgets
We use Linux dash to monitor the following widgets.
- RAM
- Software
- IP
- General info
- Load Average
- Internet Speed
- Processes
- Logs
- Disk Usage
- Users
Step 1: To Install Apache, PHP Modules and PHP
Run the following commands to install and update the Apache packages.
In Ubuntu/Debian
# apt-get install apache2 apache2-utils
In CentOS/RHEL
[root@linuxhelp Desktop]# yum install httpd httpd-tools
Loaded plugins: fastestmirror, refresh-packagekit, security
Setting up Install Process
Loading mirror speeds from cached hostfile
epel/metalink                                            | 5.1 kB     00:00
* base: centos.webwerks.com
* epel: epel.mirror.net.in
.
.
.
Updated:
httpd.x86_64 0:2.2.15-47.el6.centos.4
httpd-tools.x86_64 0:2.2.15-47.el6.centos.4
Complete!
Now Apache is successfully installed.
Run the following command to install php
In Ubuntu/Debian
# apt-get install php5 curl php5-curl php5-json
In CentOS/RHEL
[root@linuxhelp Desktop]# yum install php php-xml php-common php-json
Loaded plugins: fastestmirror, refresh-packagekit, security
Setting up Install Process
Loading mirror speeds from cached hostfile
* base: centos.webwerks.com
* epel: epel.mirror.net.in
* extras: centos.webwerks.com
* nethserver-base: nethserver.antani.co
* nethserver-updates: nethserver.antani.co
* rpmforge: mirror.smartmedia.net.id
.
.
.

Installed:
php.x86_64 0:5.3.3-46.el6_7.1         php-common.x86_64 0:5.3.3-46.el6_7.1
php-xml.x86_64 0:5.3.3-46.el6_7.1
Dependency Installed:
php-cli.x86_64 0:5.3.3-46.el6_7.1

Complete!
php is installed successfully.
Step 2: Install git package
Run the following command to install the git packages.
In Debian/Ubuntu
# apt-get install git
In CentOS/RHEL
[root@linuxhelp Desktop]# yum install git

Loaded plugins: fastestmirror, refresh-packagekit, security

Setting up Install Process
Loading mirror speeds from cached hostfile
* base: centos.webwerks.com
* epel: epel.mirror.net.in
* extras: centos.webwerks.com
* nethserver-base: mirror.nethserver.org
* nethserver-updates: mirror.nethserver.org
.
.
.
Installed:
git.x86_64 0:1.7.1-4.el6_7.1
Dependency Installed:
perl-Error.noarch 1:0.17015-4.el6      perl-Git.noarch 0:1.7.1-4.el6_7.1

Complete!
Now the git packages are successfully installed.
Step 3: To Download and Install Linux-Dash
Download the ' linux-dash' package from ' Github' repository. You should download this package from Apache public location ' /var/www/html' .
[root@linuxhelp html]# git clone https://github.com/afaqurk/linux-dash.git
Step 4 : Restart your Apache server
Run the following command to restart the services.
[root@linuxhelp html]# service httpd restart

Stopping httpd:                                            [  OK  ]
Starting httpd:                                            [  OK  ]
Step 5: To Monitor Server using linux-dash
Now open your browser clear all the cache from your browser and go to the folder where you installed ' linux-dash' i.e http://localhost/linux-dash.
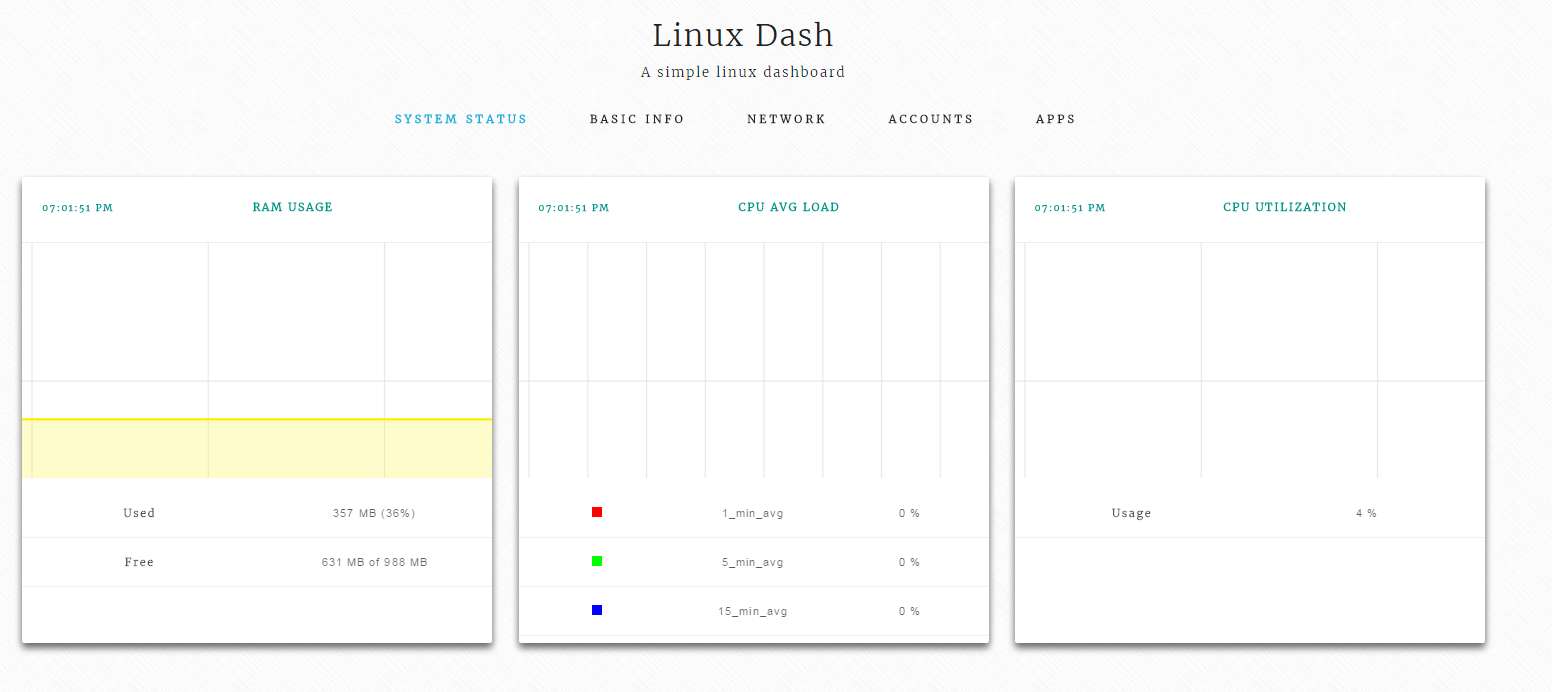
Now your linux-dash will be successfully installed you can easily monitor server. Now the below screen shot shows the various performance of your server.
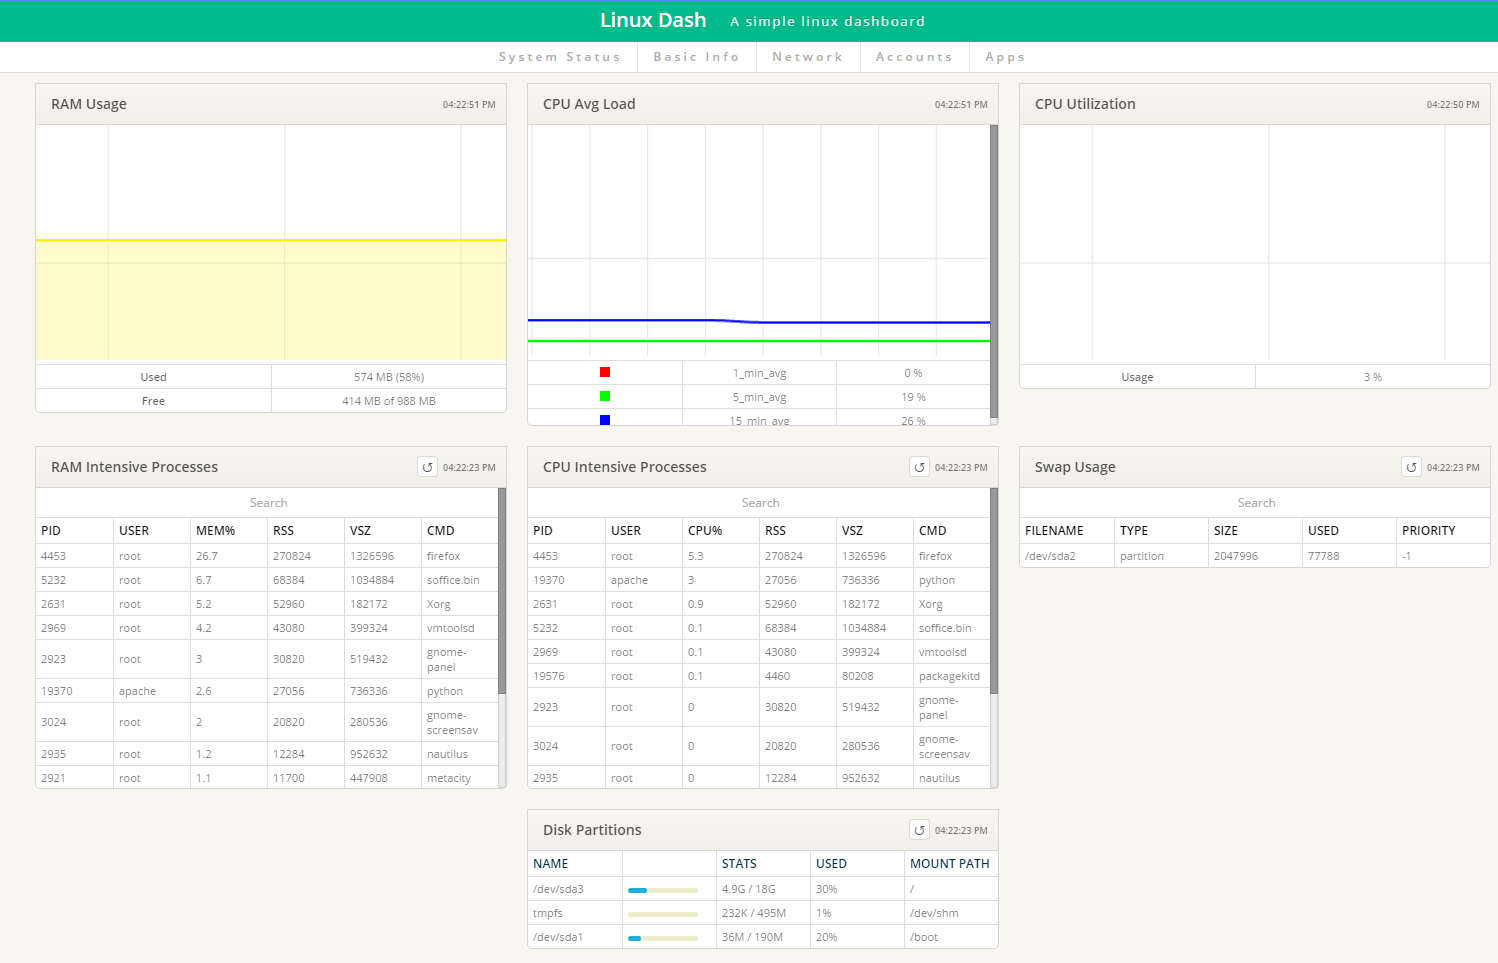
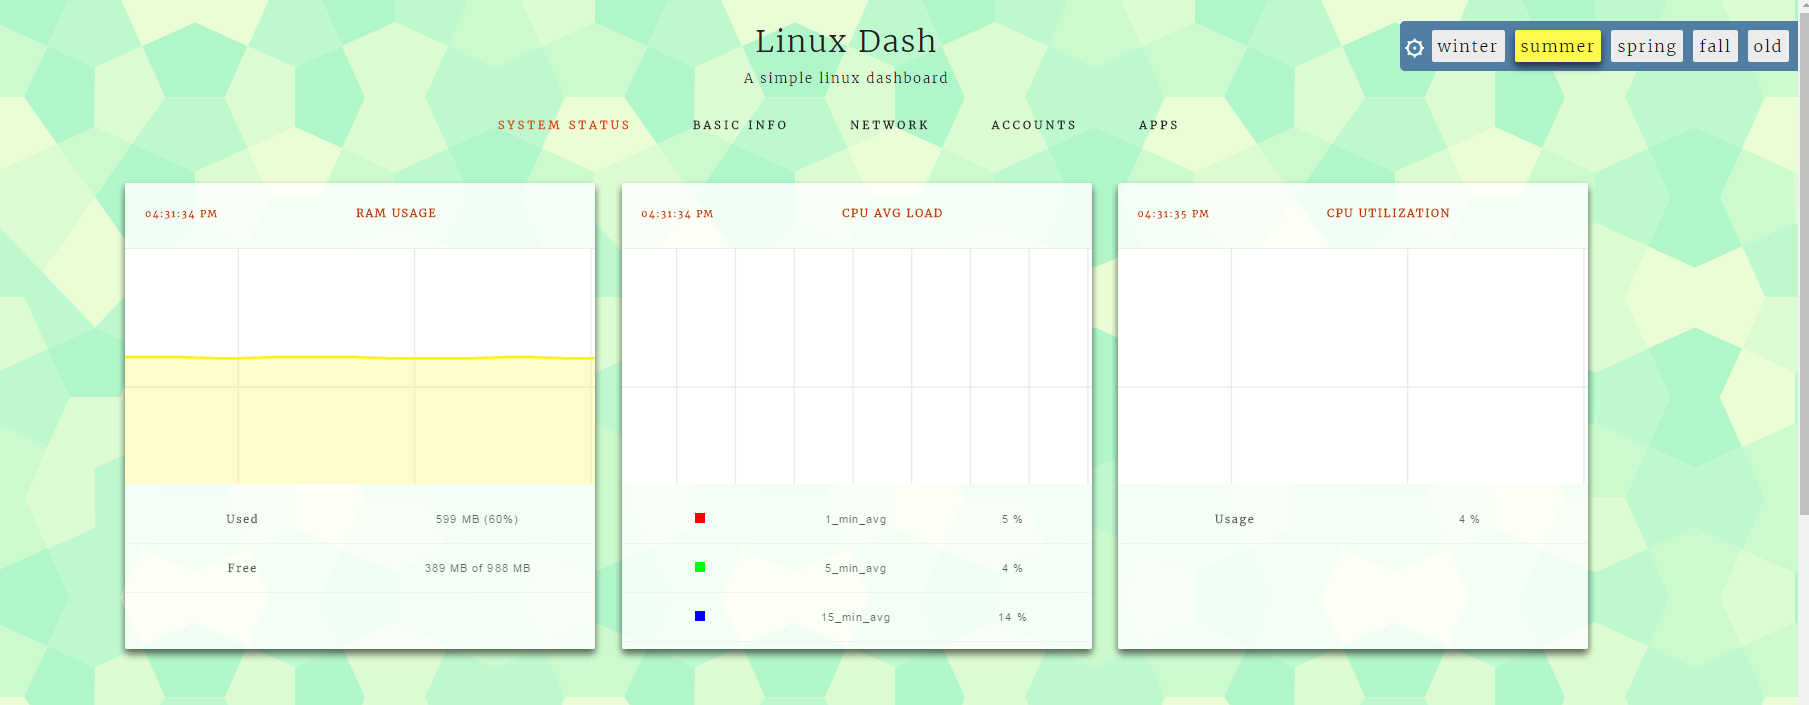
Monitor system status information
Click the system status, to view the status of the systems in the server.
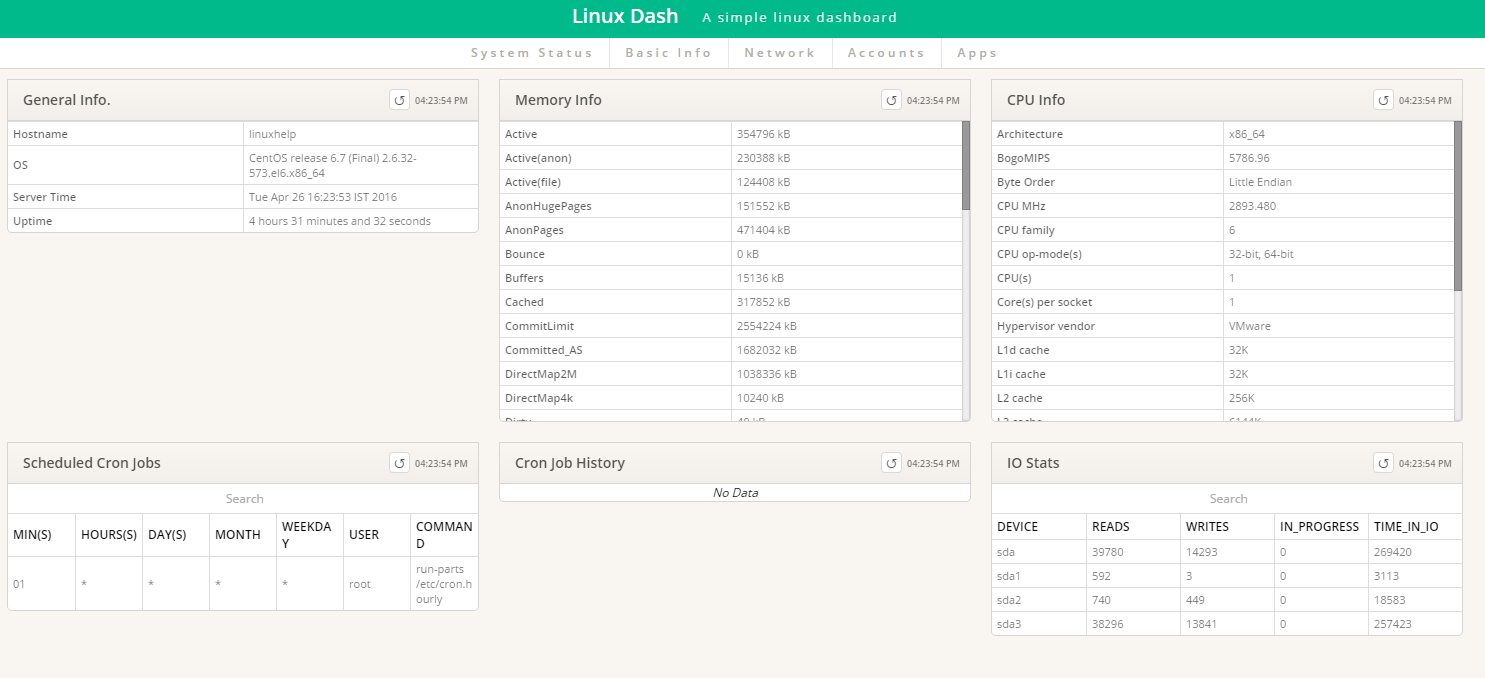
Monitor system basic information
Click basic information, to view the basic information of the systems in the server.
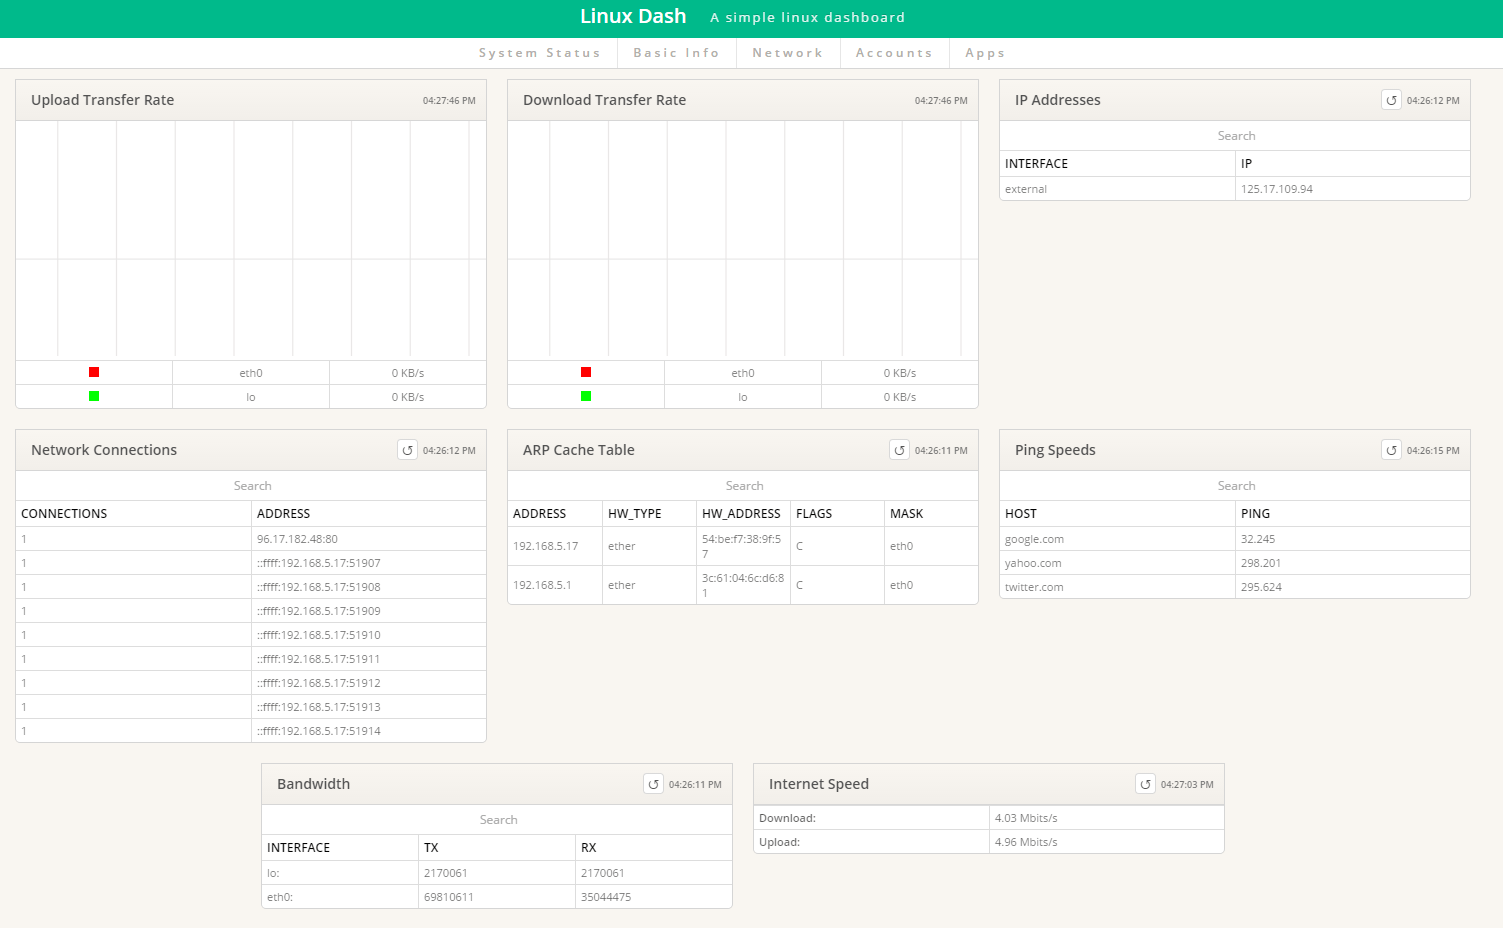
Monitor Network status information
Click network status, to know the network status information of the systems in the server.

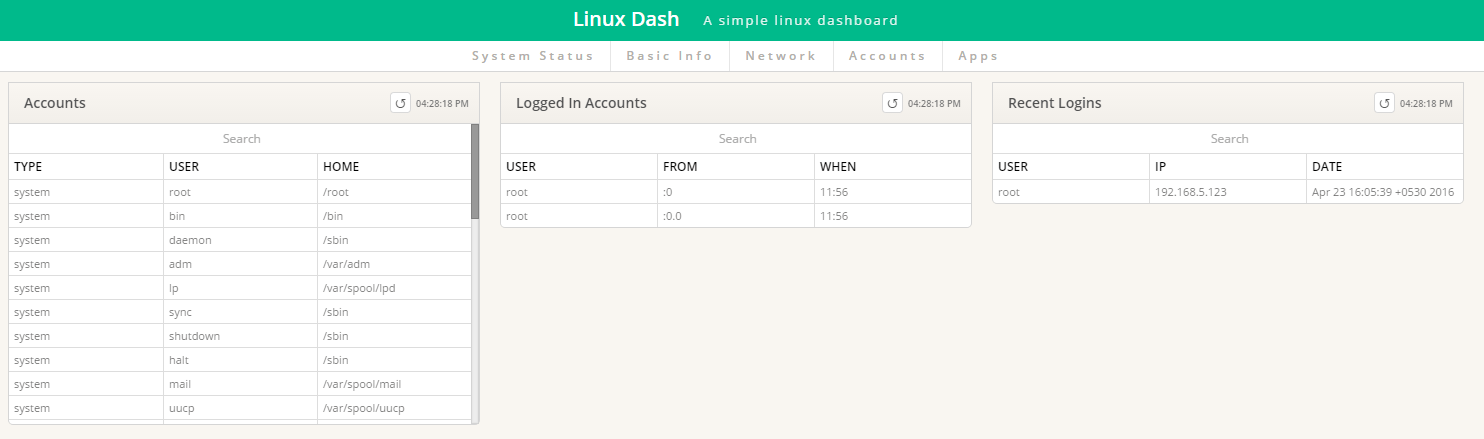
Monitor your system account status information
Click account status, to view the account status information of the systems in the server.

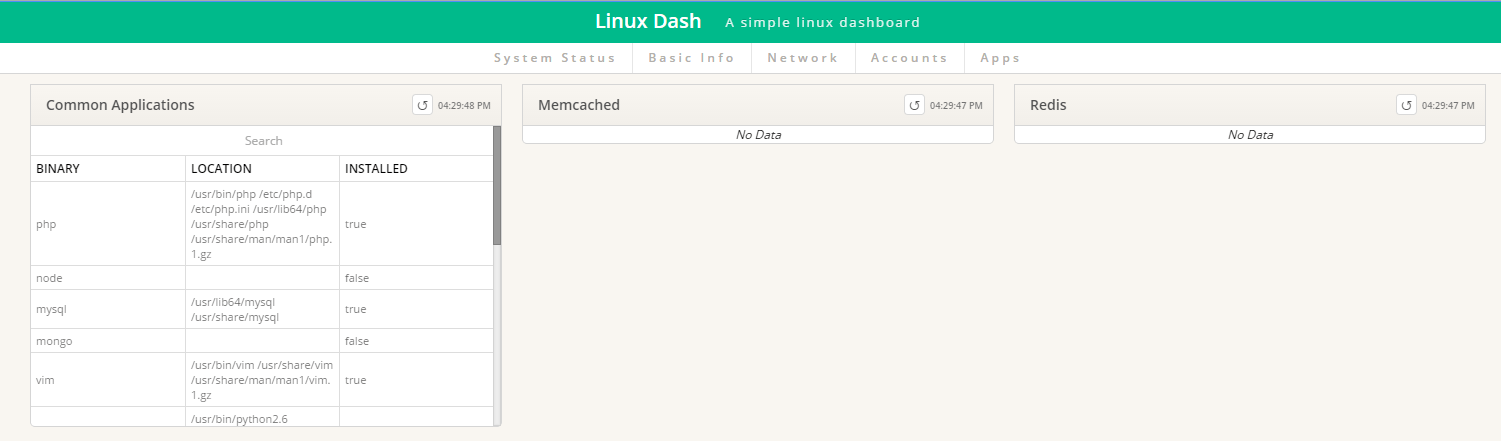
Monitor your installed application status information
Click application status, to view the application status of the systems in the server.
To change your Linux-dash background
To change your Linux-dash background themes
Step 6: To protect password in linux-dash
Protecting password in your statistics page, you have to generate files like, ' .htaccess' and ' .htpasswd' . The below command can create a ' linux' user and also creates new ' htpasswd' file under ' /var' folder.
[root@linuxhelp ~]# htpasswd -c /var/.htpasswd linux
New password:
Re-type new password:
Adding password for linux user
To create a file ' .htaccess' under the directory ' linux-dash' and include the below content in it. Just save and exit the file.
AuthName " Restricted Area"

AuthType Basic
AuthUserFile /var/.htpasswd
AuthGroupFile /dev/null
require valid-user
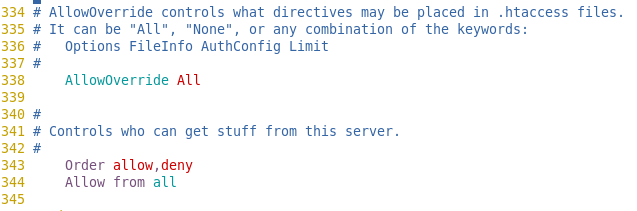
Step7: Allow the override option in Apache configuration file.
[root@linuxhelp ~]# vim /etc/httpd/conf/httpd.conf
Step 8: Restart Apache server
Run the following command to restart the server.
[root@linuxhelp html]# service httpd restart

Stopping httpd:                                            [  OK  ]
Starting httpd: httpd: apr_sockaddr_info_get() failed for linuxhelp
httpd: Could not reliably determine the server' s fully qualified domain name, using 127.0.0.1 for ServerName
[  OK  ]
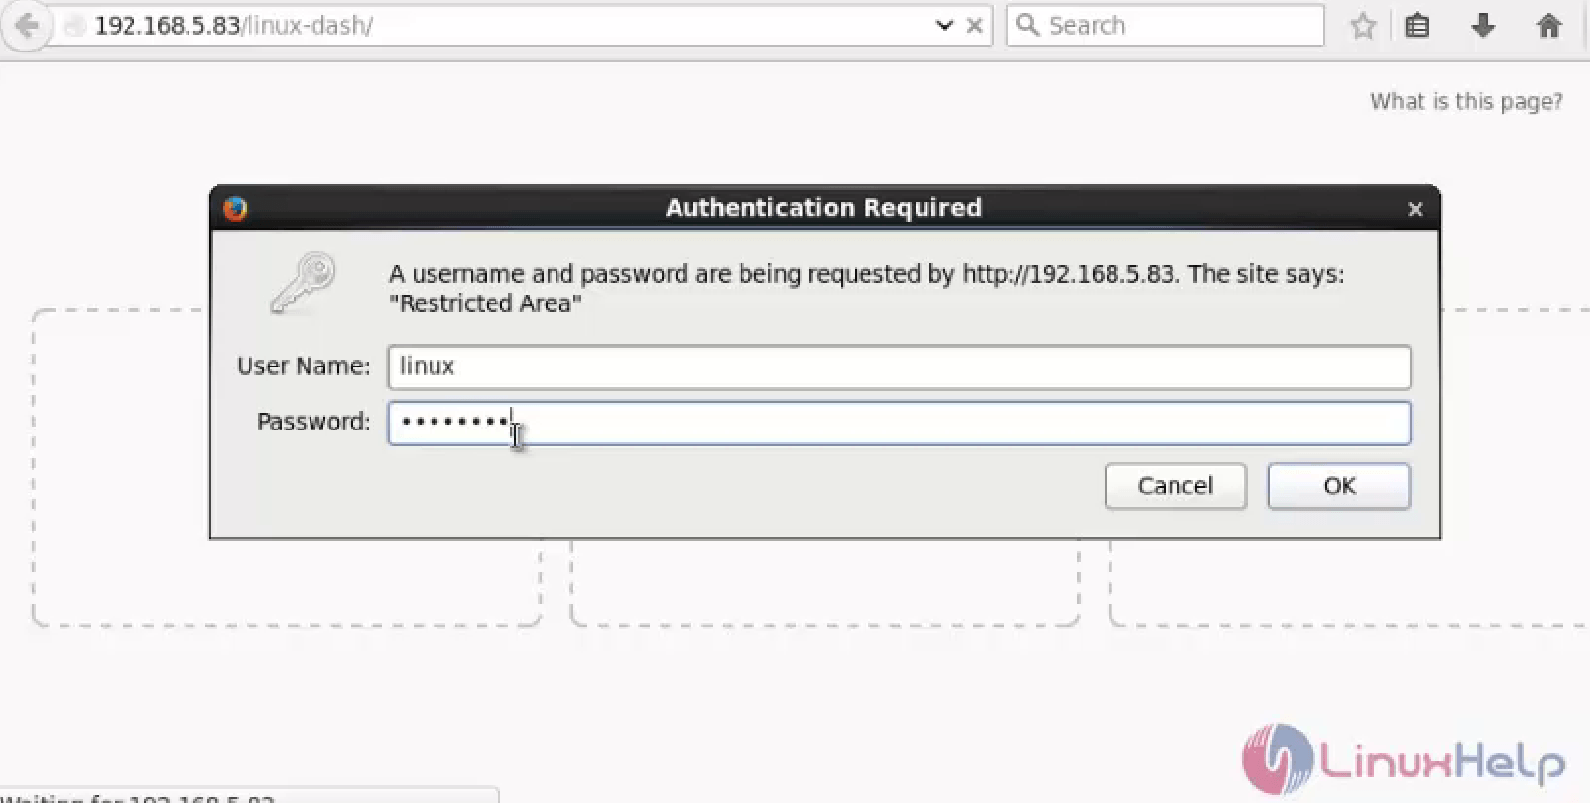
Step 9: Now open your Linux-dash tool with secure password protection.
First clear all browser' s cache and then next go to the statistics page, your system prompts you to login.Enter the username and password, what you used in the htpasswd command.
Comments ( 1 )