How to install BackDrop CMS – 1.9.3 on Ubuntu – 17.04
To install BackDrop CMS &ndash 1.9.3 on Ubuntu &ndash 17.04
Backdrop CMS is a full-featured content management system that permits the non-technical users to manage a wide variety of content. It can be used to create all kinds of websites including blogs, image galleries, social networks, intranets, and more. Installation of Backdrop CMS is explained in this tutorial.
Prerequisites
Backdrop CMS requires a webserver to functionally based on LAMP setup on your system and also with following required PHP modules.
apt-get install php-mysql php-curl php-json php-cgi php libapache2-mod-php php-mcrypt php-xmlrpc php-gd php-mbstring php php-common php-xmlrpc php-soap php-xml php-intl php-cli php-ldap php-zip php-readline php-imap php-tidy php-recode php-sqlite3 php-xdebug php-gettext php-dev php-pear php-memcache php-memcached php-bz2
Installing BackDrop CMS
To create the new database, you need to run the following command.
root@linuxhelp1:/var/www# mysql -u root -p
Enter password:
Welcome to the MariaDB monitor.  Commands end with   or g.
Your MariaDB connection id is 11
Server version: 10.1.25-MariaDB- Ubuntu 17.04

Copyright (c) 2000, 2017, Oracle, MariaDB Corporation Ab and others.

Type ' help '  or ' h'  for help. Type ' c'  to clear the current input statement.

MariaDB [(none)]>  create database backdrop
Query OK, 1 row affected (0.00 sec)

MariaDB [(none)]>  grant all privileges on backdrop.* to ' backuser' @' localhost'  identified by ' 123'
Query OK, 0 rows affected (0.01 sec)

MariaDB [(none)]>  flush privileges
Query OK, 0 rows affected (0.00 sec)

MariaDB [(none)]>  exit
Bye
And then, switch into the directory as follows.
root@linuxhelp1:~# cd /home/user/Downloads/
After that, unzip the packages in the following manner.
root@linuxhelp1:/home/user/Downloads# unzip backdrop.zip
Archive:  backdrop.zip
  inflating: backdrop/files/.htaccess
  inflating: backdrop/files/README.md
  inflating: backdrop/core/includes/database/mysql/query.inc
  inflating: backdrop/core/includes/database/mysql/install.inc
  inflating: backdrop/core/includes/database/mysql/database.inc
  inflating: backdrop/core/includes/database/mysql/schema.inc
  inflating: backdrop/core/includes/database/query.inc
  inflating: backdrop/core/includes/database/select.inc
  inflating: backdrop/core/includes/database/prefetch.inc
  inflating: backdrop/core/includes/database/database.inc
  inflating: backdrop/core/includes/database/schema.inc
.
.
  inflating: backdrop/profiles/minimal/minimal.profile
  inflating: backdrop/profiles/minimal/minimal.info
  inflating: backdrop/profiles/minimal/minimal.install
  inflating: backdrop/profiles/README.md
  inflating: backdrop/themes/README.md
  inflating: backdrop/sites/sites.php
  inflating: backdrop/sites/README.md
  inflating: backdrop/index.php
  inflating: backdrop/robots.txt
  inflating: backdrop/.htaccess
  inflating: backdrop/.editorconfig
  inflating: backdrop/README.md
  inflating: backdrop/.gitignore
  inflating: backdrop/settings.php
And then, move the file.
root@linuxhelp1:/home/user/Downloads# mv backdrop /var/www/
Again, switch to the directory.
root@linuxhelp1:/home/user/Downloads# cd /var/www/
Later, change ownership and permission for the file.
root@linuxhelp1:/var/www# chown -R www-data.www-data backdrop
root@linuxhelp1:/var/www# chmod -R 775 backdrop
And change the value inside php.ini file.
root@linuxhelp1:/var/www# vim /etc/php/7.0/apache2/php.ini
[..]
memory_limit = 256M
upload_max_filesize=100M
max_execution_time=360
date.timzone=Asia/Kolkata
[..]
You now need to create virtualHost. Run the following command and configure the VirtualHost.
root@linuxhelp1:/var/www# vim /etc/apache2/sites-available/backdrop.conf
< VirtualHost *:80>
ServerName www.linuxhelp1.com
DocumentRoot /var/www/backdrop/

< Directory /var/www/backdrop/>
AllowOverride All
allow from all
< /Directory>

< /VirtualHost>
And then, enable the site access.
root@linuxhelp1:/var/www# a2ensite backdrop.conf
Enabling site backdrop.
To activate the new configuration, you need to run:
  systemctl reload apache2
After that, enable the rewrite module too.
root@linuxhelp1:/var/www# a2enmod rewrite
Enabling module rewrite.
To activate the new configuration, you need to run:
  systemctl restart apache2
And disable the default site access.
root@linuxhelp1:/var/www# a2dissite 000-default.conf
Site 000-default disabled.
To activate the new configuration, you need to run:
  systemctl reload apache2
You should now restart the apache2 service.
root@linuxhelp1:/var/www# systemctl restart apache2
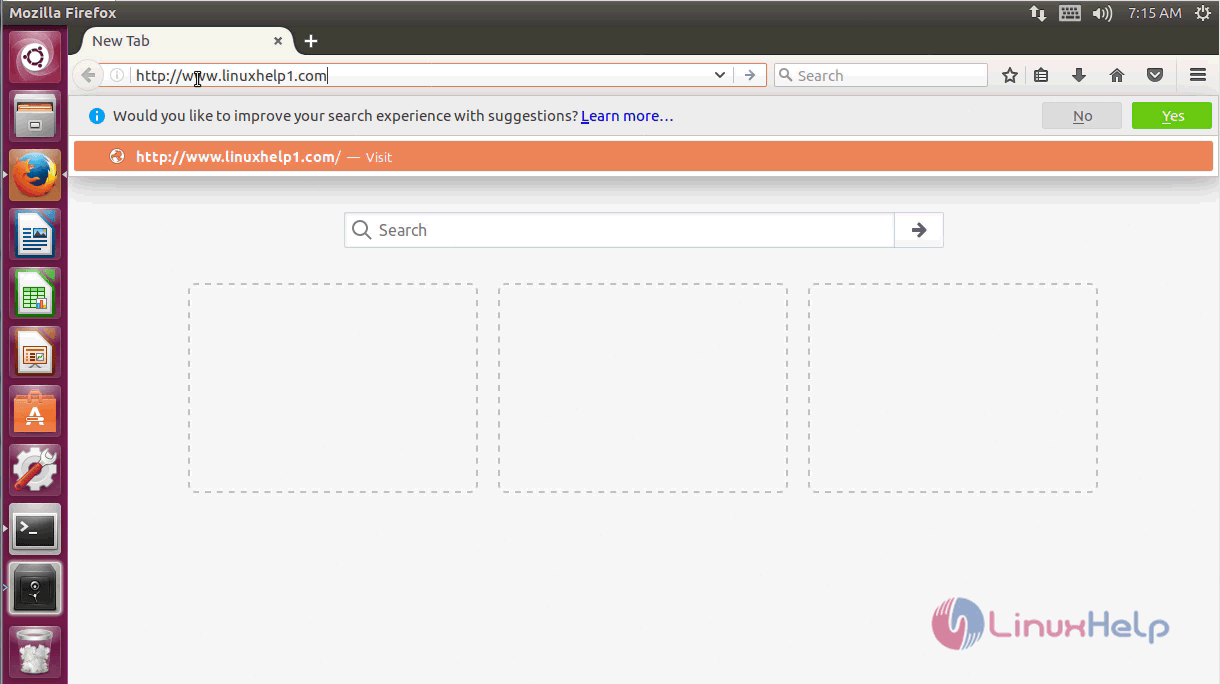
Now, open your browser and type http://local Ip (or) domain name.
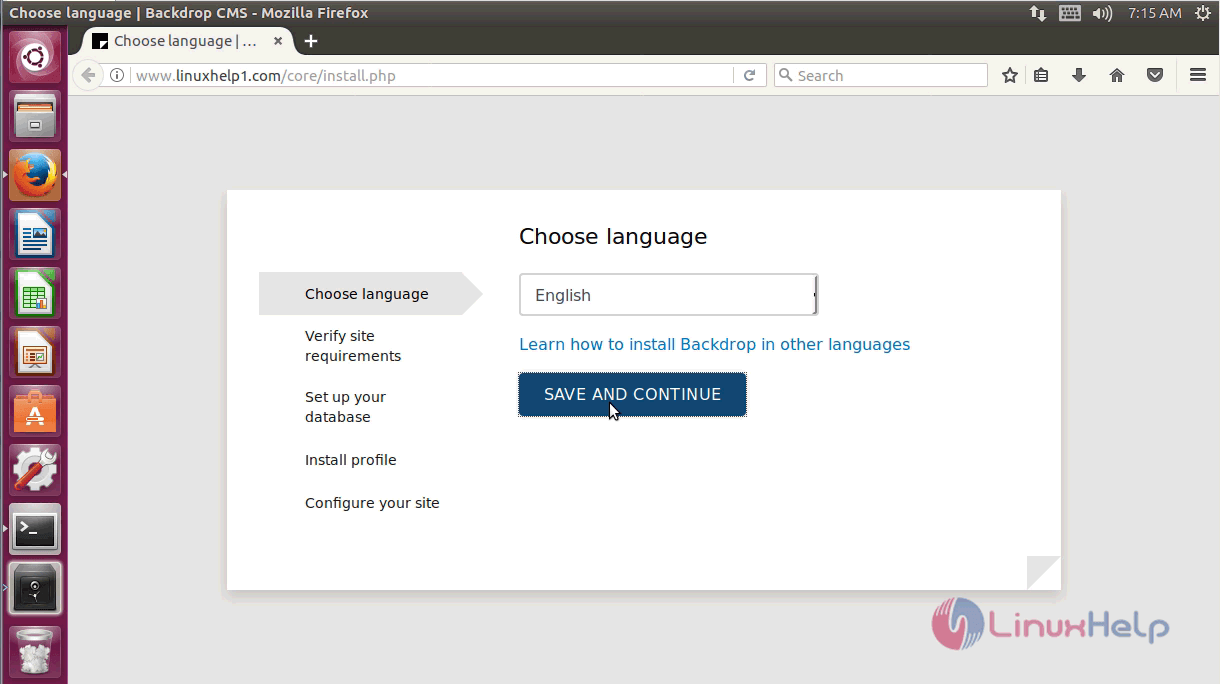
And choose the language.
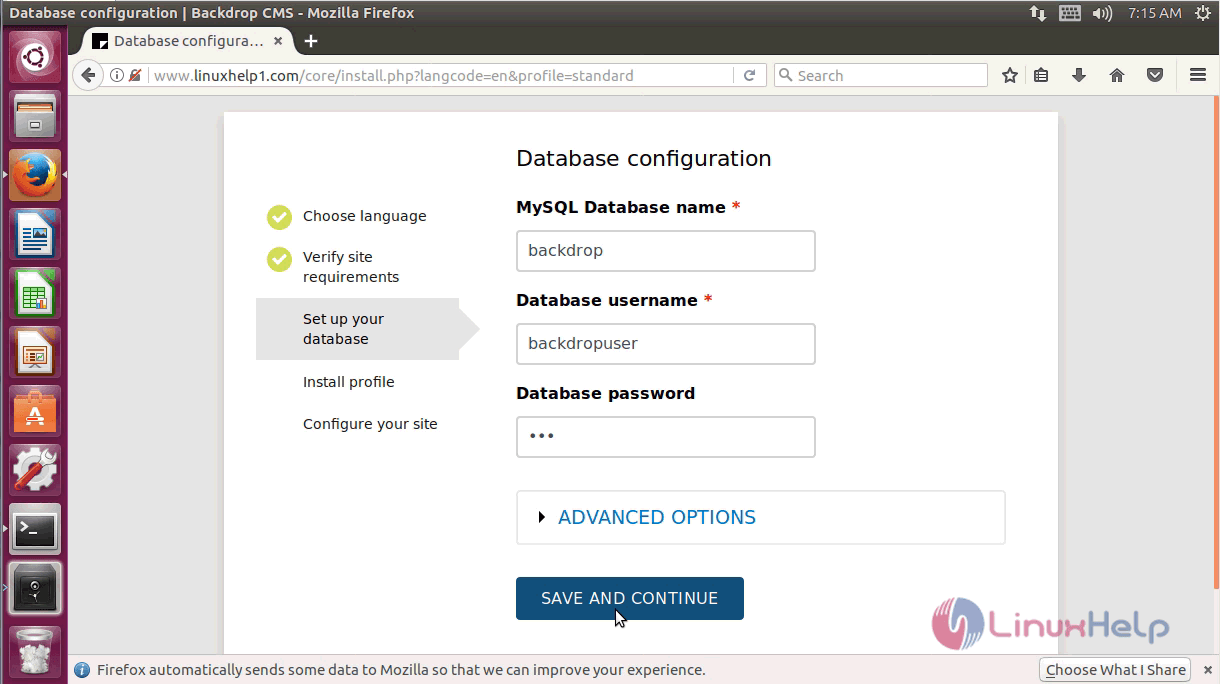
And give the database details and proceed further.
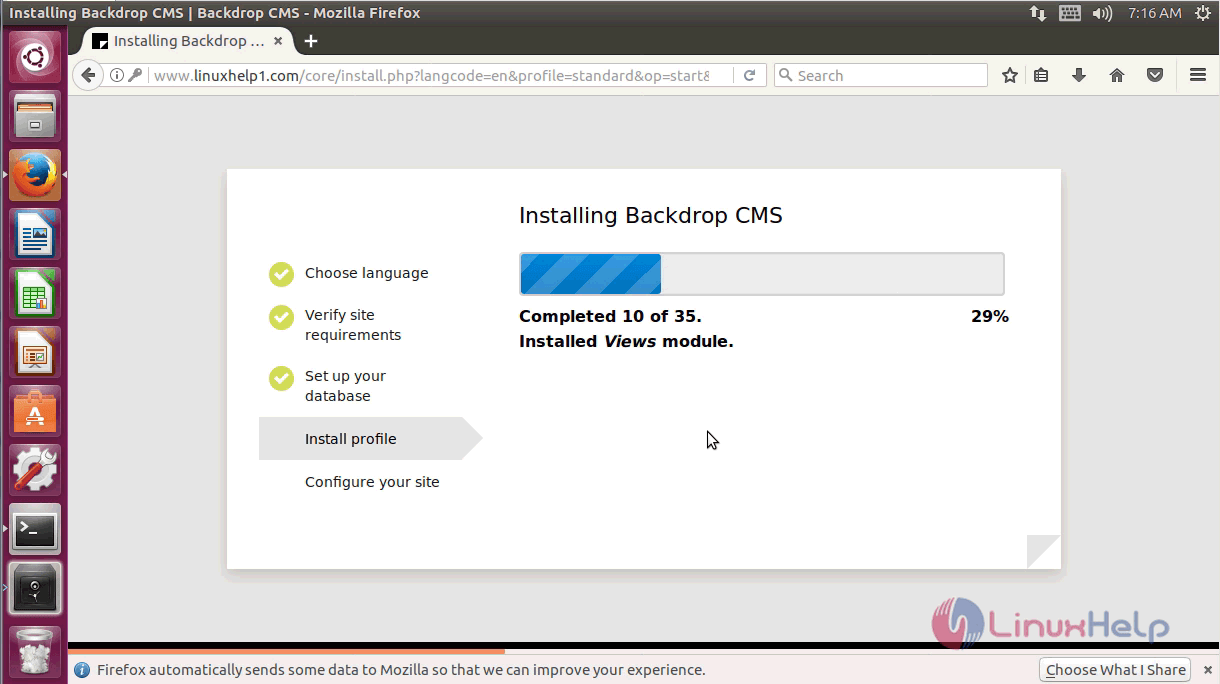
The Backdrop is now getting installed.
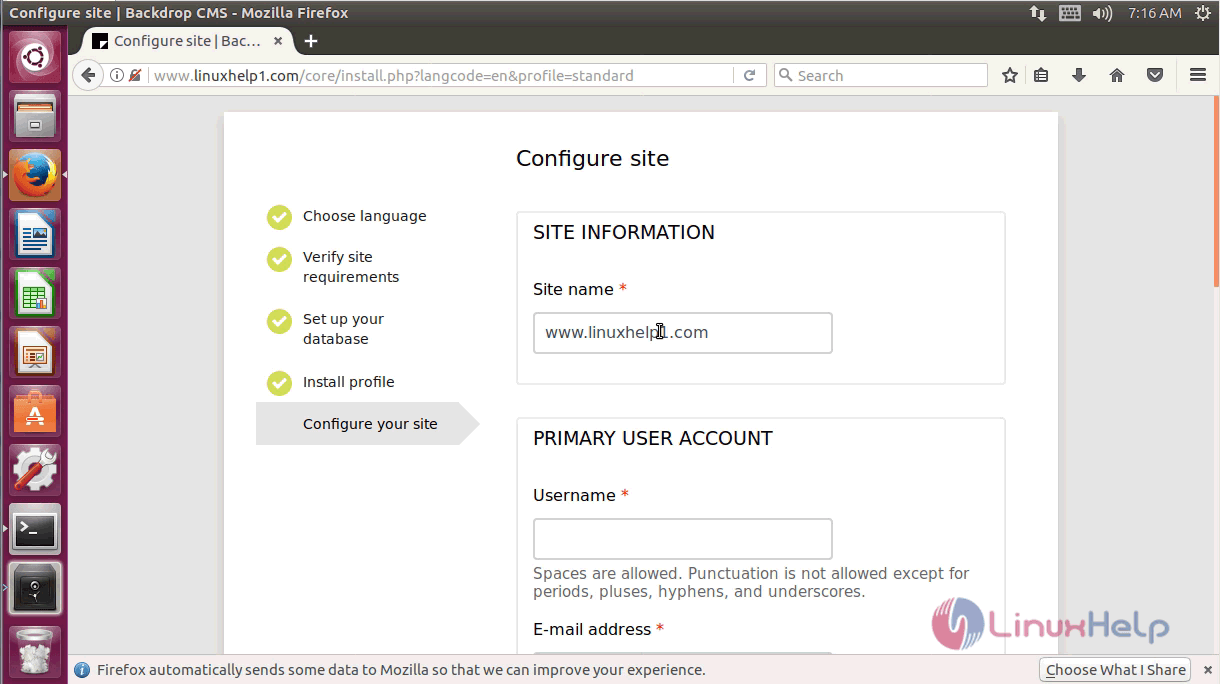
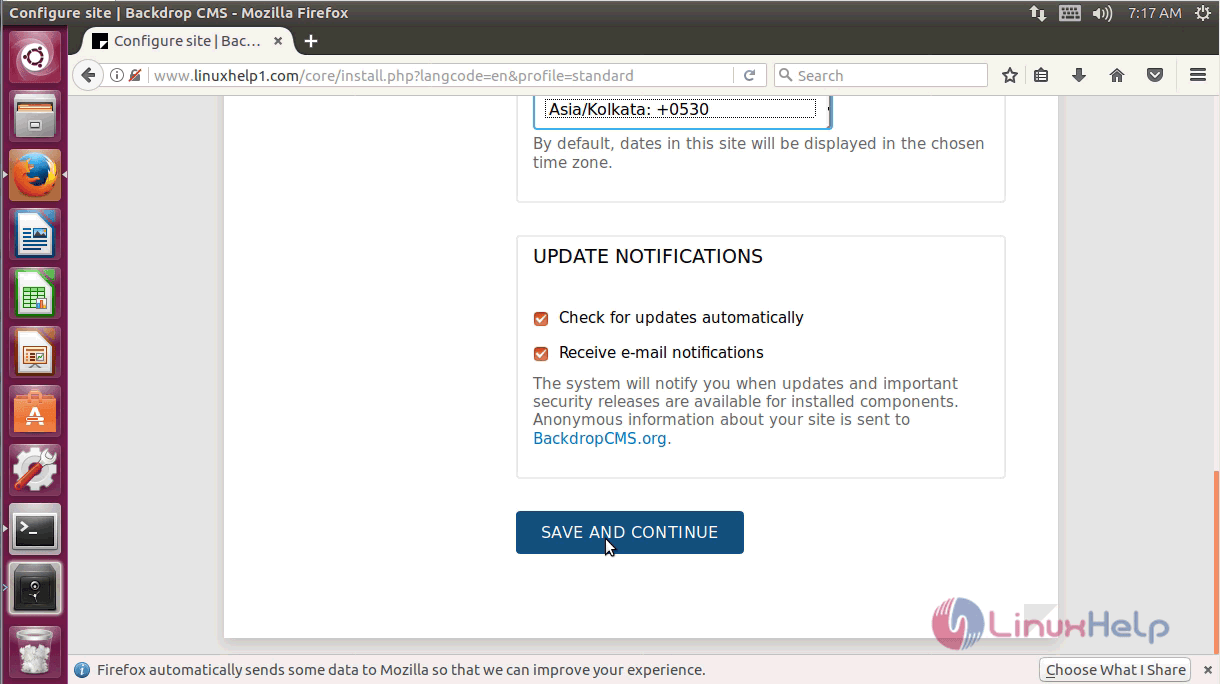
The site information is displayed. Configure it as you desire.
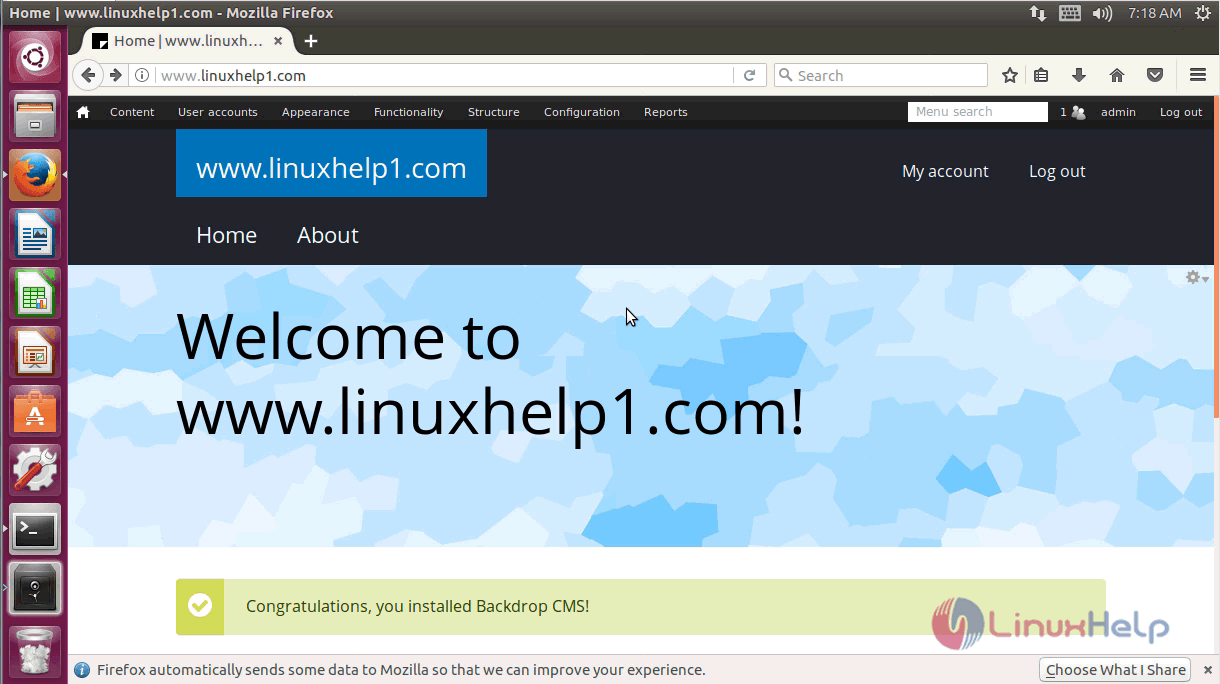
Now, open Backdrop application.
And then, check the version.
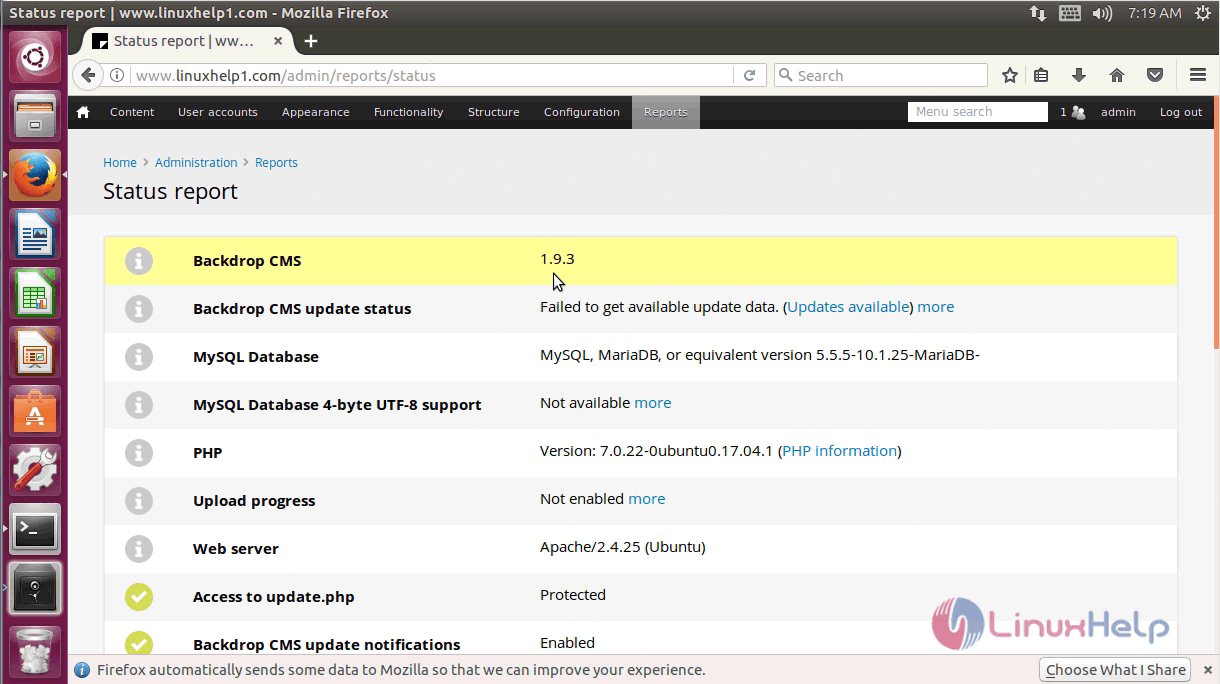
With this, the method to install Backdrop CMS comes to an end.
Comments ( 0 )
No comments available