How to install Bludit CMS with Nginx on CentOS 6.9
To install Bludit CMS with Nginx on CentOS 6.9
Bludit is a free, open-source and simple web application with which you can create your website or blog within few few minutes. Since the Bludit application has files in JSON format for storing the content, there isn' t any necessity to install or configure a database. Although, you need to make sure that you have a web server with PHP support for using it. Before proceeding to the installation procedure, check whether the target system is installed with Ngnx and PHP. This tutorial explains the installation procedure of Bludit CMS with Nginx on CentOS 6.9.
Installation procedure
To start with the installation procedure, download the Bludit package from its official site by running the wget command followed by the download link.
[root@linuxhelp11 Desktop]# wget https://s3.amazonaws.com/bludit-s3/bludit-builds/bludit-v1.6.2.zip
--2017-09-28 02:27:42--  https://s3.amazonaws.com/bludit-s3/bludit-builds/bludit-v1.6.2.zip
Resolving s3.amazonaws.com... 54.231.120.10
Connecting to s3.amazonaws.com|54.231.120.10|:443... connected.
HTTP request sent, awaiting response... 200 OK
Length: 969341 (947K) [application/zip]
Saving to: “ bludit-v1.6.2.zip”

100%[======================================> ] 969,341     62.4K/s   in 11s

2017-09-28 02:27:54 (89.9 KB/s) - “ bludit-v1.6.2.zip”  saved [969341/969341]
Extract the downloaded file using unzip command.
[root@linuxhelp11 Desktop]# unzip bludit-v1.6.2.zip
Archive:  bludit-v1.6.2.zip
   creating: bludit/
  inflating: bludit/.htaccess
   creating: bludit/bl-content/
   creating: bludit/bl-kernel/
   creating: bludit/bl-kernel/abstract/

.
.
 inflating: bludit/bl-themes/log/php/sidebar.php
  inflating: bludit/index.php
  inflating: bludit/install.php
Move the extracted directory to HTML location by running the following command.
[root@linuxhelp11 Desktop]# mv bludit /usr/share/nginx/html/
Edit the php configuration file using vim editor and edit the timezone in the file. Save and exit the file.
[root@linuxhelp11 Desktop]# vim /etc/php.ini
date.timezone = Asia/Kolkata
Edit the php-fpm configuration file using the vim editor and enter the following content in the file. Save and exit the file.
[root@linuxhelp11 Desktop]# vim /etc/php-fpm.d/www.conf

listen = /var/run/php-fpm/php-fpm.sock
listen.owner = nginx
listen.group = nginx
user = nginx
group = nginx
Configure the Nginx configuration file and enter the following content in the file. Save and exit the file.
[root@linuxhelp11 Desktop]# vim /etc/nginx/conf.d/default.conf
server {
.
.
Root /usr/share/nginx/html/bludit
index index.html index.php
.
.
location / {
    try_files $uri $uri/ @rewrites
  }
  location @rewrites {
    #rewrite ^ /index.php last
    rewrite ^/(.*)$ /index.php?url=$1 last
  }
.
.
location ~ \.php {
    fastcgi_index index.php
    fastcgi_split_path_info ^(.+\.php)(.*)$
    include /etc/nginx/fastcgi_params
    fastcgi_pass unix:/var/run/php-fpm/php-fpm.sock
    fastcgi_param SCRIPT_FILENAME $document_root$fastcgi_script_name
  }
}
Change the ownership of file in the HTML location.
[root@linuxhelp11 Desktop]# chown -R nginx:nginx /usr/share/nginx/html
Restart the php-fpm service.
[root@linuxhelp11 Desktop]#  service php-fpm restart
Stopping php-fpm:                                          [  OK  ]
Starting php-fpm:                                          [  OK  ]
Restart the Nginx service.
[root@linuxhelp11 Desktop]# service nginx restart
Stopping nginx:                                            [  OK  ]
Starting nginx:                                            [  OK  ]
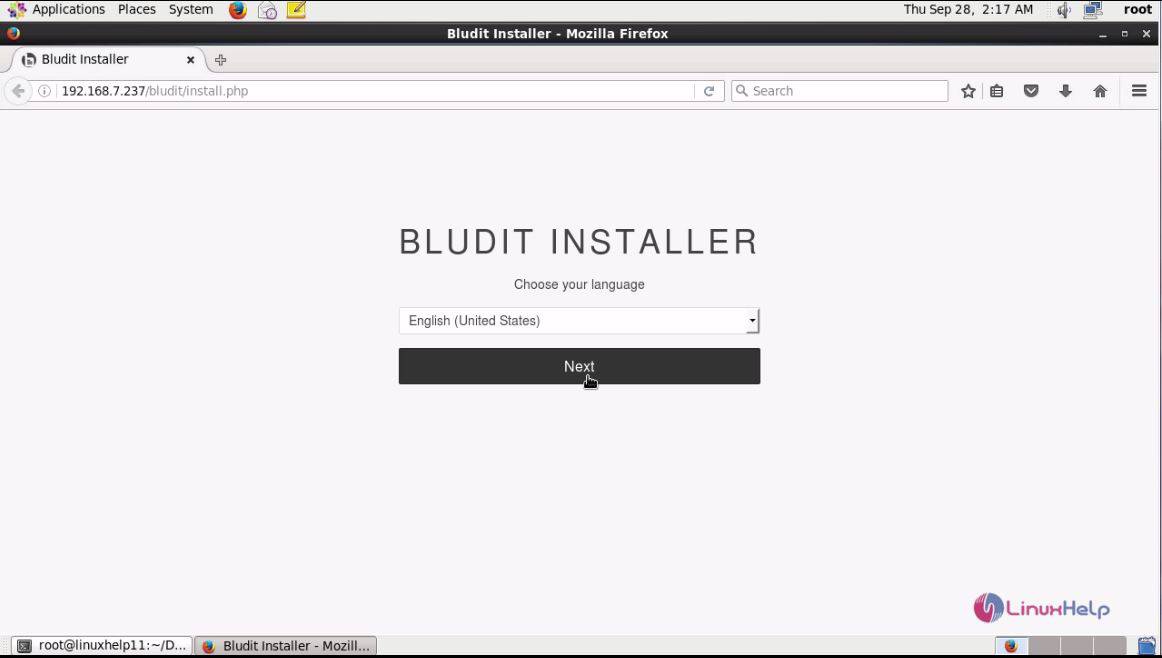
Open a browser and give the URL as http://machineip. The installation of Bludit is open, choose a required language and click continue.
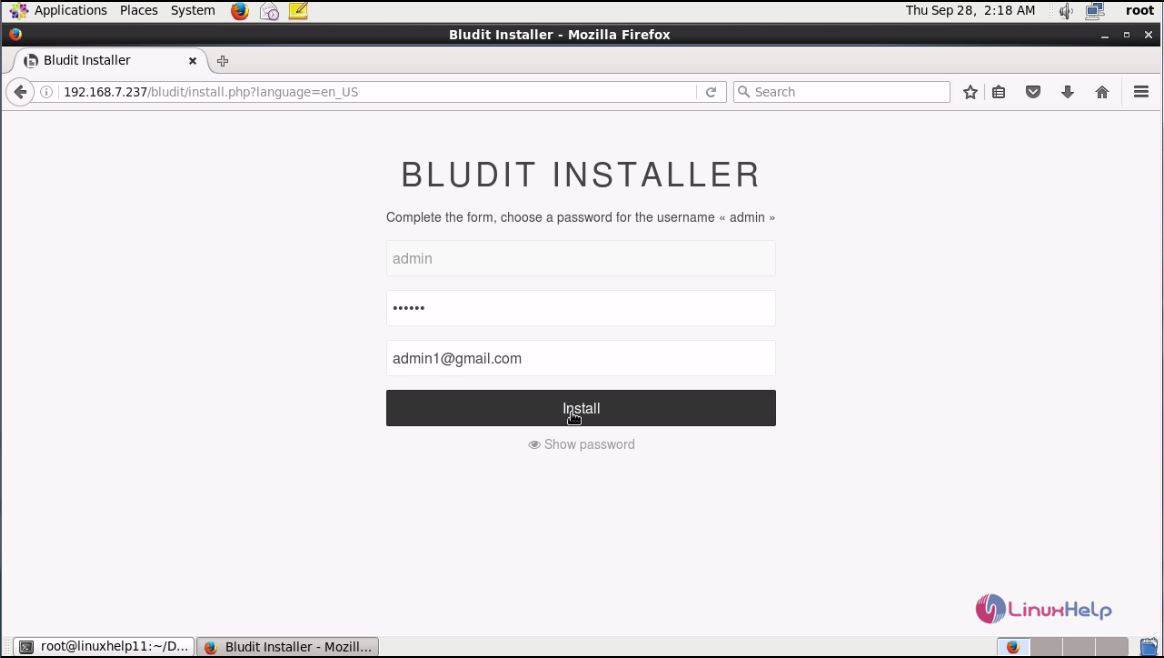
Fill in the admin credential details and click install.
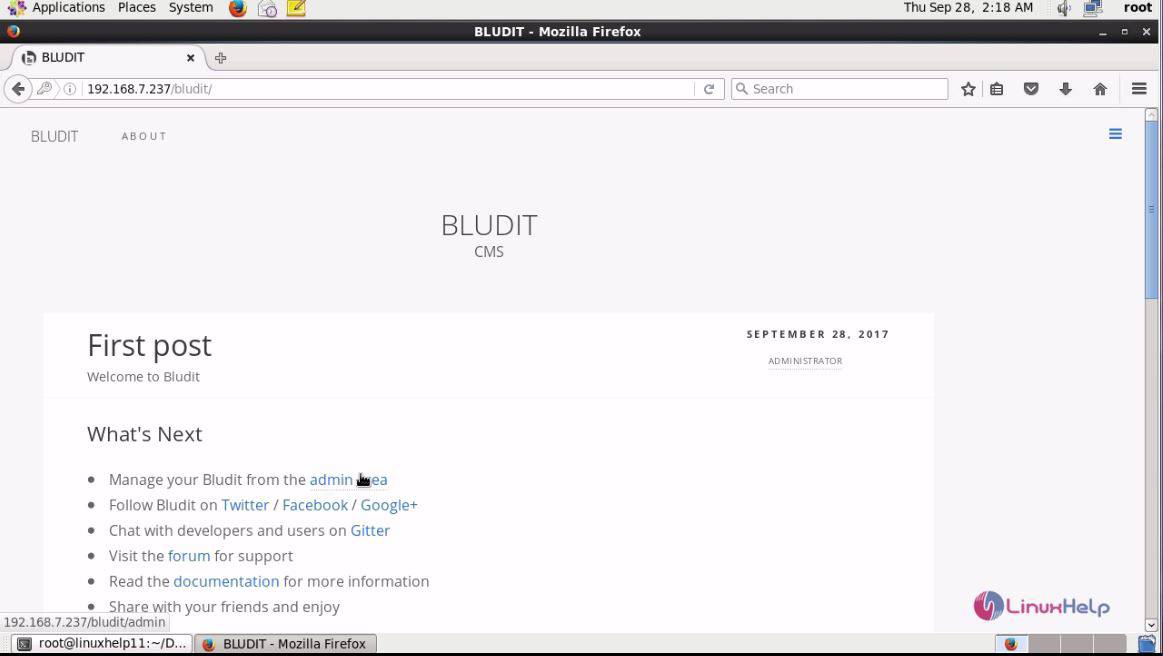
The demo page of Bludit CMS is opened and now to open admin panel, click admin area to redirect the site to admin login page.
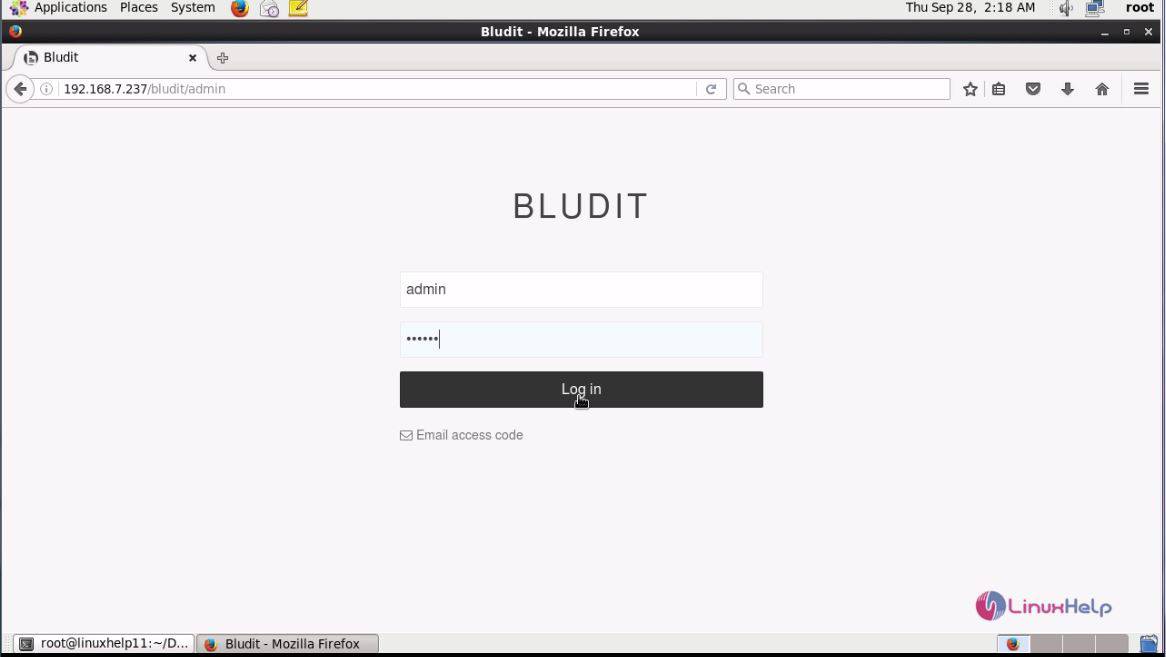
Enter the admin credentials and click login.
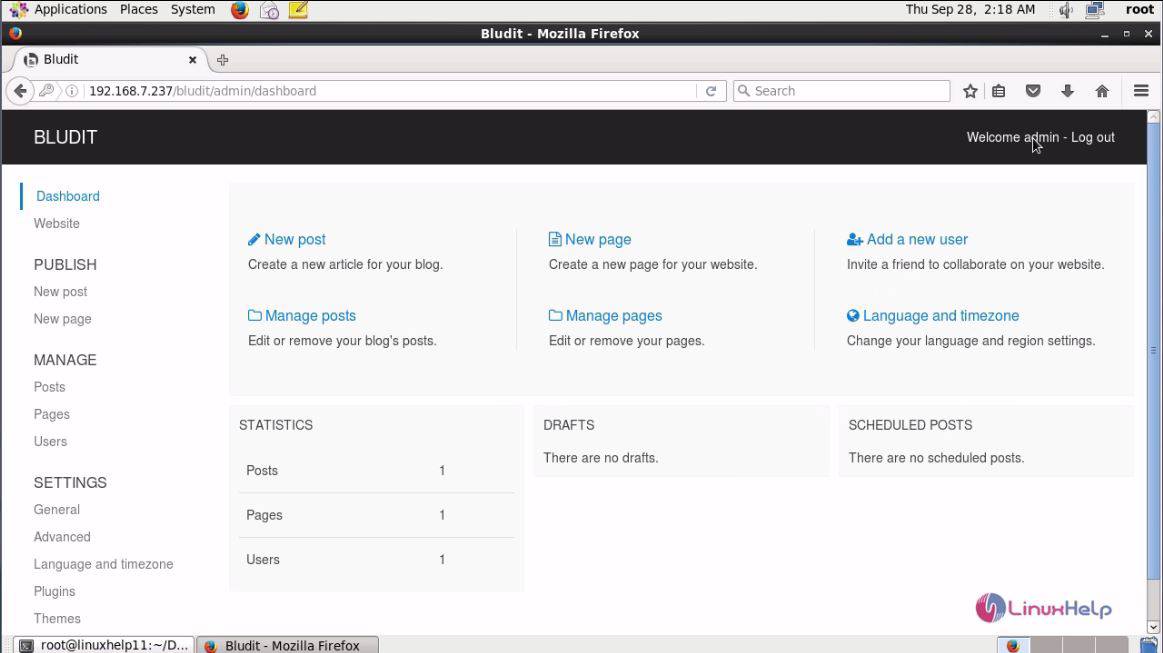
The admin dashboard of Bludit is now open for the admin to maintain the website.
The installation procedure of Bludit CMS with Nginx on CentOS 6.9 is done without any glitches.
Comments ( 0 )
No comments available