How to install Elgg on Ubuntu 16.04
To install Elgg on Ubuntu 17.04
In our previous article, we have seen about the installation procedure of Elgg on Ubuntu 16.04. In this article, we will be briefed about the installation procedure of Elgg on Ubuntu 17.04. Elgg is an open-source and powerful social networking engine used to create your own social networking web site. It is a PHP-based application and can easily be installed on a Linux VPS.
Pre-Requirement
- LAMP (Apache, PHP 5.6, MariaDB)
- MariaDB (create database and user. Provide privileges to user)
- PHP modules (php php-mysql php-gd php-imap php-ldap php-odbc php-pear php-xml php-xmlrpc php-mbstring)
Installation procedure
To proceed with the installation procedure, enter into HTML location by executing the following cd command.
root@linuxhelp11:~# cd /var/www/html/
Next download the Elgg package by running the wget command followed by the download link.
root@linuxhelp11:/var/www/html# wget https://elgg.org/download/elgg-2.3.4.zip
--2017-10-26 02:51:07--  https://elgg.org/download/elgg-2.3.4.zip
Resolving elgg.org (elgg.org)... 140.211.15.97
Connecting to elgg.org (elgg.org)|140.211.15.97|:443... connected.
HTTP request sent, awaiting response... 200 OK
Length: 25414873 (24M) [application/zip]
Saving to: ‘ elgg-2.3.4.zip’

elgg-2.3.4.zip        100%[========================> ]  24.24M  1.01MB/s    in 25s

2017-10-26 02:51:34 (1001 KB/s) - ‘ elgg-2.3.4.zip’  saved [25414873/25414873]
Extract the downloaded package by using the unzip command.
root@linuxhelp11:/var/www/html# unzip elgg-2.3.4.zip
Archive:  elgg-2.3.4.zip
   creating: elgg-2.3.4/
  inflating: elgg-2.3.4/install.php
  inflating: elgg-2.3.4/upgrade.php
  inflating: elgg-2.3.4/composer.json
   creating: elgg-2.3.4/mod/
   creating: elgg-2.3.4/mod/blog/
  inflating: elgg-2.3.4/mod/blog/start.php
  inflating: elgg-2.3.4/mod/blog/activate.php
   creating: elgg-2.3.4/mod/blog/views/
   creating: elgg-2.3.4/mod/blog/views/default/
   creating: elgg-2.3.4/mod/blog/views/default/blog/
.
.

 inflating: elgg-2.3.4/vendor/zendframework/zend-mime/CONTRIBUTING.md
  inflating: elgg-2.3.4/vendor/zendframework/zend-mime/LICENSE.md
  inflating: elgg-2.3.4/index.php
Rename the extracted directory to any name the user desires.
root@linuxhelp11:/var/www/html# mv elgg-2.3.4 elgg
Create a virtual host configuration file named elgg.conf and enter the following contents in the file. Save and exit the file.
root@linuxhelp11:/var/www/html# nano /etc/apache2/sites-available/elgg.conf
< VirtualHost *:80>
ServerAdmin [email protected]
DocumentRoot /var/www/html/elgg/
ServerName elgg.com
ServerAlias www.elgg.com
ErrorLog logs/elgg.com-error_log
CustomLog logs/elgg.com-access_log common
< /VirtualHost>
Provide the entry in hosts file by entering the following content in the file. Save and exit the file.
root@linuxhelp11:/var/www/html# nano /etc/hosts
< ipaddress>  elgg.com
Create a directory for Elgg named elggdata by running the mkdir command as follows.
root@linuxhelp11:/var/www/html# mkdir elggdata
Change the ownership of file in HTML location by executing the following command.
root@linuxhelp11:/var/www/html# chown -R www-data.www-data /var/www/html/
Restart the Apache service.
root@linuxhelp11:/var/www/html# systemctl restart apache2
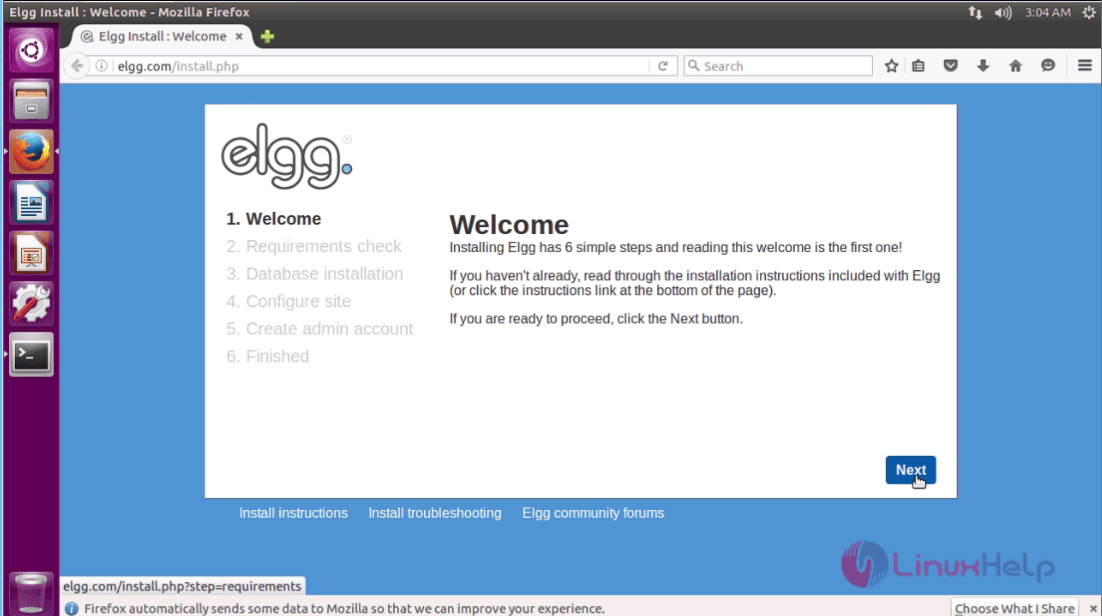
Switch over to the browser and enter the URL as https://elgg.com/install.php. The installation page of Elgg appears on the screen. Click Next option.
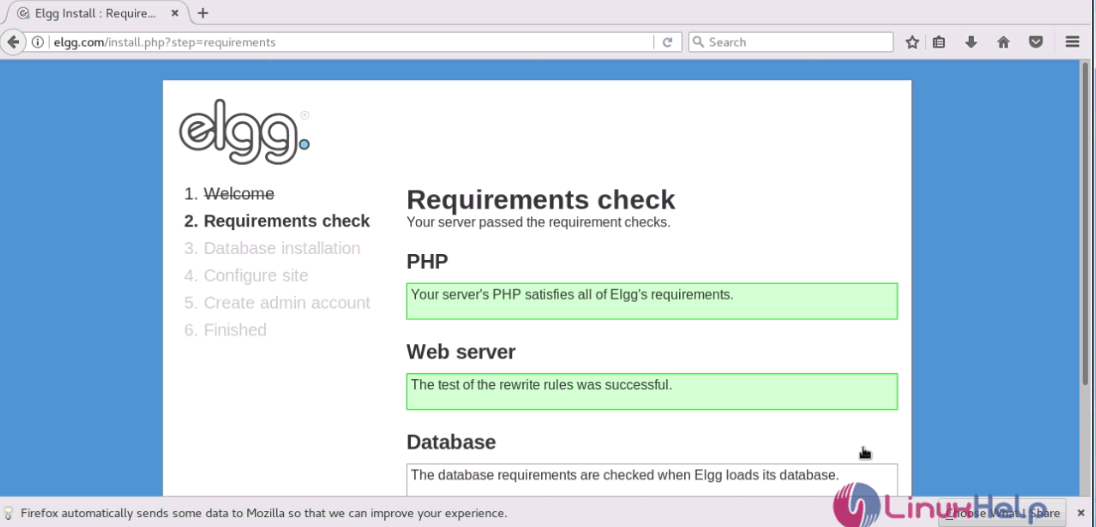
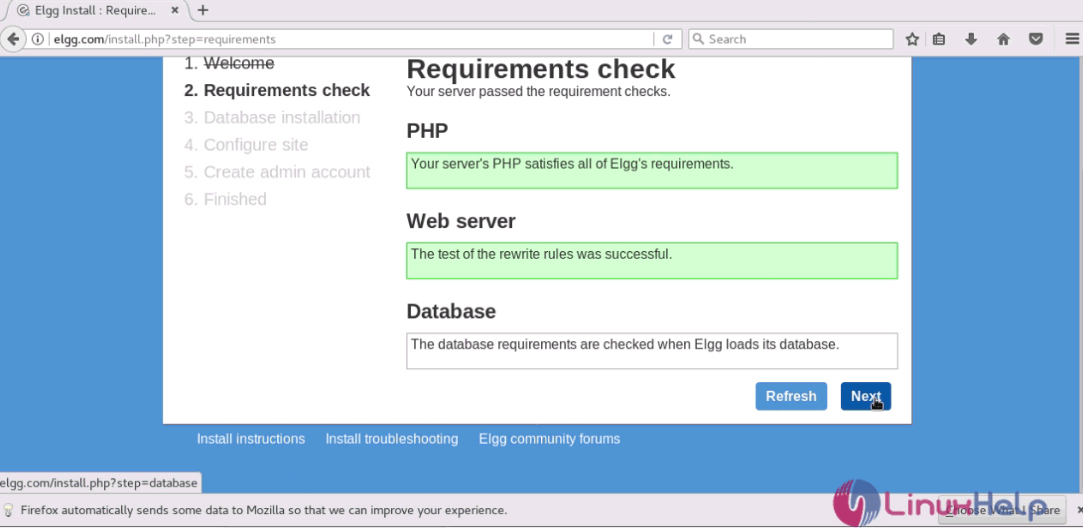
This window shows the system requirements before starting the installation procedure and click Next.
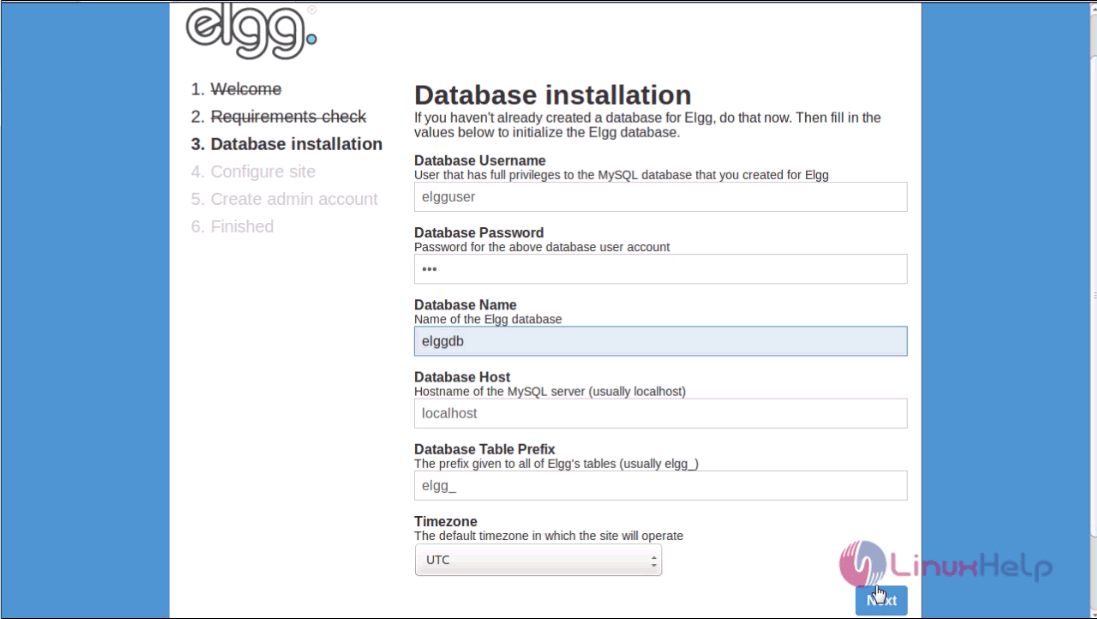
Enter the following details to create a database and click Next.
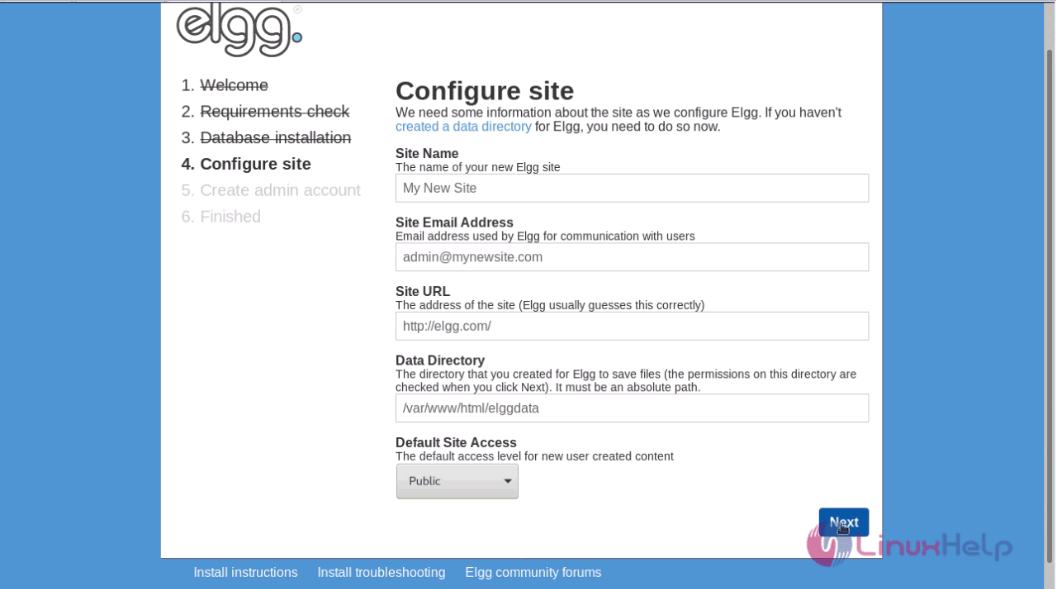
Enter the required details to configure the site and click Next.
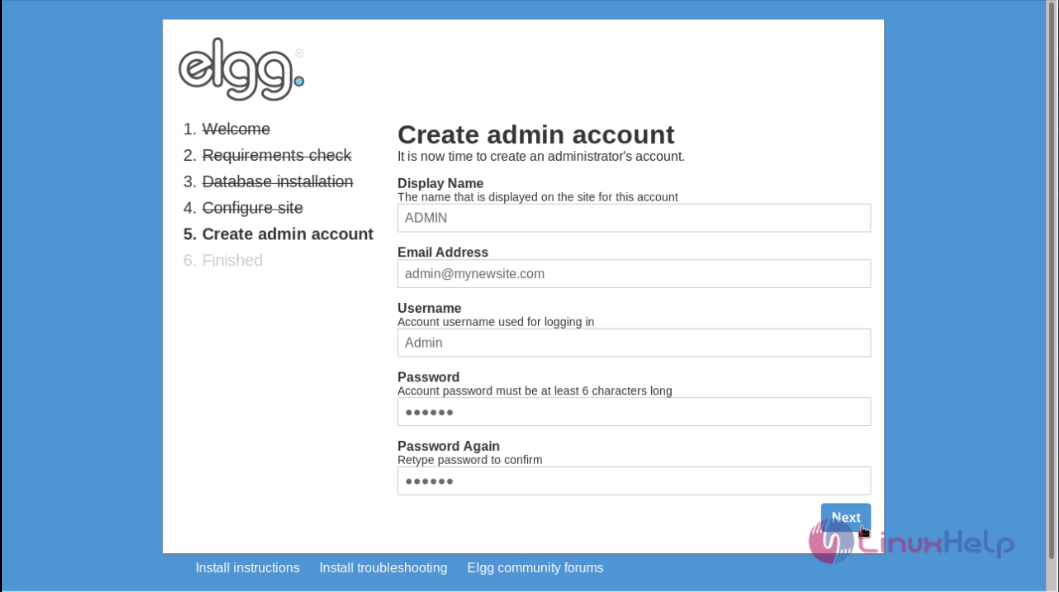
Enter the required details for creating an admin account and click Next.
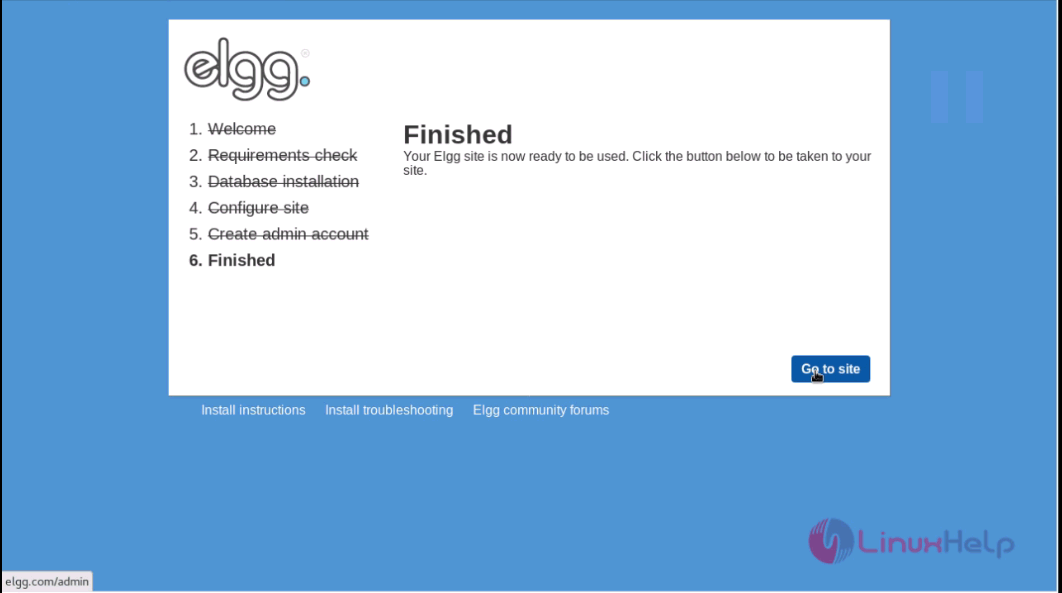
The installation is now complete. Click Go to Site option to enter into the Elgg' s admin page.
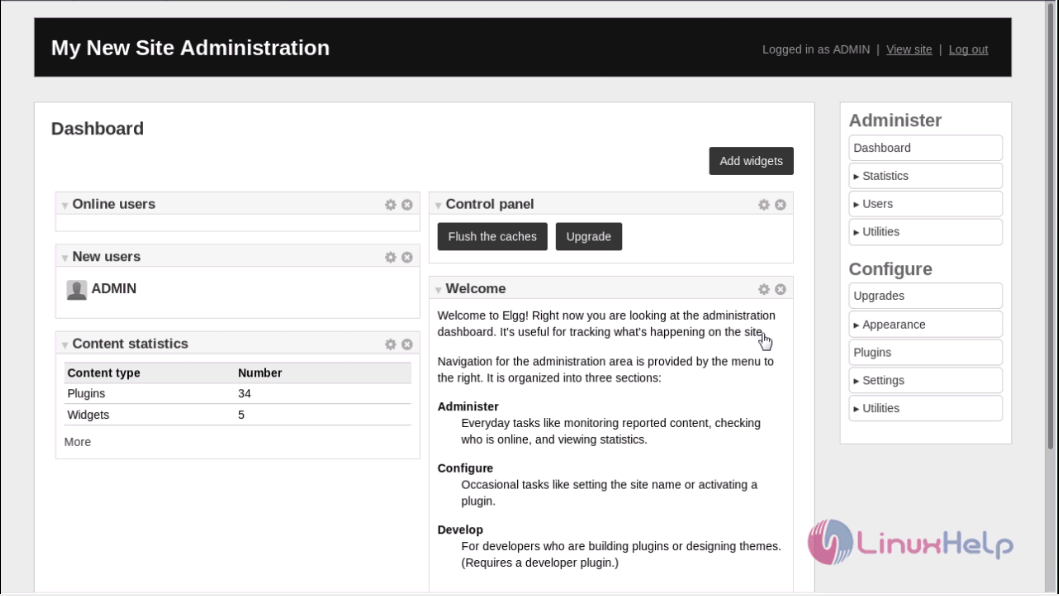
The admin page of Elgg appears on the screen.
Thus we conclude the installation procedure of Elgg on Ubuntu 16.04.
Comments ( 0 )
No comments available