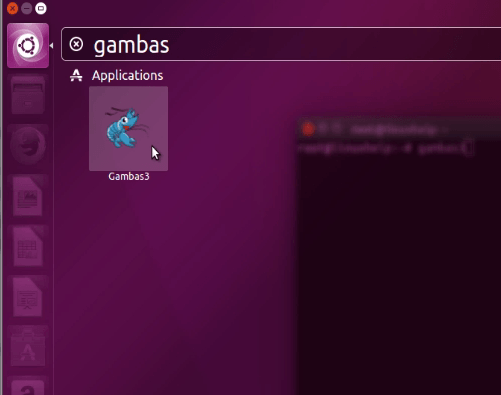
How to install gambas in Ubuntu
To install gambas in Ubuntu
Gambas is the name of an object-oriented dialect program that is developed for Linux systems. Installation of gambas is explained in this manual.
To install Gambas
Add the necessary files for the Gambas installation by running the following command.
root@linuxhelp:~# add-apt-repository ppa:gambas-team/gambas-daily
This PPA contain the latest development version of Gambas.
More info: https://launchpad.net/~gambas-team/+archive/ubuntu/gambas-daily
Press [ENTER] to continue or ctrl-c to cancel adding it
gpg: keyring `/tmp/tmphnsf2vy4/secring.gpg'  created
gpg: keyring `/tmp/tmphnsf2vy4/pubring.gpg'  created
gpg: requesting key 6CAEE58D from hkp server keyserver.ubuntu.com
gpg: /tmp/tmphnsf2vy4/trustdb.gpg: trustdb created
gpg: key 6CAEE58D: public key " Launchpad PPA for Gambas Ubuntu Maintainers"  imported
gpg: no ultimately trusted keys found
gpg: Total number processed: 1
gpg:               imported: 1  (RSA: 1)
OK
Update your apt source with the help of the following command.
root@linuxhelp:~# apt-get update
Hit:1 http://in.archive.ubuntu.com/ubuntu xenial InRelease
Get:2 http://security.ubuntu.com/ubuntu xenial-security InRelease [94.5 kB]
Get:3 http://in.archive.ubuntu.com/ubuntu xenial-updates InRelease [95.7 kB]
Hit:4 http://ppa.launchpad.net/atareao/sunflower/ubuntu xenial InRelease
Get:5 http://ppa.launchpad.net/dhor/myway/ubuntu xenial InRelease [17.5 kB]
Hit:6 http://in.archive.ubuntu.com/ubuntu xenial-backports InRelease
.
.
.
Get:22 http://ppa.launchpad.net/dhor/myway/ubuntu xenial/main amd64 Packages [8,948 B]
Get:23 http://ppa.launchpad.net/gambas-team/gambas-daily/ubuntu xenial/main amd64 Packages [13.8 kB]
Get:24 http://ppa.launchpad.net/gambas-team/gambas-daily/ubuntu xenial/main i386 Packages [13.8 kB]
Get:25 http://ppa.launchpad.net/gambas-team/gambas-daily/ubuntu xenial/main Translation-en [5,804 B]
Fetched 268 kB in 7s (36.6 kB/s)
Reading package lists... Done
W: https://www.arangodb.com/repositories/arangodb3/xUbuntu_16.04/Release.gpg: Signature by key 4497DA50FBD0158CCFD1996CEE611E131C42E360 uses weak digest algorithm (SHA1)
Now lets start to install Gambas by using the following command.
root@linuxhelp:~# apt-get install gambas3
Reading package lists... Done
Building dependency tree
Reading state information... Done
The following packages were automatically installed and are no longer required:
  libwxbase3.0-0v5 libwxgtk3.0-0v5
Use ' sudo apt autoremove'  to remove them.
The following additional packages will be installed:
  autotools-dev debhelper debugedit dh-strip-nondeterminism gambas3-dev
  gambas3-gb-args gambas3-gb-cairo gambas3-gb-chart gambas3-gb-clipper
  gambas3-gb-complex gambas3-gb-compress gambas3-gb-compress-bzlib2
  gambas3-gb-compress-zlib gambas3-gb-crypt gambas3-gb-data gambas3-gb-db
  gambas3-gb-db-form gambas3-gb-db-mysql gambas3-gb-db-odbc
  gambas3-gb-db-postgresql gambas3-gb-db-sqlite3 gambas3-gb-dbus
  gambas3-gb-dbus-trayicon gambas3-gb-desktop gambas3-gb-desktop-gnome-keyring
  gambas3-gb-desktop-x11 gambas3-gb-eval-highlight gambas3-gb-form
  gambas3-gb-form-dialog gambas3-gb-form-editor gambas3-gb-form-mdi
  gambas3-gb-form-stock gambas3-gb-form-terminal gambas3-gb-gmp gambas3-gb-gsl
  gambas3-gb-gtk gambas3-gb-gtk-opengl gambas3-gb-gtk3 gambas3-gb-httpd
  gambas3-gb-image gambas3-gb-image-effect gambas3-gb-image-imlib
.
.
.
Setting up dh-strip-nondeterminism (0.015-1) ...
Setting up debhelper (9.20160115ubuntu3) ...
Setting up gambas3-gb-desktop-x11 (3.9.90+svn7862+build2~ubuntu16.04.1) ...
Setting up gambas3-ide (3.9.90+svn7862+build2~ubuntu16.04.1) ...
Setting up gambas3 (3.9.90+svn7862+build2~ubuntu16.04.1) ...
Processing triggers for libc-bin (2.23-0ubuntu3) ...
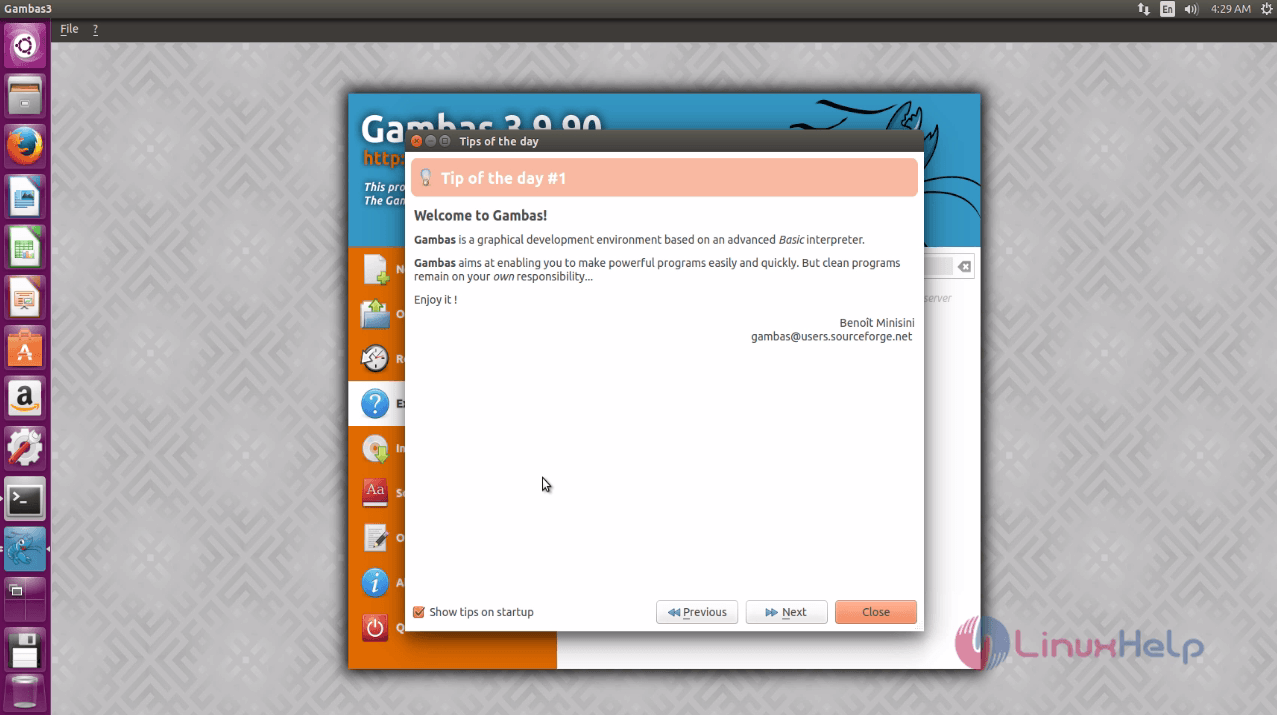
To launch Gambas
Just execute the following command to start Gambas from the terminal.
root@linuxhelp:~# gambas3
The tips wizard appears. Go through it and close to proceed further.
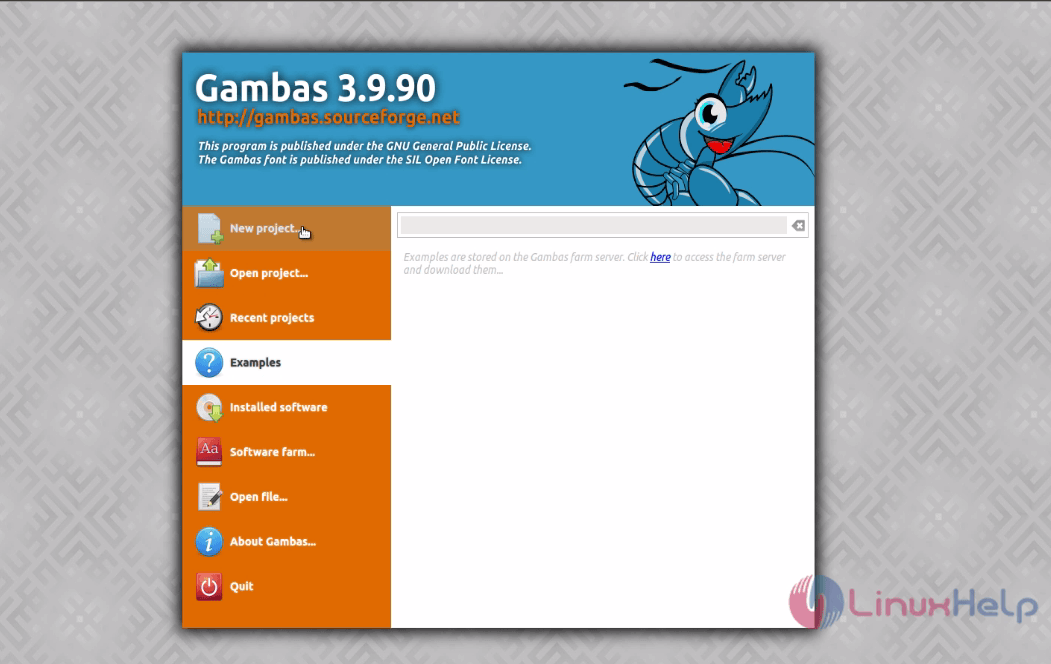
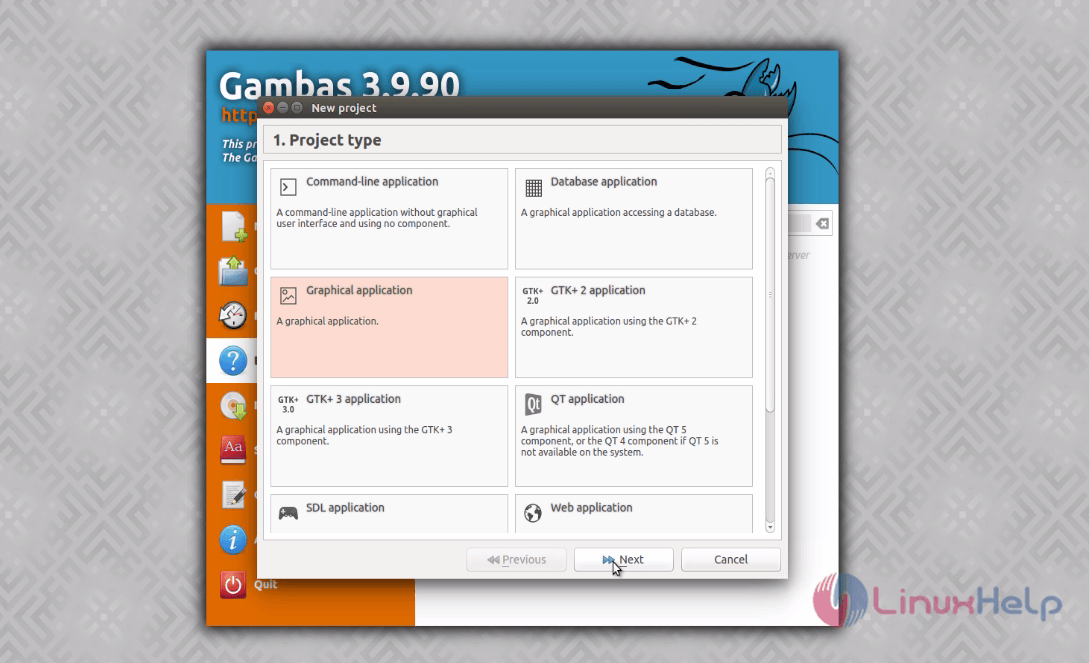
The main project page appears. Click New project and choose the type of the project.
Choose the path where you want to store the project and click “ Next” .
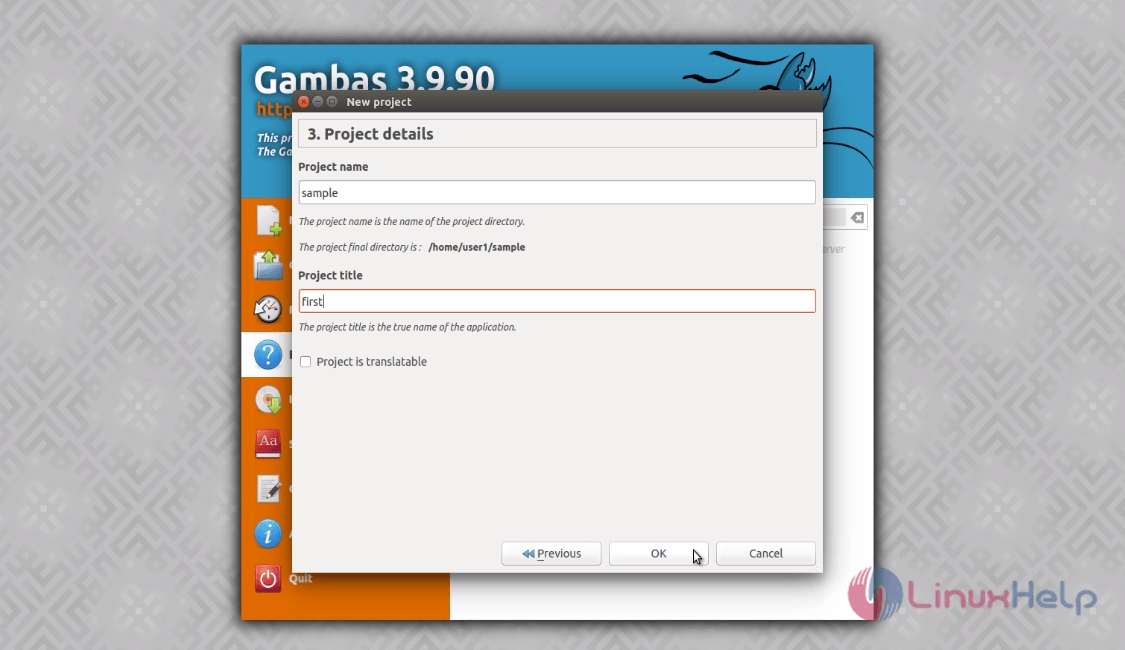
Now give your project a name and title. Finally click ' OK' .
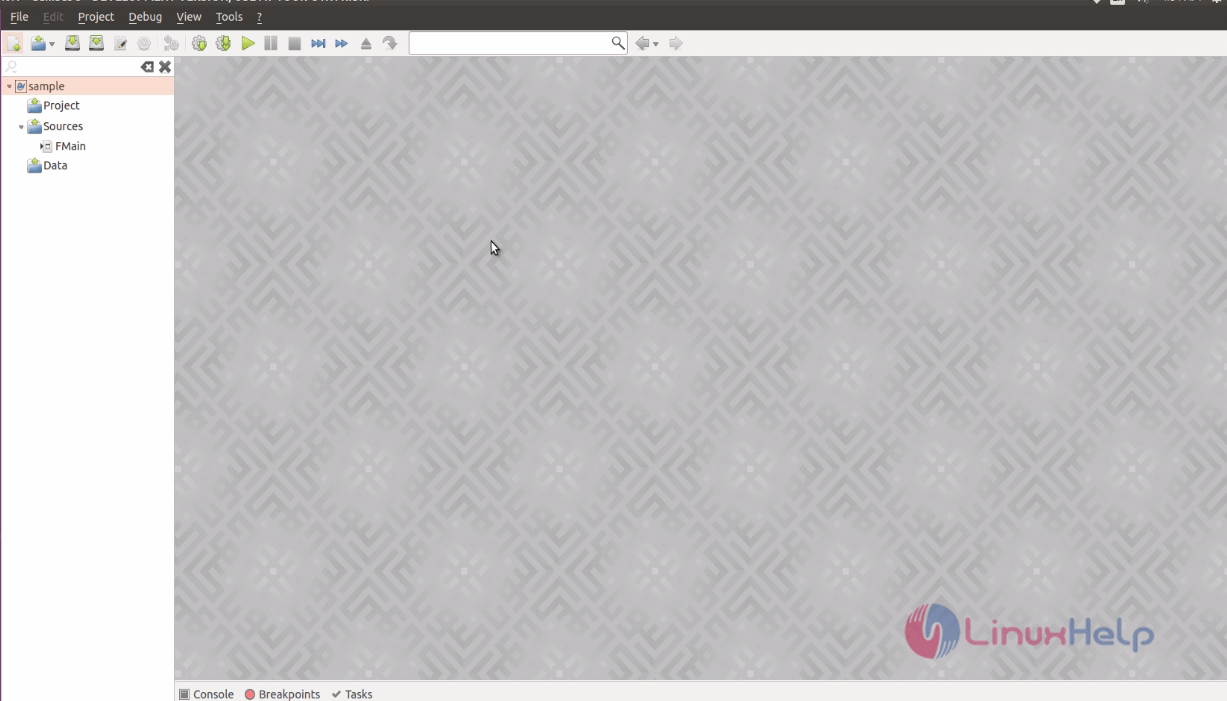
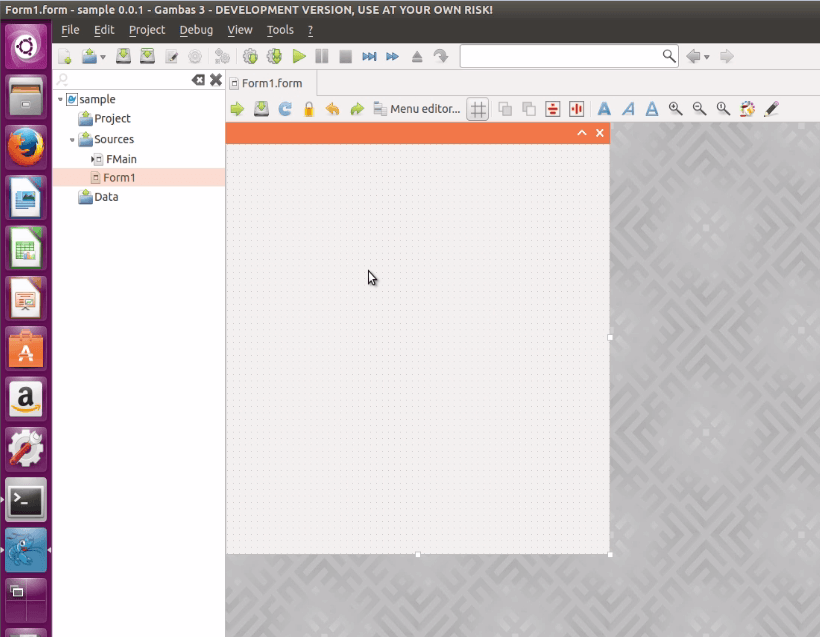
A blank screen appears as below.
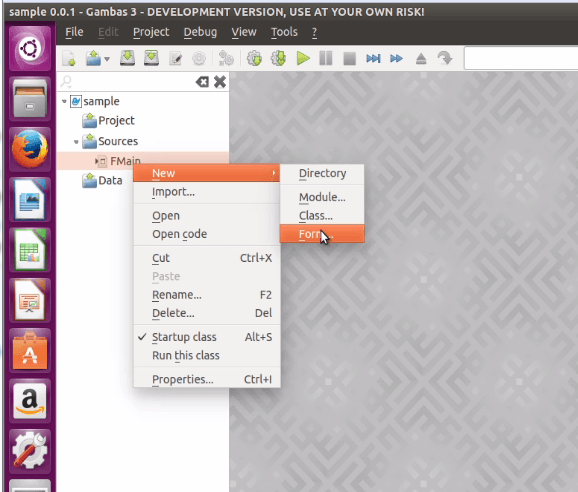
Navigate to Fmain -> New -> Form
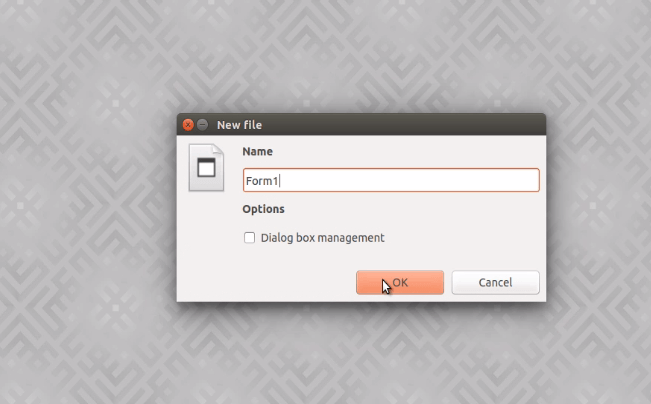
Enter the form name and click OK to start adding components to your project.
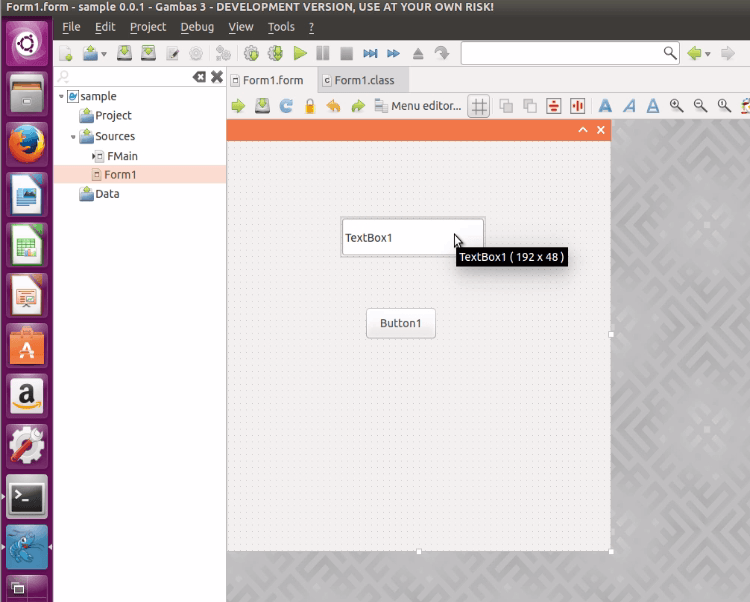
Just do " Drag and Drop" !!!
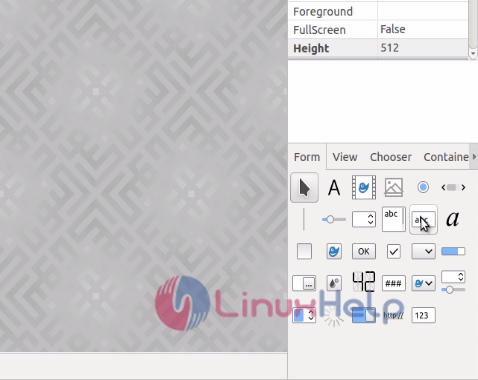
Double click on the tools to start adding functionalities.icon
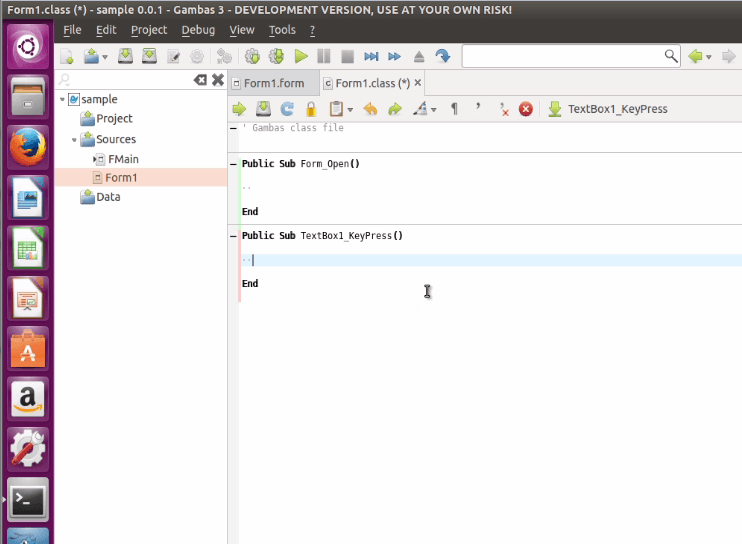
After adding the code, save your project.
Comments ( 0 )
No comments available