How to install Nagios in openSUSE
To install Nagios server monitoring tool in OpenSUSE
In this article we will learn how to install Nagios in openSUSE. It is a free source application that monitors system, networks and infrastructure. It provides monitoring and alerting services for switches, applications, servers, and services.
To install pre-request packages
First install the pre-request packages by utilizing the following command.
linuxhelp:/home/user1 # zypper install apache2 php5 gcc glibc  gd wget perl make apache2-mod_php5
Retrieving repository ' openSUSE-13.2-Non-Oss'  metadata ...................[done]
Building repository ' openSUSE-13.2-Non-Oss'  cache ........................[done]
Retrieving repository ' openSUSE-13.2-Oss'  metadata .......................[done]
.
.
.
(30/31) Installing: apache2-prefork-2.4.10-31.1 ..........................[done]
(31/31) Installing: apache2-mod_php5-5.6.1-72.1 ..........................[done]
To check and restart the deleted files, you can use ' zypper ps' to list these programs.
Then create user and group for nagios.
linuxhelp:/home/user1 # useradd nagios
linuxhelp:/home/user1 # groupadd ngadmin
Once you have created the user, add those user into the nagios group.
linuxhelp:/home/user1 # usermod -a -G ngadmin nagios
linuxhelp:/home/user1 # usermod -a -G ngadmin wwwrun
To download and install Nagios
Download the nagios package by running the following command.
linuxhelp:/home/user1 # wget http://prdownloads.sourceforge.net/sourceforge/nagios/nagios-4.0.8.tar.gz
--2016-09-14 14:50:34-- http://prdownloads.sourceforge.net/sourceforge/nagios/nagios-4.0.8.tar.gz
Resolving prdownloads.sourceforge.net (prdownloads.sourceforge.net)... 216.34.181.59
.
.
.
Length: 1805059 (1.7M) [application/x-gzip]
Saving to: ‘ nagios-4.0.8.tar.gz’
nagios-4.0.8.tar.gz 100%[===================================================> ] 1.72M 448KB/s in 3.9s
2016-09-14 14:50:40 (448 KB/s) - ‘ nagios-4.0.8.tar.gz’  saved [1805059/1805059]
Once the download is completed, extract the downloaded tar package.
linuxhelp:/home/user1 # tar -xvf nagios-4.0.8.tar.gz
nagios-4.0.8/
nagios-4.0.8/.gitignore
nagios-4.0.8/Changelog
nagios-4.0.8/INSTALLING
nagios-4.0.8/LEGAL
.
.
.
nagios-4.0.8/xdata/xrddefault.h
nagios-4.0.8/xdata/xsddefault.c
nagios-4.0.8/xdata/xsddefault.h
Now compile to install the Nagios.
linuxhelp:/home/user1/nagios-4.0.8 # ./configure --with-nagios-group=nagios --with-command-group=nagcmd
checking for a BSD-compatible install... /usr/bin/install -c
checking build system type... x86_64-unknown-linux-gnu
checking host system type... x86_64-unknown-linux-gnu
checking for gcc... gcc
.
.
.
Traceroute (used by WAP): /usr/sbin/traceroute
Review the options above for accuracy. If they look okay,
type ' make all'  to compile the main program and CGIs.
Run the following command to install the Nagios package.
linuxhelp:/home/user1/nagios-4.0.8 # make all
cd ./base & &  make
make[1]: Entering directory ' /home/user1/nagios-4.0.8/base'
gcc -Wall -I.. -g -O2 -DHAVE_CONFIG_H -DNSCORE -c -o nagios.o nagios.c
gcc -Wall -I.. -g -O2 -DHAVE_CONFIG_H -DNSCORE -c -o broker.o broker.c
.
.
.
For more information on obtaining support for Nagios, visit:

http://support.nagios.com
*************************************************************
Enjoy.
linuxhelp:/home/user1/nagios-4.0.8 # make install
cd ./base & &  make install
make[1]: Entering directory ' /home/user1/nagios-4.0.8/base'
make install-basic
.
.
make install-config
- This installs sample config files in /usr/local/nagios/etc
make[1]: Leaving directory ' /tmp/nagios-4.0.8'
8. Make install-init the nagios package.
linuxhelp:/home/user1/nagios-4.0.8 # make install-init
/usr/bin/install -c -m 755 -d -o root -g root /etc/rc.d
/usr/bin/install -c -m 755 -o root -g root daemon-init /etc/rc.d/nagios

*** Init script installed ***
After installing Nagios, run the make install-config command.
linuxhelp:/tmp/nagios-4.0.8 # make install-config
/usr/bin/install -c -m 775 -o nagios -g nagios -d /usr/local/nagios/etc
/usr/bin/install -c -m 775 -o nagios -g nagios -d /usr/local/nagios/etc/objects
/usr/bin/install -c -b -m 664 -o nagios -g nagios sample-config/nagios.cfg /usr/local/nagios/etc/nagios.cfg
/usr/bin/install -c -b -m 664 -o nagios -g nagios sample-config/cgi.cfg /usr/local/nagios/etc/cgi.cfg
.
.
.
/usr/bin/install -c -b -m 664 -o nagios -g nagios sample-config/template-object/switch.cfg /usr/local/nagios/etc/objects/switch.cfg

*** Config files installed ***
Then run the make install-commandmode command.
linuxhelp:/tmp/nagios-4.0.8 # make install-commandmode
/usr/bin/install -c -m 775 -o nagios -g nagcmd -d /usr/local/nagios/var/rw
chmod g+s /usr/local/nagios/var/rw

*** External command directory configured ***
Finally use the below command for the webconf installation.
linuxhelp:/tmp/nagios-4.0.8 # make install-webconf
/usr/bin/install -c -m 644 sample-config/httpd.conf /etc/apache2/conf.d/nagios.conf

*** Nagios/Apache conf file installed ***
Verify the nagios access details as shown below.
linuxhelp:~ # vi /usr/local/nagios/etc/objects/contacts.cfg
After verifying the Nagios access details, create password for nagios login and restart the apache services.
linuxhelp:~ # htpasswd2 -c /usr/local/nagios/etc/htpasswd.users nagiosadmin
New password:
Re-type new password:
Adding password for user nagiosadmin
linuxhelp:~ # systemctl restart apache2
Utilize the following command for downloading the Nagios plugin.
linuxhelp:/tmp # wget http://nagios-plugins.org/download/nagios-plugins-2.0.3.tar.gz
--2016-09-16 19:42:48-- http://nagios-plugins.org/download/nagios-plugins-2.0.3.tar.gz
Resolving nagios-plugins.org (nagios-plugins.org)... 72.14.186.43
Connecting to nagios-plugins.org (nagios-plugins.org)|72.14.186.43|:80... connected.
HTTP request sent, awaiting response... 200 OK
Length: 2659772 (2.5M) [application/x-gzip]
Saving to: ‘ nagios-plugins-2.0.3.tar.gz’

nagios-plugins-2.0.3.tar.gz 100%[=================================================> ] 2.54M 581KB/s in 5.1s

2016-09-16 19:42:53 (512 KB/s) - ‘ nagios-plugins-2.0.3.tar.gz’  saved [2659772/2659772]
Run the following command to extract the nagios plugin.
linuxhelp:/tmp # tar -xvf nagios-plugins-2.0.3.tar.gz
nagios-plugins-2.0.3/
nagios-plugins-2.0.3/perlmods/
nagios-plugins-2.0.3/perlmods/Config-Tiny-2.14.tar.gz
nagios-plugins-2.0.3/perlmods/parent-0.226.tar.gz
nagios-plugins-2.0.3/perlmods/Test-Simple-0.98.tar.gz
.
.
.
nagios-plugins-2.0.3/pkg/solaris/pkginfo
nagios-plugins-2.0.3/pkg/redhat/
nagios-plugins-2.0.3/pkg/redhat/requires
After extraction, compile and install the nagios plugin.
linuxhelp:/tmp/nagios-plugins-2.0.3 # ./configure --with-nagios-user=nagios --with-nagios-group=nagios
checking for a BSD-compatible install... /usr/bin/install -c
checking whether build environment is sane... yes
checking for a thread-safe mkdir -p... /usr/bin/mkdir -p
checking for gawk... gawk
checking whether make sets $(MAKE)... yes
.
.
.
--with-perl: /usr/bin/perl
--enable-perl-modules: no
--with-cgiurl: /nagios/cgi-bin
--with-trusted-path: /bin:/sbin:/usr/bin:/usr/sbin
--enable-libtap: no
Use the following command to start installing the Nagios plugin.
linuxhelp:/tmp/nagios-plugins-2.0.3 # make
make all-recursive
make[1]: Entering directory ' /tmp/nagios-plugins-2.0.3'
Making all in gl
make[2]: Entering directory ' /tmp/nagios-plugins-2.0.3/gl'
rm -f alloca.h-t alloca.h & &
{ echo ' /* DO NOT EDIT! GENERATED AUTOMATICALLY! */'

make[2]: Entering directory ' /tmp/nagios-plugins-2.0.3'
make[2]: Leaving directory ' /tmp/nagios-plugins-2.0.3'
make[1]: Leaving directory ' /tmp/nagios-plugins-2.0.3'
linuxhelp:/tmp/nagios-plugins-2.0.3 # make install
Making install in gl
make[1]: Entering directory ' /tmp/nagios-plugins-2.0.3/gl'
make install-recursive
make[2]: Entering directory ' /tmp/nagios-plugins-2.0.3/gl'
make[3]: Entering directory ' /tmp/nagios-plugins-2.0.3/gl'
.
.
.
make[2]: Nothing to be done for ' install-data-am' .
make[2]: Leaving directory ' /tmp/nagios-plugins-2.0.3'
make[1]: Leaving directory ' /tmp/nagios-plugins-2.0.3'
After the plugins are installed, check the nagios configuration file.
linuxhelp:/tmp/nagios-plugins-2.0.3 # /usr/local/nagios/bin/nagios -v /usr/local/nagios/etc/nagios.cfg
Nagios Core 4.0.8
Copyright (c) 2009-present Nagios Core Development Team and Community Contributors
Copyright (c) 1999-2009 Ethan Galstad
Last Modified: 08-12-2014
.
.
.
Total Warnings: 0
Total Errors: 0
Things look okay - No serious problems were detected during the pre-flight check
Then Start the nagios service
linuxhelp:/tmp/nagios-plugins-2.0.3 # systemctl start nagios
You can also use the following command to start the nagios on boot itself.
linuxhelp:/tmp/nagios-plugins-2.0.3 # chkconfig nagios on
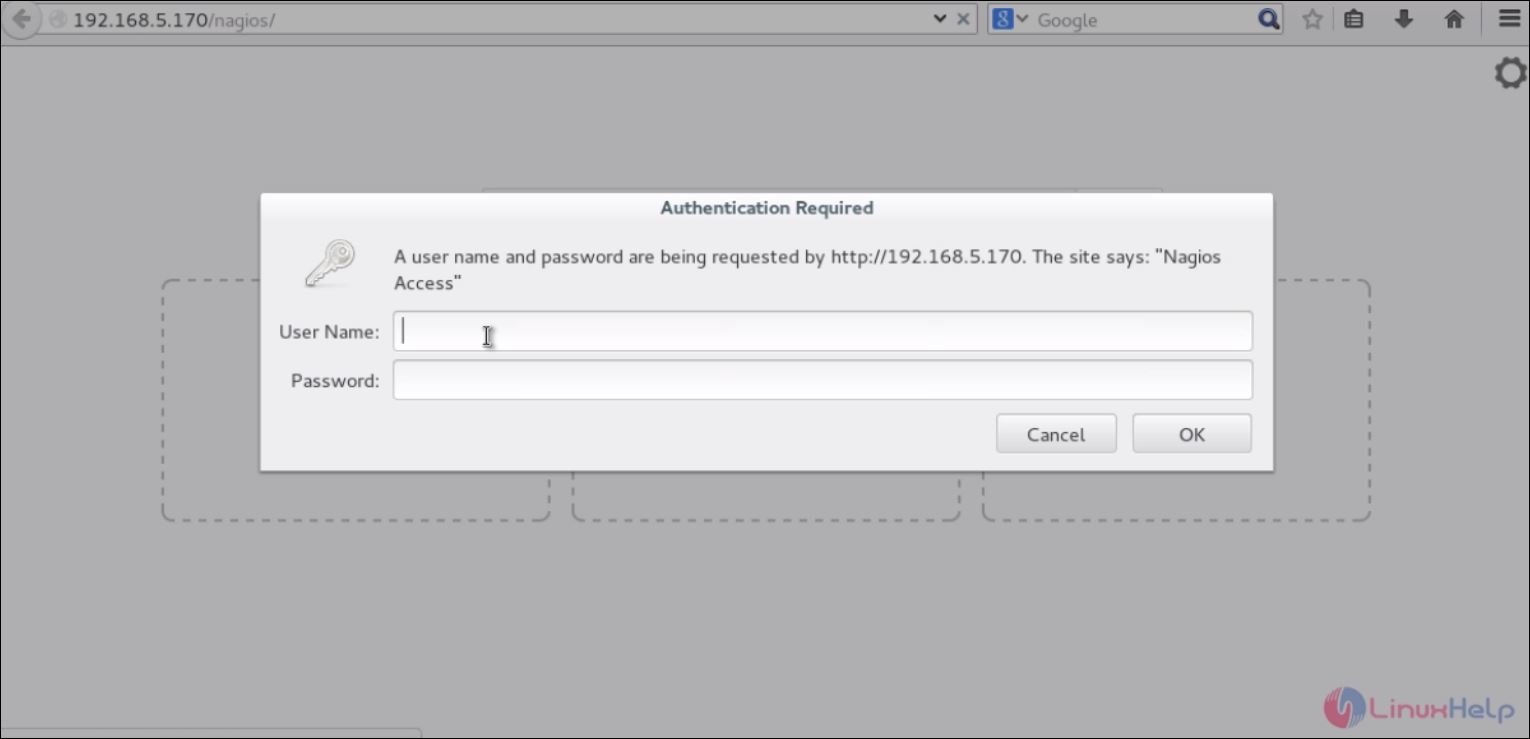
Trigger the browser with the following URL http://< IP_address> /nagios and enter the user credentials to login into the Nagios.
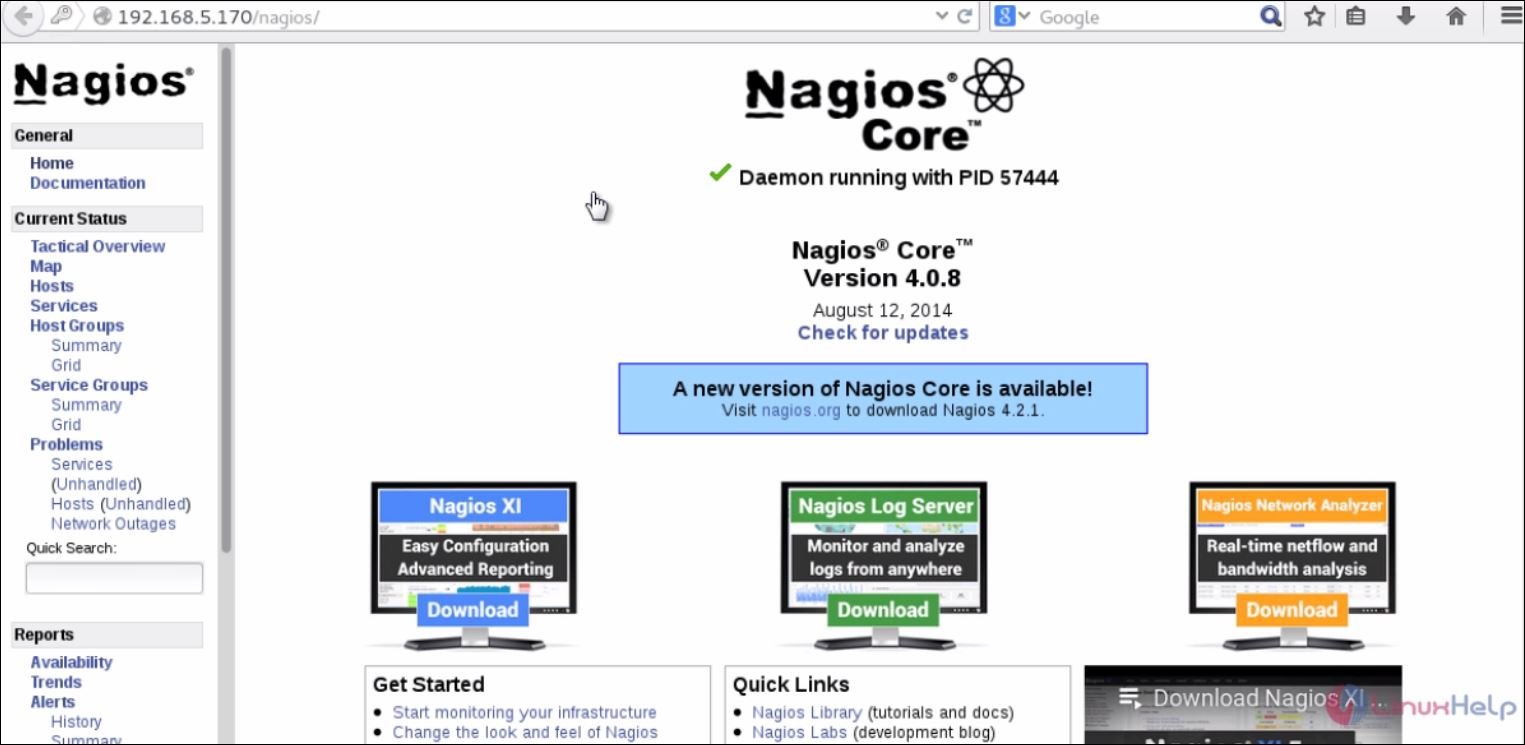
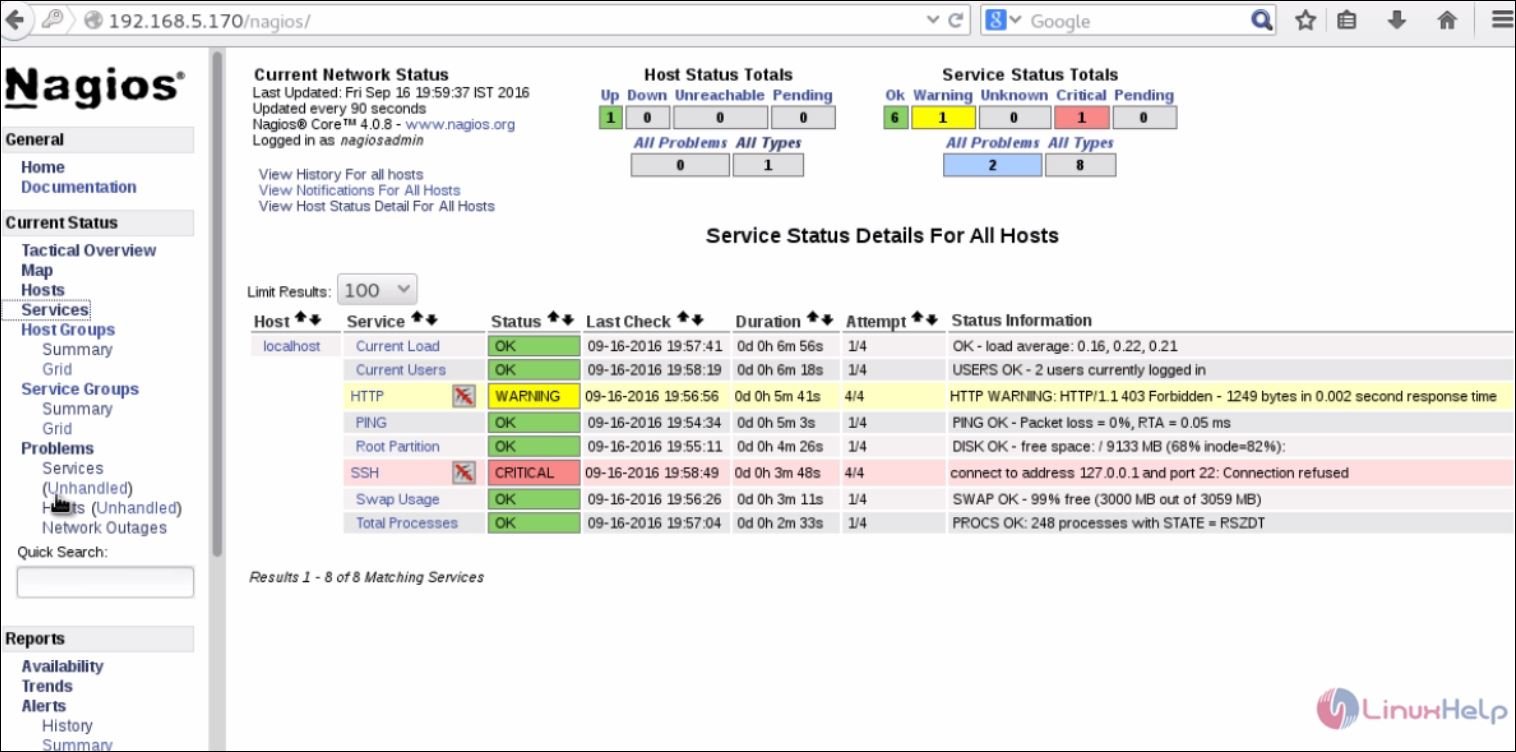
Now you can start checking the status of your server.
Comments ( 0 )
No comments available