How to install TextPattern CMS with Nginx on CentOS 6.9
To install TextPattern CMS with Nginx on CentOS 6.9
Textpattern CMS is especially designed for web developers, designers and bloggers. It allows the users to publish their content with the easy interface. The textpattern tool is developed with advanced features to create, edit and publish content in the websites. It contains features like conversion of plain text to XHTML code, tag-based template system, built-in site statistics and seperation of content from presentation. This tutorial covers the installation procedure of Textpattern CMS with Nginx on CentOS 6.9.
Installation procedure
To proceed with the installation procedure, edit the php configuration file using vim editor and change the timezone in the file. Save and exit the file.
[root@linuxhelp1 ~]# vim /etc/php.ini
date.timezone = Asia/Kolkata
Edit the php-fpm configuration file using vim editor and enter the following changes. Save and exit the file.
[root@linuxhelp1 ~]# vim /etc/php-fpm.d/www.conf
listen = /var/run/php-fpm/php-fpm.sock
listen.owner = nginx
listen.group = nginx
user = nginx
group = nginx
Restart the php-fpm service by running the following command.
[root@linuxhelp1 ~]# service php-fpm restart
Stopping php-fpm:                                          [  OK  ]
Starting php-fpm:                                          [  OK  ]
Next download the textpattern package by executing the wget command followed by the download link.
[root@linuxhelp1 ~]#  wget https://textpattern.com/file_download/75/textpattern-4.6.2.zip
--2017-09-17 00:18:27--  https://textpattern.com/file_download/75/textpattern-4.6.2.zip
Resolving textpattern.com... 37.153.96.164
Connecting to textpattern.com|37.153.96.164|:443... connected.
HTTP request sent, awaiting response... 200 OK
Length: 1657031 (1.6M) [application/octet-stream]
Saving to: “ textpattern-4.6.2.zip”

100%[======================================> ] 1,657,031    350K/s   in 4.6s
2017-09-17 00:18:33 (350 KB/s) - “ textpattern-4.6.2.zip”  saved [1657031/1657031]
The package has been downloaded in the target system. Extract the downloaded file using unzip command.
[root@linuxhelp1 ~]# unzip textpattern-4.6.2.zip
Archive:  textpattern-4.6.2.zip
   creating: textpattern-4.6.2/
  inflating: textpattern-4.6.2/.htaccess
  inflating: textpattern-4.6.2/css.php
.
.
inflating: textpattern-4.6.2/textpattern/vendors/Textpattern/Validator/Validator.php
  inflating: textpattern-4.6.2/textpattern/vendors/Txp.php
Move the textpattern package into the HTML location.
[root@linuxhelp1 ~]# mv textpattern-4.6.2/textpattern/ /usr/share/nginx/html/
Change the ownership of file php-fpm file by running the following command.
[root@linuxhelp1 ~]# chown nginx:nginx /var/run/php-fpm/php-fpm.sock
Change the ownership of file HTML location.
[root@linuxhelp1 ~]# chown -R nginx:nginx /usr/share/nginx
Configure the Nginx configuration file using vim editor and edit the changes in the file. Save and exit the file.
[root@linuxhelp1 ~]# vim /etc/nginx/conf.d/default.conf
server {
    listen       80 default_server
    listen       [::]:80 default_server
    server_name  _
    root         /usr/share/nginx/html
    # Load configuration files for the default server block.
    include /etc/nginx/default.d/*.conf
    index index.html index.php
    location ~ \.php {
    fastcgi_index index.php
    fastcgi_split_path_info ^(.+\.php)(.*)$
    include /etc/nginx/fastcgi_params
    fastcgi_pass unix:/var/run/php-fpm/php-fpm.sock
    fastcgi_param SCRIPT_FILENAME $document_root$fastcgi_script_name
    }
   error_page 404 /404.html
        location = /40x.html {
    }
    error_page 500 502 503 504 /50x.html
        location = /50x.html {
    }
}
Restart the Nginx service.
[root@linuxhelp1 ~]# service nginx restart
Stopping nginx:                                            [  OK  ]
Starting nginx:                                            [  OK  ]
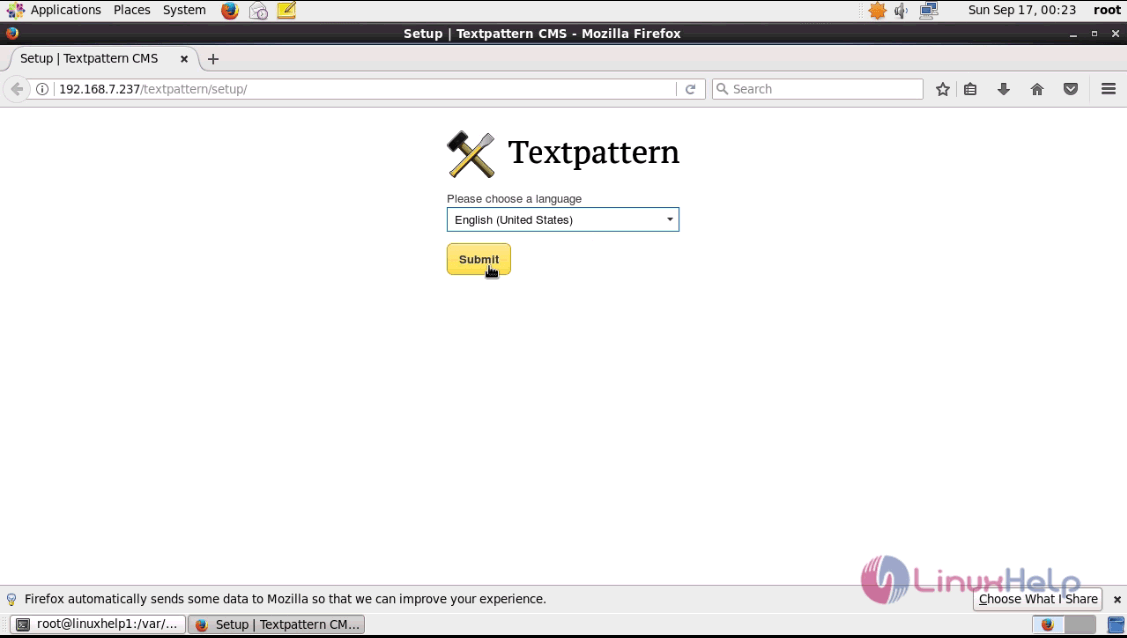
Swtich over to the browser and give the URL as http://machineip/textpattern/setup. It will lead to the setup starts, choose the required language and click submit.
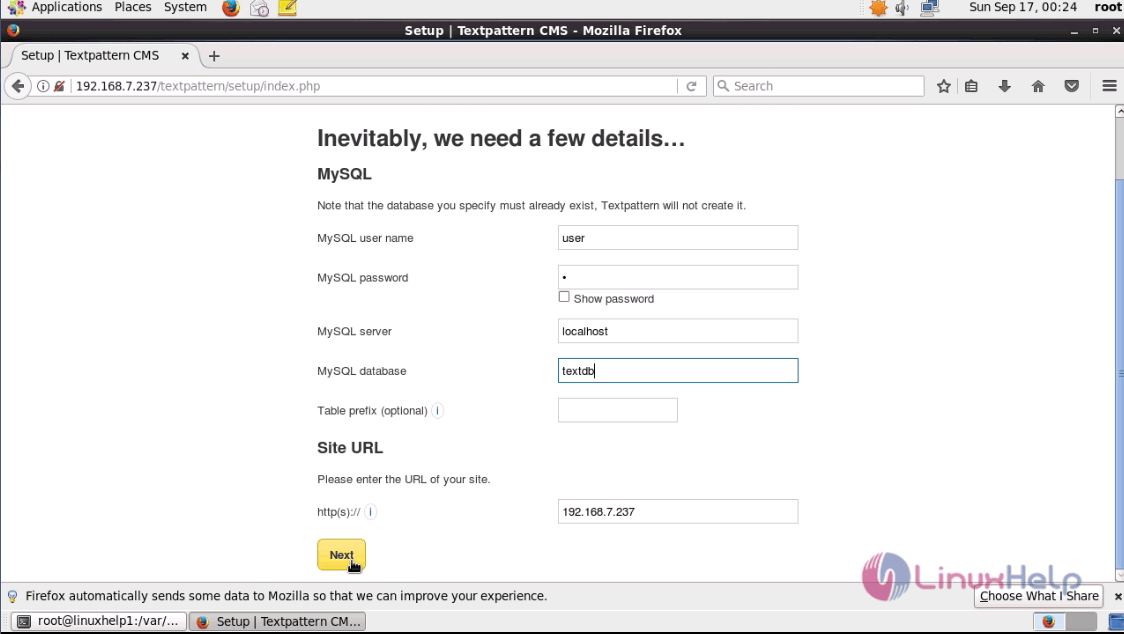
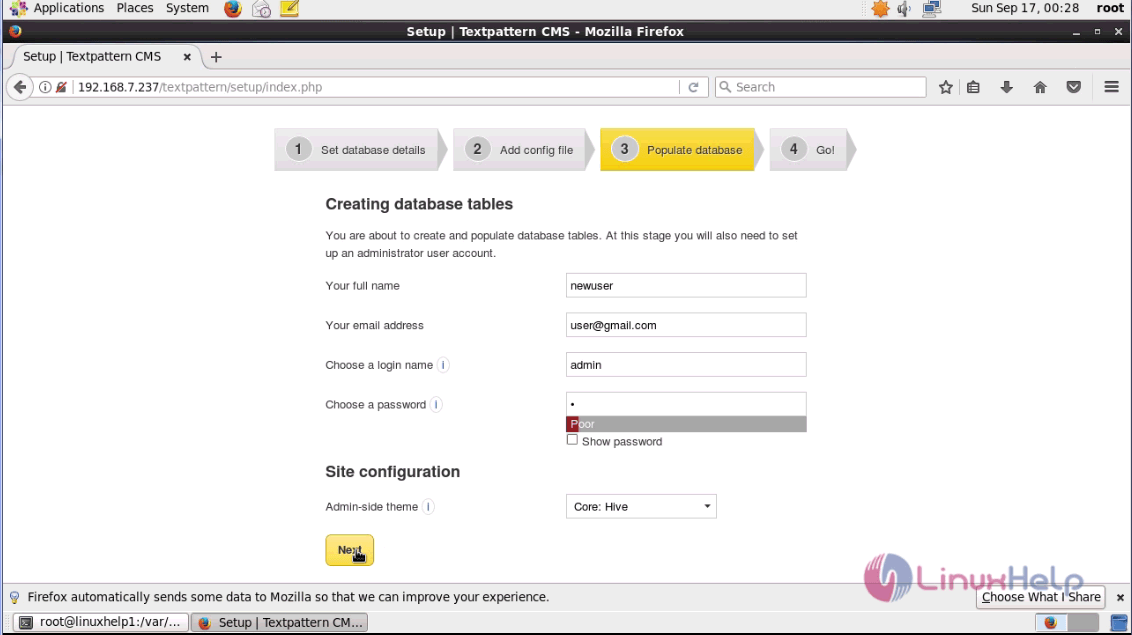
Enter the database tables details and click next.
A configuration file is prompted to the user to enter into the Textpattern directory.
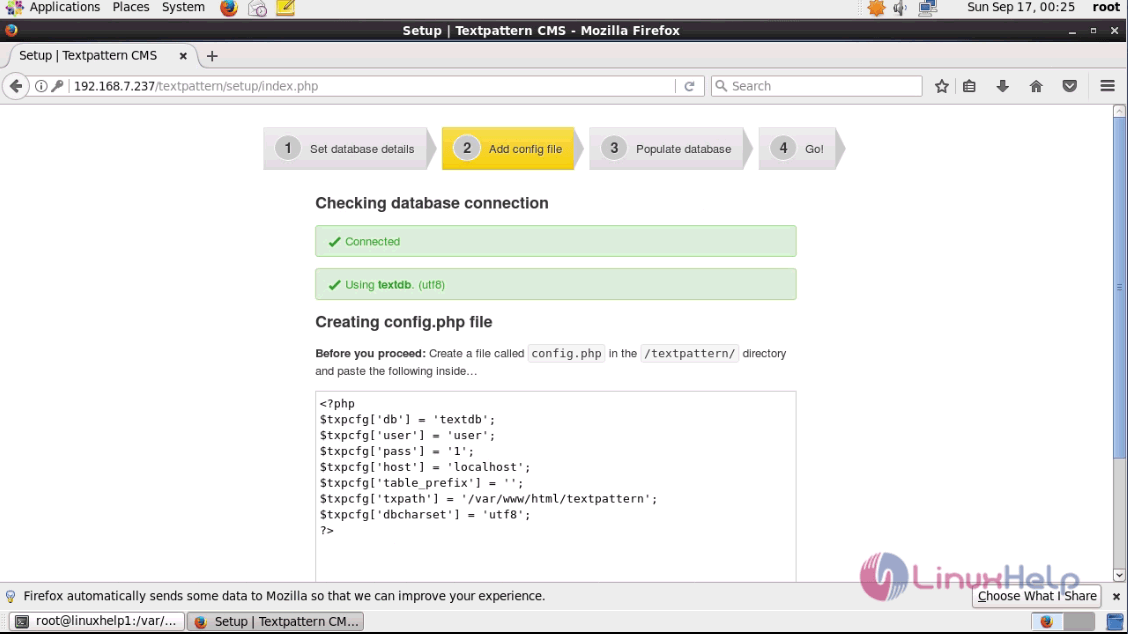
Open the terminal and add the above configuration file content in the file. Save and exit the file.
[root@linuxhelp1 textpattern]# vim config.php
< ?php
$txpcfg[' db' ] = ' textdb'
$txpcfg[' user' ] = ' user'
$txpcfg[' pass' ] = ' 1'
$txpcfg[' host' ] = ' localhost'
$txpcfg[' table_prefix' ] = ' '
$txpcfg[' txpath' ] = ' /var/www/html/textpattern'
$txpcfg[' dbcharset' ] = ' utf8'
?>
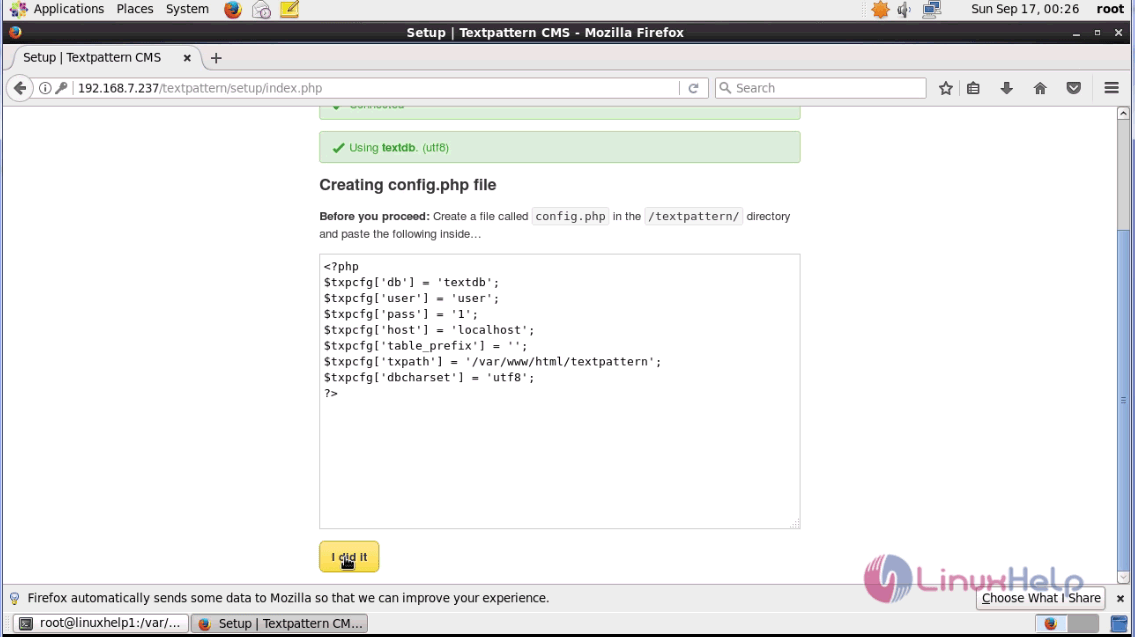
Switch over to the browser after adding the configuration file and click " I did it" option.
Enter the database tables details and click next.
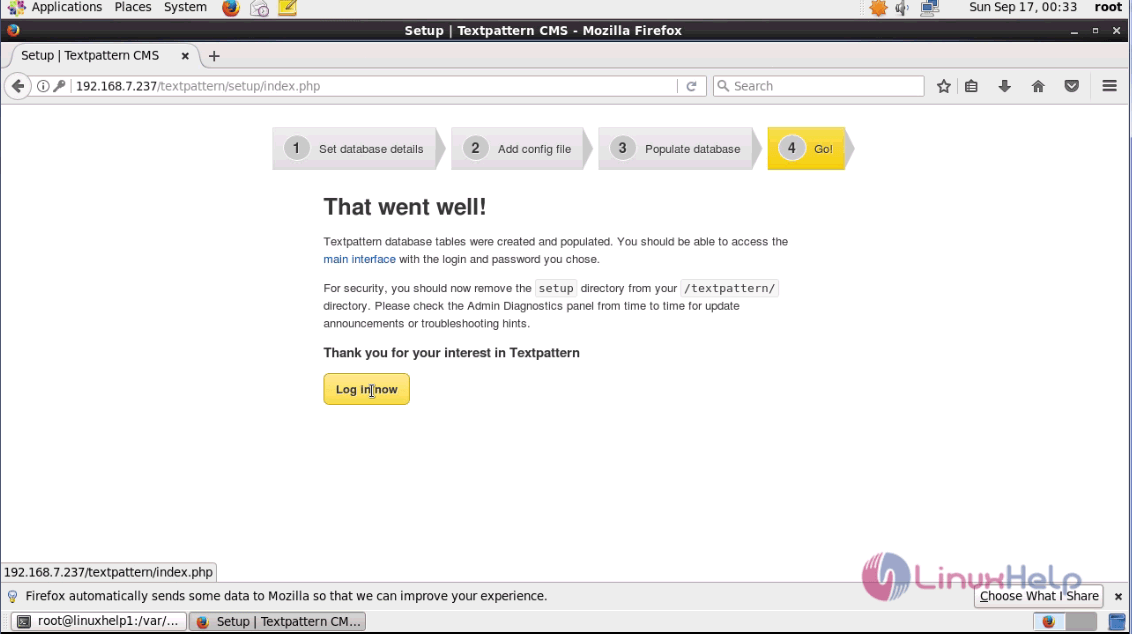
The installation is complete. Click login now option.
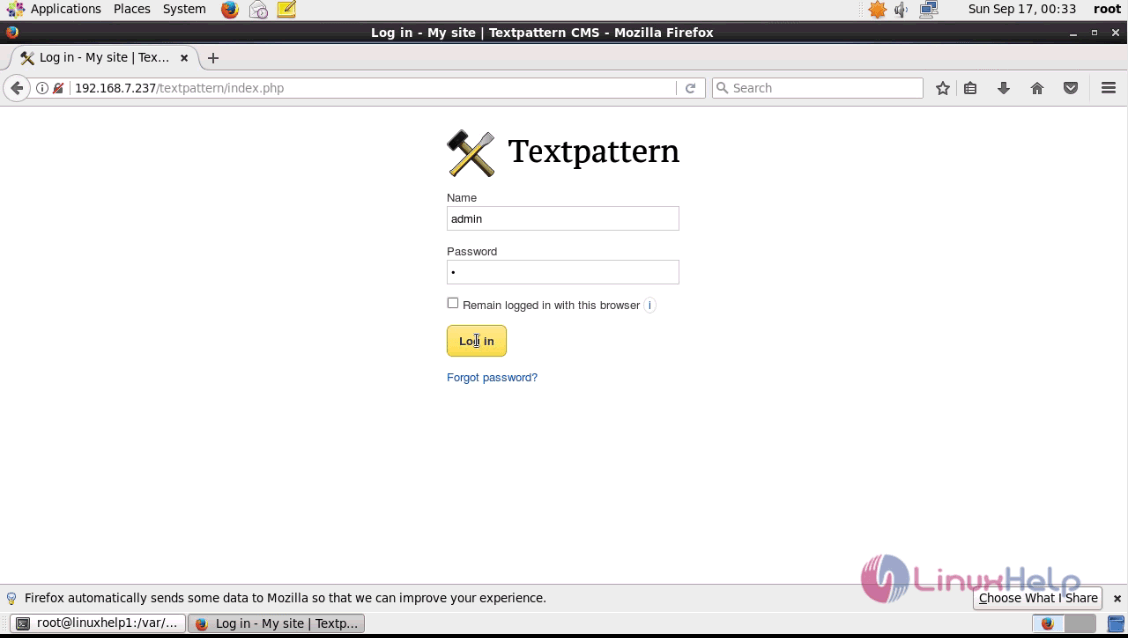
The login page appears on the screen. Enter the admin credentials and login.
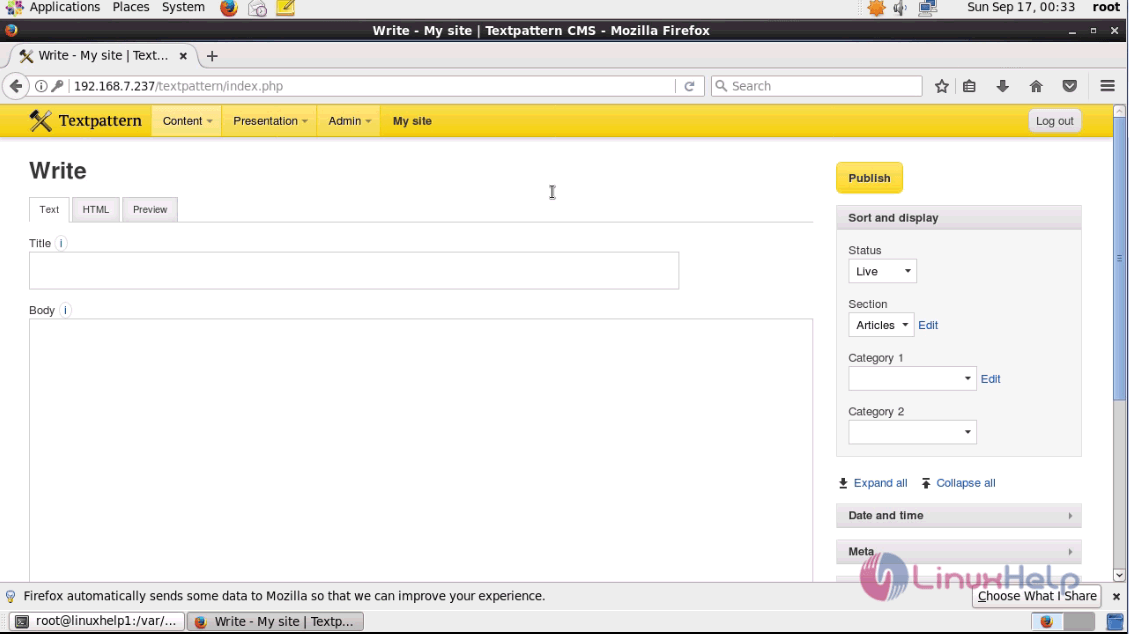
The admin page of Textpattern appears on the screen.
The installation procedure of Textpattern CMS with Nginx on CentOS 6.9 is done without any glitches.
Comments ( 0 )
No comments available