How to install TYPO3 CMS on CentOS 7
To install TYPO3 CMS on CentOS 7
TYPO3 is a free and open source enterprise content management system. It is written in PHP and uses MySQL to store its data. TYPO3 can run on HTTP server such as Apache or IIS. It also runs on PHP 5.3 or newer versions. TYPO3 is a responsive, multilingual and secure CMS. It can also be customized and extended without writing any code. This tutorial explains the installation procedure of TYPO3 CMS on CentOS 7.
Pre-Requisite
Before proceeding to the installation procedure, Setup a LAMP environment in your system by installing the Apache server, MySQL and PHP packages.
Installation procedure
To start with the installation procedure, move to Apache Document Root directory by running the following command.
[root@linuxhelp ~]# cd /var/www/
Now download the TYPO3 package from its official website by executing the following wget command followed by the download link.
[root@linuxhelp www]# wget https://get.typo3.org/8.7.3 -O typo3.tar.gz
--2017-09-04 15:56:14--  https://get.typo3.org/8.7.3
Resolving get.typo3.org (get.typo3.org)... 104.25.212.19, 104.25.213.19, 2400:cb00:2048:1::6819:d413, ...
Connecting to get.typo3.org (get.typo3.org)|104.25.212.19|:443... connected.
HTTP request sent, awaiting response... 302 Moved Temporarily
Location: https://typo3.azureedge.net/typo3/8.7.3/typo3_src-8.7.3.tar.gz [following]
--2017-09-04 15:56:16--  https://typo3.azureedge.net/typo3/8.7.3/typo3_src-8.7.3.tar.gz
Resolving typo3.azureedge.net (typo3.azureedge.net)... 117.18.232.200, 2606:2800:147:120f:30c:1ba0:fc6:265a
Connecting to typo3.azureedge.net (typo3.azureedge.net)|117.18.232.200|:443... connected.
HTTP request sent, awaiting response... 200 OK
Length: 18024088 (17M) [application/octet-stream]
Saving to: ‘ typo3.tar.gz’
100%[==================================================================================================> ] 18,024,088   421KB/s   in 56s
2017-09-04 15:57:13 (315 KB/s) - ‘ typo3.tar.gz’  saved [18024088/18024088]

typo3_src-8.7.3/typo3/sysext/extbase/Classes/Mvc/View/ViewInterface.php
typo3_src-8.7.3/typo3/sysext/extbase/Classes/Mvc/Web/
typo3_src-8.7.3/typo3/sysext/extbase/Classes/Mvc/Web/AbstractRequestHandler.php
typo3_src-8.7.3/typo3/sysext/extbase/Classes/Mvc/Web/BackendRequestHandler.php
typo3_src-8.7.3/typo3/sysext/extbase/Classes/Mvc/Web/CacheHashEnforcer.php
typo3_src-8.7.3/typo3/sysext/extbase/Classes/Mvc/Web/FrontendRequestHandler.php
typo3_src-8.7.3/typo3/sysext/extbase/Classes/Mvc/Web/ReferringRequest.php
.
.
.
.
typo3_src-8.7.3/vendor/typo3fluid/fluid/src/ViewHelpers/RenderViewHelper.php
typo3_src-8.7.3/vendor/typo3fluid/fluid/src/ViewHelpers/SectionViewHelper.php
typo3_src-8.7.3/vendor/typo3fluid/fluid/src/ViewHelpers/SpacelessViewHelper.php
typo3_src-8.7.3/vendor/typo3fluid/fluid/src/ViewHelpers/SwitchViewHelper.php
typo3_src-8.7.3/vendor/typo3fluid/fluid/src/ViewHelpers/ThenViewHelper.php
typo3_src-8.7.3/vendor/typo3fluid/fluid/src/ViewHelpers/VariableViewHelper.php
Rename the extracted directory.
[root@linuxhelp www]# mv typo3*/ typo3/
Rename the .htaccess file.
[root@linuxhelp www]# mv typo3/_.htaccess typo3/.htaccess
Next create an empty file in root directory. The web installer will check for this file before starting the installation procedure.
[root@linuxhelp www]# touch /var/www/typo3/FIRST_INSTALL
In the PHP.ini file, do the following changes and save the file.
[root@linuxhelp www]# vim /etc/php.ini

max_input_vars = 1500
max_execution_time = 240
Provide owner permission and read write execution permission.
[root@linuxhelp www]# chown -R apache:apache /var/www/typo3
[root@linuxhelp www]# chmod -R 775 /var/www/typo3
Configure your Apache virtual host by creating a configuration file named typo.conf using vim editor. Enter the following contents into the file and save it.
[root@linuxhelp www]# vim /etc/httpd/conf.d/typo.conf
< VirtualHost *:80>
    ServerName 192.168.7.165
    DocumentRoot /var/www/typo3
    < Directory /var/www/typo3>
        Options Indexes FollowSymLinks MultiViews
        AllowOverride All
        Order allow,deny
        allow from all
    < /Directory>
< /VirtualHost>
Restart your Apache service by running the following command.
[root@linuxhelp www]# systemctl restart httpd
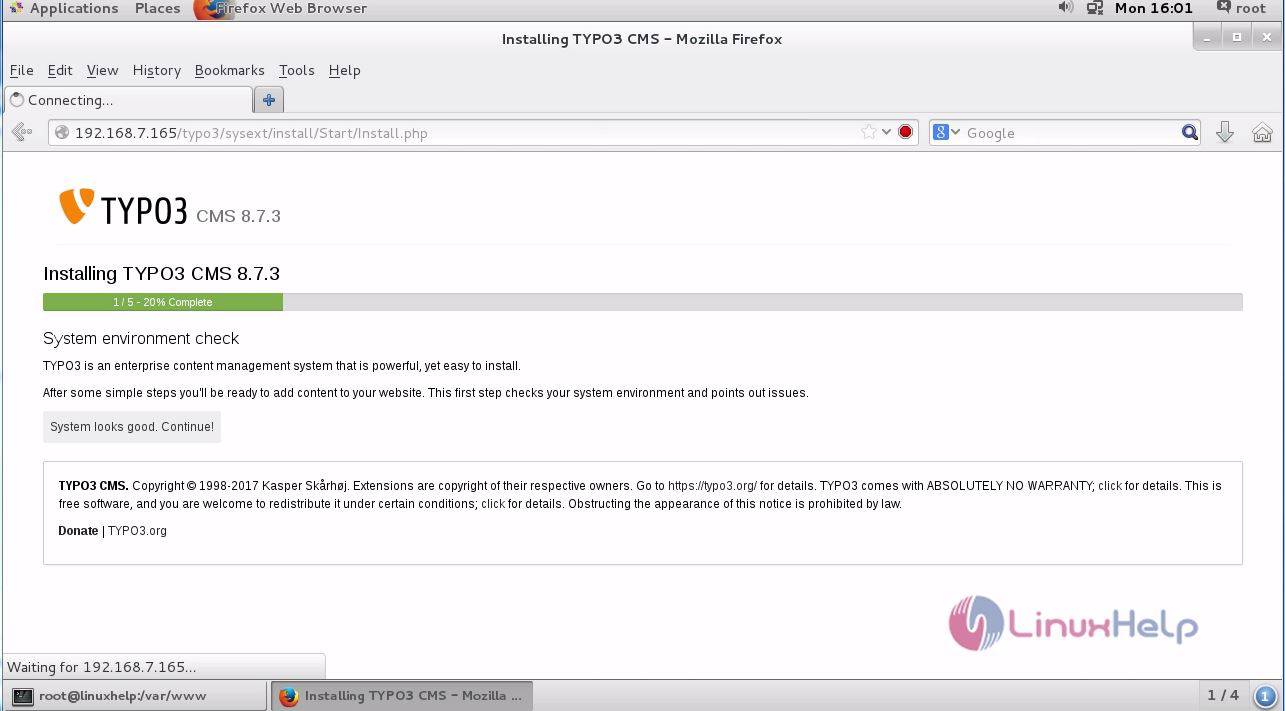
Switch over to your browser and enter your machine’ s IP address. It will lead to the installation progress bar of TYPO3 CMS.
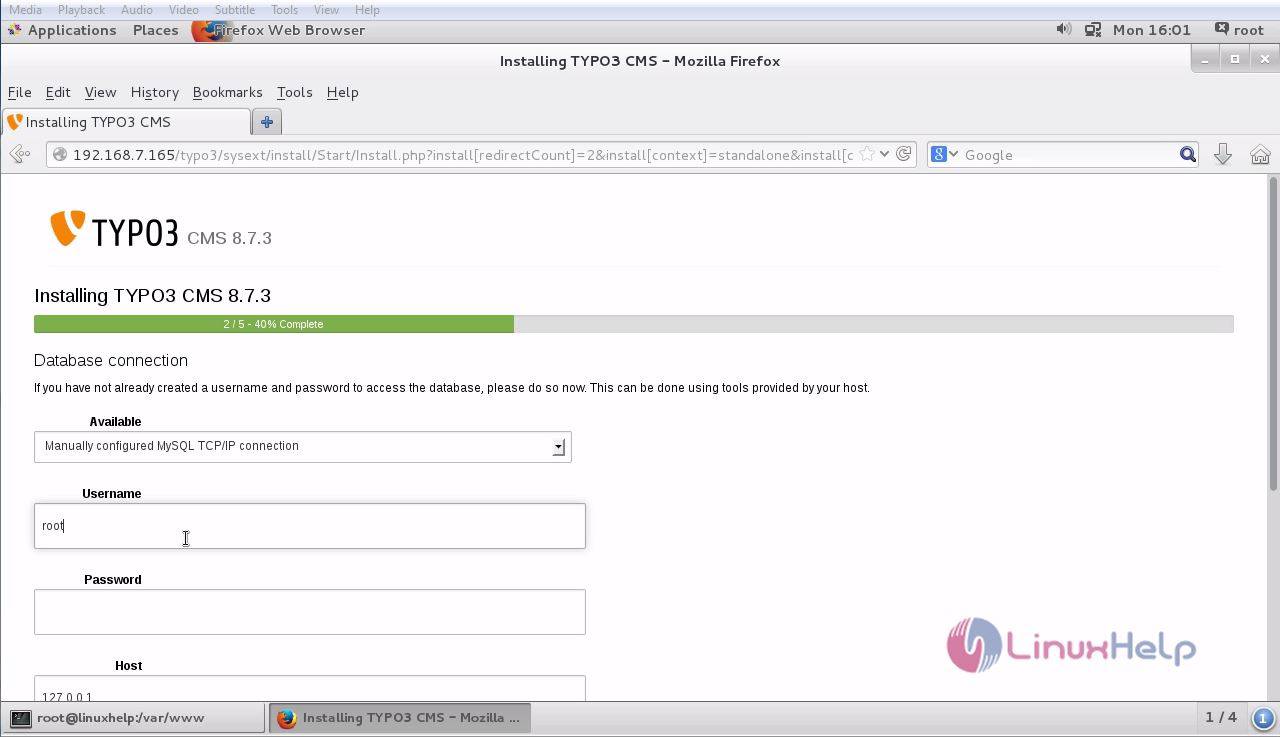
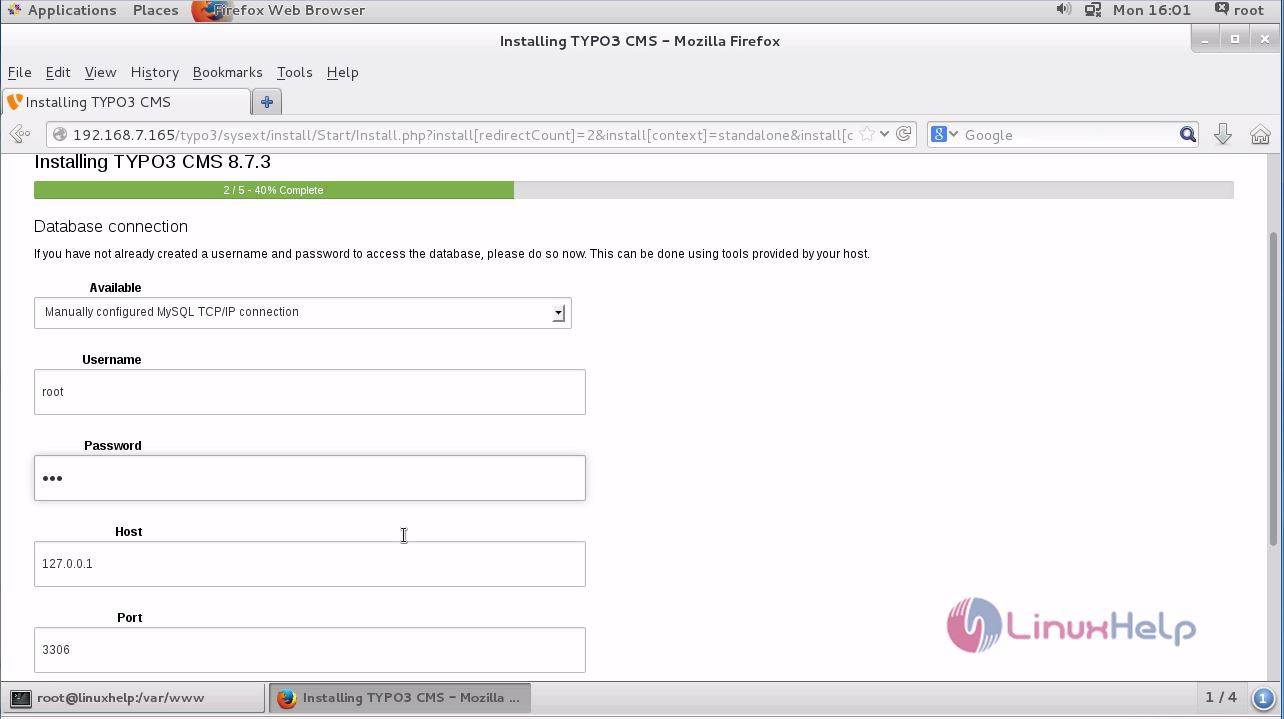
Enter your database credentials to create a new database connection.
Select your newly created database in the drop-down menu bar.

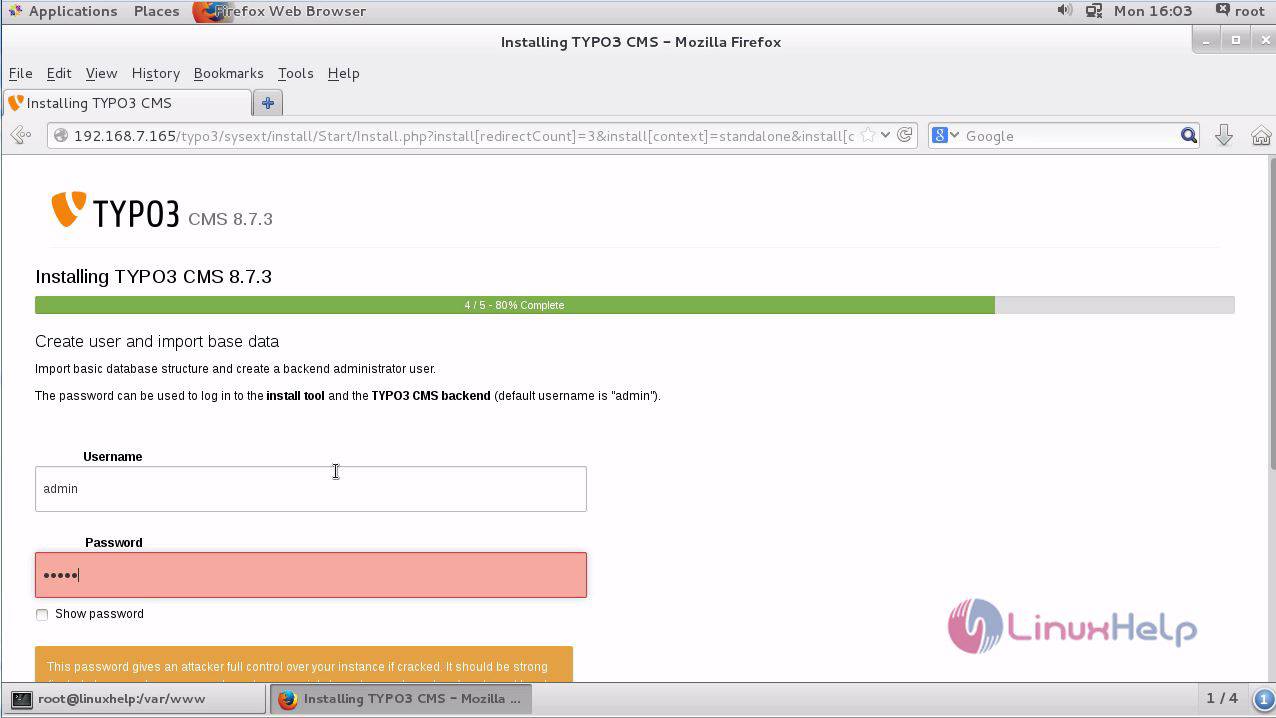
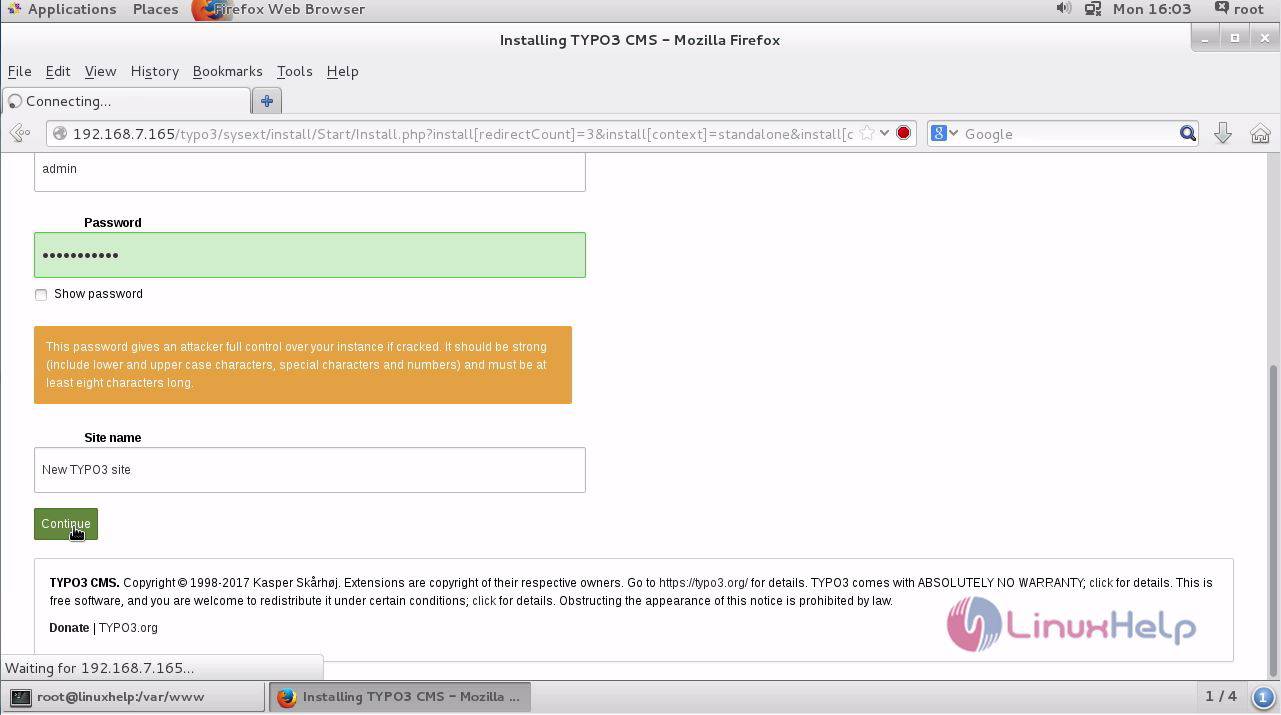
Create the admin credentials by entering the username and password details.
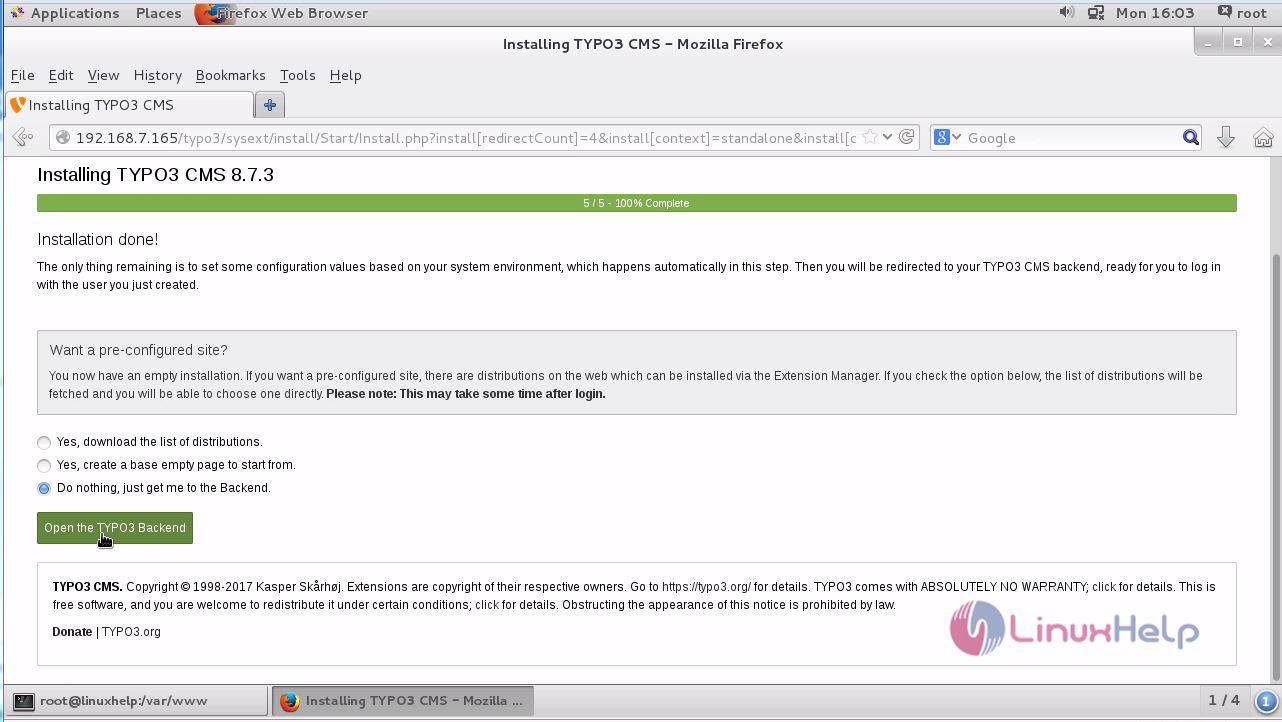
Select the required options to continue to the installation process.
The installation procedure is complete. Click on the Open the TYPO3 backend option.
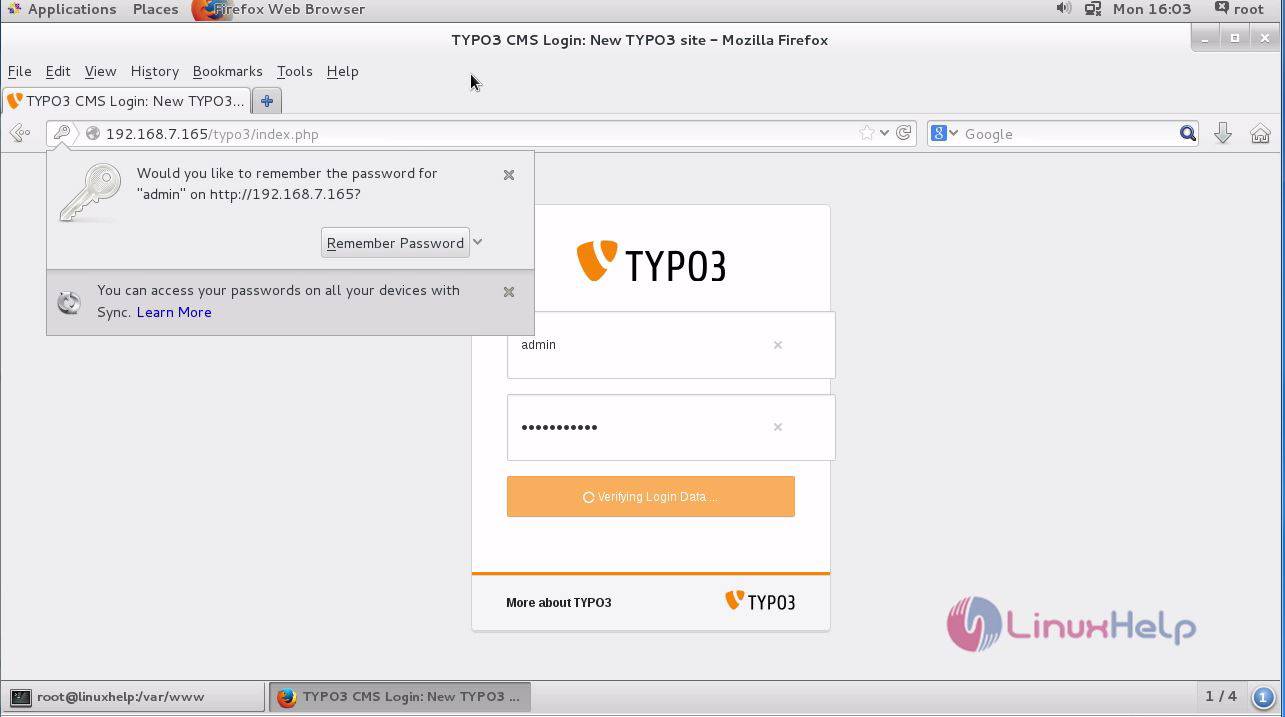
It will lead to the admin login. Enter the required credentials.
The TYPO3 application is running without any hurdles.
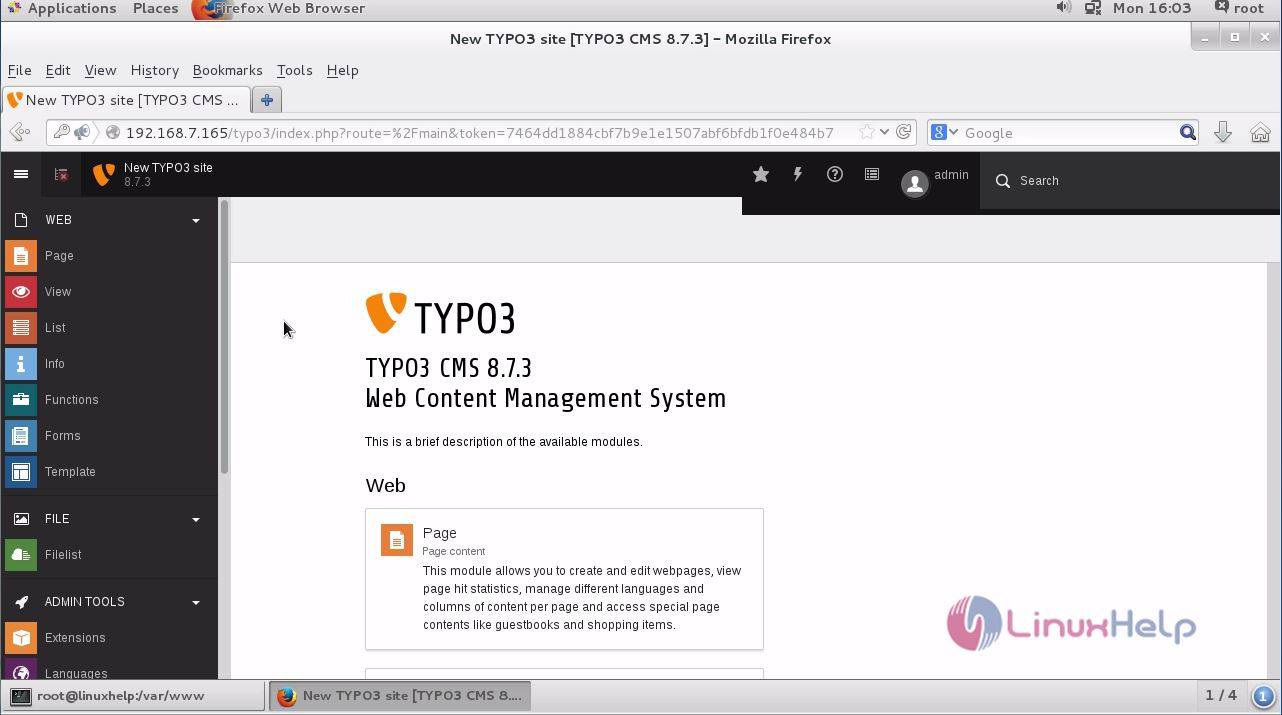
The installation procedure of TYPO3 on CentOS 7 is done successfully.
Comments ( 0 )
No comments available