How to install Xibo CMS with Nginx on CentOS 6.9
To install Xibo CMS with Nginx on CentOS 6.9
Xibo which is an open source digital signage (public display signs) solutions that comprised of a web based content management system (CMS) and choice of Windows or Android signage players. The best way to capture the attention of people for your very important announcements can be done with digital signs using Xibo. It lets us to turn PCs and TVs into a distinctive way of getting the word out, transforming them into information desks which you can place in strategic locations to draw people' s attention. It is a backend processor for creating content for your websites. Xibo CMS will also supports for Media storage option for your websites by setting up digital signatures. This tutorial covers the explanation of Xibo CMS with Nginx on CentOS 6.9.
Pre-Requisite
Before starting the installation procedure, check whether the target system has been installed with LEMP (Nginx, MySQL, PHP) environment. Create a database in MySQL and grant privileges to the user.
Installation procedure
To proceed with the installation procedure, download the Xibo package by running the wget command followed by the download link.
[root@linuxhelp1 ~]#  wget ' https://citricks.net/downloads/xibo-cms-1.7.7.zip'
--2017-09-15 00:02:17--  https://citricks.net/downloads/xibo-cms-1.7.7.zip
Resolving citricks.net... 149.210.209.108, 2a01:7c8:eb:0:149:210:209:108
Connecting to citricks.net|149.210.209.108|:443... connected.
HTTP request sent, awaiting response... 200 OK
Length: 7079747 (6.8M) [application/zip]
Saving to: “ xibo-cms-1.7.7.zip”

100%[======================================> ] 7,079,747    974K/s   in 8.4s
Enter into HTML location of Nginx.
[root@linuxhelp1 ~]# cd /usr/share/nginx/html
Create a directory for Xibo CMS by running the following mkdir command.
[root@linuxhelp1 html]# mkdir xibo
Move the downloaded file into newly created directory.
[root@linuxhelp1 html]# mv ~/xibo-cms-1.7.7.zip xibo/
Enter into newly created directory.
[root@linuxhelp1 html]# cd xibo/
Extract the downloaded zip file by executing the unzip command.
[root@linuxhelp1 xibo]# unzip xibo-cms-1.7.7.zip
Archive:  xibo-cms-1.7.7.zip
  inflating: .gitignore
   creating: 3rdparty/
   creating: 3rdparty/htmlpurifier/
.
.
 inflating: Vagrantfile
  inflating: xmds.php
Edit the php-fpm configuration file using vim editor and enter the following contents in the file. Save and exit from the file.
[root@linuxhelp1 xibo]# vim /etc/php-fpm.d/www.conf
listen = /var/run/php-fpm/php-fpm.sock
listen.owner = nginx
listen.group = nginx
user = nginx
group = nginx
Edit the Nginx configuration file using vim editor and enter the following index and PHP location details in the file. Save and exit from the file.
[root@linuxhelp1 xibo]# vim /etc/nginx/conf.d/default.conf
server {
    listen       80 default_server
    listen       [::]:80 default_server
    server_name  _
    root         /usr/share/nginx/html
    # Load configuration files for the default server block.
    include /etc/nginx/default.d/*.conf
    index index.html index.php
    location ~ \.php {
    fastcgi_index index.php
    fastcgi_split_path_info ^(.+\.php)(.*)$
    include /etc/nginx/fastcgi_params
    fastcgi_pass unix:/var/run/php-fpm/php-fpm.sock
    fastcgi_param SCRIPT_FILENAME $document_root$fastcgi_script_name
    }
   error_page 404 /404.html
        location = /40x.html {
    }
    error_page 500 502 503 504 /50x.html
        location = /50x.html {
    }
}
Change the ownership of Nginx directory by executing the following command.
[root@linuxhelp1 xibo]# chown -R nginx:nginx /usr/share/nginx
Change the permission of Nginx directory by running the following command.
[root@linuxhelp1 xibo]# chmod -R 755 /usr/share/nginx
Restart the php-fpm service.
[root@linuxhelp1 xibo]# service php-fpm restart
Stopping php-fpm:                                          [  OK  ]
Starting php-fpm:                                          [  OK  ]
Restart the Nginx service by running the following command.
[root@linuxhelp1 xibo]# service nginx restart
Stopping nginx:                                            [  OK  ]
Starting nginx:                                            [  OK  ]
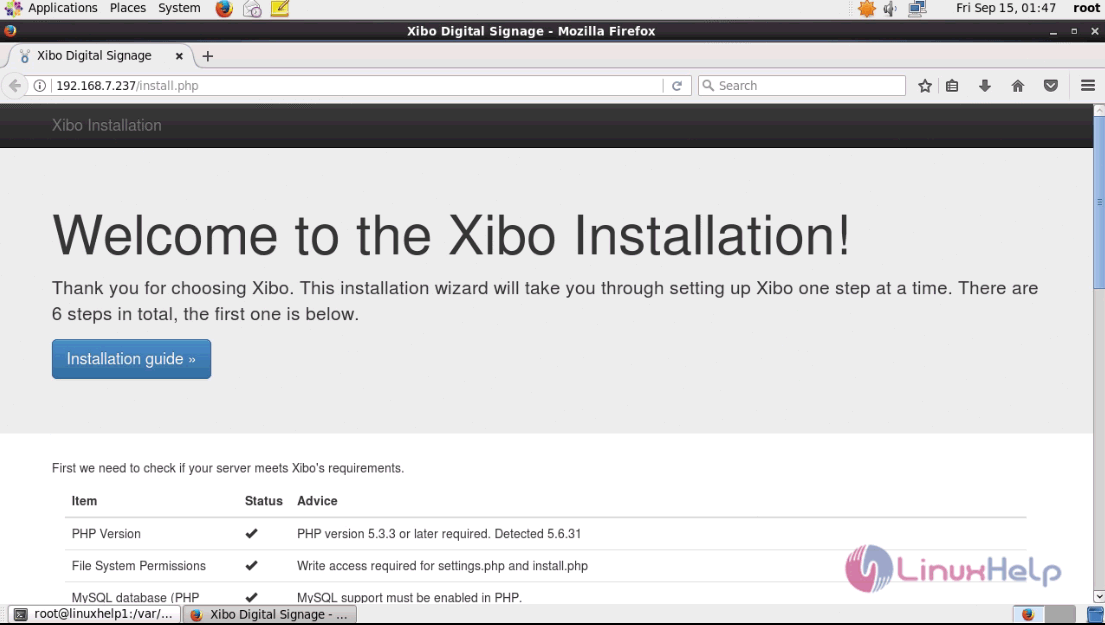
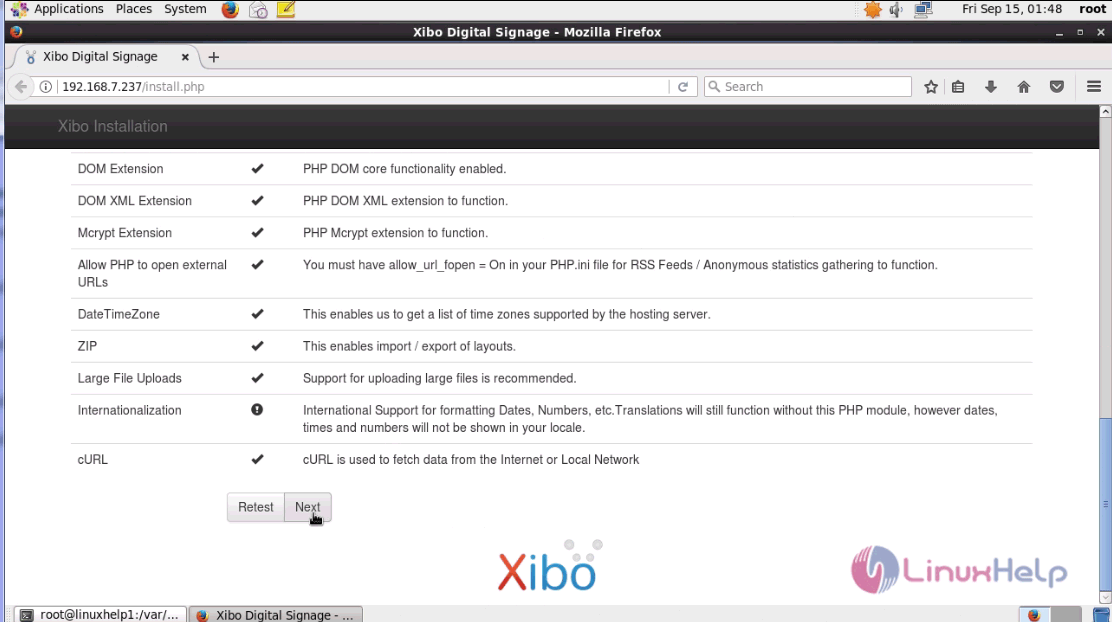
Switch over to a browser and give the URL as machine IP, it opens the list of system checks to be done before installation and click next.
Choose ' use an existing database' and fill out the essential details and click next.

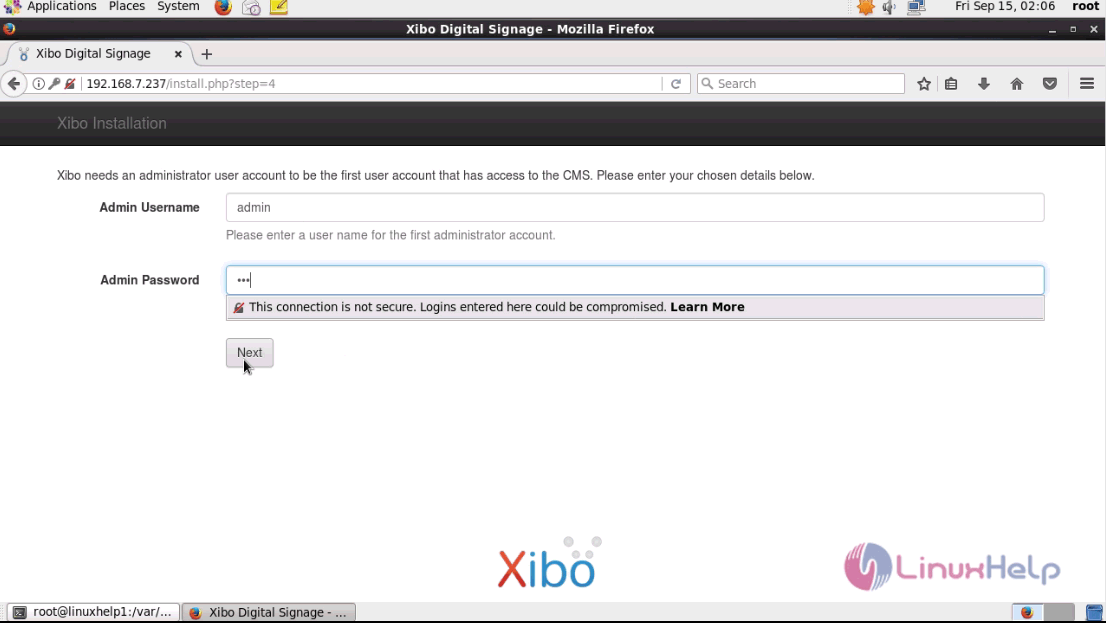
Fill the required admin details and click next.
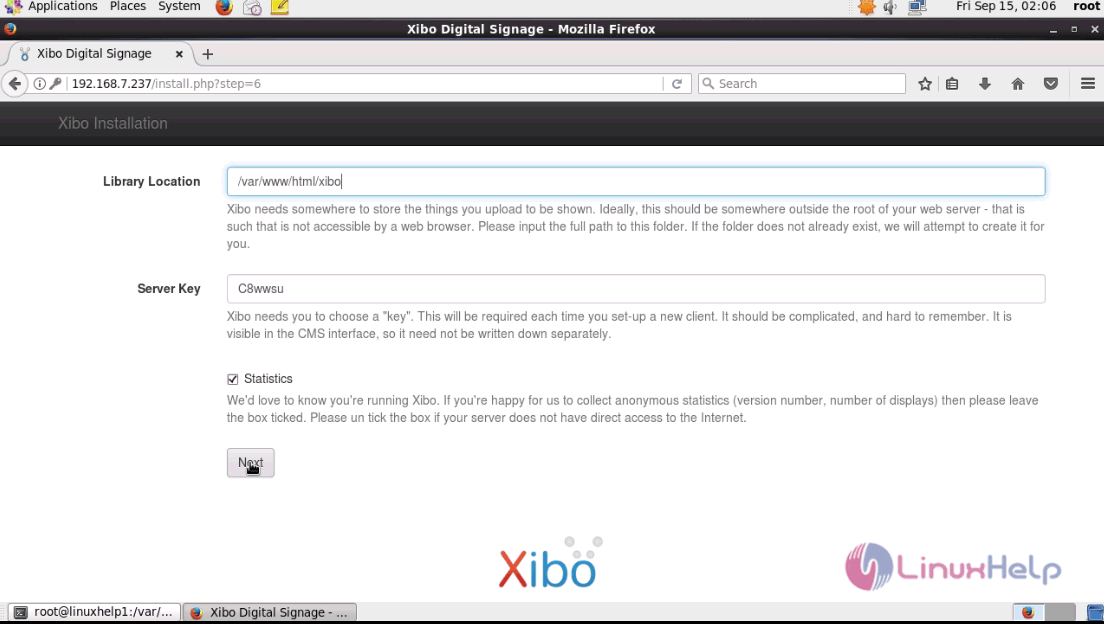
Enter the library location of the installed Xibo and click next.
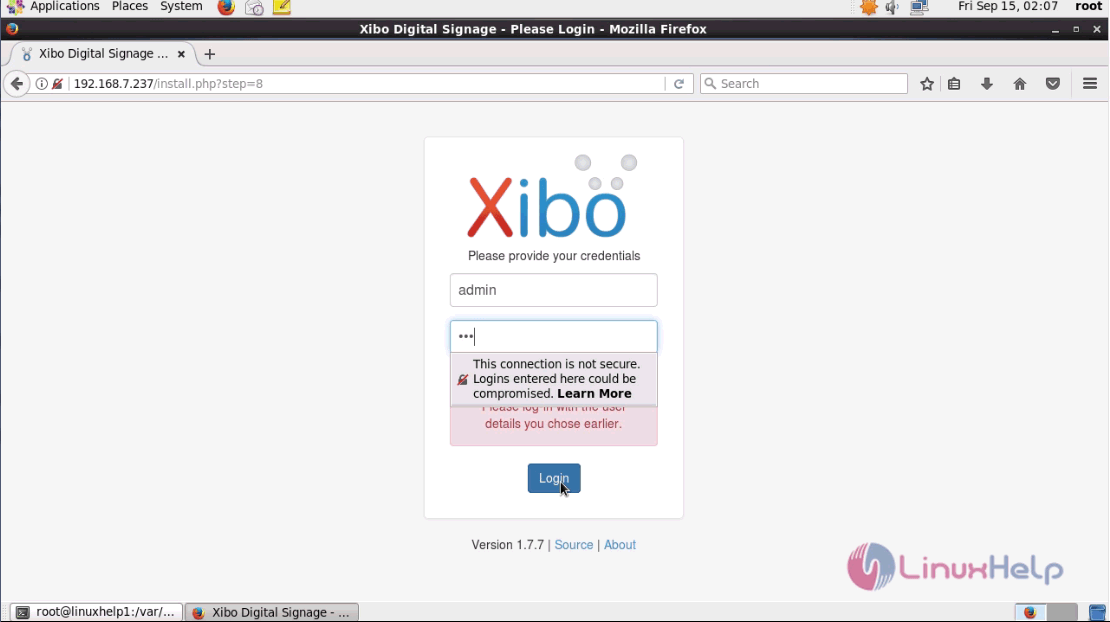
Use admin credentials to login into Xibo.
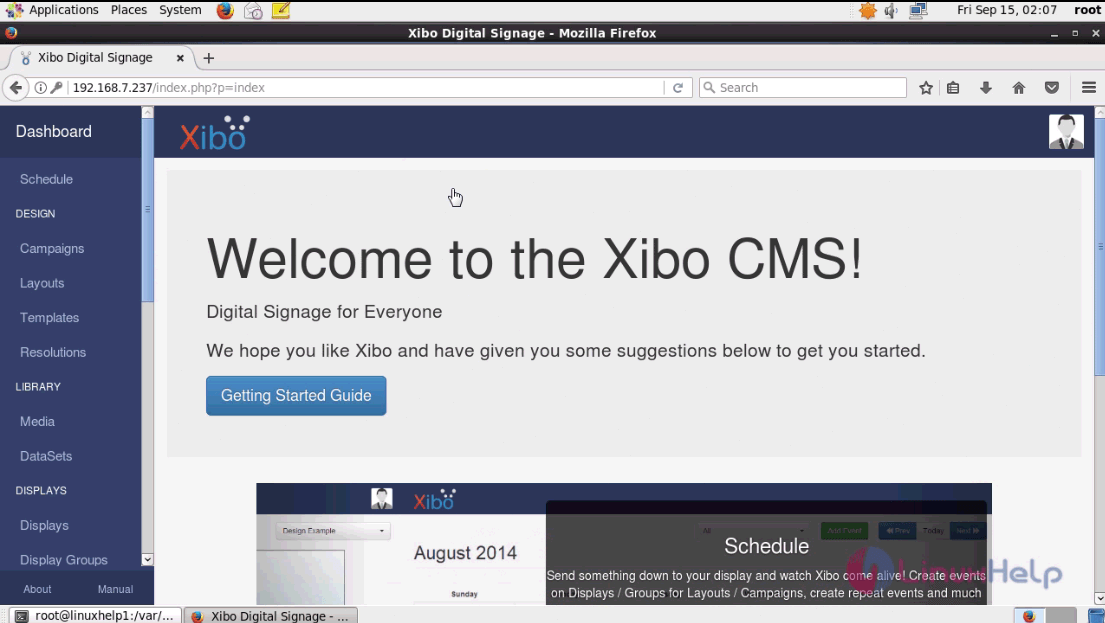
The admin page of xibo is open and now you can use the application for various CMS functions.
The installation procedure of Xibo CMS with Nginx on CentOS 6.9 is done without any glitches.
Comments ( 0 )
No comments available