How to install Zenario in Centos
Installation of Zenario in CentOS
Zenario is a Content Management System, which enables you to build web sites and powerful online applications. It is designed specially for the users who wants to grow with their site. Installation of Zenario is explained in this manual.
To install Zenario
Before installing zenario, it is necessary to install LAMP server. To know LAMP server installation follow the link,
https://www.linuxhelp.com/install-lamp-fedora-22/
After installing LAMP, use the following command to install PHP modules.
[root@linuxhelp1 Desktop]# yum install php-gd php-mbstring
Loaded plugins: fastestmirror, langpacks
Loading mirror speeds from cached hostfile
&hellip
&hellip
Installed:
  php-gd.x86_64 0:5.4.16-36.3.el7_2                                                                     php-mbstring.x86_64 0:5.4.16-36.3.el7_2
Dependency Installed:
  t1lib.x86_64 0:5.1.2-14.el7
Complete!
Then download the Zenario package by running the following command.
[root@linuxhelp1 Desktop]# wget http://zenar.io/public/downloads/LCSxf/zenario-probusiness-7.3.0.37342.zip
--2016-10-08 03:35:05--  http://zenar.io/public/downloads/LCSxf/zenario-probusiness-7.3.0.37342.zip
Resolving zenar.io (zenar.io)... 104.18.49.86, 104.18.48.86, 2400:cb00:2048:1::6812:3056, ...
&hellip
&hellip
2016-10-08 03:58:56 (8.16 KB/s) - ‘ zenario-probusiness-7.3.0.37342.zip’  saved [11951691/11951691]
Extract the downloaded zip package.
[root@linuxhelp1 Desktop]# unzip zenario-probusiness-7.3.0.37342.zip -d /var/www/html/
Archive:  zenario-probusiness-7.3.0.37342.zip
   creating: /var/www/html/zenario-probusiness-7.3.0/
  inflating: /var/www/html/zenario-probusiness-7.3.0/CONTRIBUTING.md
  inflating: /var/www/html/zenario-probusiness-7.3.0/README.md
&hellip
&hellip
&hellip
extracting: /var/www/html/zenario-probusiness-7.3.0/zenario_siteconfig.php
   creating: /var/www/html/zenario-probusiness-7.3.0/private/
  inflating: /var/www/html/zenario-probusiness-7.3.0/.htaccess
  inflating: /var/www/html/zenario-probusiness-7.3.0/robots.txt
After extracting, rename the directory and change its ownership.
[root@linuxhelp1 html]# mv zenario-probusiness-7.3.0/ zenario
[root@linuxhelp1 html]# chown -R apache.apache zenario
Create backup and docstore directories under html directory.
[root@linuxhelp1 html]# mkdir backup
[root@linuxhelp1 html]# mkdir docstore
After adding a directory, change the ownership for the directories.
[root@linuxhelp1 html]# chown apache.apache backup
[root@linuxhelp1 html]# chown apache.apache docstore
Run the following command to configure the Mariadb for zenario.
[root@linuxhelp1 html]# mysql -u root &ndash p
Enter password:
Welcome to the MariaDB monitor.  Commands end with   or g.
Your MariaDB connection id is 10
Server version: 5.5.50-MariaDB MariaDB Server
Copyright (c) 2000, 2016, Oracle, MariaDB Corporation Ab and others.
Type ' help '  or ' h'  for help. Type ' c'  to clear the current input statement.
MariaDB [(none)]>  CREATE DATABASE zenario
Query OK, 1 row affected (0.00 sec)
MariaDB [(none)]>  CREATE USER ' zenariouser' @' localhost'  IDENTIFIED BY ' 123'
Query OK, 0 rows affected (0.00 sec)
MariaDB [(none)]>  GRANT ALL PRIVILEGES ON zenario.* TO ' zenariouser' @' localhost'
Query OK, 0 rows affected (0.00 sec)
MariaDB [(none)]>  FLUSH PRIVILEGES
Query OK, 0 rows affected (0.00 sec)
MariaDB [(none)]>  exit
Bye
To Configure Apache web server
Create the ‘ vhosts.conf’ file in /etc/httpd/conf.d/
[root@linuxhelp1 html]# nano /etc/httpd/conf.d/vhosts.conf
Add the following line to the file and then Save & Exit.
Include Optional vhosts.d/*.conf
[root@linuxhelp1 html]# mkdir /etc/httpd/vhosts.d/
[root@linuxhelp1 html]# nano /etc/httpd/vhosts.d/linuxhelp1.com.conf
Add the following lines to the file.
< VirtualHost 192.168.7.235:80>
ServerAdmin [email protected]
DocumentRoot " /var/www/html/zenario/"
ServerName linuxhelp1.com
ServerAlias www.yourdomain.com
ErrorLog " /var/log/httpd/yourdomain.com-error_log"
CustomLog " /var/log/httpd/yourdomain.com-access_log"  combined

< Directory " /var/www/html/zenario/" >
DirectoryIndex index.html index.php
Options FollowSymLinks
AllowOverride All
Require all granted
< /Directory>
< /VirtualHost>
Save the file and exit.
Restart the Apache web server.
[root@linuxhelp1 html]# systemctl restart httpd.service
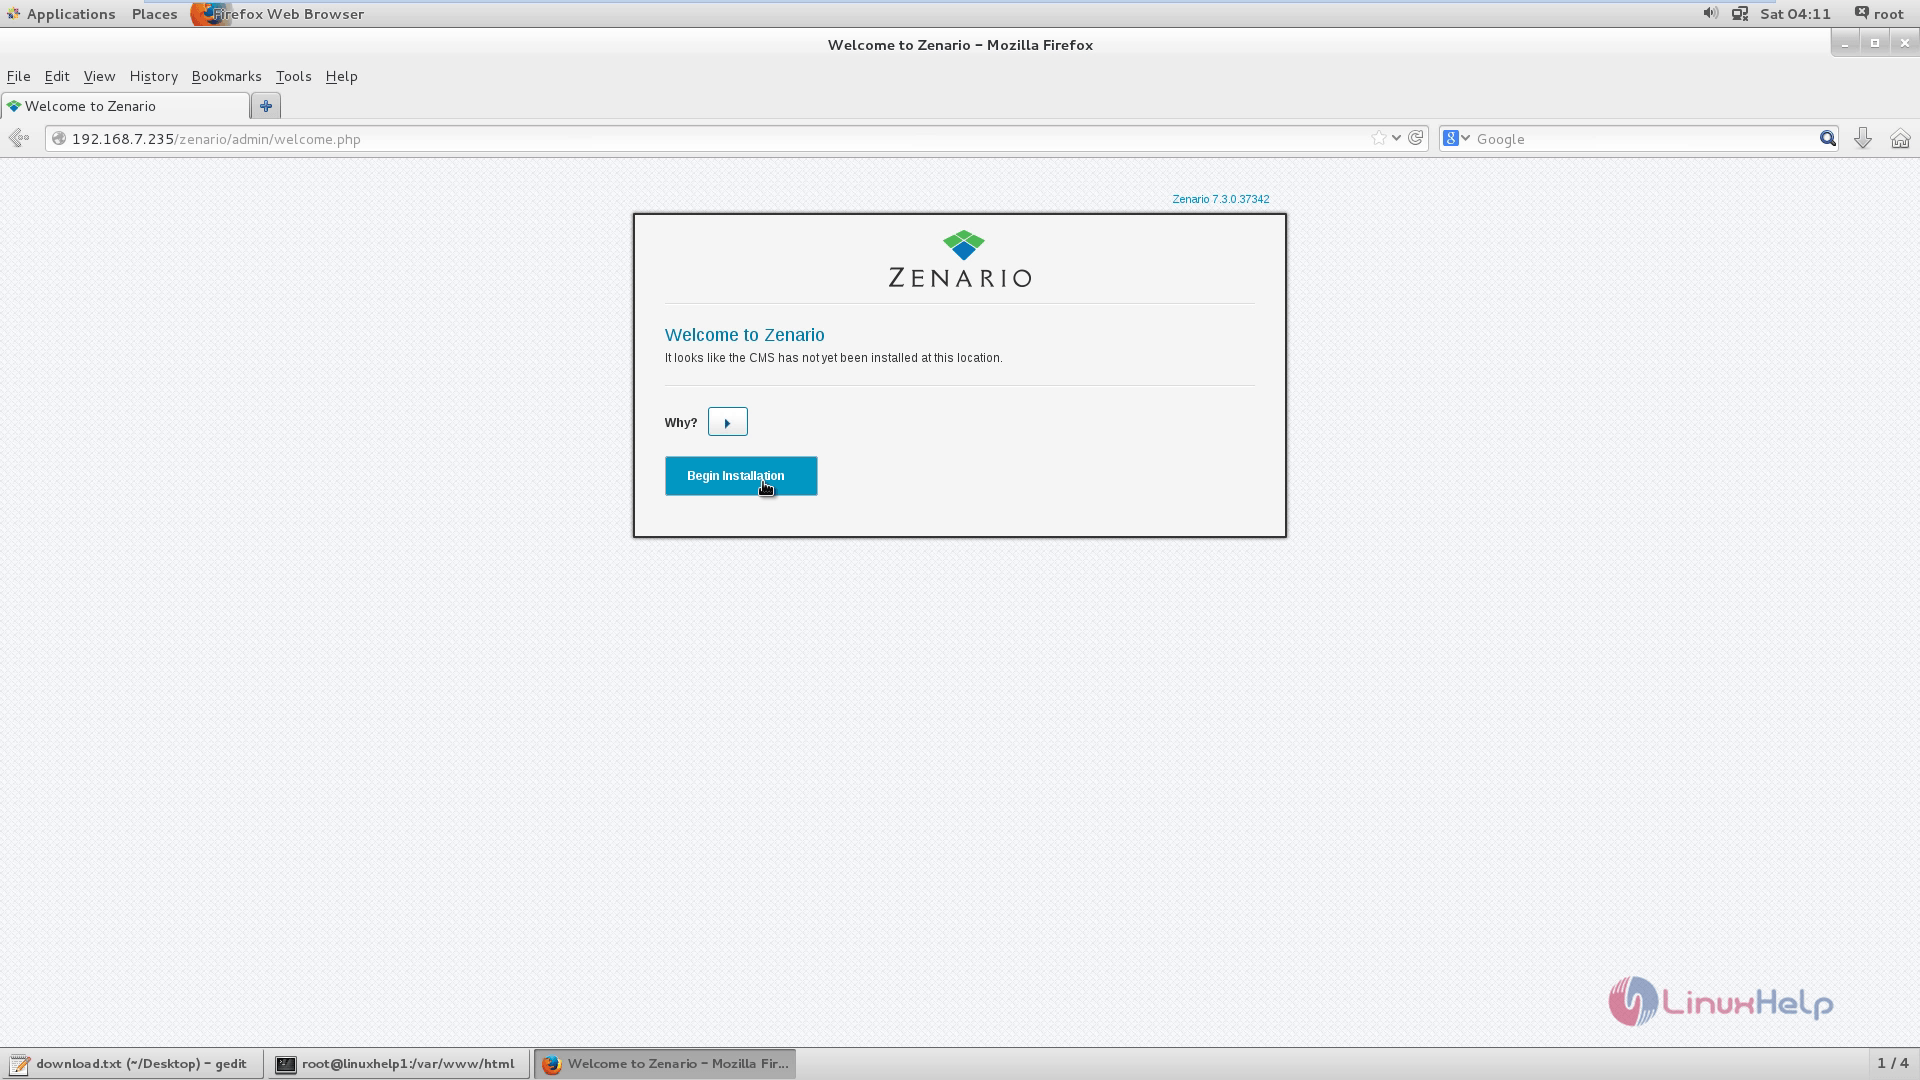
Open the web browser and navigate to http://< IP_address> Zenario Installation wizard appears.
Select Begin Installation.
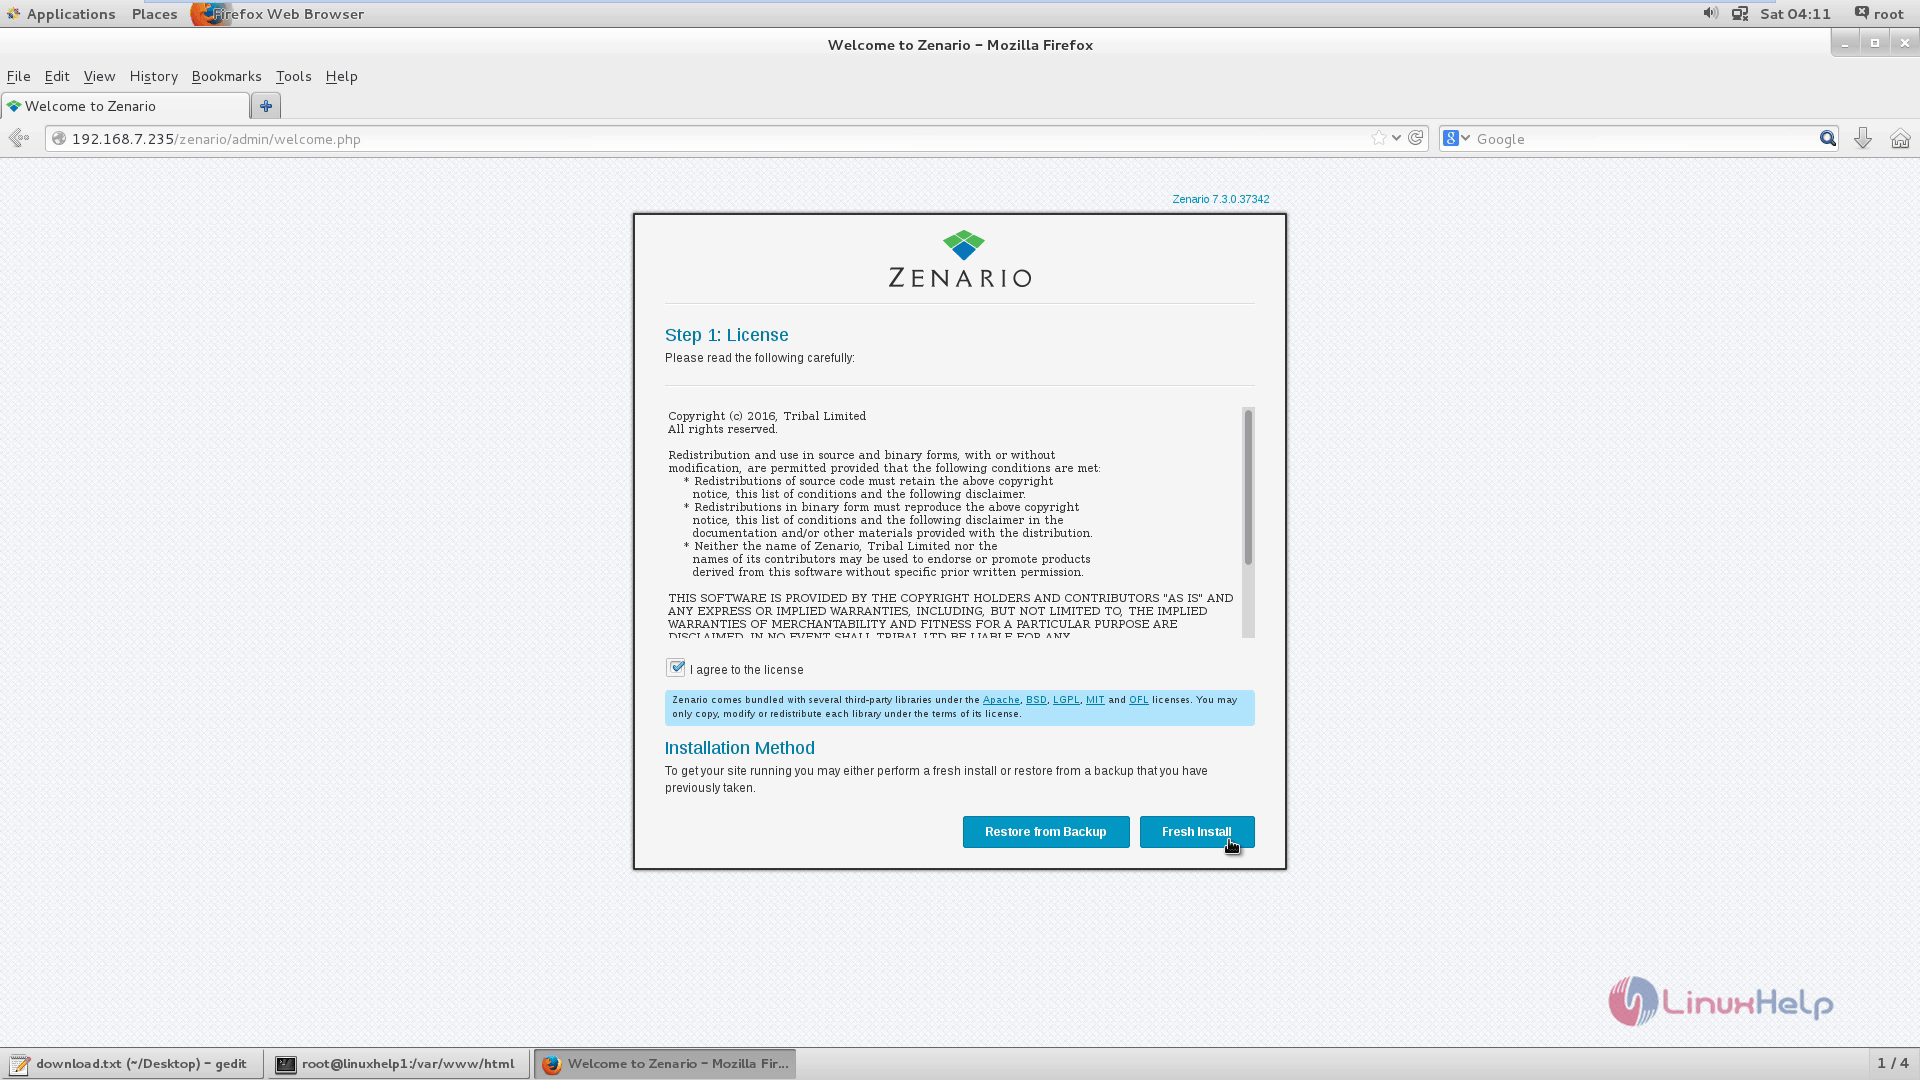
Read and accept the license agreement and click Fresh install.
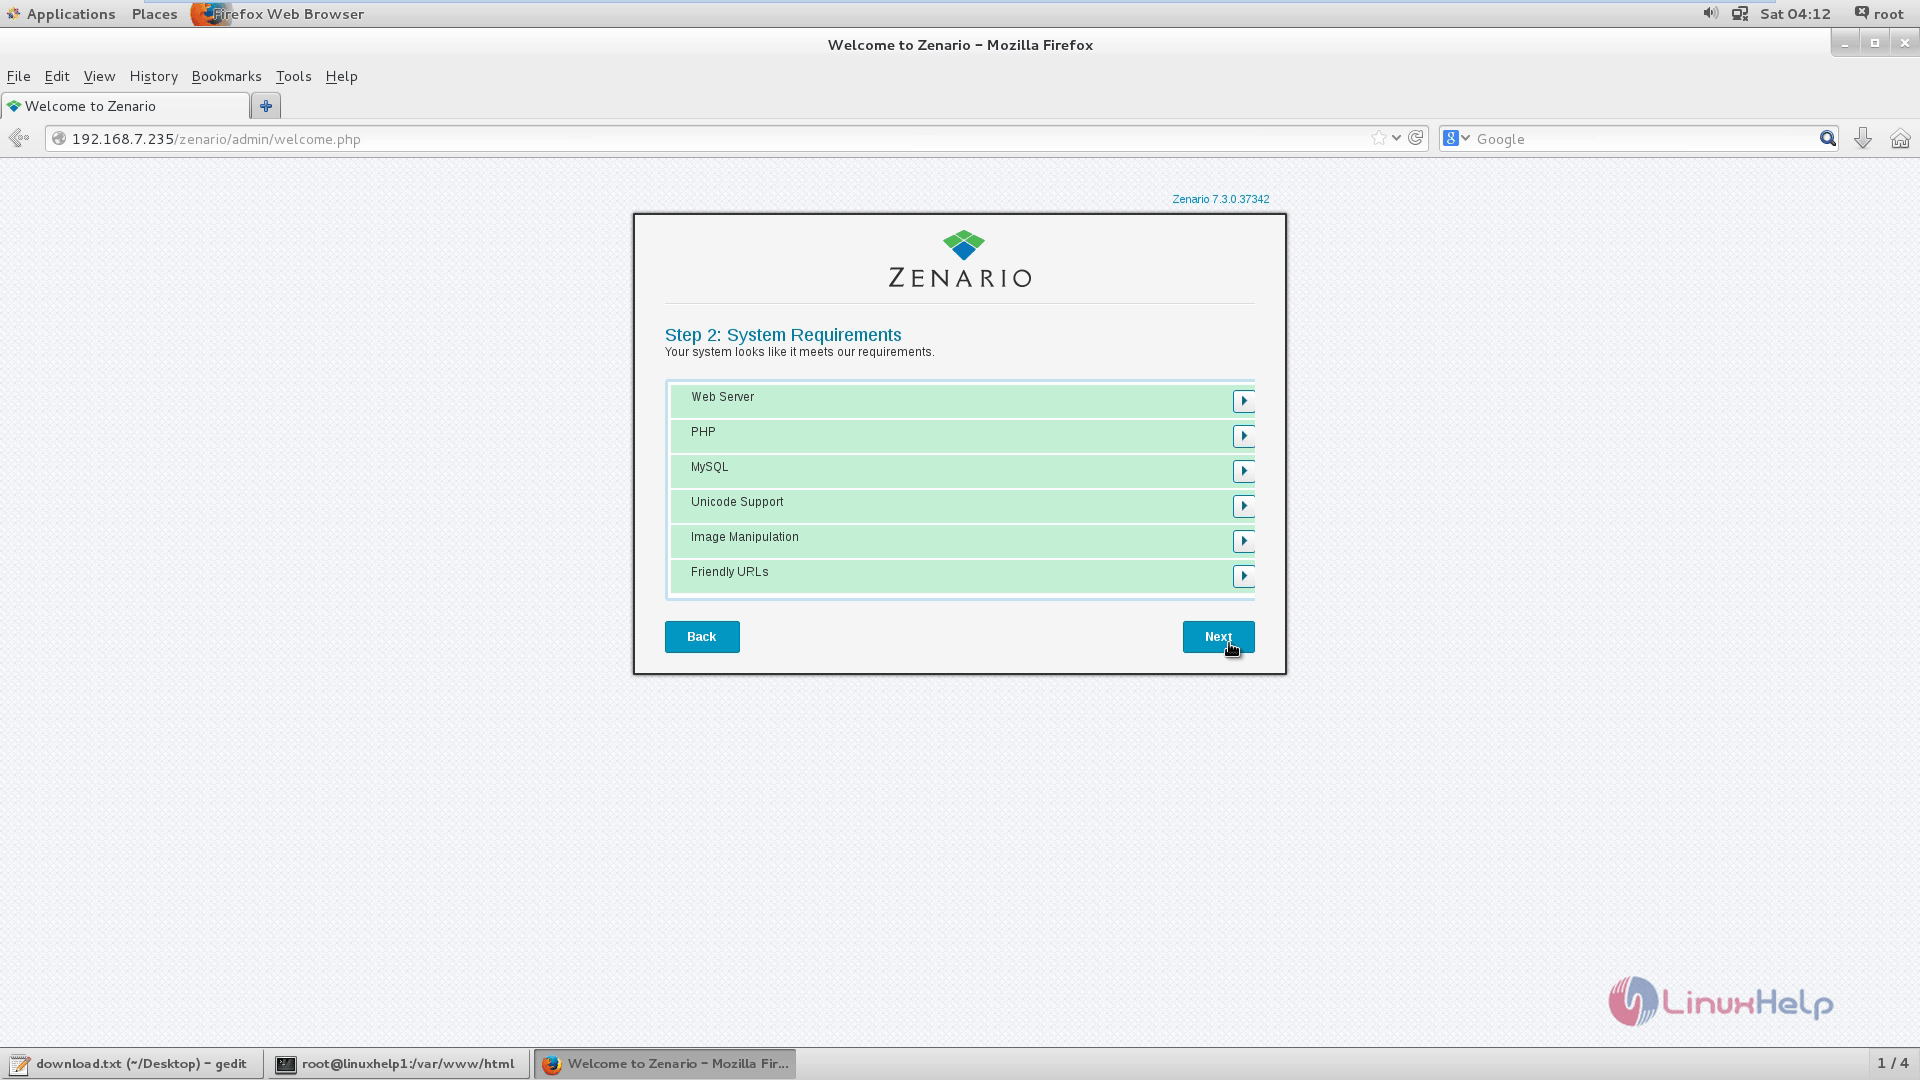
Check whether the System requirements are met and click Next.
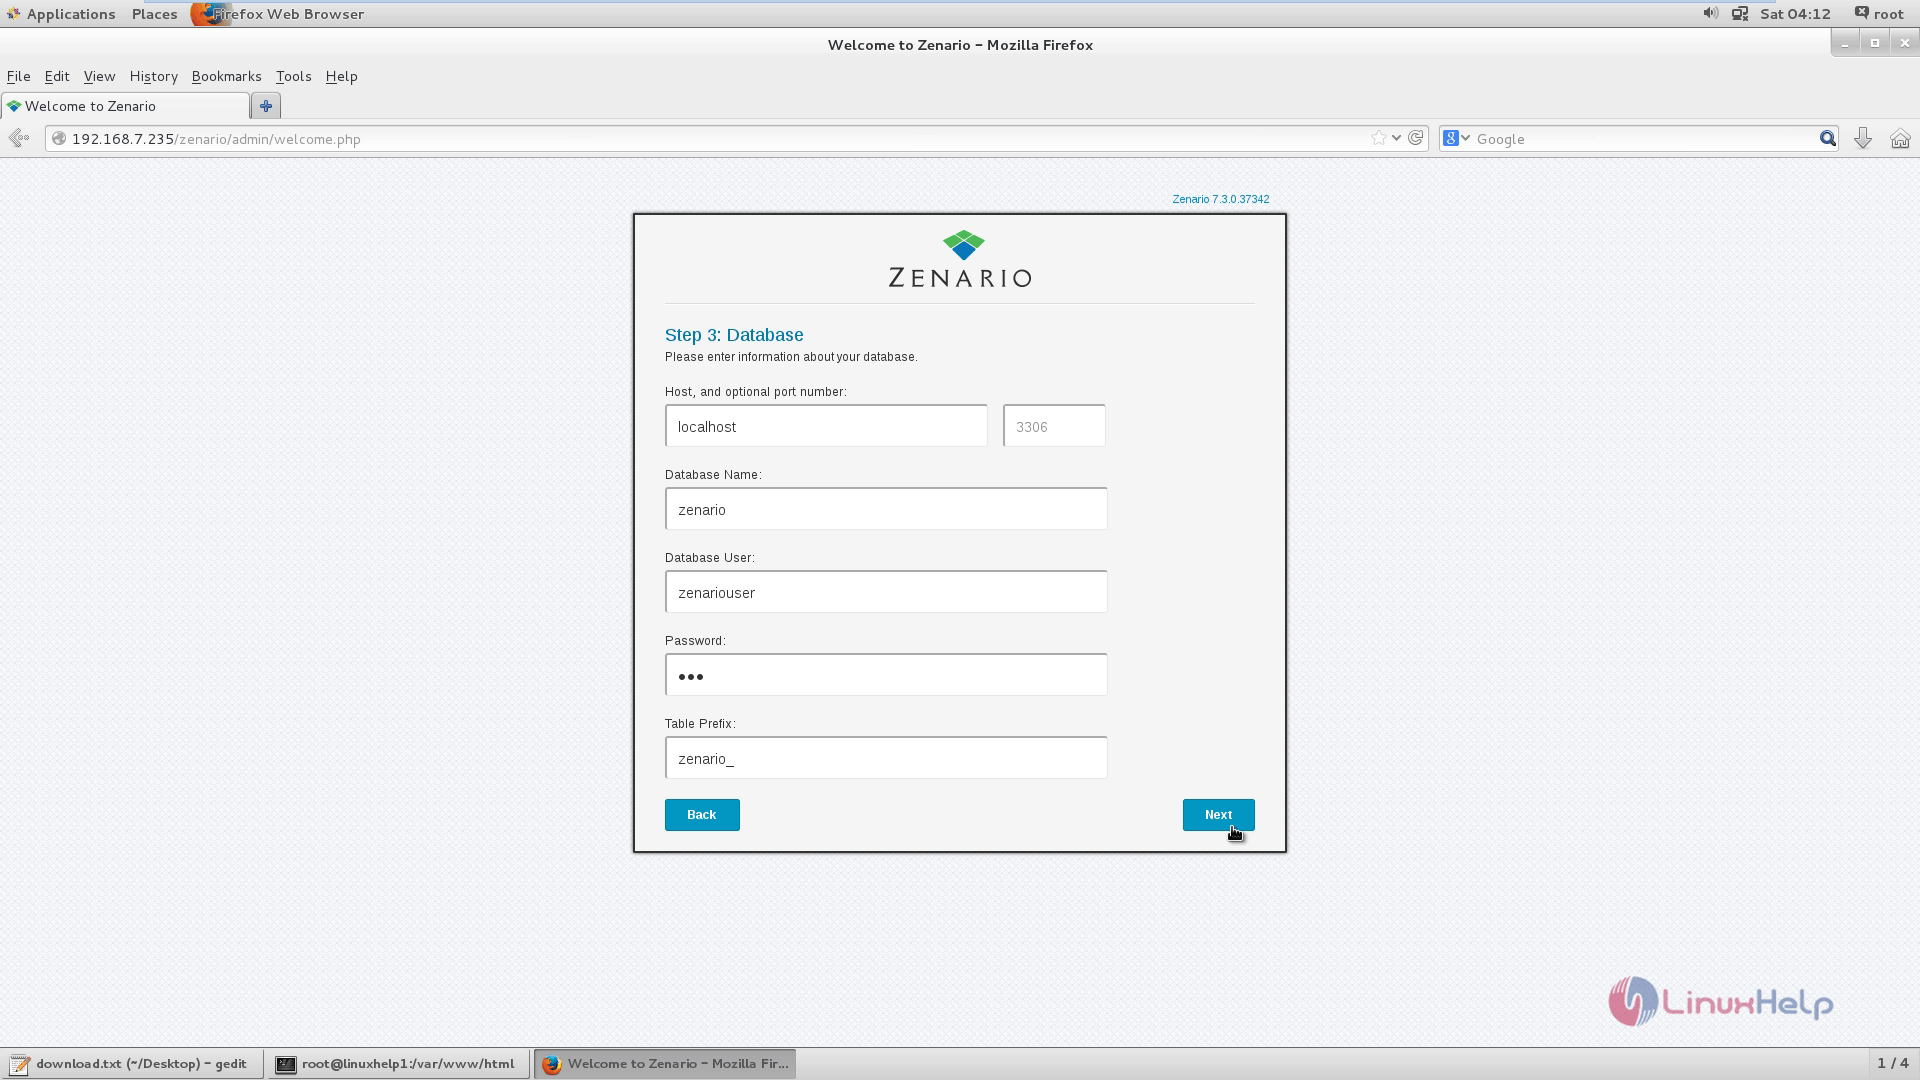
Fill the Database Information.
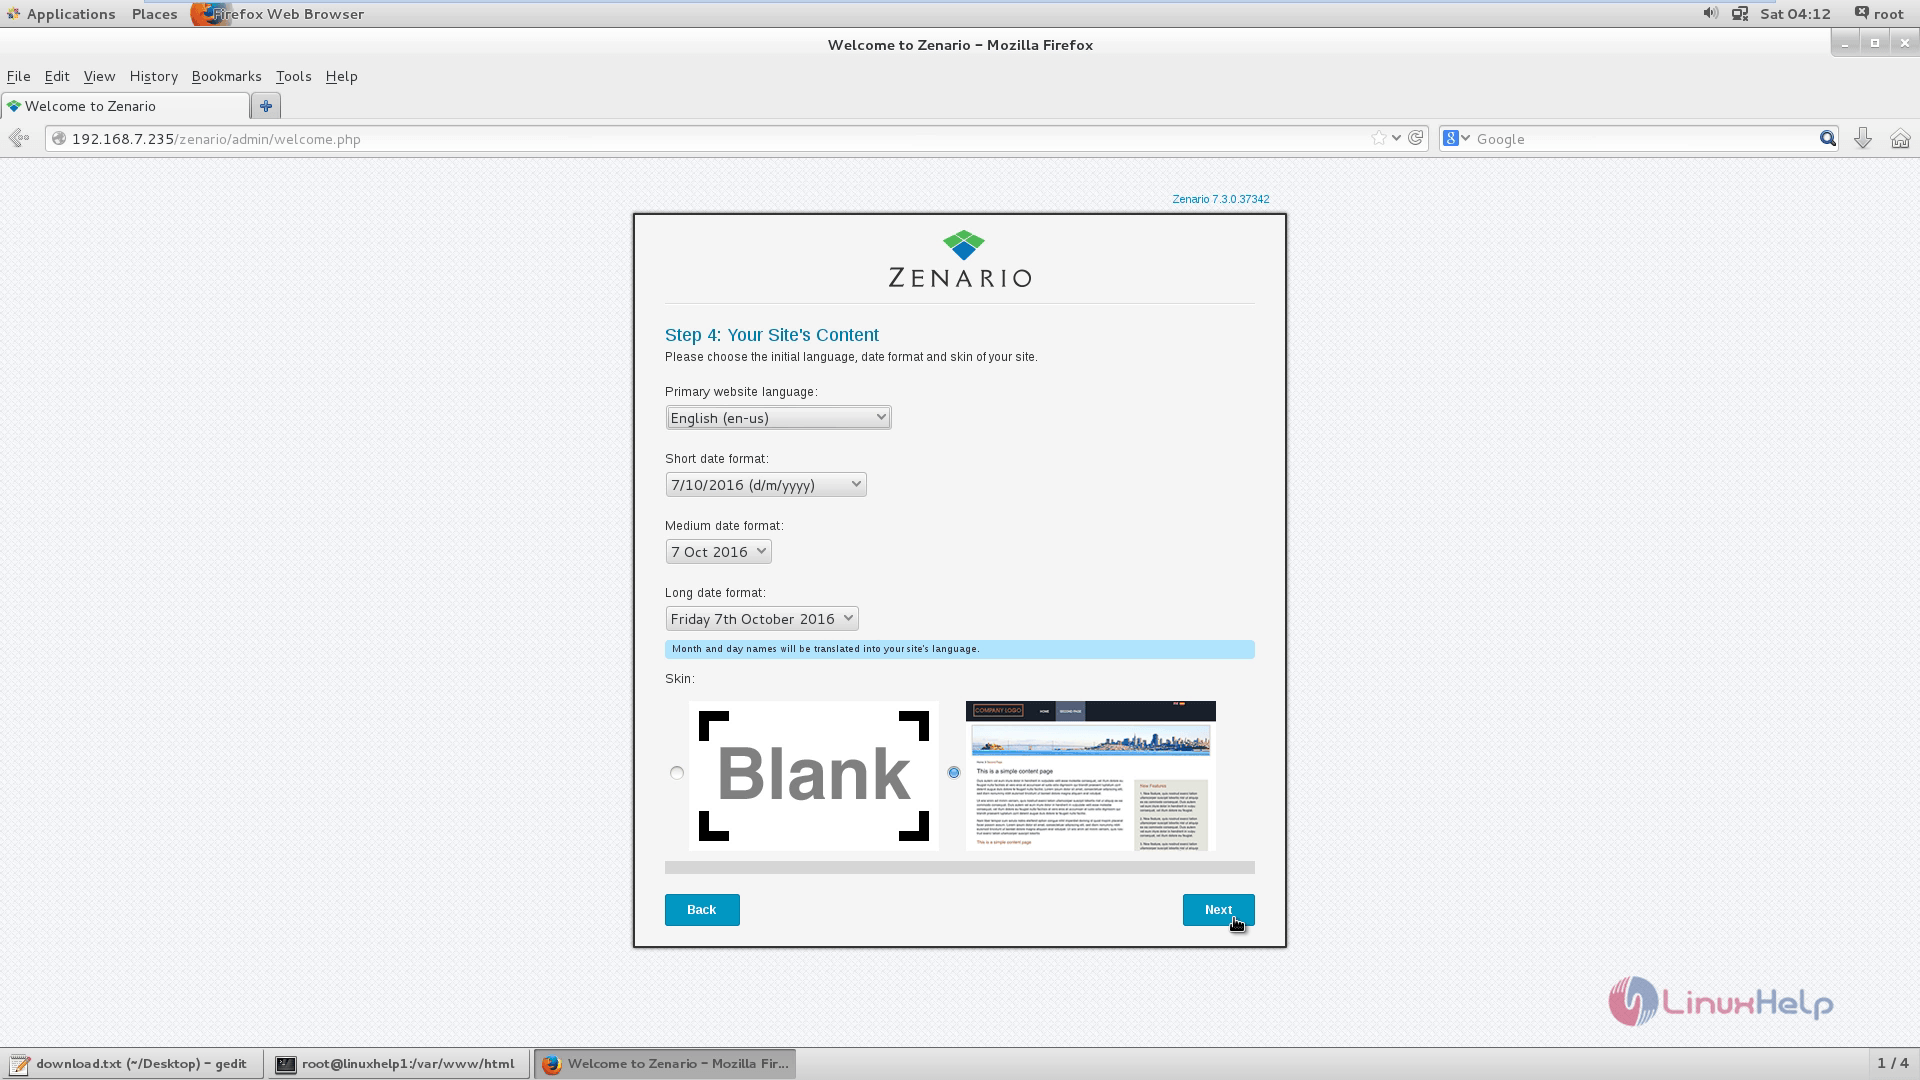
Select your site content and click Next.
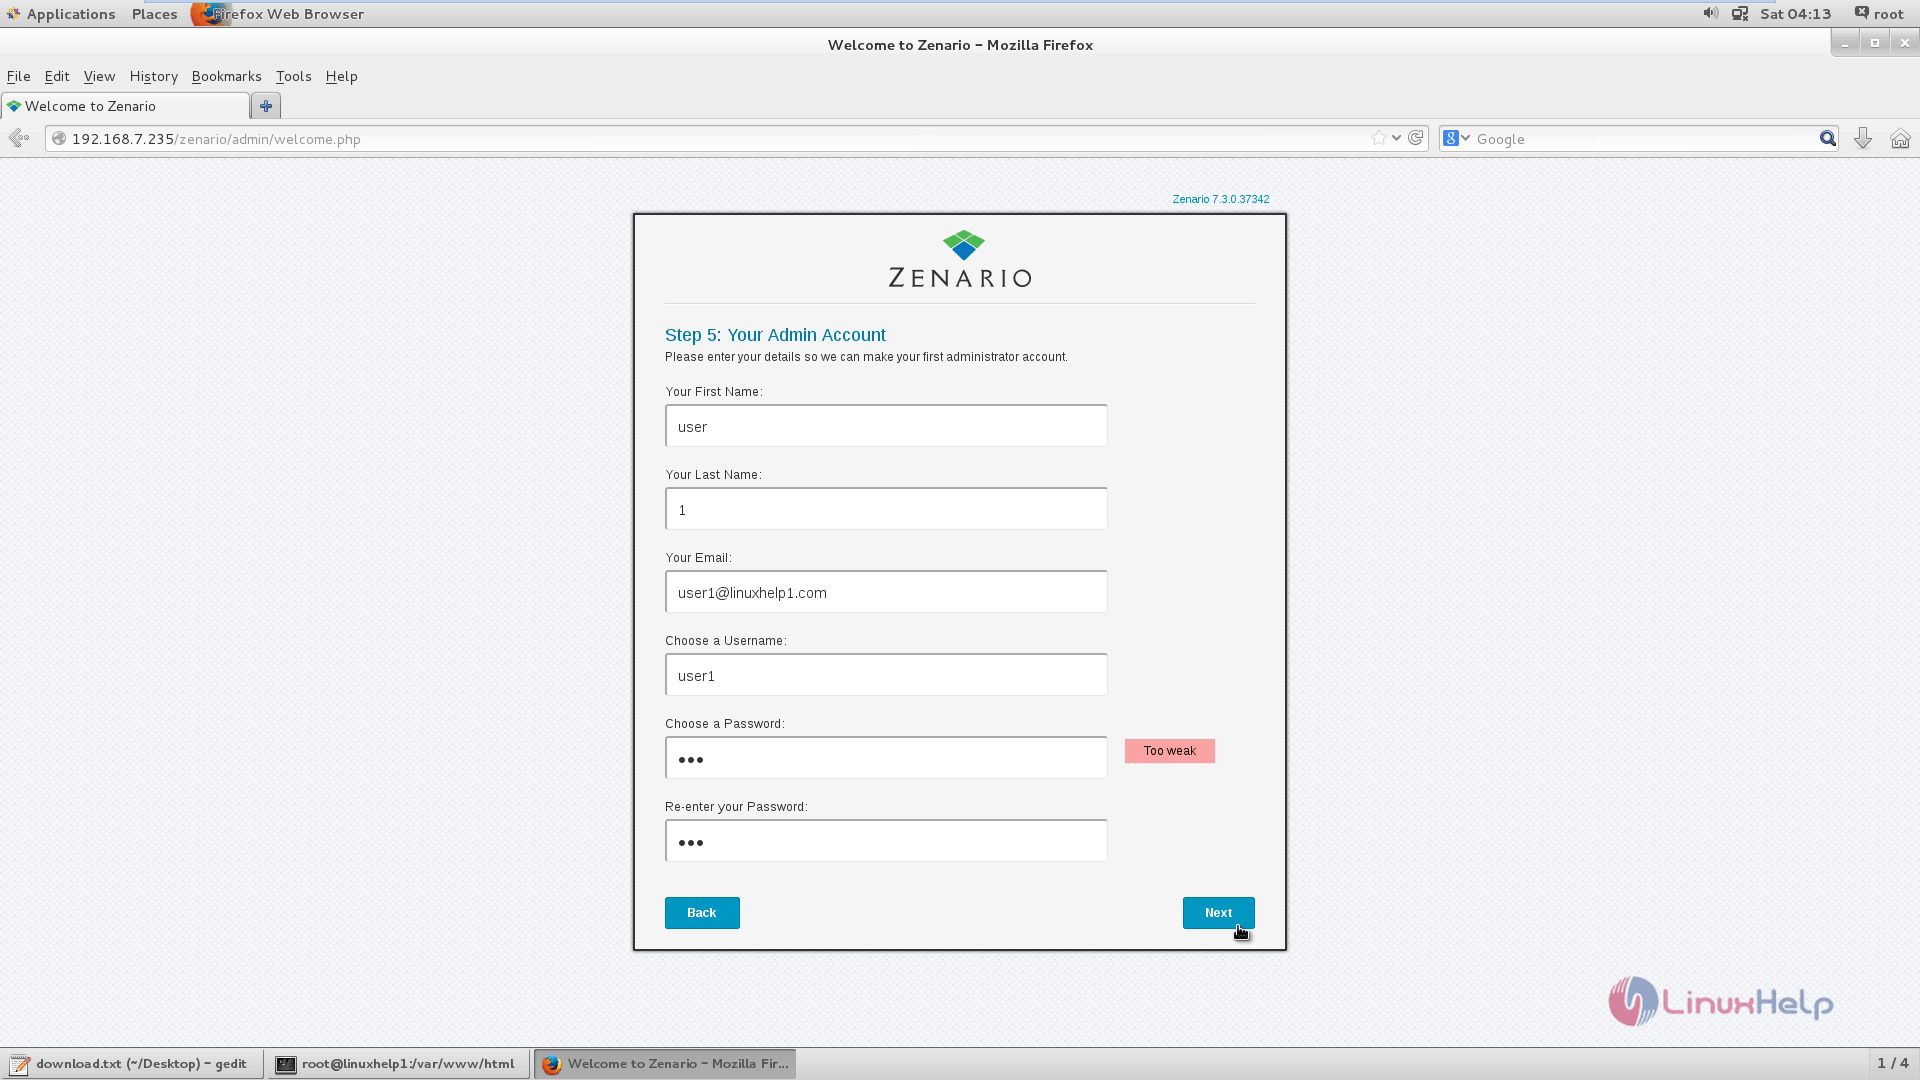
Then add your admin account detail and click Next.
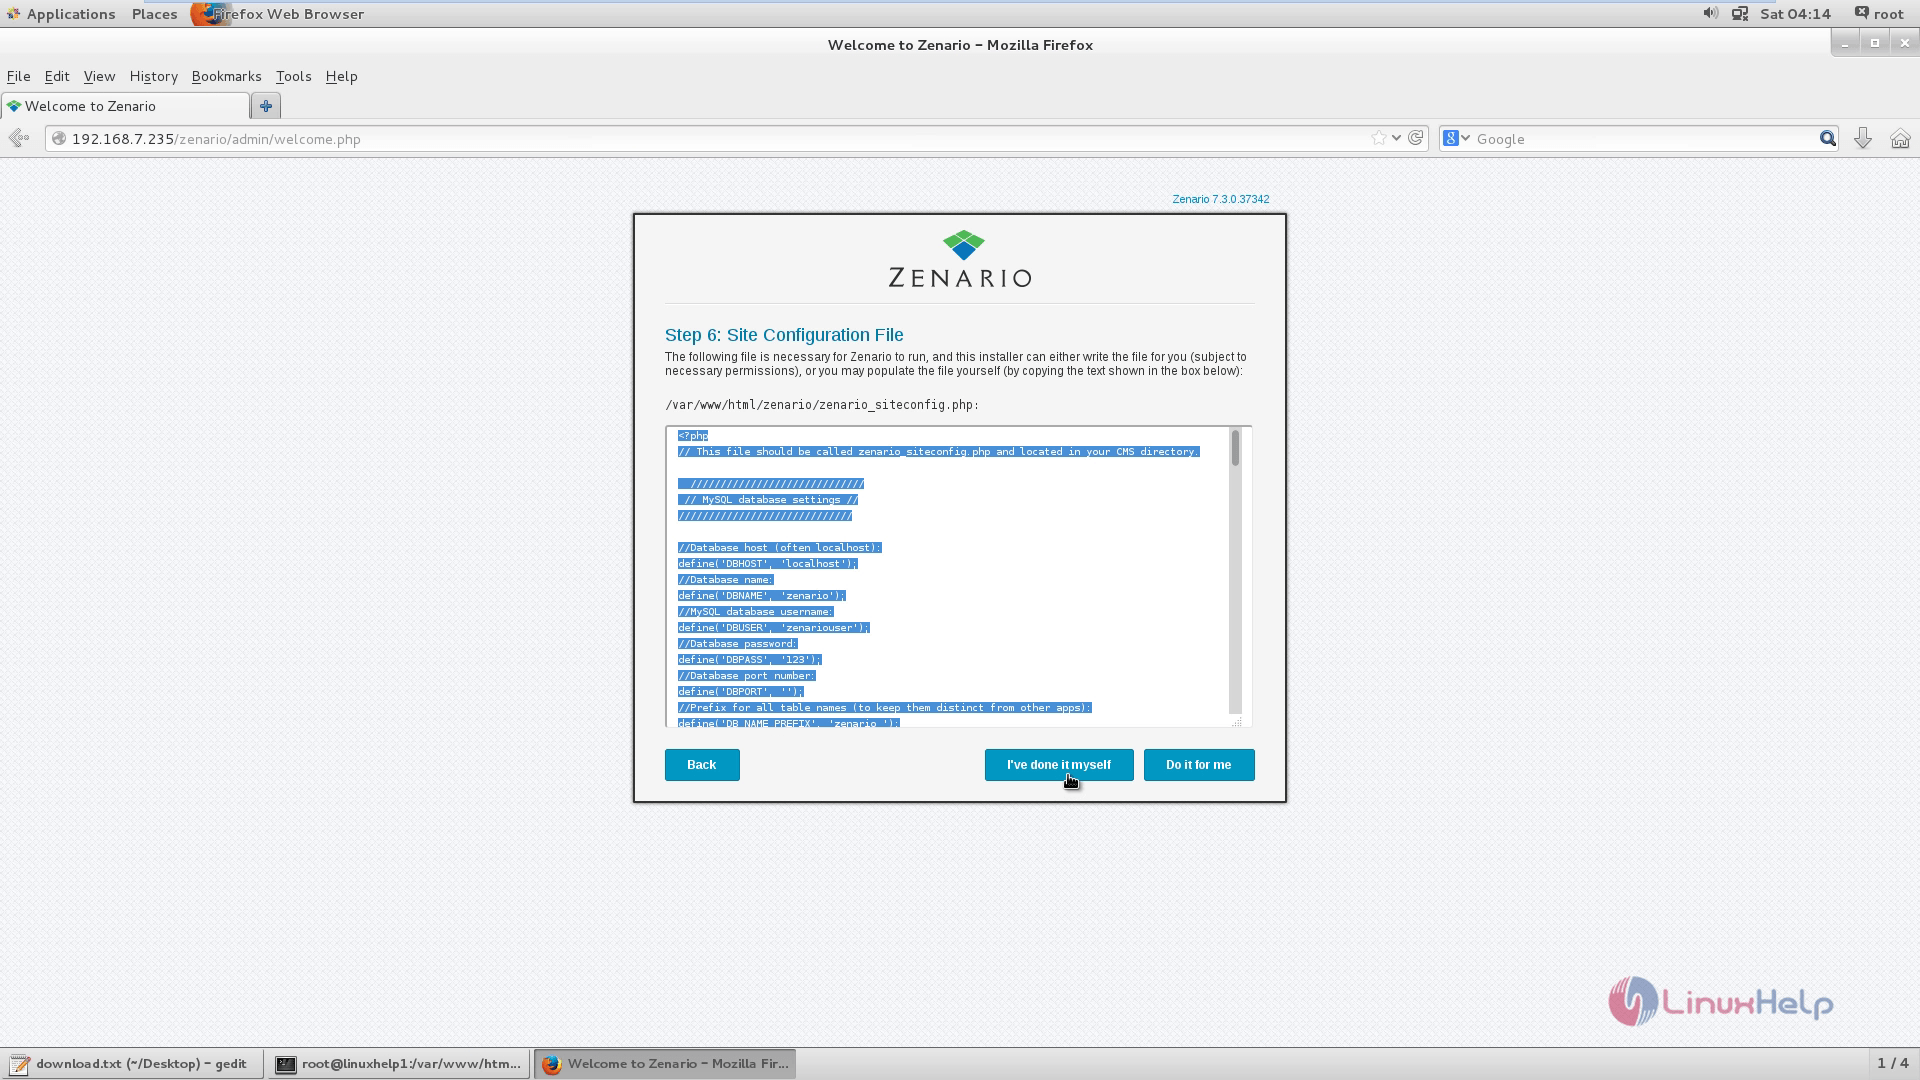
Copy the configurations and paste it to the /var/www/html/zenario/zenario_siteconfig.php file as instructed in the snap.
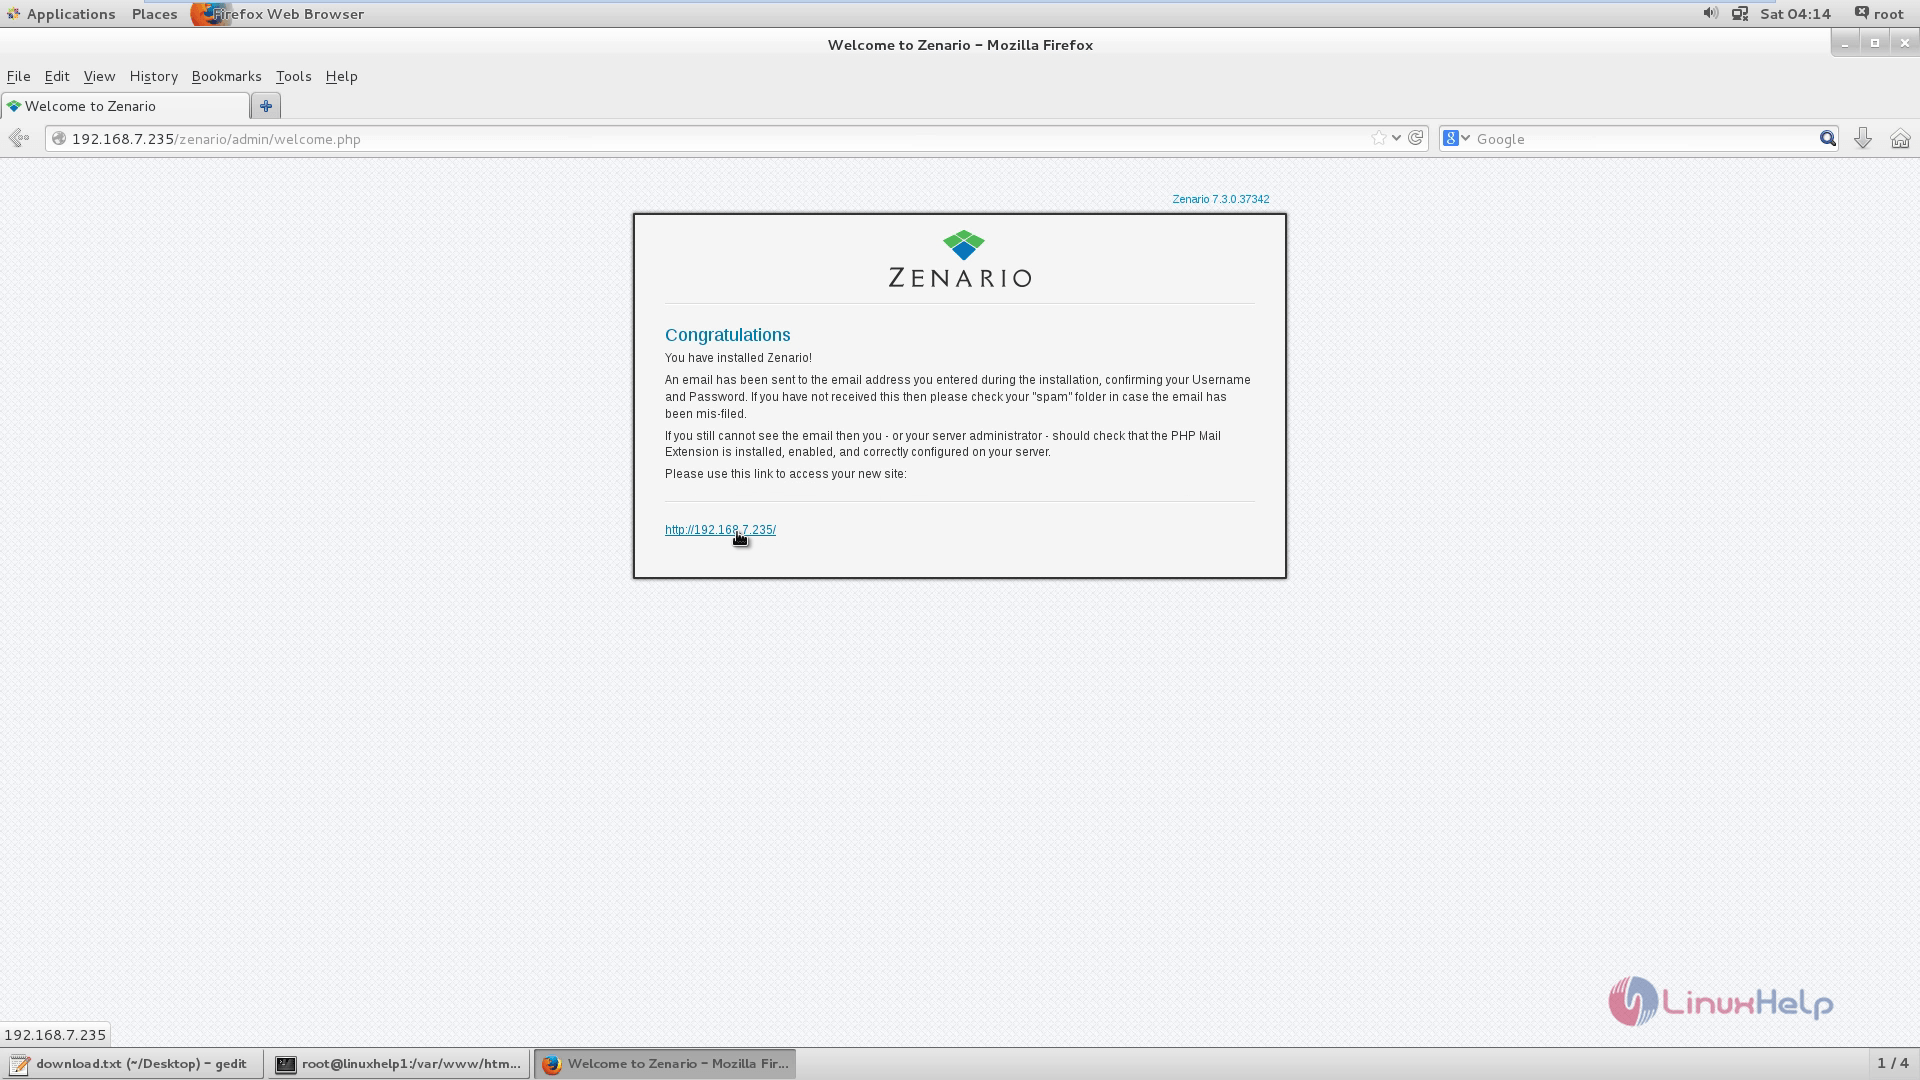
Installation is successfully completed.
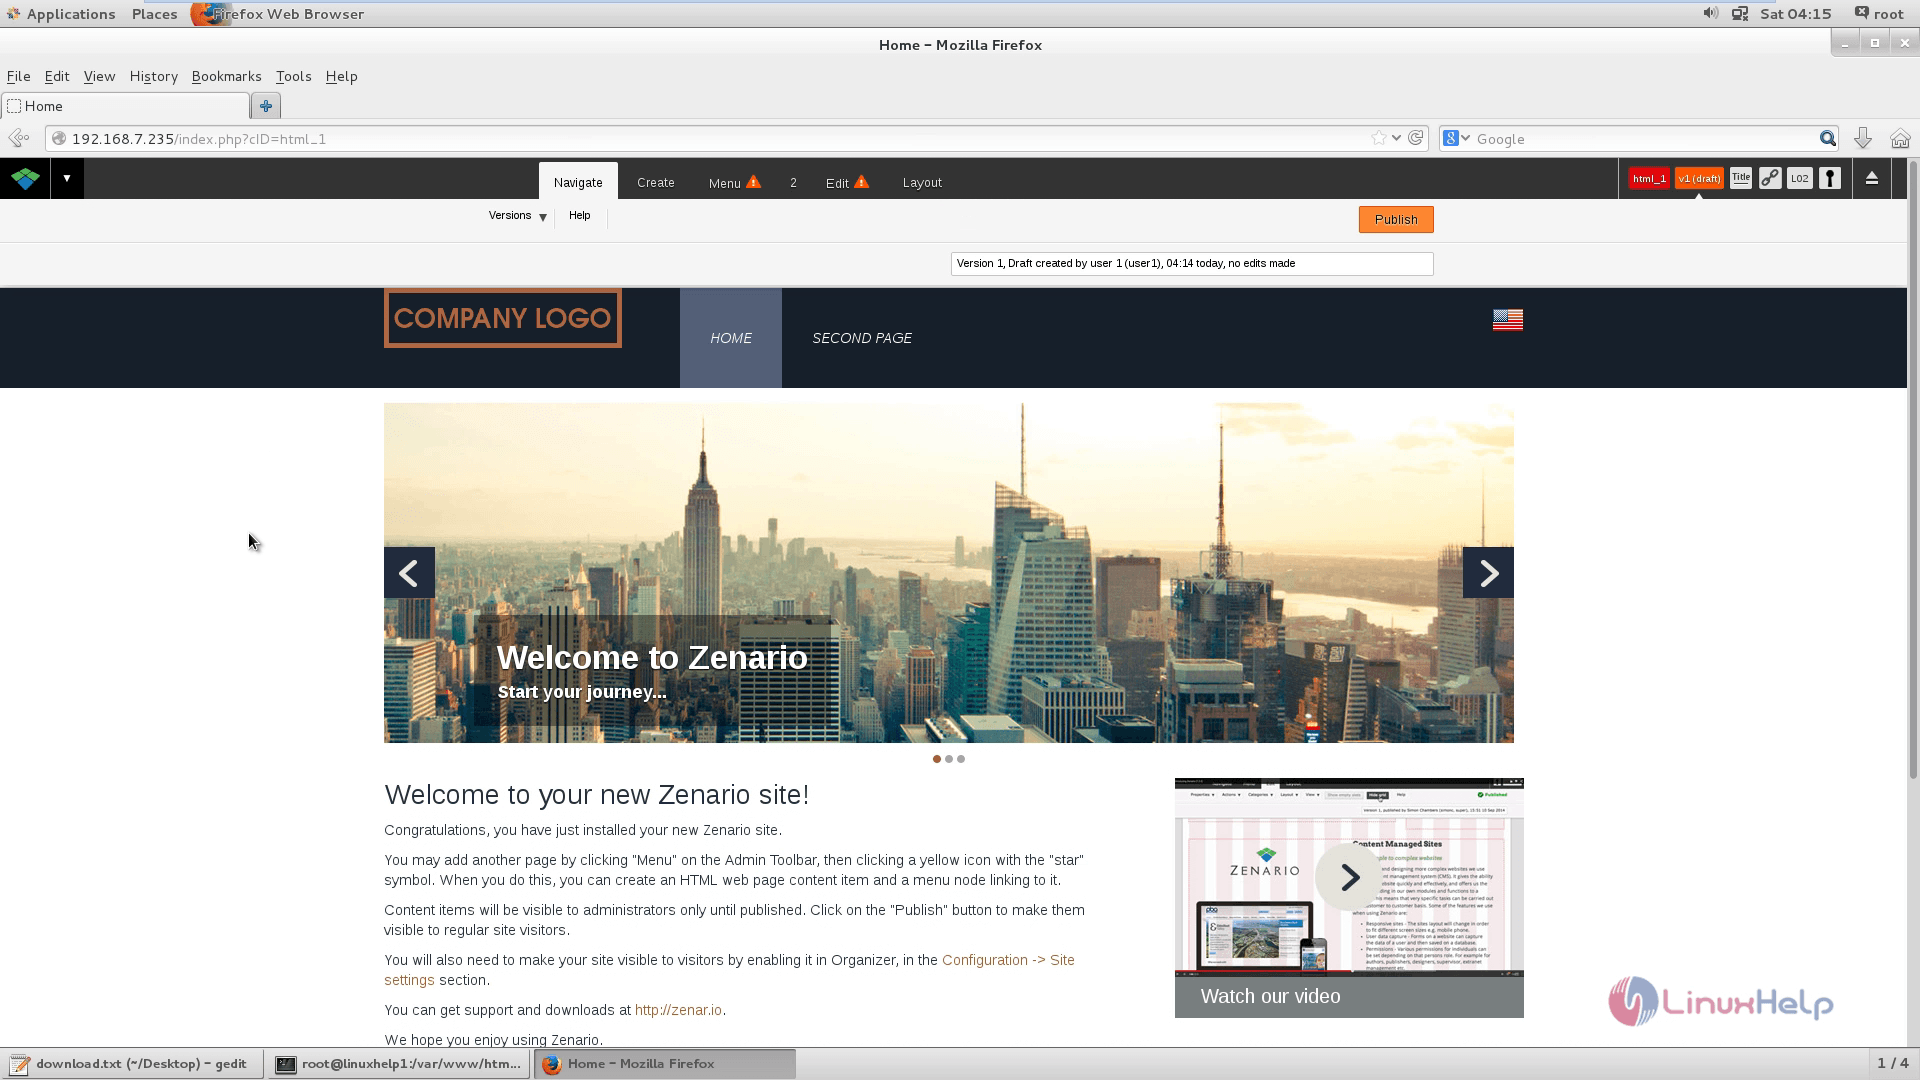
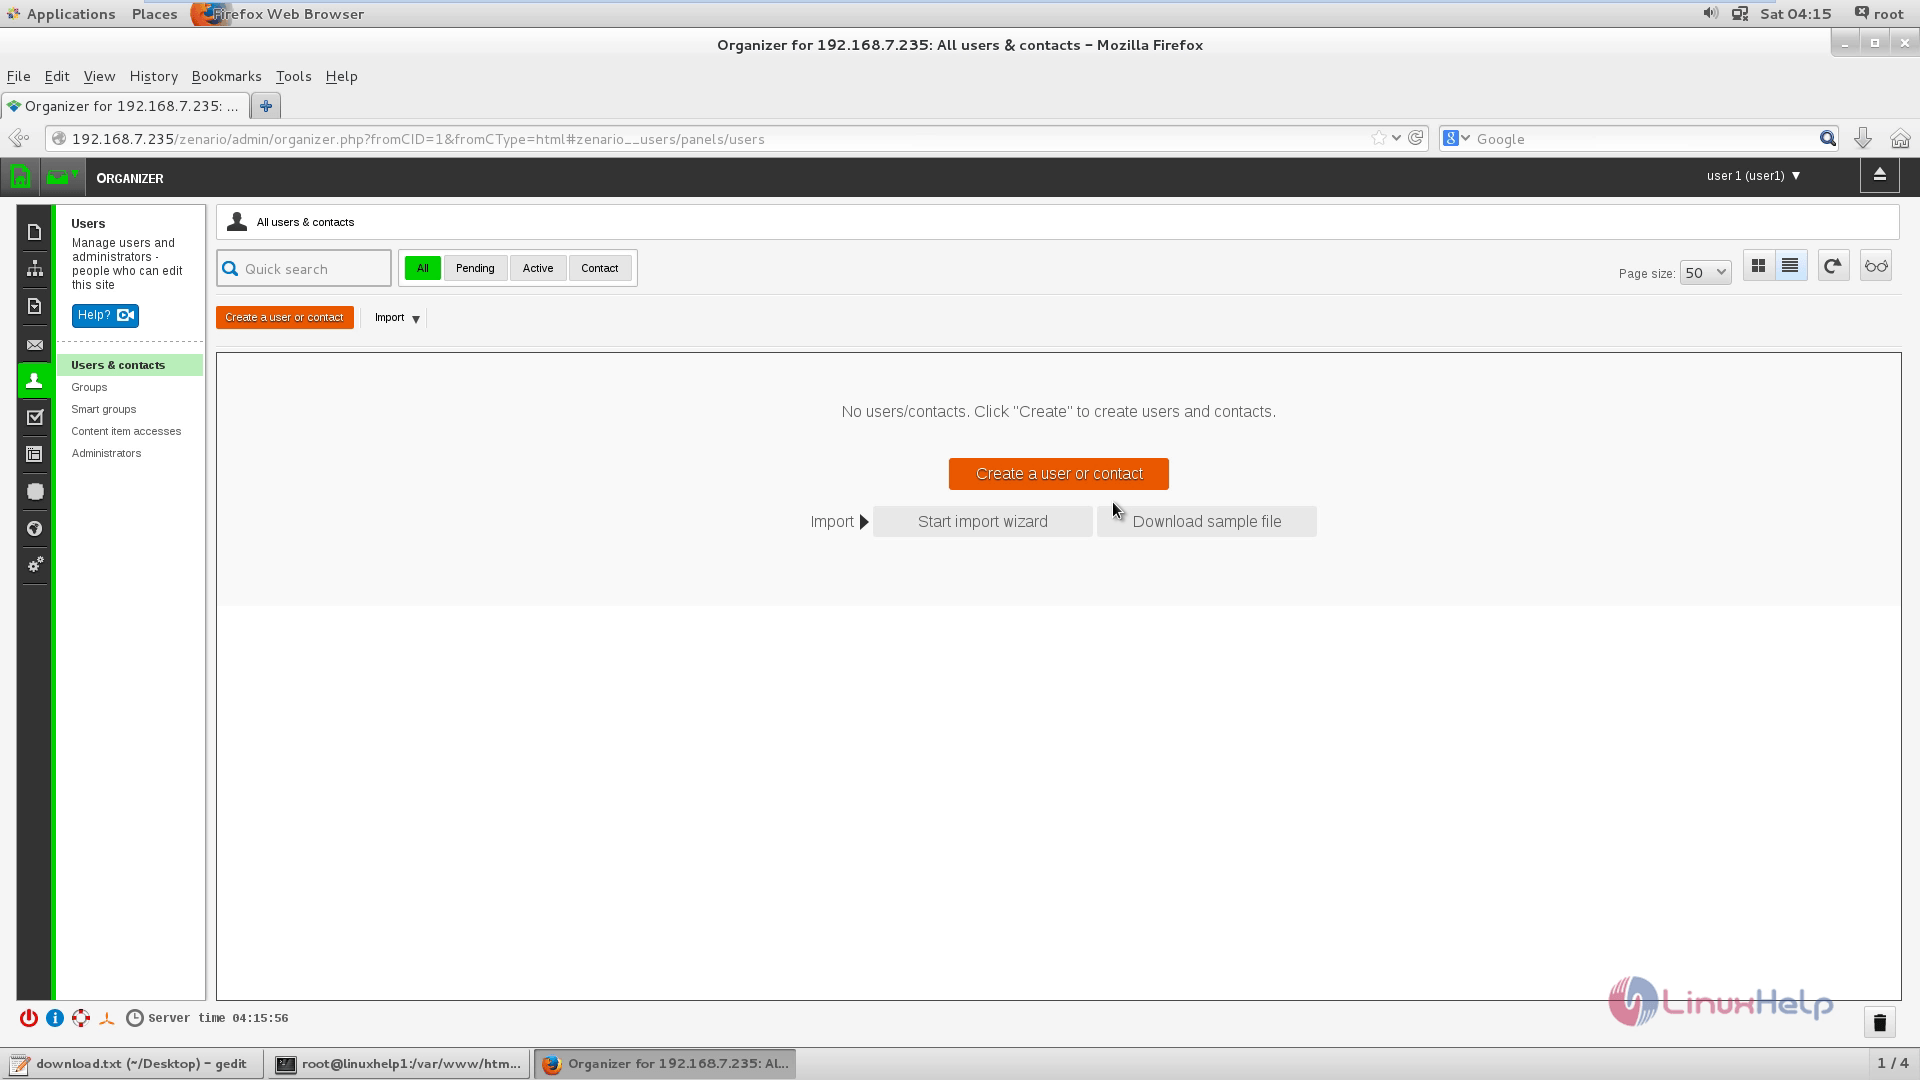
Start your journey with Zenario by Creating a new user account.
Comments ( 0 )
No comments available