How to install Zurmo CRM in CentOS 7
To install Zurmo CRM in CentOS 7
Zurmo is a free, open-source web-based customer relationship management application which is both easy to use and manage. It is written in PHP using jQuery, Yii Framework, and RedBeanPHP. It makes use of MySQL to store its database. It includes features like Contact Management, Activity Management, Deal Tracking, Reporting,etc. It is simple to install Zurm CRM and in this article, you will learn about the method to install Zurmo on CentOS 7.
Intalling Zurmo CRM
For installing Zurmo CRM, you need to have LAMP stack installed in your system. After installing the lamp LAMP stack, you can continue your zurmo installation process.
But before that, you need to edit the /etc/php.ini file. In that file, enable the date.timezone option and add your time zone. Here the following timezone is selected.
date.timezone = Asia/Kolkata
Next change the following option values as mentioned below
upload_max_filesize = 20M
post_max_size = 20M
max_execution_time = 300
After that, save the file and exit.
If you don’ t have the memcached package installed, use the following command to install it. It is very essential for the installation process.
[root@test Desktop]# yum install memcached
Next, you need to configure the MySQL database. Log into MySQL as a root user and make the necessary settings.
[root@test Desktop]# mysql -u root -p
Enter password:
Welcome to the MariaDB monitor.  Commands end with   or g.
Your MariaDB connection id is 2
Server version: 5.5.56-MariaDB MariaDB Server
Copyright (c) 2000, 2017, Oracle, MariaDB Corporation Ab and others.
Type ' help '  or ' h'  for help. Type ' c'  to clear the current input statement.
MariaDB [(none)]>  CREATE DATABASE zurmo
Query OK, 1 row affected (0.00 sec)
MariaDB [(none)]>  CREATE USER ' zurmo_user' @' localhost'  IDENTIFIED BY ' password'
Query OK, 0 rows affected (0.00 sec)
MariaDB [(none)]>  GRANT ALL PRIVILEGES ON zurmo.* TO ' zurmo_user' @' localhost'
Query OK, 0 rows affected (0.00 sec)
MariaDB [(none)]>  FLUSH PRIVILEGES
Query OK, 0 rows affected (0.00 sec)
MariaDB [(none)]>  exit
Bye
Once the database configuration is done, you shall download the Zurmo CRM with the help of the following command.
[root@test Desktop]# wget http://build.zurmo.com/downloads/zurmo-stable-3.2.3.74732d3df221.tar.gz
--2017-11-13 16:23:42--  http://build.zurmo.com/downloads/zurmo-stable-3.2.3.74732d3df221.tar.gz
Resolving build.zurmo.com (build.zurmo.com)... 209.59.163.106
Connecting to build.zurmo.com (build.zurmo.com)|209.59.163.106|:80... connected.
HTTP request sent, awaiting response... 200 OK
Length: 27274590 (26M) [application/x-gzip]
Saving to: ‘ zurmo-stable-3.2.3.74732d3df221.tar.gz’
100%[=========================================================================================================================================================================> ] 2,72,74,590  260KB/s   in 2m 38s
2017-11-13 16:26:21 (169 KB/s) - ‘ zurmo-stable-3.2.3.74732d3df221.tar.gz’  saved [27274590/27274590]
Once the installation package is downloaded, you shall extract it as follows.
[root@test Desktop]# tar -xvf zurmo-stable-3.2.3.74732d3df221.tar.gz
zurmo/
zurmo/README.text
zurmo/index.php
zurmo/redbean/
&hellip
&hellip
&hellip
zurmo/app/index.php
zurmo/app/roots.php
zurmo/app/assets/
zurmo/app/assets/index.html
Now move the zurmo directory to /var/www/html/ location.
[root@test Desktop]# mv zurmo /var/www/html/
And then, change the ownership for the zurmo directory with the help of the following command.
[root@test Desktop]# chown -R apache:apache /var/www/html/zurmo
Next step is very crucial. You need to configure the Apache VirtualHost for Zurmo. Open the .conf file for Zurmo.
[root@test Desktop]# nano /etc/httpd/conf.d/zurmo.conf
And, make the necessary modifications as follows.
< VirtualHost *:80>
    ServerAdmin [email protected]
    DocumentRoot " /var/www/html/zurmo/"
    ServerName test.linuxhelp1.com
    ServerAlias www.test.linuxhelp1.com
    < Directory " /var/www/html/zurmo/" >
        Options Indexes FollowSymLinks
        AllowOverride All
        Require all granted
    < /Directory>
    ErrorLog " /var/log/httpd/test-error_log"
    CustomLog " /var/log/httpd/test-access_log"  combined
< /VirtualHost>
Save the file and exit.
Once it is completed, you shall restart the Apache Web Server by running the following command.
[root@test Desktop]# systemctl restart httpd
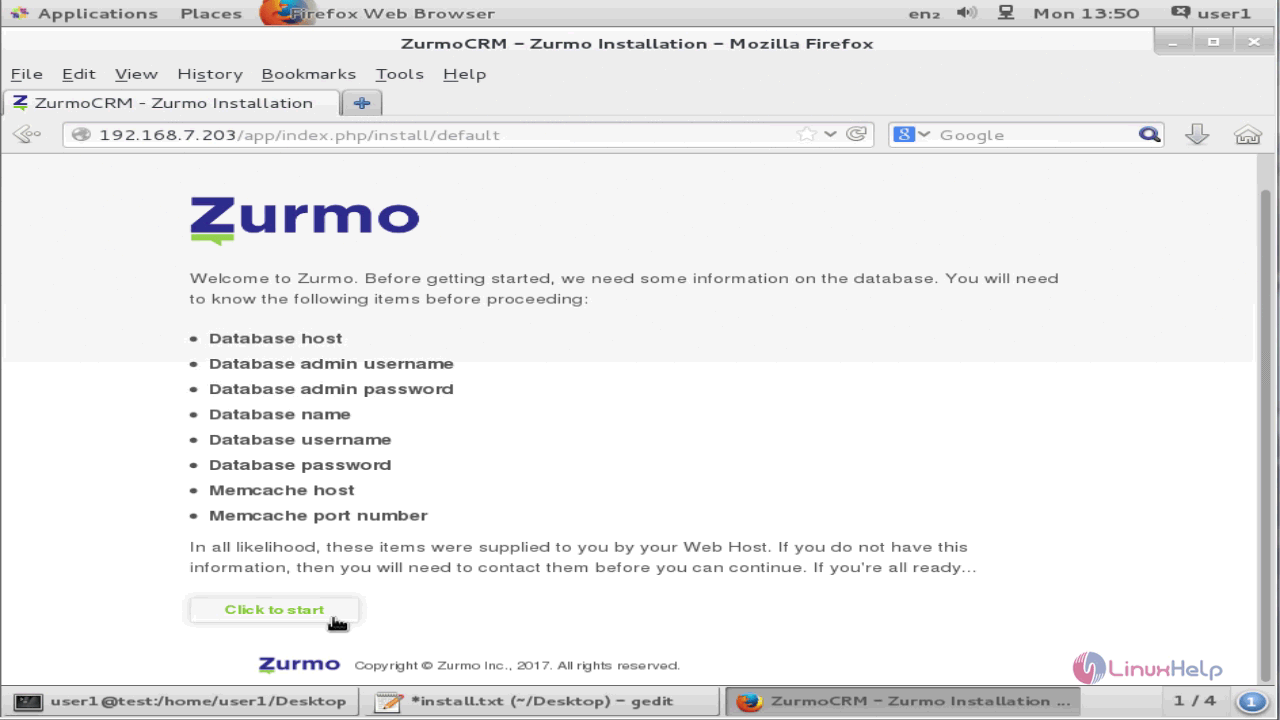
Next, open the web browser and navigate to http://192.168.7.203/. When the installation page appears, click on the Start the installation.
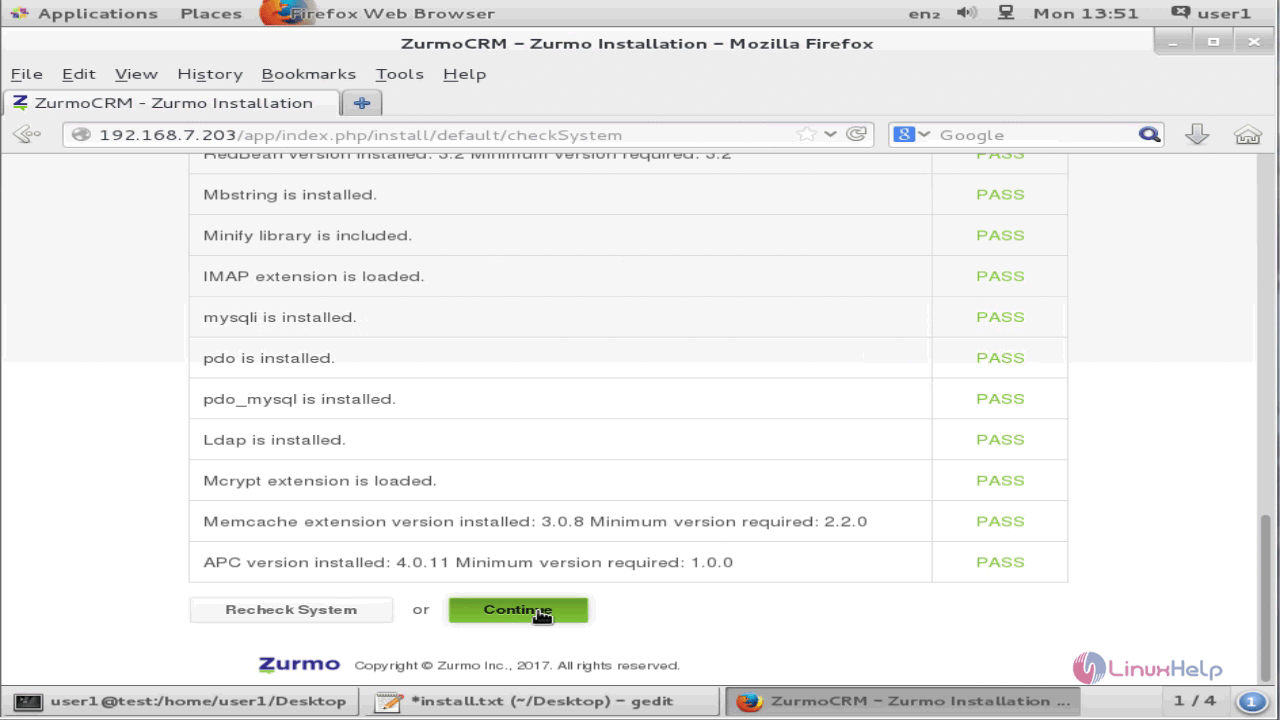
In the following page, the Services are installed correctly. Click on the Continue option.
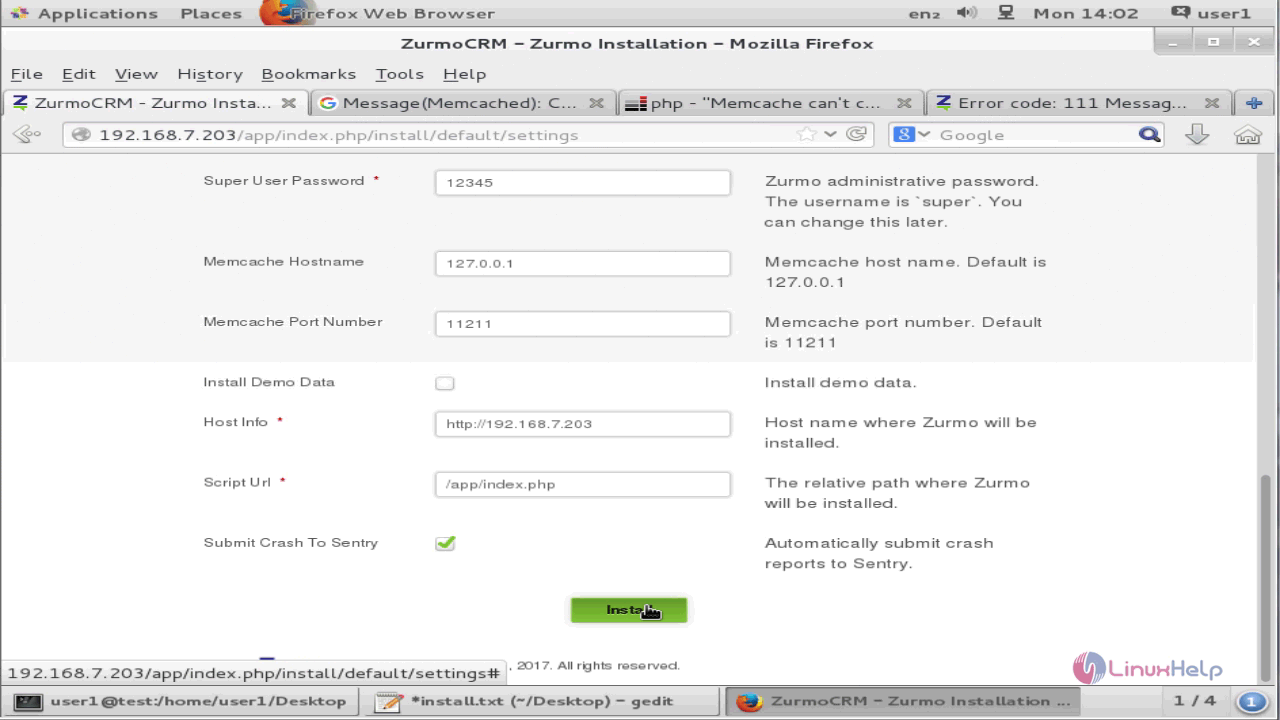
Enter the necessary database information and Zurmo admin details in the respective fields.
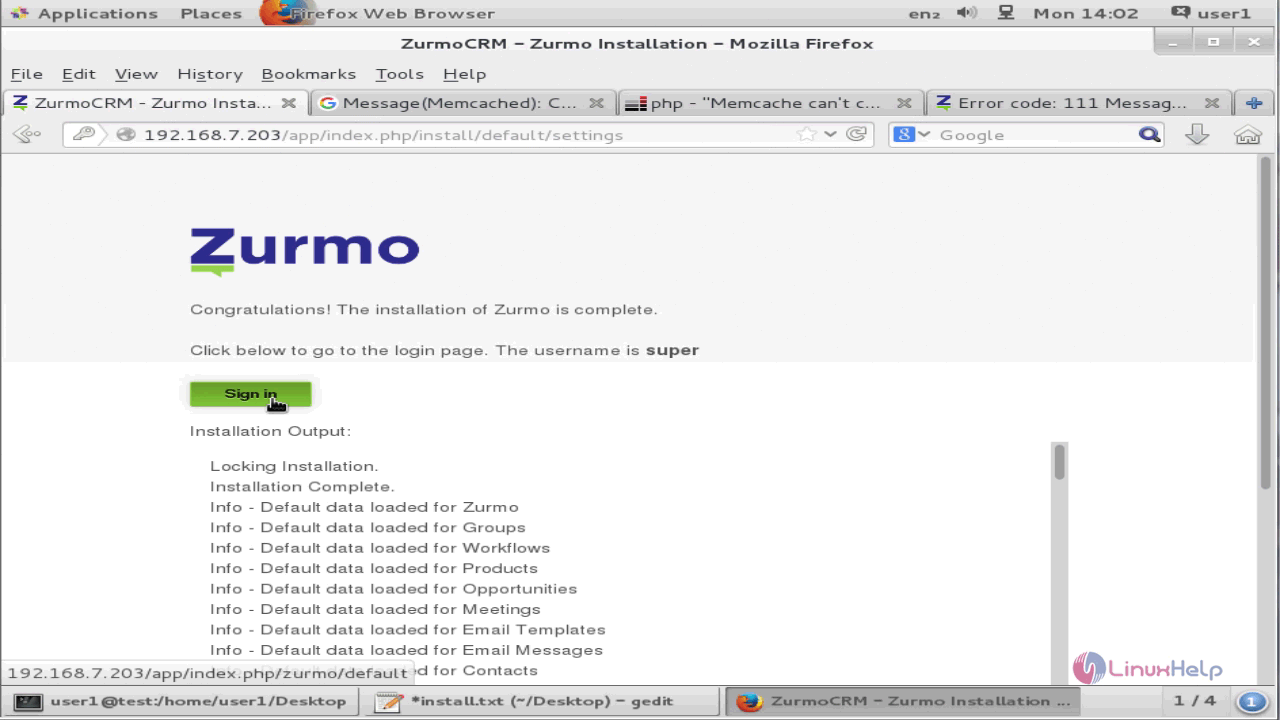
Installation has been completed. You can now click the Sign in option.
You are now taken to the Sign in page. Enter your login credentials and sign in.

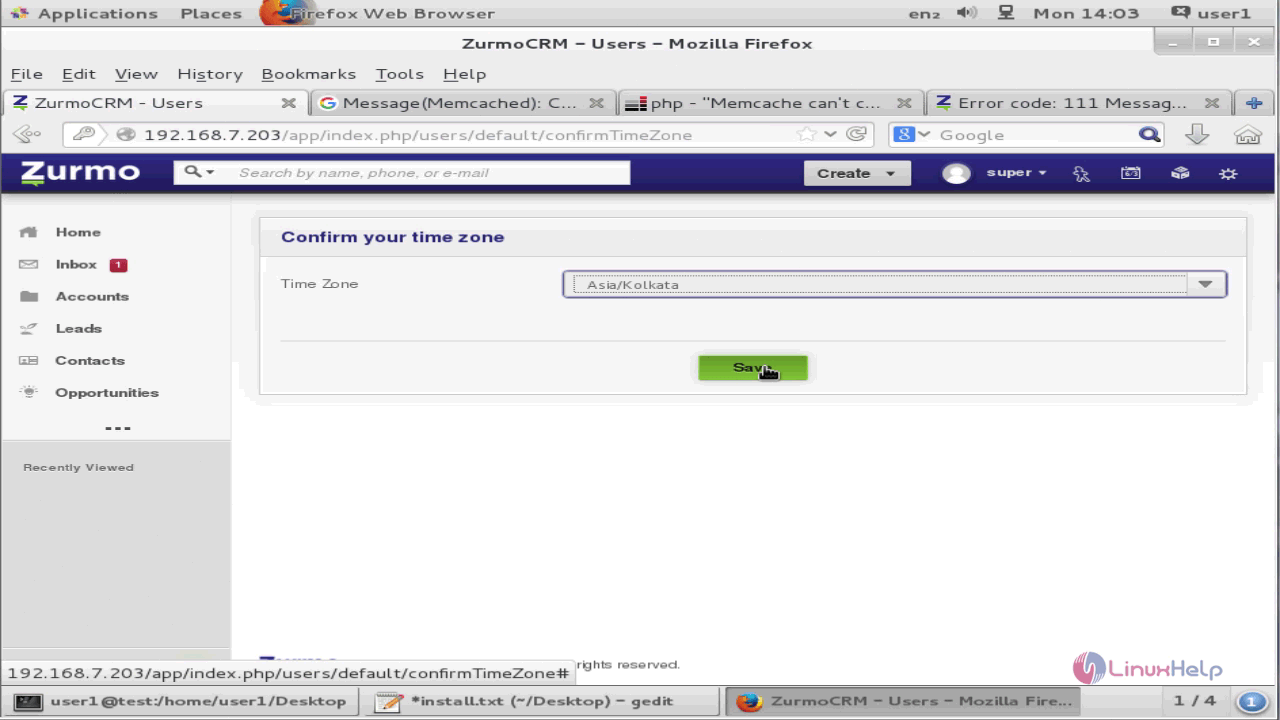
Once you are in, make sure you configure your time zone.
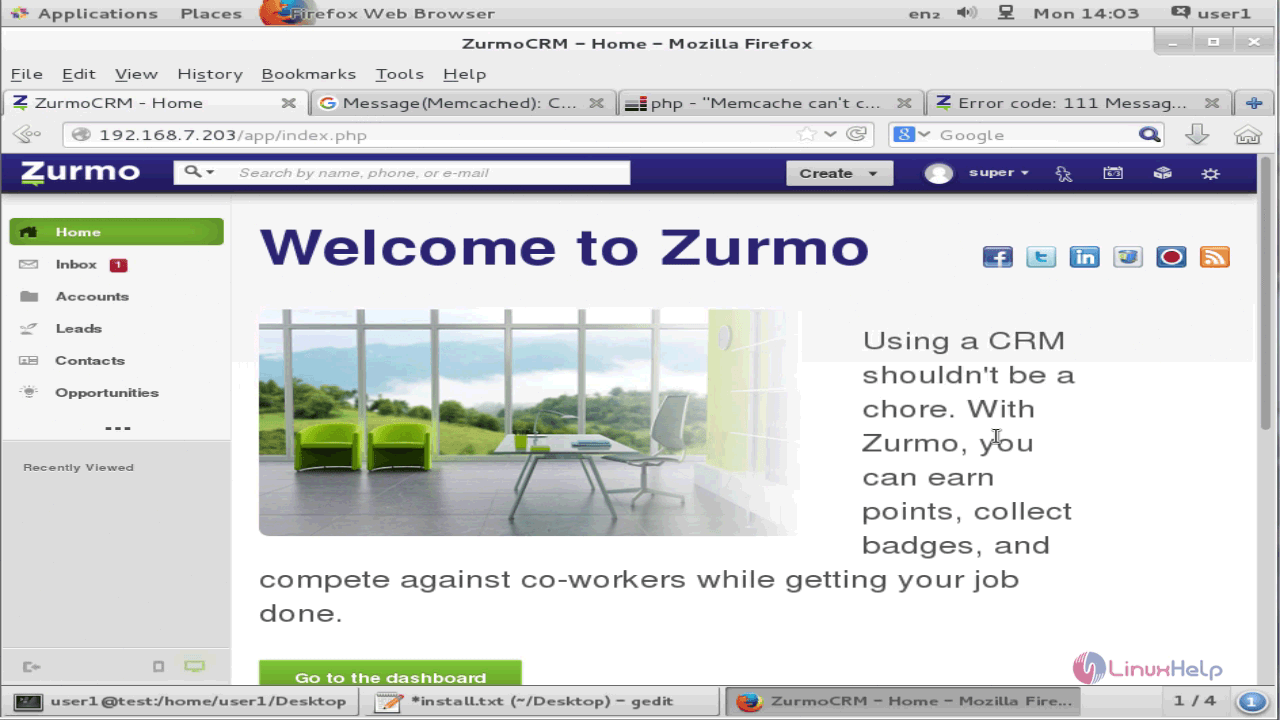
Zurmo welcome page appears on your screen.
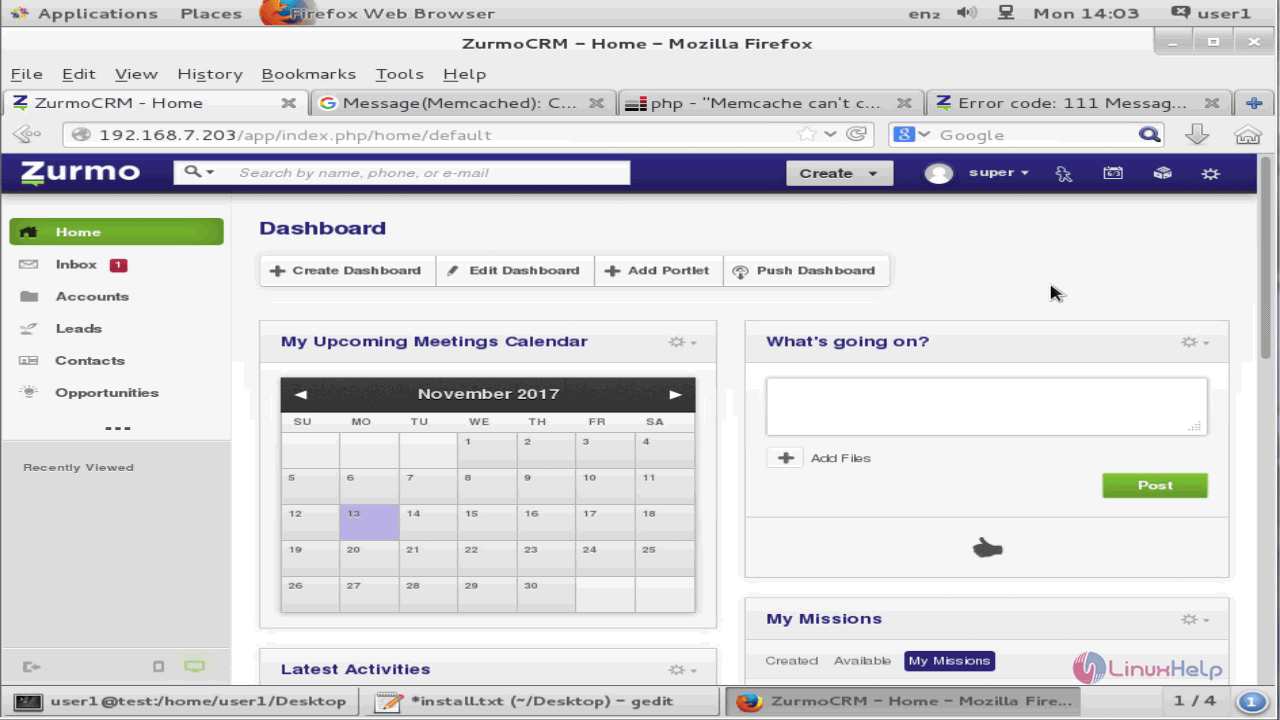
You can conveniently manage your Zurmo CRM with via its dashboard.
With this the installation of Zurmo CRM comes to an end.
Comments ( 0 )
No comments available