How to Setup Flickr Website using Piwigo
Setup Your Own Flickr Website Using Piwigo
Piwigo is a photo gallery software for the web which is similar to Flickr for sharing photos with our family/friends. If you have large collection of photos to be shared/stored in your own server, then Piwigo is the best choice. Installation of Piwigo is explained in this article.
To Install Piwigo
For this setup, install the LAMP server. To know how to install it, visit
https://www.linuxhelp.com/install-lamp-fedora-22/
php entension
[root@linuxhelp1 ~]# yum install php-gd php-mysql -y
Loaded plugins: fastestmirror, refresh-packagekit, security
Setting up Install Process
Loading mirror speeds from cached hostfile
 * base: centos.excellmedia.net
 * epel: epel.mirror.net.in
 * extras: centos.excellmedia.net
 * updates: centos.excellmedia.net
Resolving Dependencies
-->  Running transaction check
--->  Package php-gd.x86_64 0:5.3.3-47.el6 will be installed
--->  Package php-mysql.x86_64 0:5.3.3-47.el6 will be installed
-->  Finished Dependency Resolution
.
.
.
Installed:
  php-gd.x86_64 0:5.3.3-47.el6                                              php-mysql.x86_64 0:5.3.3-47.el6

Complete!
Open the php.ini file and set your time zone,
[root@linuxhelp1 ~]# vim /etc/php.ini
date.timezone = Asia/Kolkata
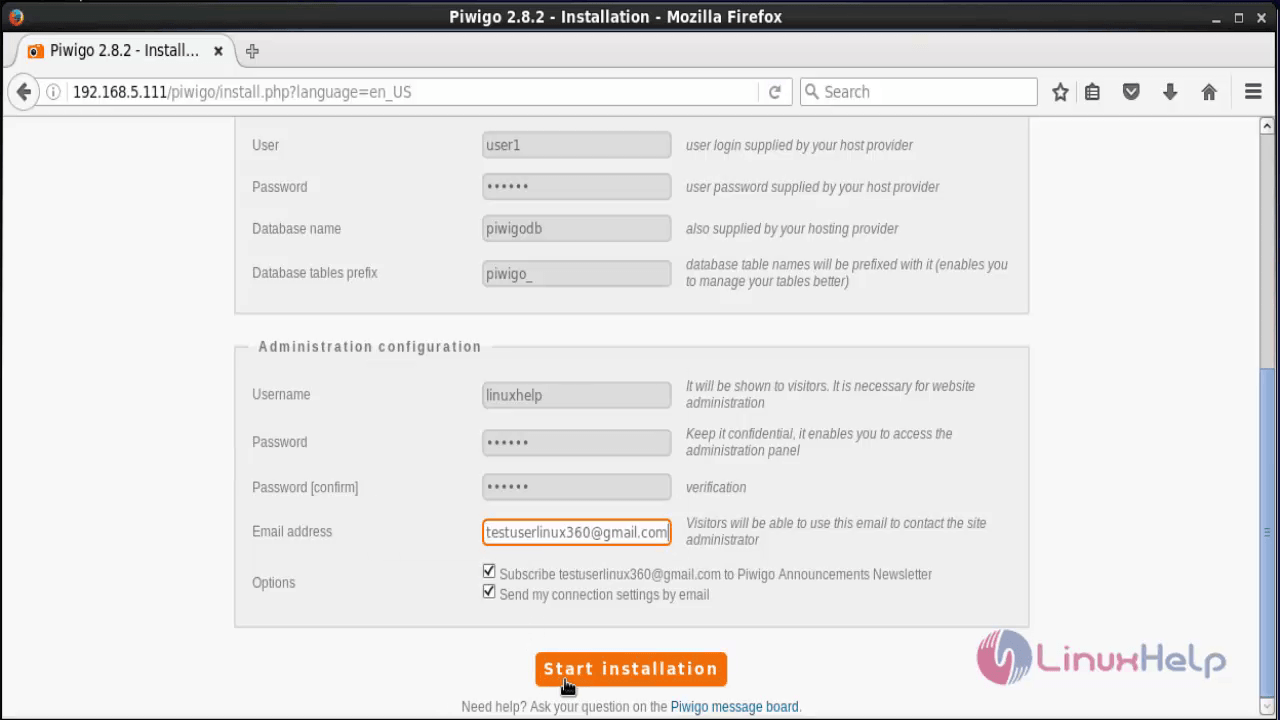
To Create database for Piwigo
Create a database and assign full permission to “ user” .
[root@linuxhelp1 ~]# mysql -u root -p
Enter password:
Welcome to the MySQL monitor.  Commands end with   or g.
Your MySQL connection id is 11
Server version: 5.1.73 Source distribution

Copyright (c) 2000, 2013, Oracle and/or its affiliates. All rights reserved.

Oracle is a registered trademark of Oracle Corporation and/or its
affiliates. Other names may be trademarks of their respective
owners.

Type ' help '  or ' h'  for help. Type ' c'  to clear the current input statement.

mysql>  create database piwigodb DEFAULT CHARACTER SET = ' utf8'
Query OK, 1 row affected (0.00 sec)

mysql>  grant all on piwigodb.* to user1@localhost identified by ' linuxc'
Query OK, 0 rows affected (0.05 sec)

mysql>  flush privileges
Query OK, 0 rows affected (0.00 sec)

mysql>  exit
Bye
Download the piwigo package by using the following command.
[root@linuxhelp1 ~]# wget http://piwigo.org/download/dlcounter.php?code=latest
--2016-07-21 14:24:55--  http://piwigo.org/download/dlcounter.php?code=latest
Resolving piwigo.org... 87.98.147.22
Connecting to piwigo.org|87.98.147.22|:80... connected.
HTTP request sent, awaiting response... 200 OK
Length: 7570310 (7.2M) [application/zip]
Saving to: “ dlcounter.php?code=latest”

100%[===============================================================================================================> ] 7,570,310    216K/s   in 43s

2016-07-21 14:25:38 (172 KB/s) - “ dlcounter.php?code=latest”  saved [7570310/7570310]
Extract the downloaded zip file by using the following command.
[root@linuxhelp1 ~]# ls
anaconda-ks.cfg  Desktop  dlcounter.php?code=latest  Documents  Downloads  install.log  install.log.syslog  Music  Pictures  Public  Templates  Videos
[root@linuxhelp1 ~]# unzip dlcounter.php?code=latest
Archive:  dlcounter.php?code=latest
   creating: piwigo/
  inflating: piwigo/README.md
  inflating: piwigo/action.php
  inflating: piwigo/random.php
.
.
.
inflating: piwigo/language/en_UK/help/permalinks.html
  inflating: piwigo/language/en_UK/install.lang.php
  inflating: piwigo/language/en_UK/about.html
[root@linuxhelp1 ~]# ls
anaconda-ks.cfg  dlcounter.php?code=latest  Downloads    install.log.syslog  Pictures  Public     Videos
Desktop          Documents                  install.log  Music               piwigo    Templates
[root@linuxhelp1 ~]# mv piwigo/ /var/www/html/
Set full permissions to the following folders.
[root@linuxhelp1 ~]# chmod -R 777 /var/www/html/piwigo/_data/
[root@linuxhelp1 ~]# chmod -R 777 /var/www/html/piwigo/upload/
[root@linuxhelp1 ~]# mkdir /var/www/html/piwigo/local/watermarks
[root@linuxhelp1 ~]# chmod -R 777 /var/www/html/piwigo/local/watermarks/
Open your web browser and point to http://< IP_address> /piwigo
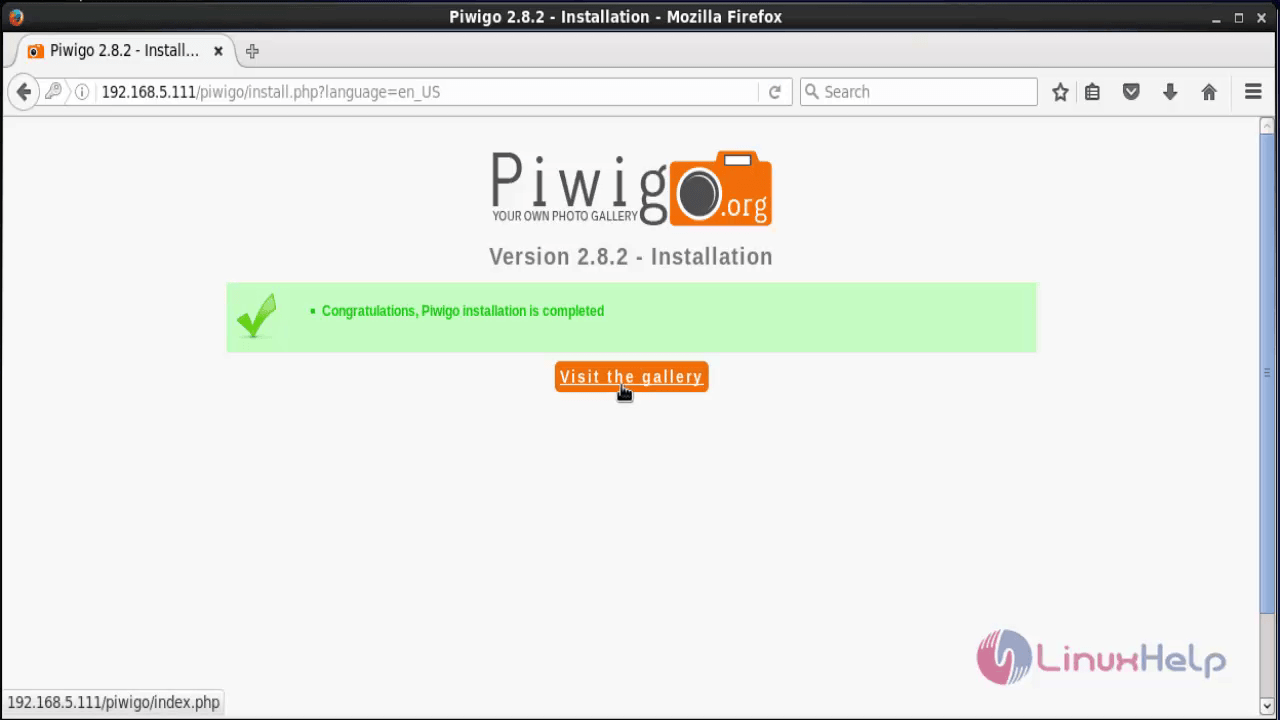
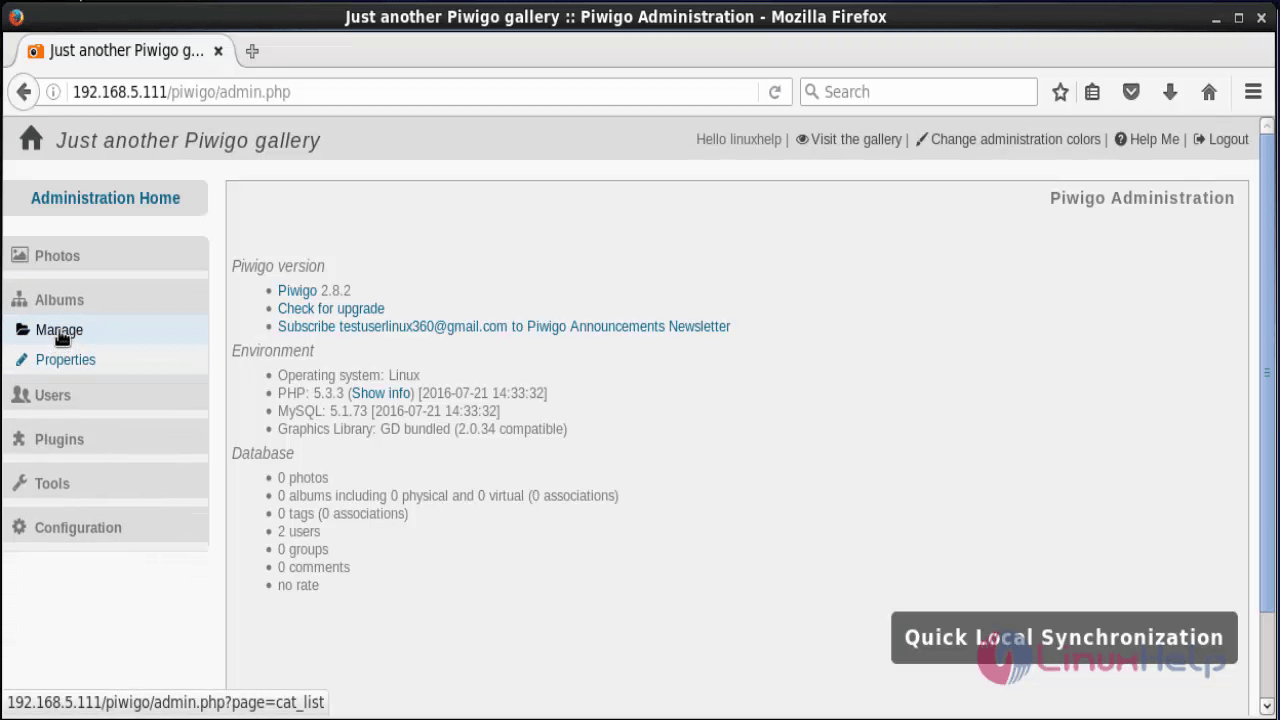
Congratulations! Piwigo has been installed.
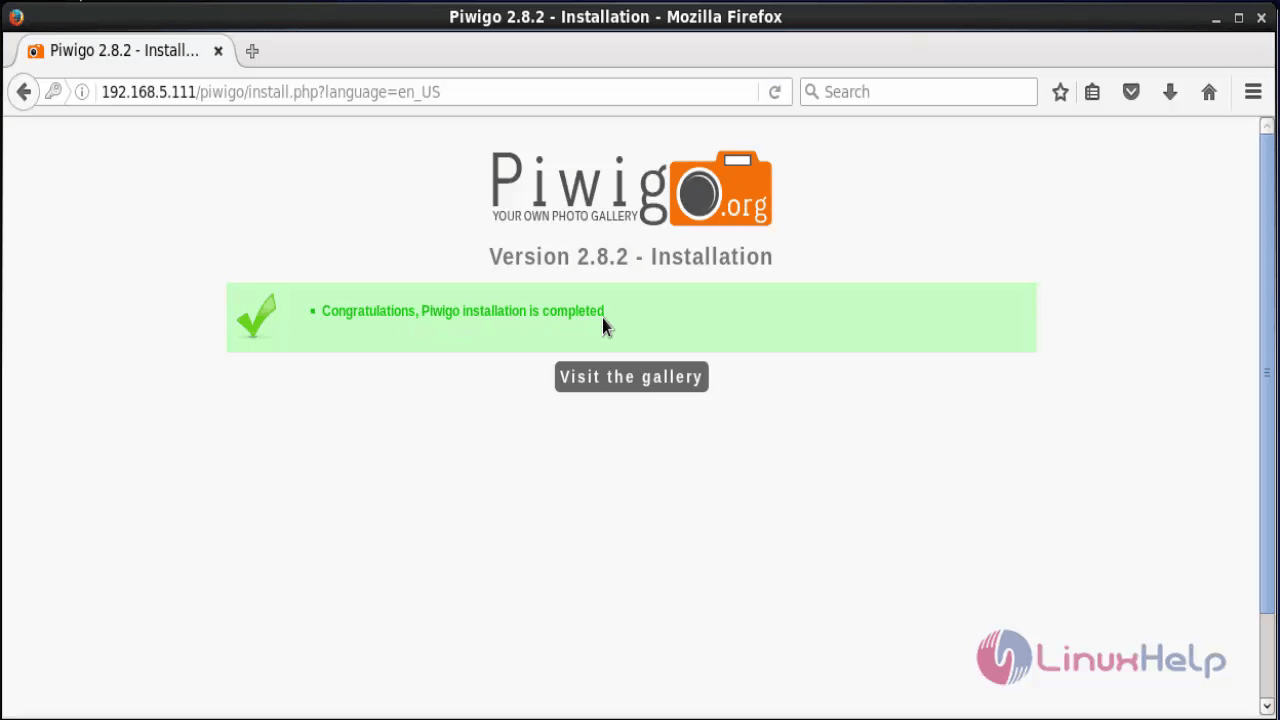
Click visit the gallery to visit the main page.
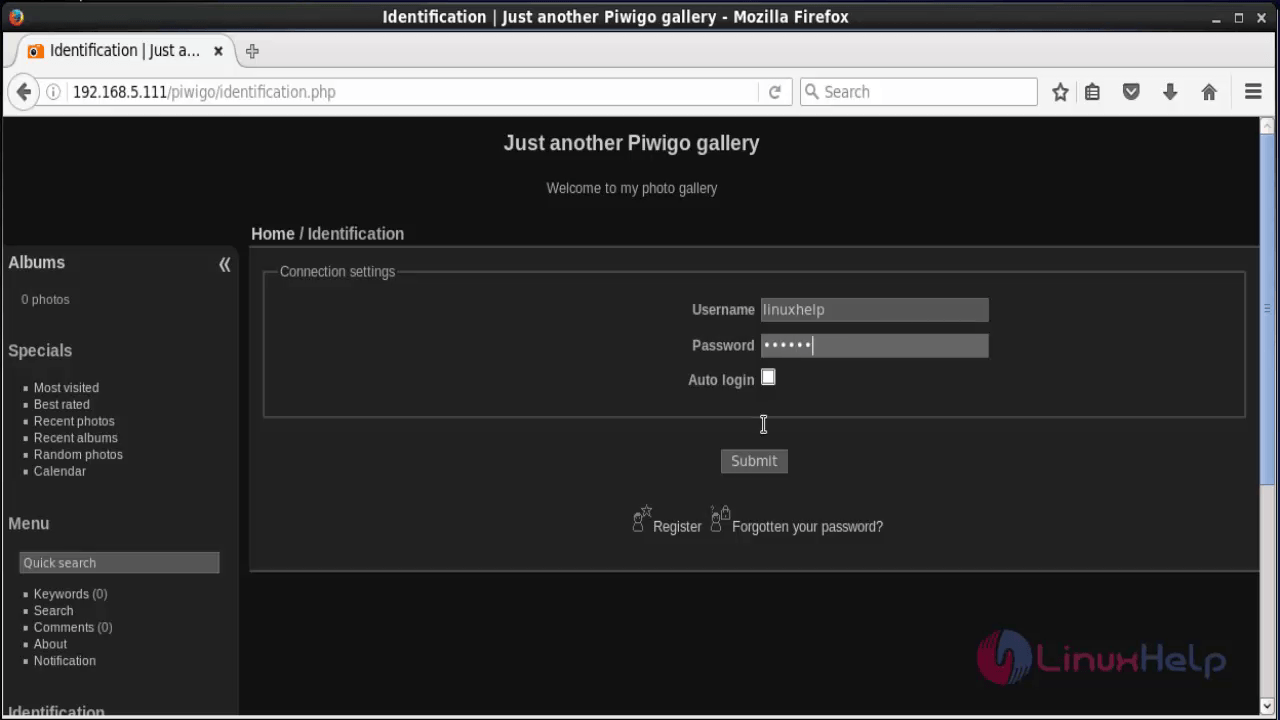
Login using the user credentials.
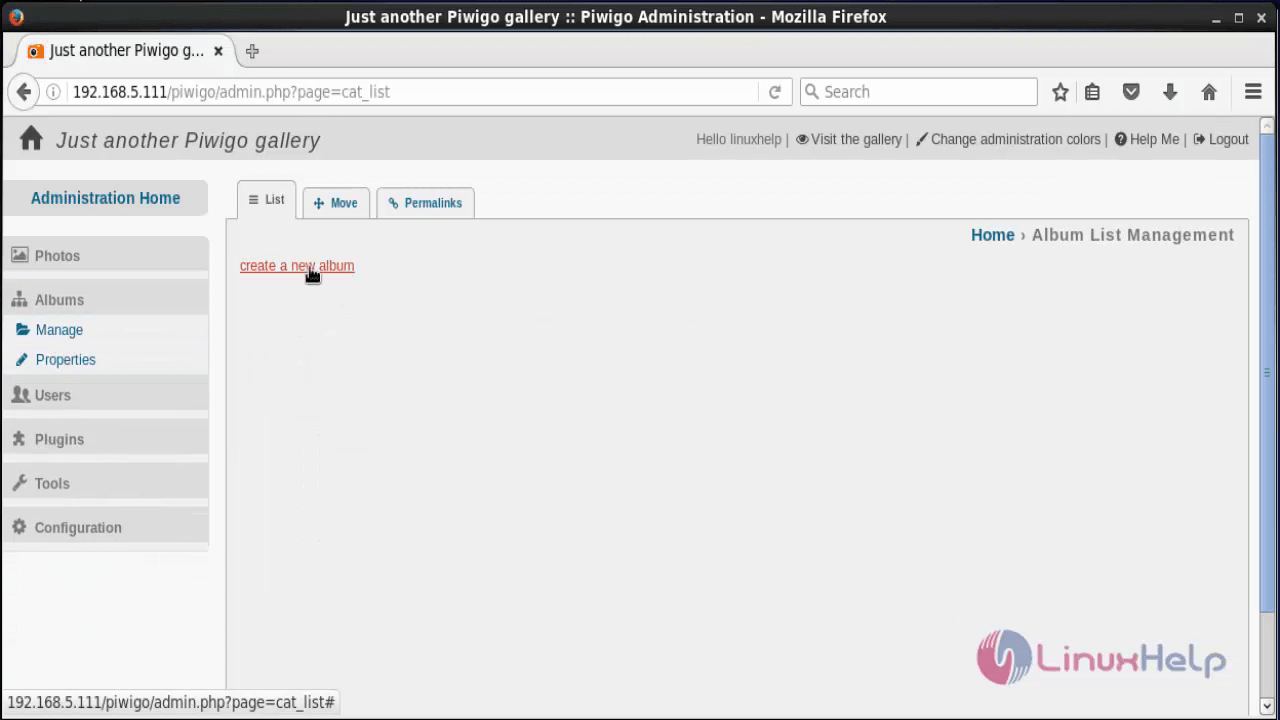
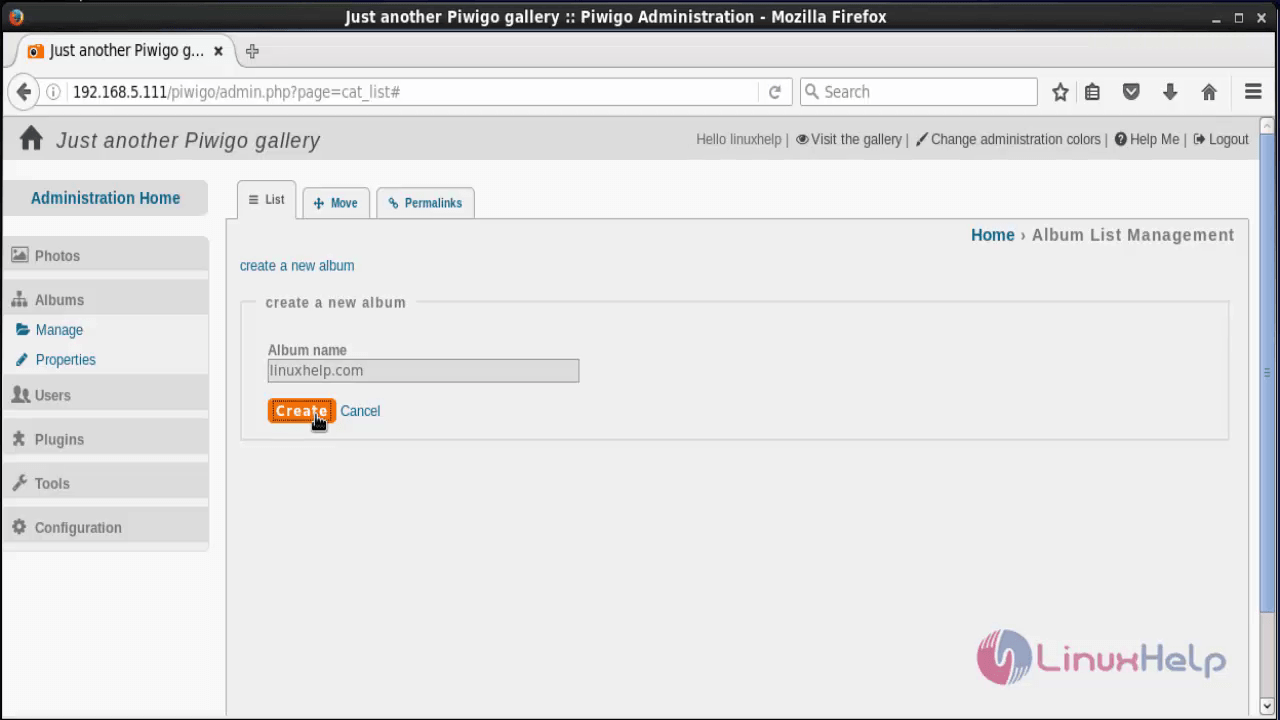
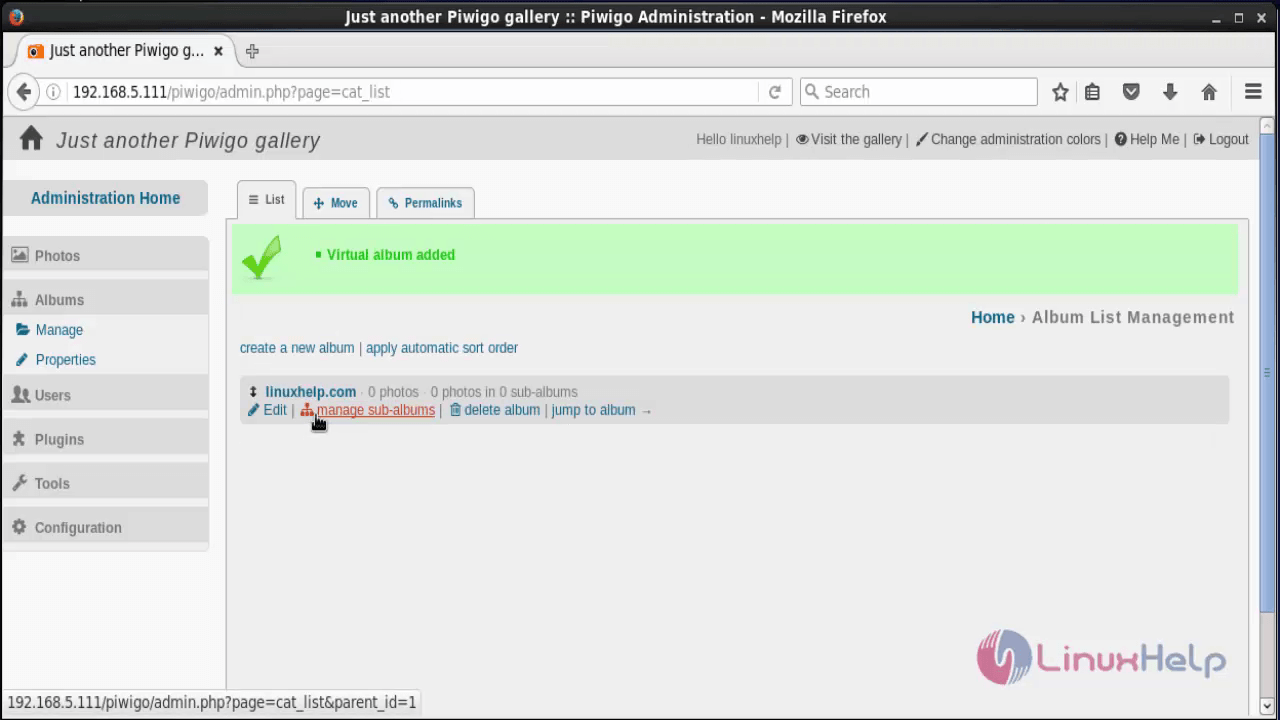
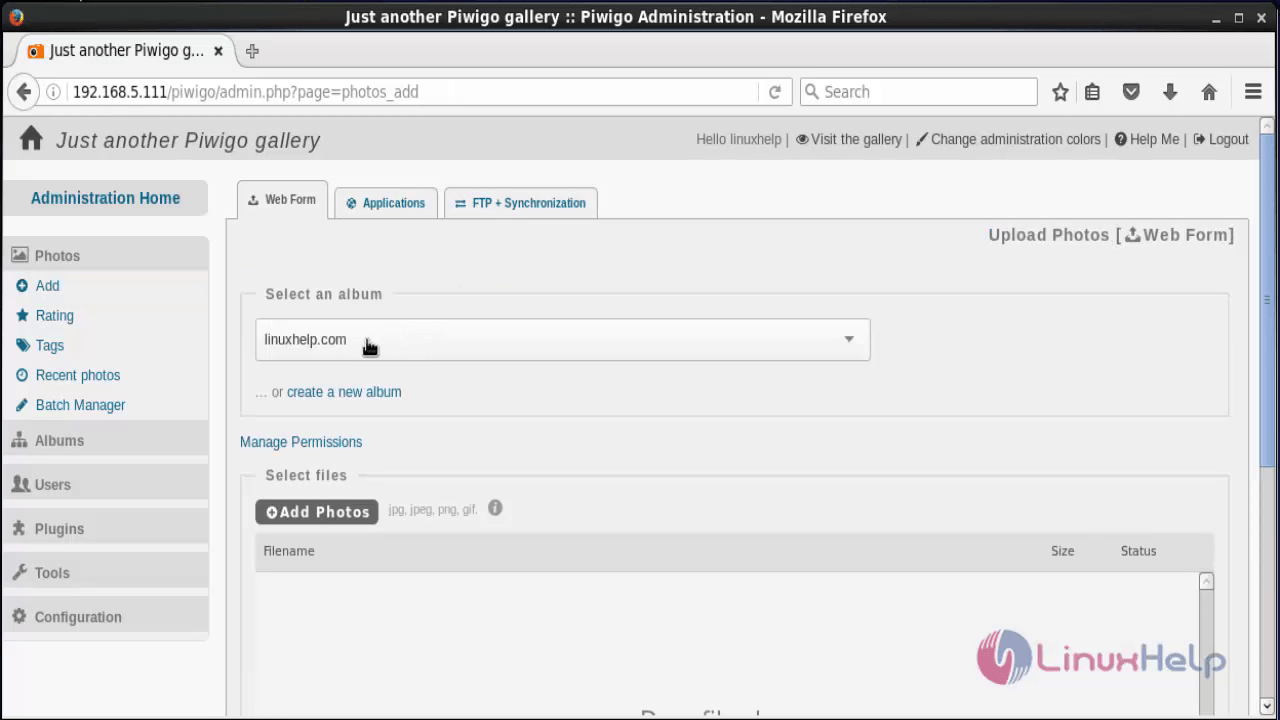
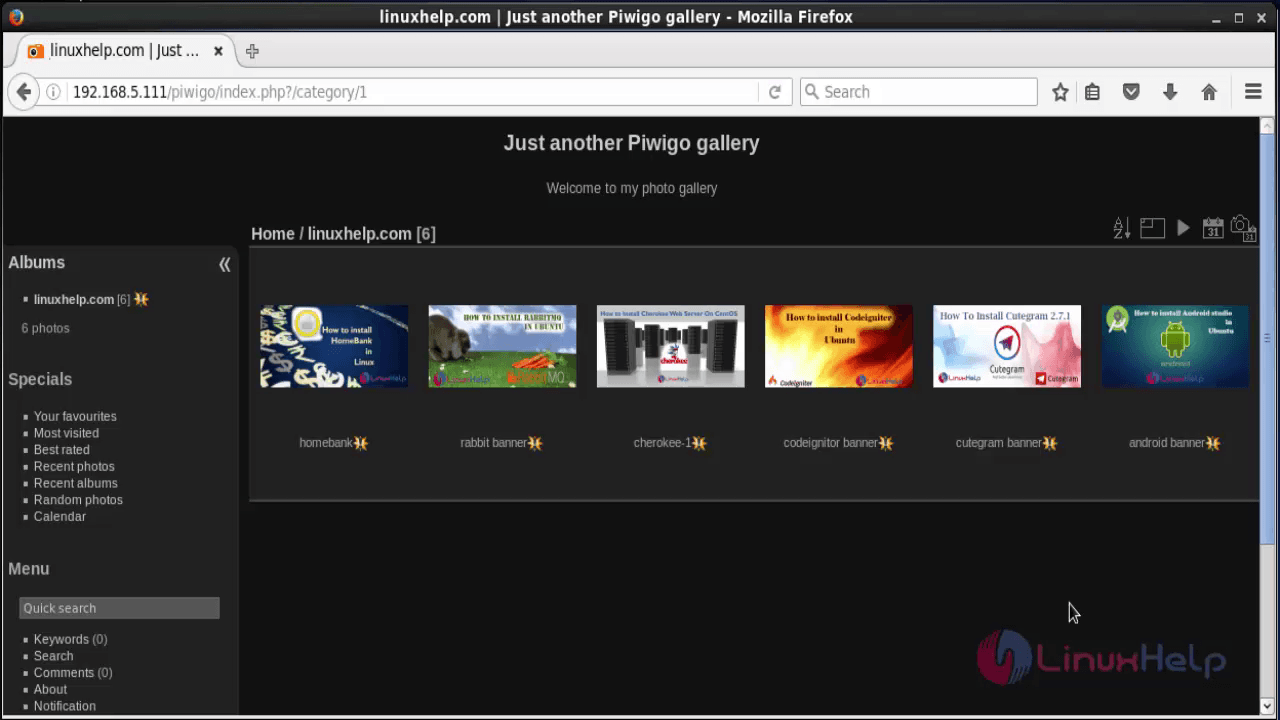
To Create Albums
Add images to our account or create one or more Albums to organize your photos as per your requirement.
Make sure that you logged-in as the administrative user to create/edit/delete albums.
Click on photos and choose the album and click on add photo
Now you’ ll see the selected images will be uploaded into your album.
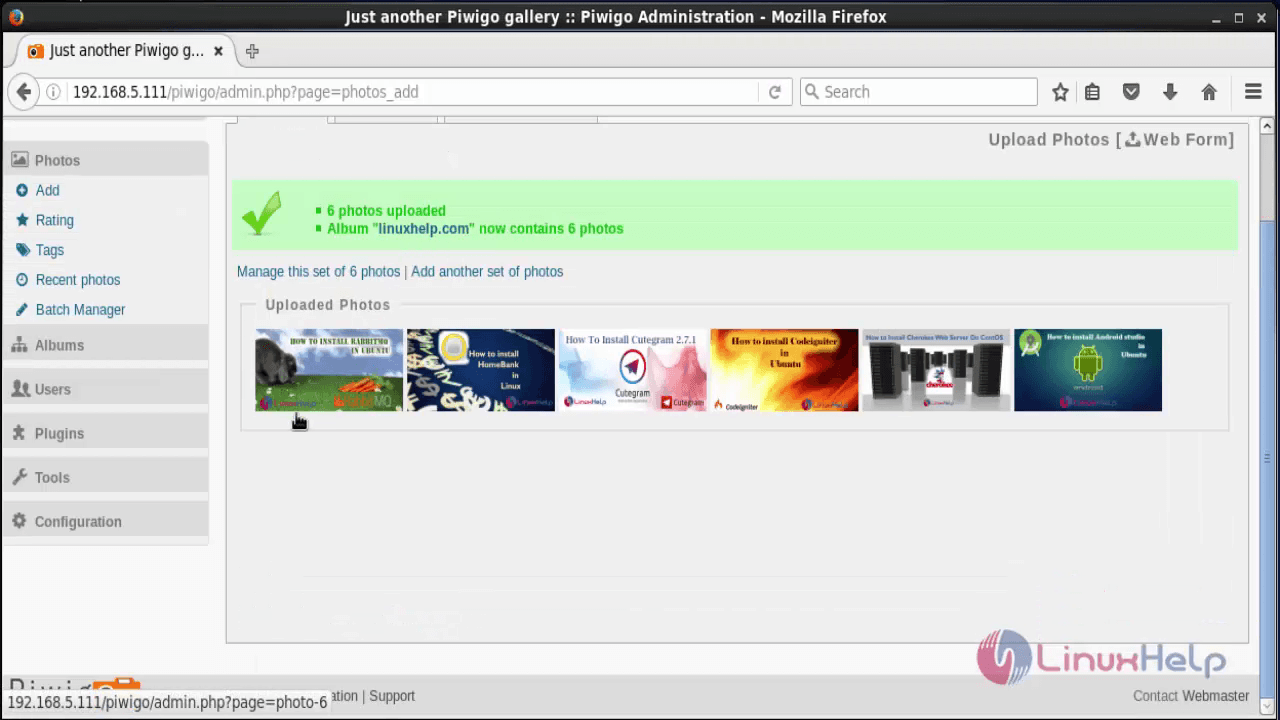
Also you can make your photos private.
Once the photos are uploaded, log out from the admin user.
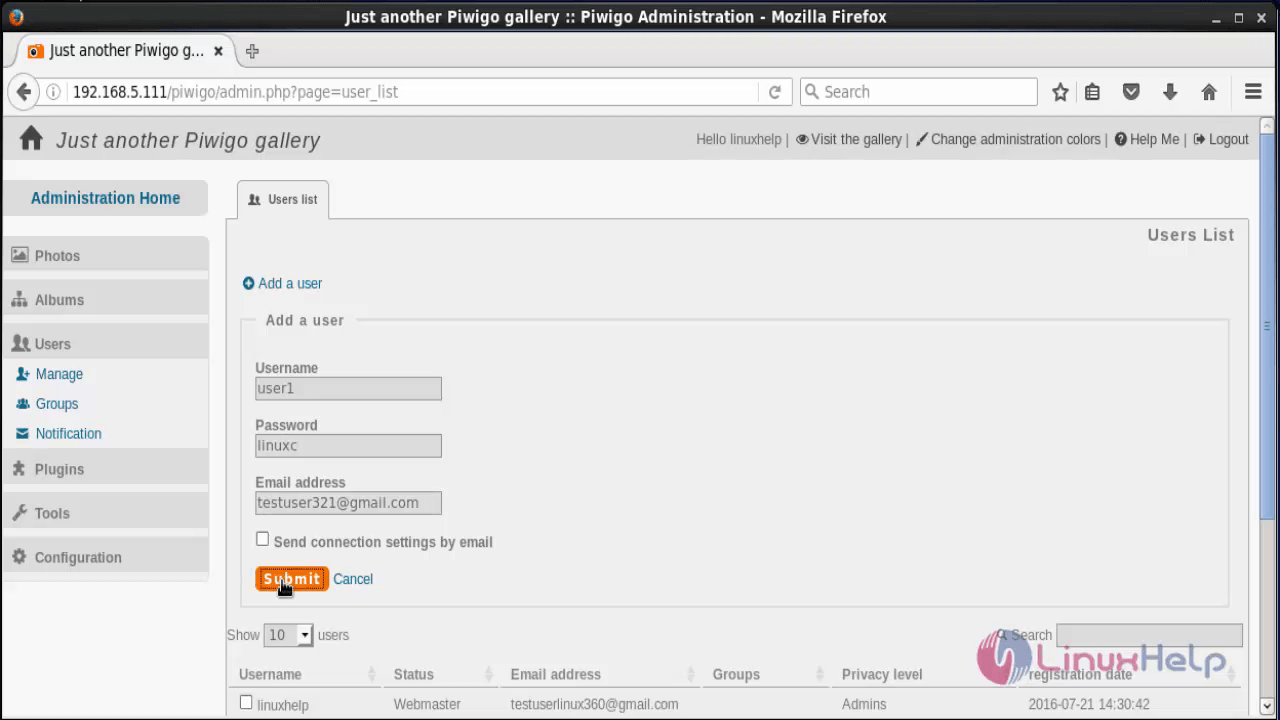
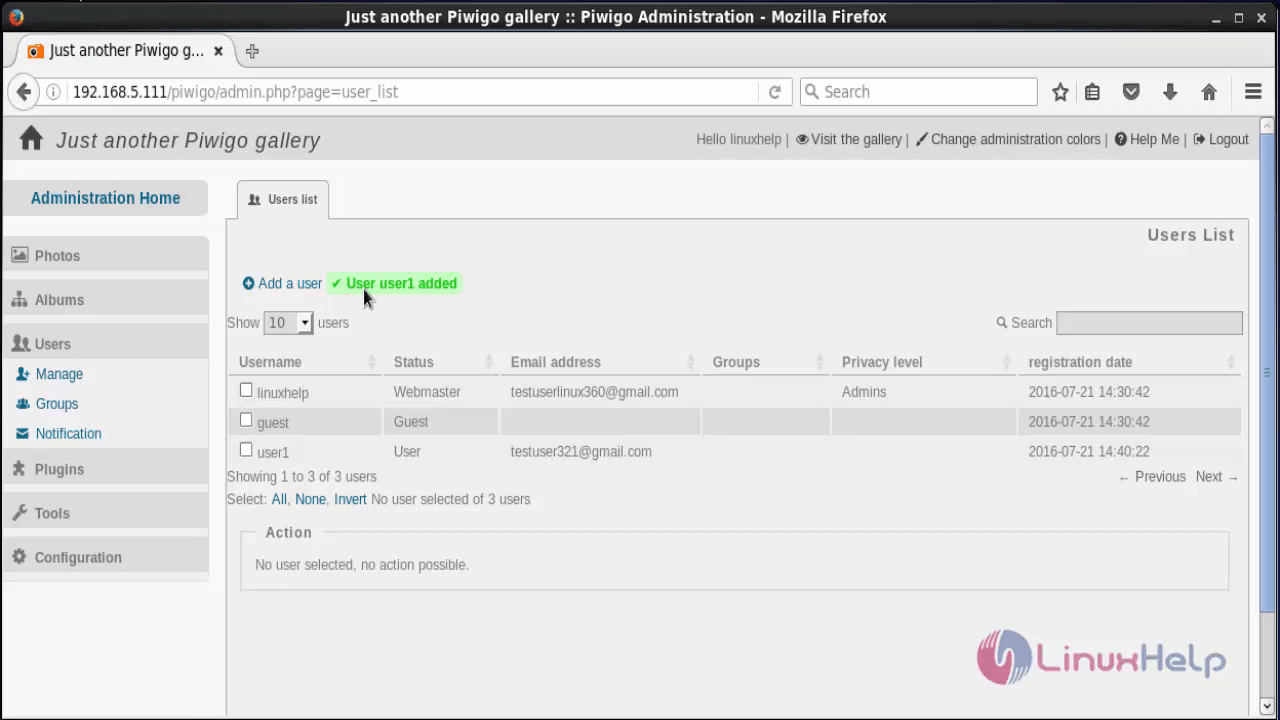
To Register New users
Click on Users&rarr Manage&rarr Add Users
Comments ( 0 )
No comments available