How to Setup Nextcloud file sharing Server in CentOS 7
To Setup Nextcloud file sharing Server in CentOS 7
Nextcloud is an open source tool that grant permission to share and sync the files and folders in any cloud storage device. Here the Nextcloud server will be the centralized storage for all the clients. Installation of file sharing server in CentOS is explained in this article.
Use the following command to compose a LAMP Server.
[root@linuxhelp ~]# yum install httpd php php-mysql sqlite php-dom php-mbstring php-gd php-pdo php-json php-xml php-zip php-gd curl php-curl php-mcrypt php-pear mariadb-server mariadb -y
Loaded plugins: fastestmirror, langpacks
Loading mirror speeds from cached hostfile
 * base: centos.webwerks.com
 * epel: epel.mirror.net.in
 * extras: centos.webwerks.com
 * updates: mirror.nbrc.ac.in
Resolving Dependencies
-->  Running transaction check
--->  Package curl.x86_64 0:7.29.0-19.el7 will be updated
--->  Package curl.x86_64 0:7.29.0-25.el7.centos will be an update
-->  Processing Dependency: libcurl = 7.29.0-25.el7.centos for package: curl-7.29.0-25.el7.centos.x86_64
--->  Package httpd.x86_64 0:2.4.6-40.el7.centos.4 will be installed
.
.
.
Dependency Installed:
  apr.x86_64 0:1.4.8-3.el7                  apr-util.x86_64 0:1.5.2-6.el7           httpd-tools.x86_64 0:2.4.6-40.el7.centos.4         libmcrypt.x86_64 0:2.5.8-13.el7
  libzip.x86_64 0:0.10.1-8.el7              mailcap.noarch 0:2.1.41-2.el7           perl-Compress-Raw-Bzip2.x86_64 0:2.061-3.el7       perl-Compress-Raw-Zlib.x86_64 1:2.061-4.el7
  perl-DBD-MySQL.x86_64 0:4.023-5.el7       perl-DBI.x86_64 0:1.627-4.el7           perl-Data-Dumper.x86_64 0:2.145-3.el7              perl-IO-Compress.noarch 0:2.061-2.el7
  perl-Net-Daemon.noarch 0:0.48-5.el7       perl-PlRPC.noarch 0:0.2020-14.el7       php-cli.x86_64 0:5.4.16-36.1.el7_2.1               php-process.x86_64 0:5.4.16-36.1.el7_2.1
  t1lib.x86_64 0:5.1.2-14.el7

Updated:
  curl.x86_64 0:7.29.0-25.el7.centos                                                            sqlite.x86_64 0:3.7.17-8.el7

Dependency Updated:
  libcurl.x86_64 0:7.29.0-25.el7.centos                                                       mariadb-libs.x86_64 1:5.5.47-1.el7_2

Complete!
Start and enable the services, after the LAMP installation.
[root@linuxhelp ~]# systemctl start httpd
[root@linuxhelp ~]# systemctl enable httpd
ln -s ' /usr/lib/systemd/system/httpd.service'  ' /etc/systemd/system/multi-user.target.wants/httpd.service'
[root@linuxhelp ~]# systemctl start mariadb
[root@linuxhelp ~]# systemctl enable mariadb
ln -s ' /usr/lib/systemd/system/mariadb.service'  ' /etc/systemd/system/multi-user.target.wants/mariadb.service'
Fix the root password for the database by using the following command.
[root@linuxhelp ~]# mysql_secure_installation
/usr/bin/mysql_secure_installation: line 379: find_mysql_client: command not found

NOTE: RUNNING ALL PARTS OF THIS SCRIPT IS RECOMMENDED FOR ALL MariaDB
      SERVERS IN PRODUCTION USE!  PLEASE READ EACH STEP CAREFULLY!

In order to log into MariaDB to secure it, we' ll need the current
password for the root user.  If you' ve just installed MariaDB, and
you haven' t set the root password yet, the password will be blank,
so you should just press enter here.

Enter current password for root (enter for none):
OK, successfully used password, moving on...

Setting the root password ensures that nobody can log into the MariaDB
root user without the proper authorisation.

Set root password? [Y/n] y
New password:
Re-enter new password:
Password updated successfully!
Reloading privilege tables..
 ... Success!
.
.
.

Reloading the privilege tables will ensure that all changes made so far
will take effect immediately.

Reload privilege tables now? [Y/n] y
 ... Success!

Cleaning up...

All done!  If you' ve completed all of the above steps, your MariaDB
installation should now be secure.

Thanks for using MariaDB!
Then construct the database and user for nextcloud setup.
[root@linuxhelp ~]# mysql -u root -p
Enter password:
Welcome to the MariaDB monitor.  Commands end with   or g.
Your MariaDB connection id is 10
Server version: 5.5.47-MariaDB MariaDB Server

Copyright (c) 2000, 2015, Oracle, MariaDB Corporation Ab and others.

Type ' help '  or ' h'  for help. Type ' c'  to clear the current input statement.

MariaDB [(none)]>  create database nextcloudb
Query OK, 1 row affected (0.00 sec)

MariaDB [(none)]>  grant all on nextclouddb.* to ' nxtuser' @' localhost'  identified by ' centos7'
Query OK, 0 rows affected (0.00 sec)

MariaDB [(none)]>  FLUSH PRIVILEGES
Query OK, 0 rows affected (0.00 sec)

MariaDB [(none)]>  exit
Bye
Download Nextcloud package by using the wget command.
[root@linuxhelp ~]# wget https://download.nextcloud.com/server/releases/nextcloud-9.0.53.tar.bz2
--2016-07-28 18:29:16--  https://download.nextcloud.com/server/releases/nextcloud-9.0.53.tar.bz2
Resolving download.nextcloud.com (download.nextcloud.com)... 88.198.160.133
Connecting to download.nextcloud.com (download.nextcloud.com)|88.198.160.133|:443... connected.
HTTP request sent, awaiting response... 200 OK
Length: 28549436 (27M) [application/x-bzip2]
Saving to: ‘ nextcloud-9.0.53.tar.bz2’

100%[==============================================================================================================================================> ] 28,549,436   419KB/s   in 74s

2016-07-28 18:30:33 (375 KB/s) - ‘ nextcloud-9.0.53.tar.bz2’  saved [28549436/28549436]
Unwind the downloaded tar package.
[root@linuxhelp ~]# tar -xjvf nextcloud-9.0.53.tar.bz2
nextcloud/
nextcloud/ocs/
nextcloud/ocs/routes.php
nextcloud/ocs/v2.php
nextcloud/ocs/v1.php
nextcloud/ocs/providers.php
nextcloud/console.php
.
.
.
nextcloud/resources/config/
nextcloud/resources/config/mimetypemapping.dist.json
nextcloud/resources/config/ca-bundle.crt
nextcloud/resources/config/mimetypealiases.dist.json
nextcloud/resources/codesigning/
nextcloud/resources/codesigning/root.crt
nextcloud/resources/codesigning/core.crt
nextcloud/resources/codesigning/owncloud.crt
Transfer the unwinded package to the default root directory.
[root@linuxhelp ~]# ls
anaconda-ks.cfg  Desktop  Documents  Downloads  initial-setup-ks.cfg  Music  nextcloud  nextcloud-9.0.53.tar.bz2  Pictures  Public  Templates  Videos
[root@linuxhelp ~]# mv nextcloud /var/www/html/
Switch the ownership for the nextcloud directory as ' apache' .
[root@linuxhelp ~]# chown -R apache:apache /var/www/html/nextcloud/
Empower the ports in the firewall as shown below to allow the clients to access the nextcloud.
[root@linuxhelp ~]# firewall-cmd --permanent --zone=public --add-service=http
success
[root@linuxhelp ~]# firewall-cmd --permanent --zone=public --add-service=https
success
[root@linuxhelp ~]# firewall-cmd --reload
success
To disable the selinux either run the following command,
[root@linuxhelp ~]# setenforce 0
Or Open the selinux config file and add the following entry.
[root@linuxhelp ~]# vim /etc/sysconfig/selinux
SELINUX=permissive
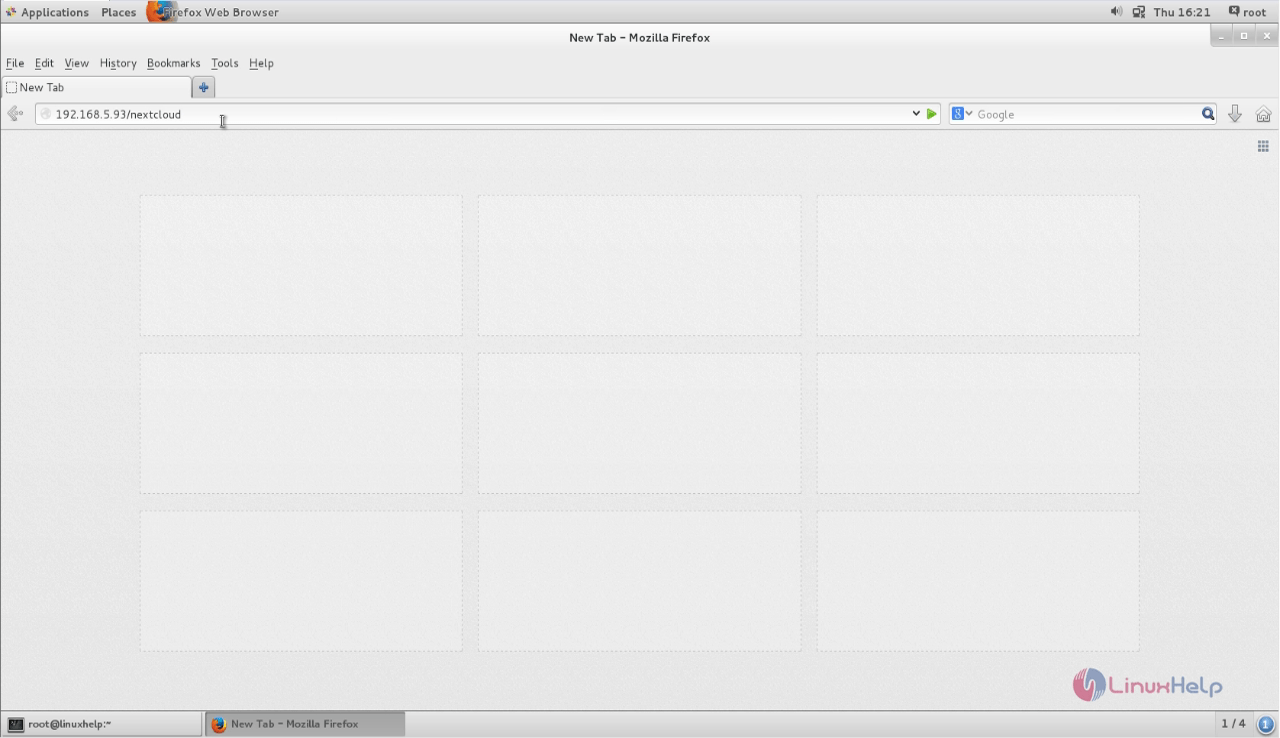
Open the browser and call the URL http://IP_address/nextcloud">http://< IP_Address> /nextcloud
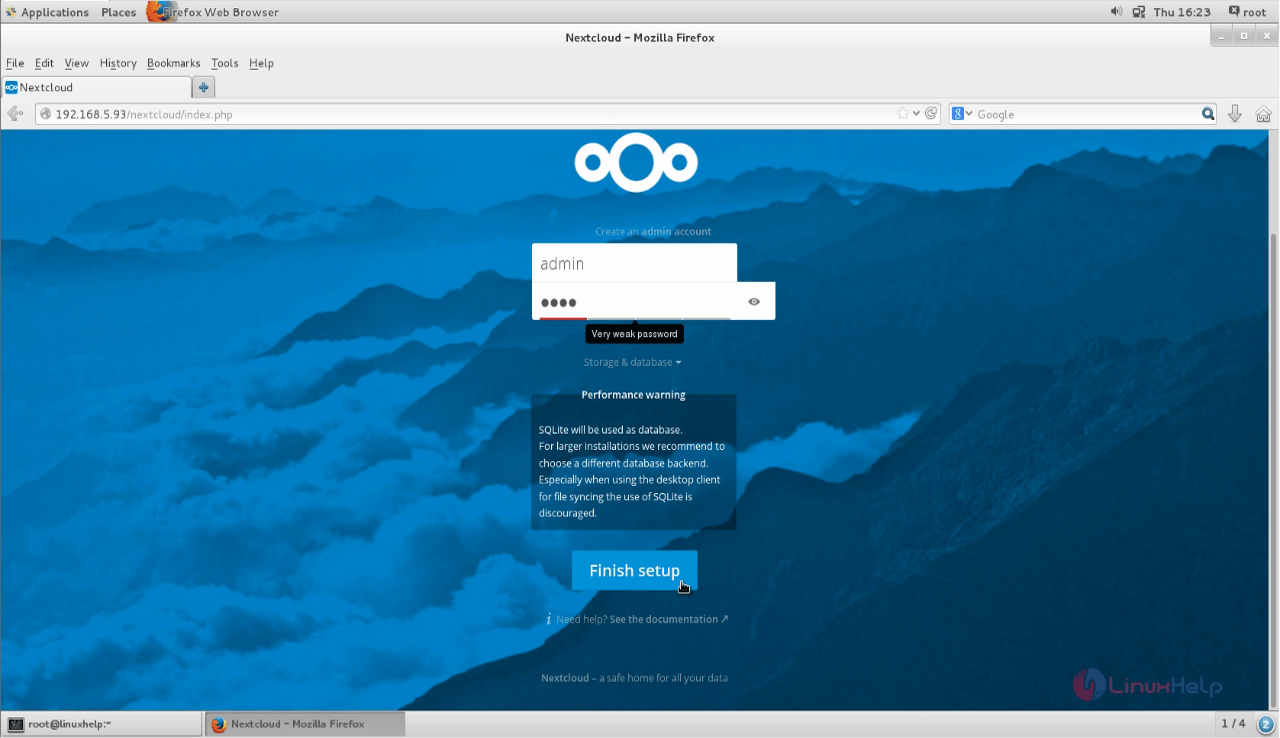
Create Admin account and click Finish setup.
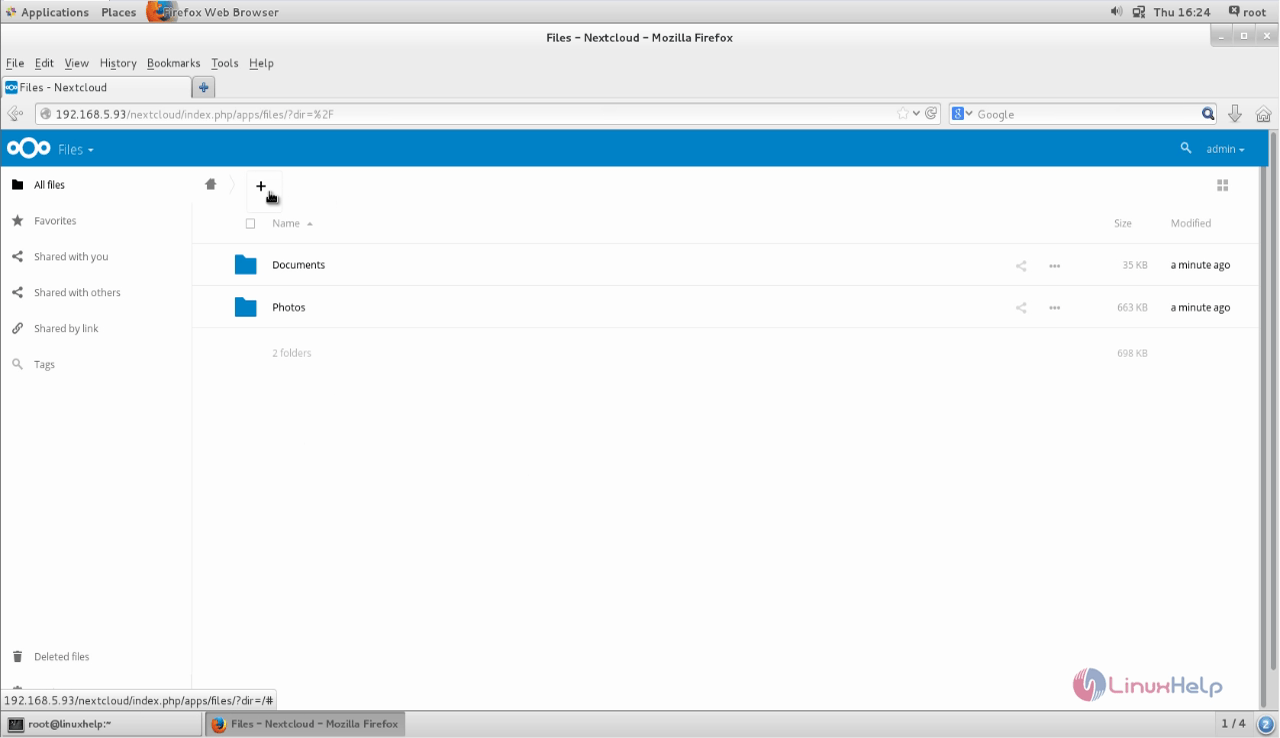
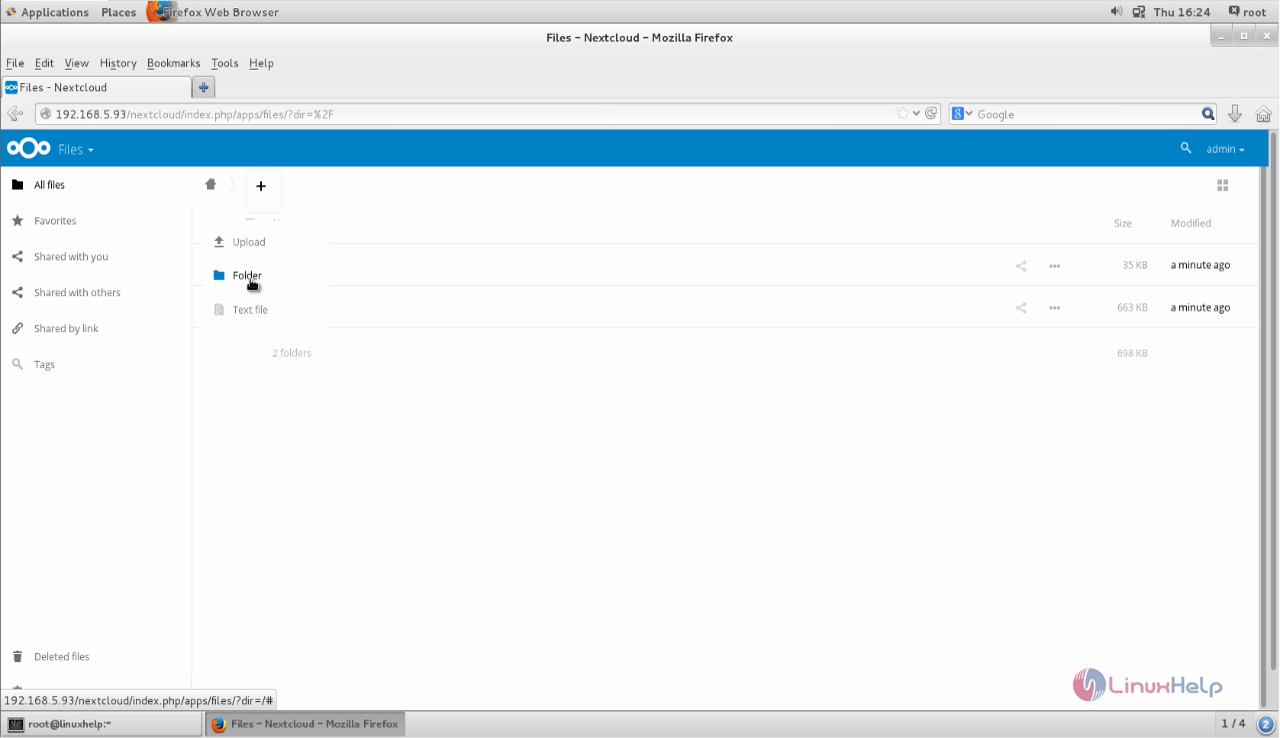
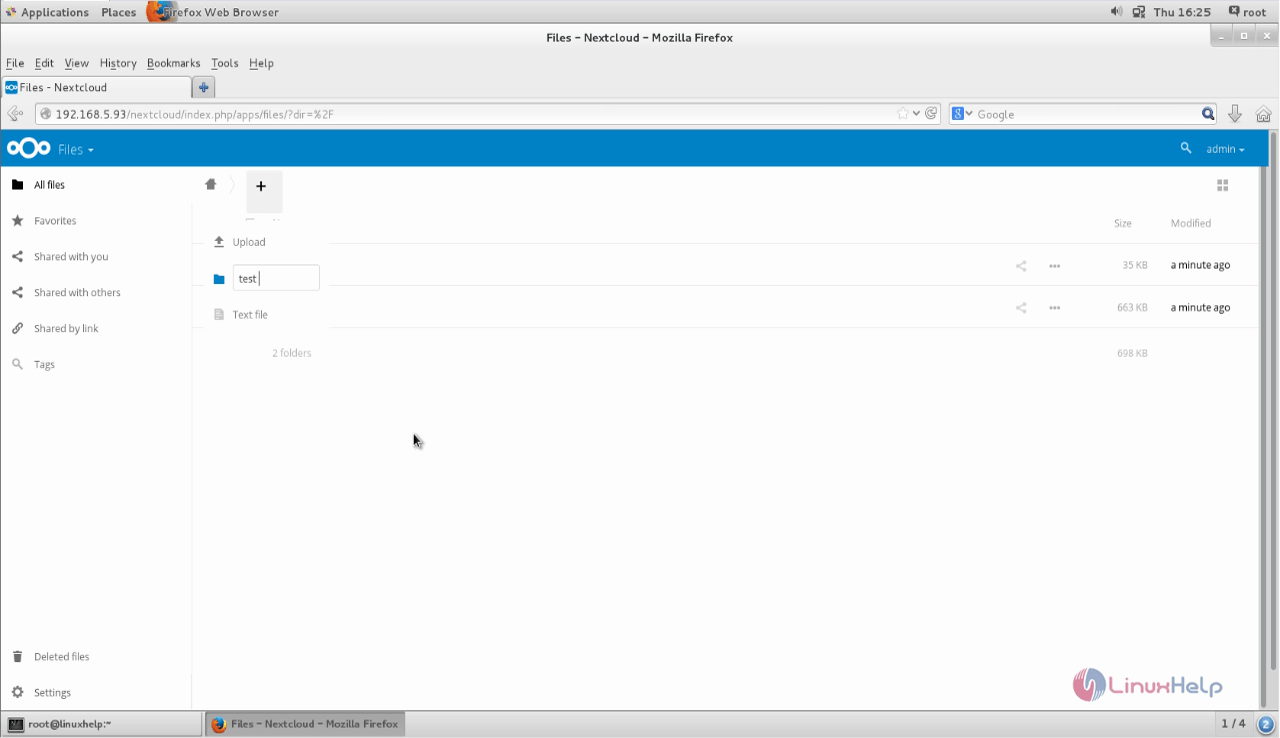
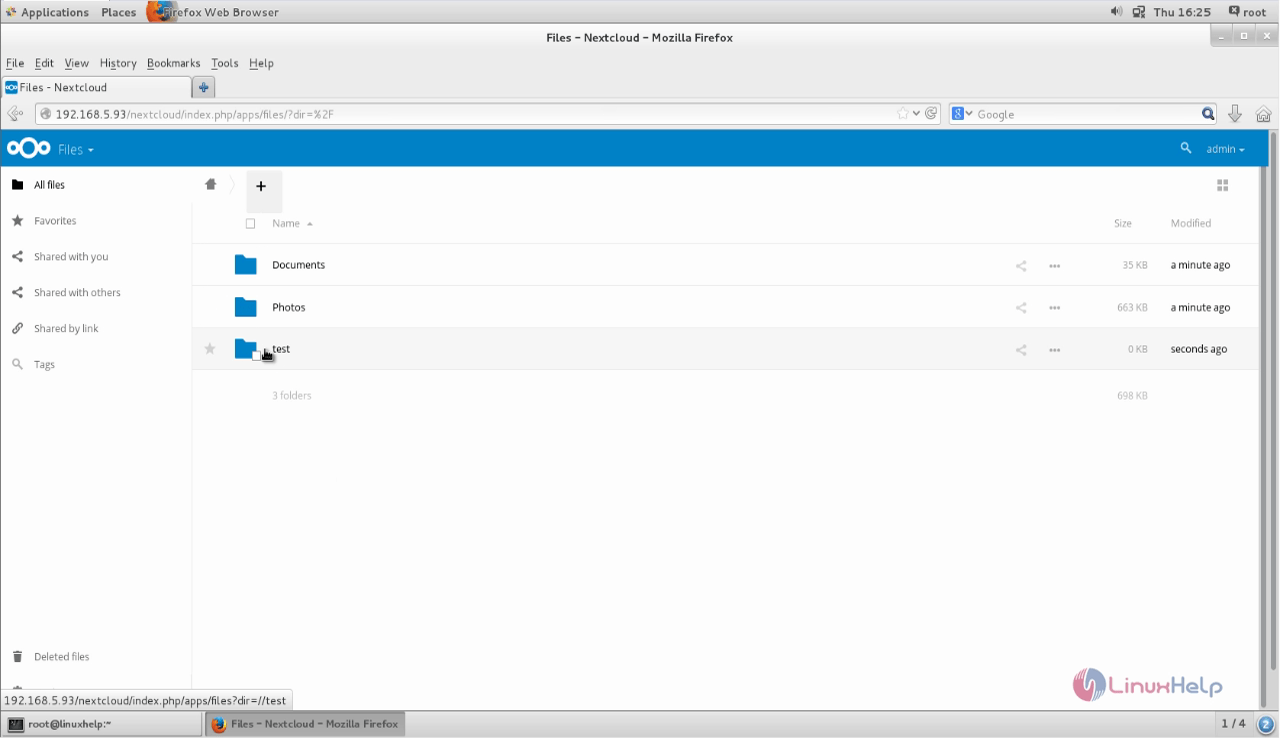
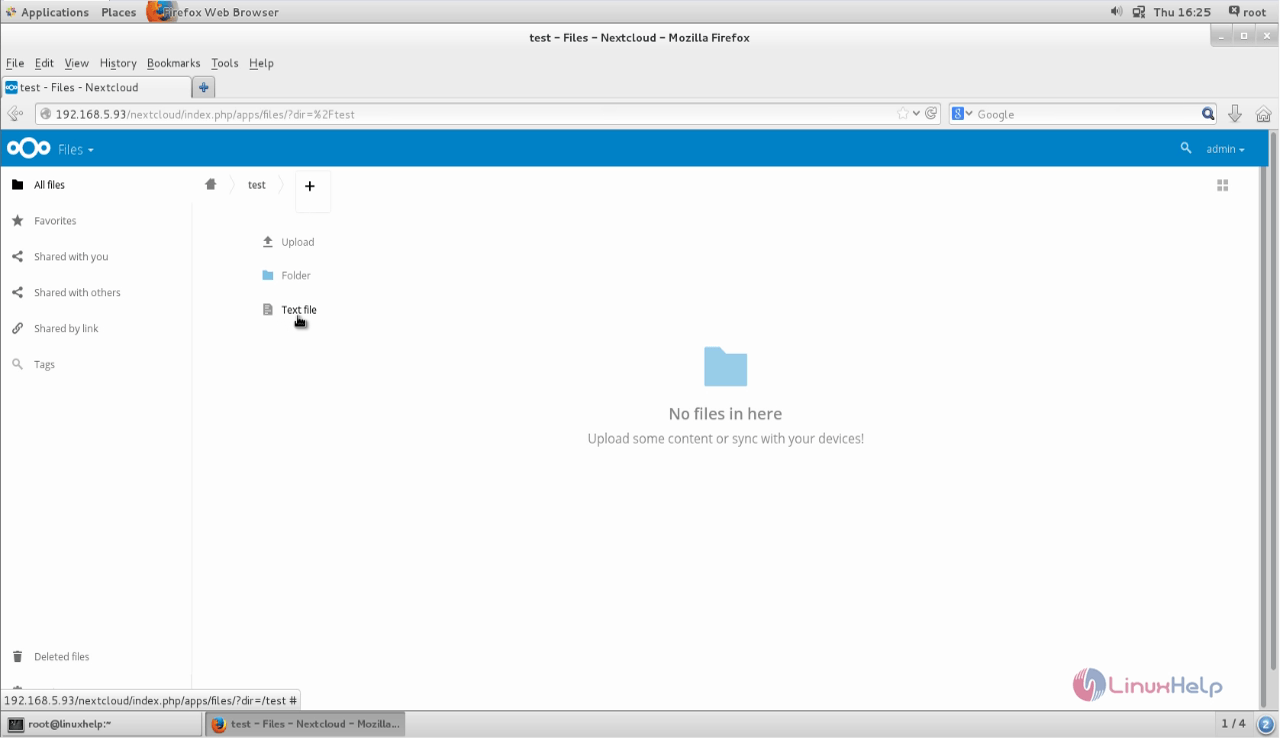
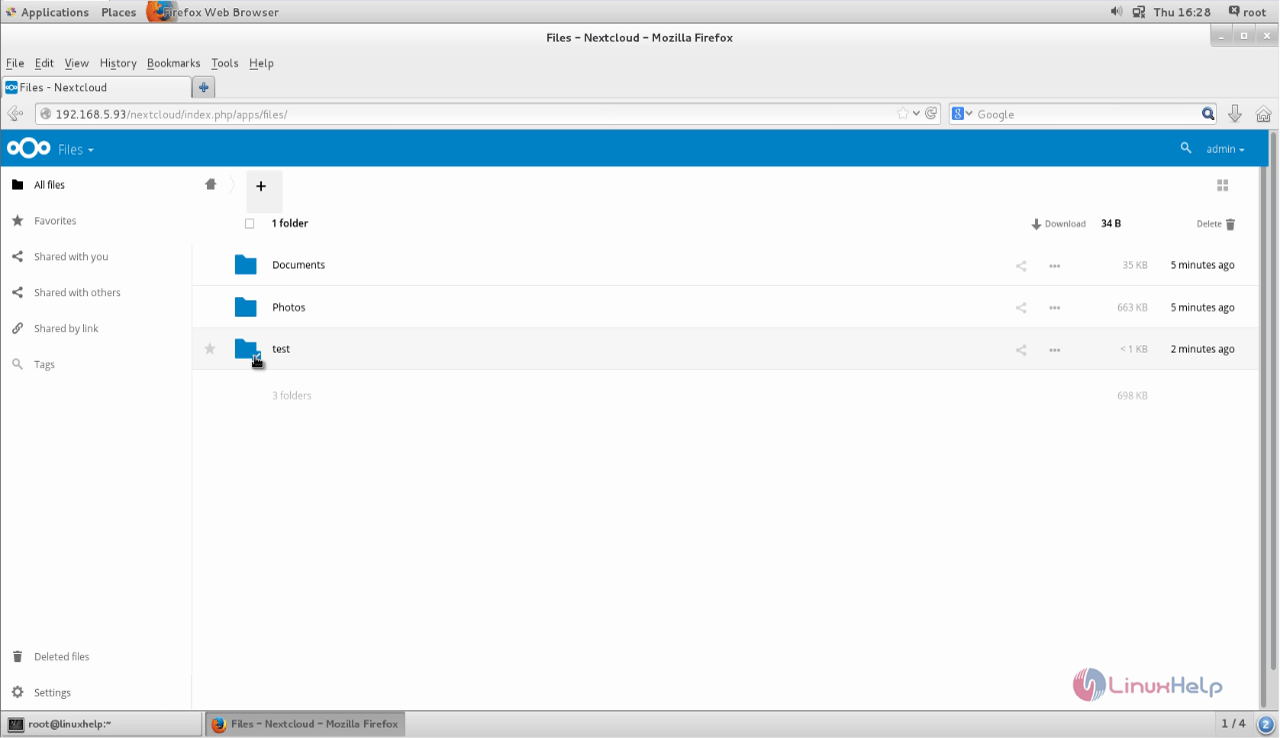
To create new folder, click " +" (add) icon.
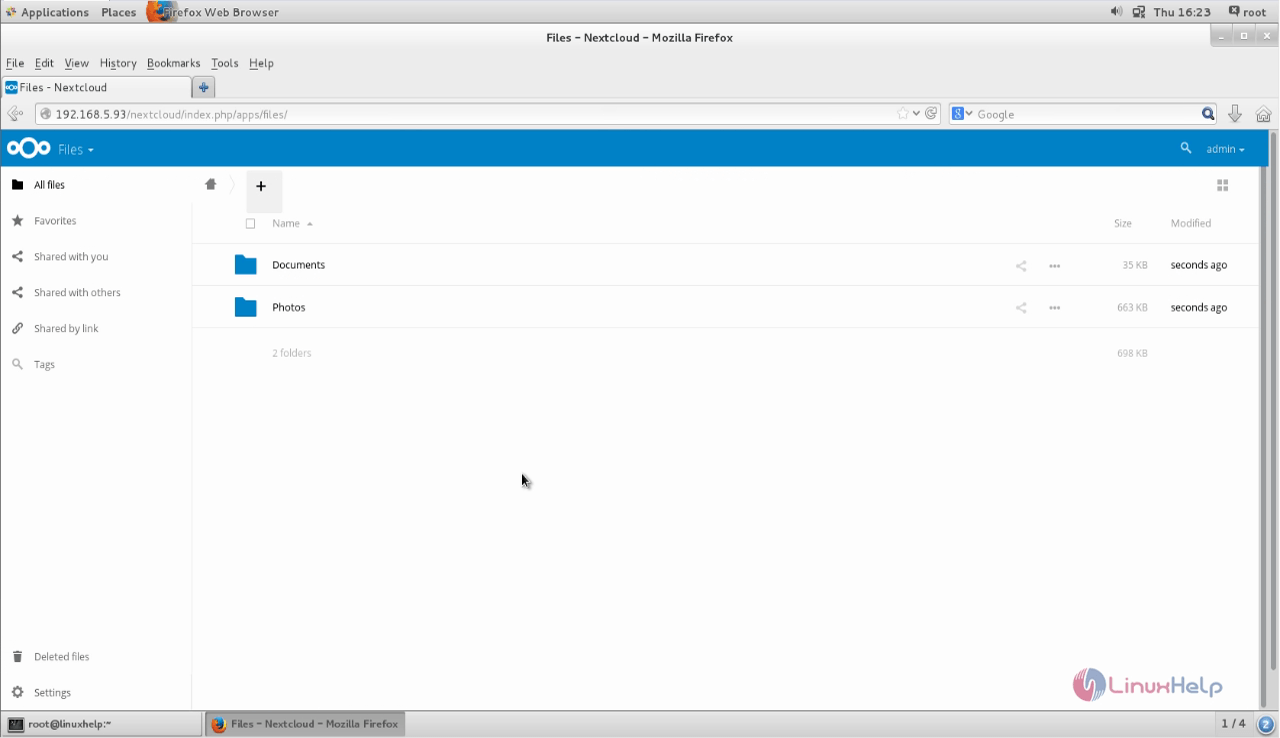
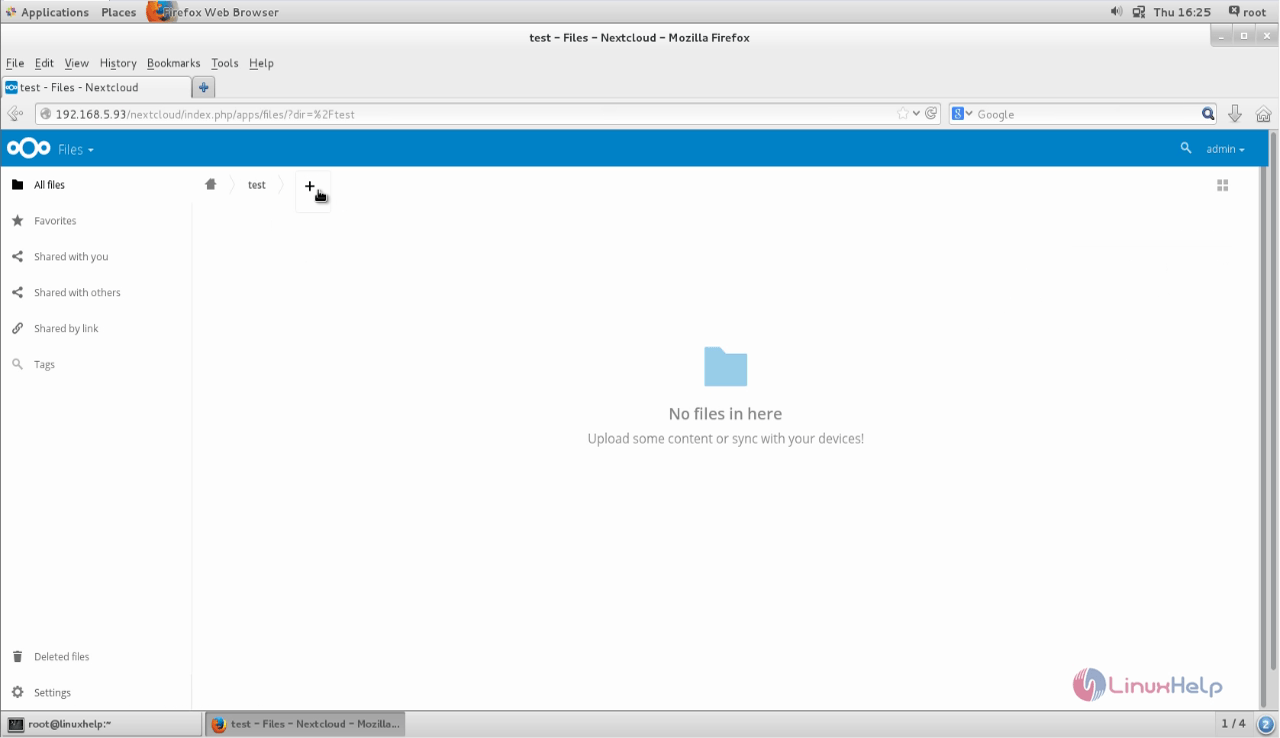
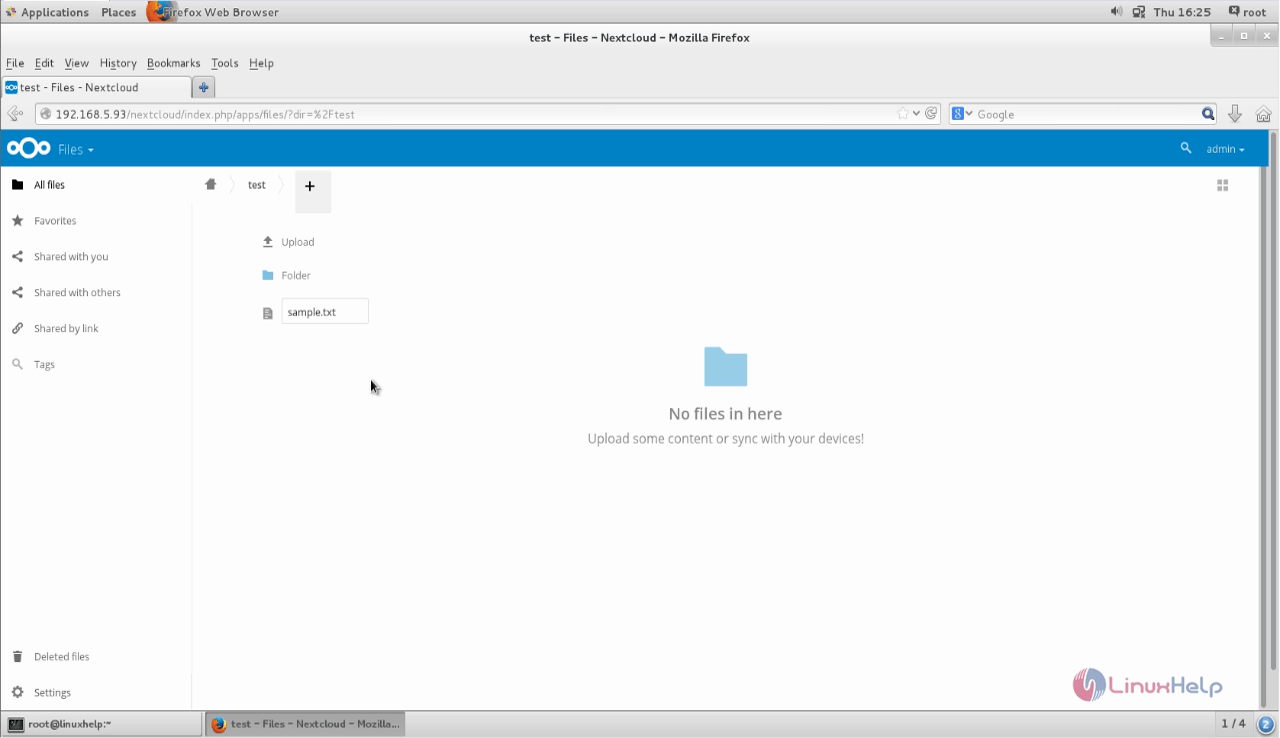
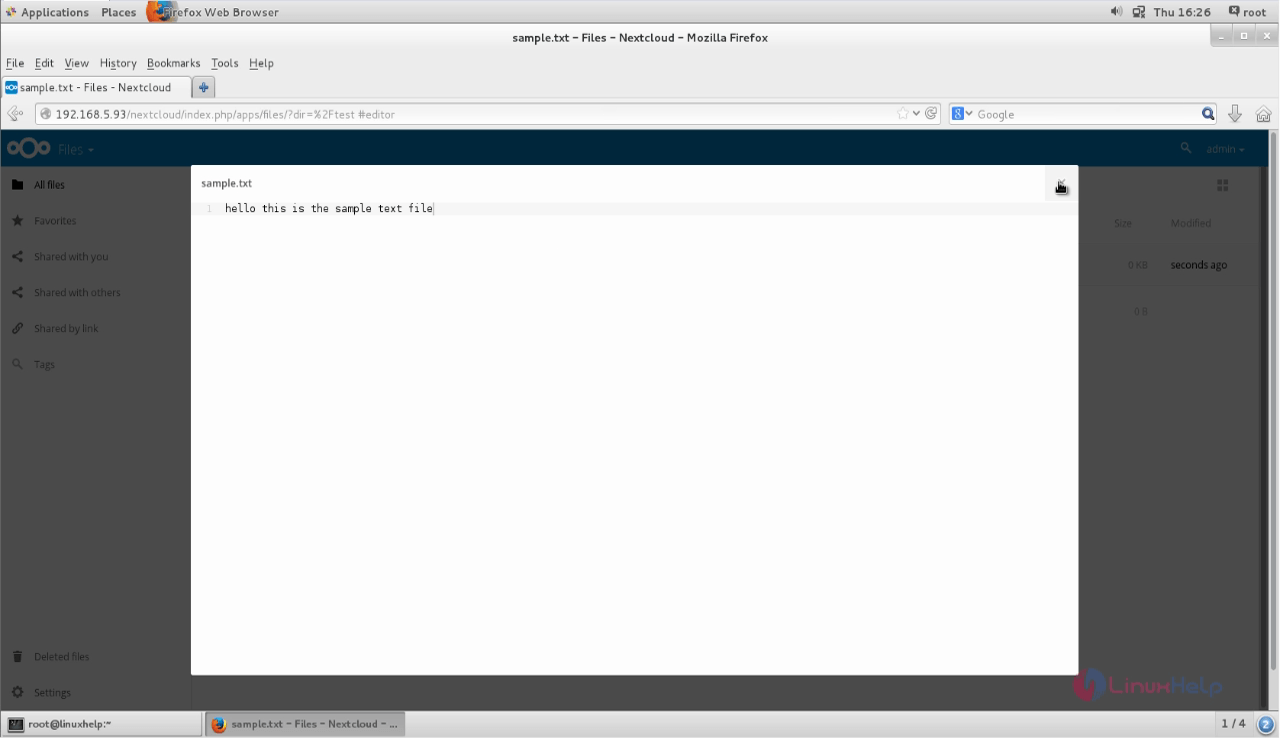
Open the created folder and add a sample text file.
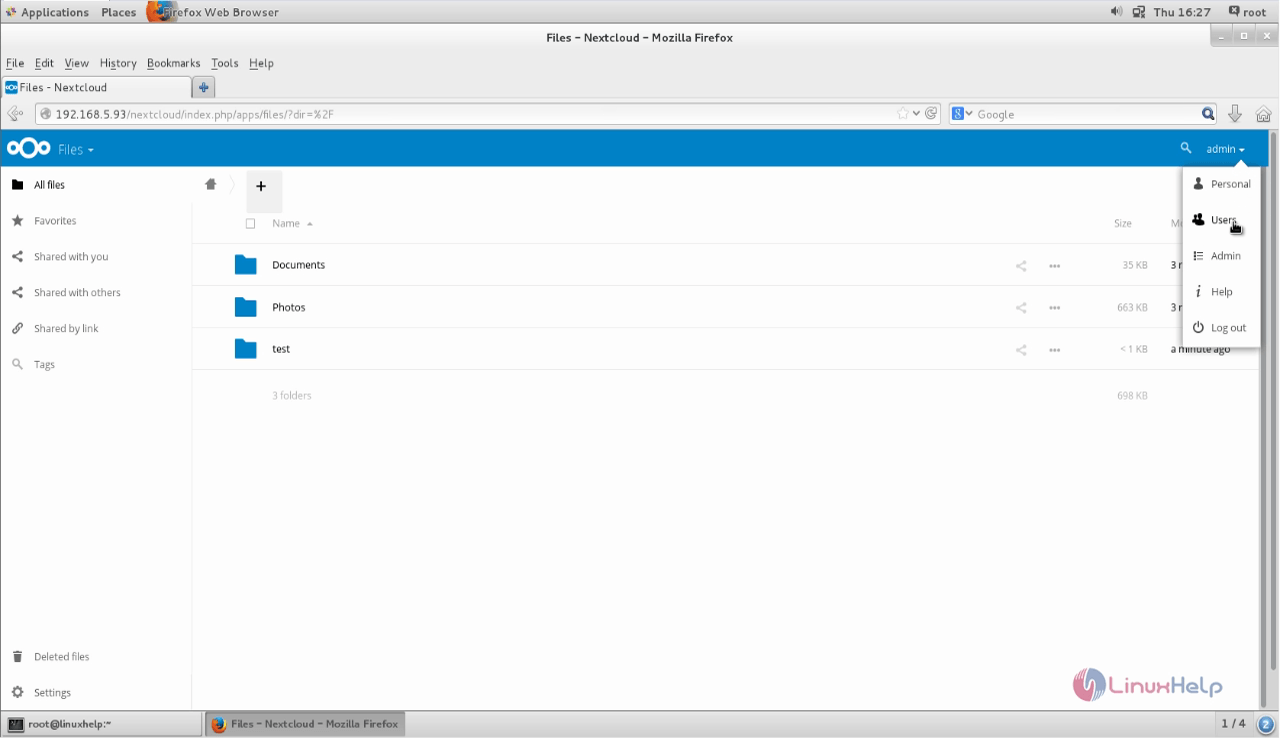
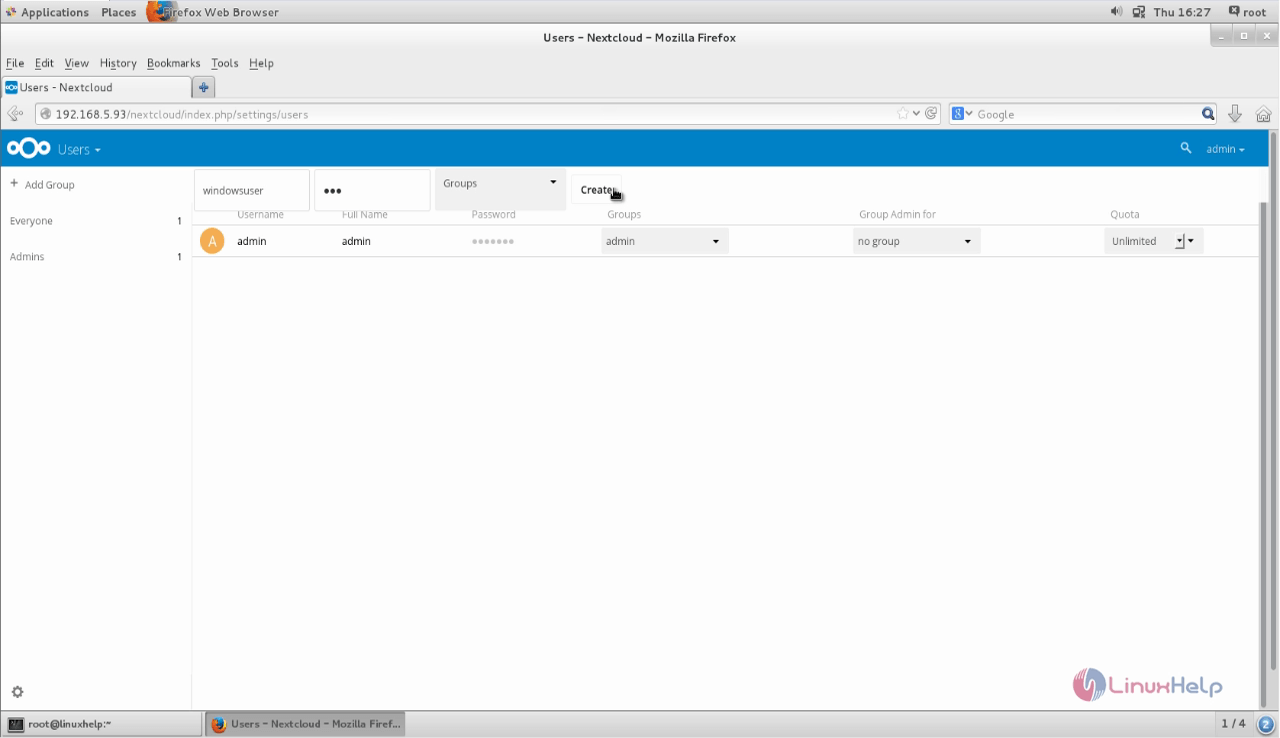
To add a new user, Go to Admin &rarr Users
Click create button.
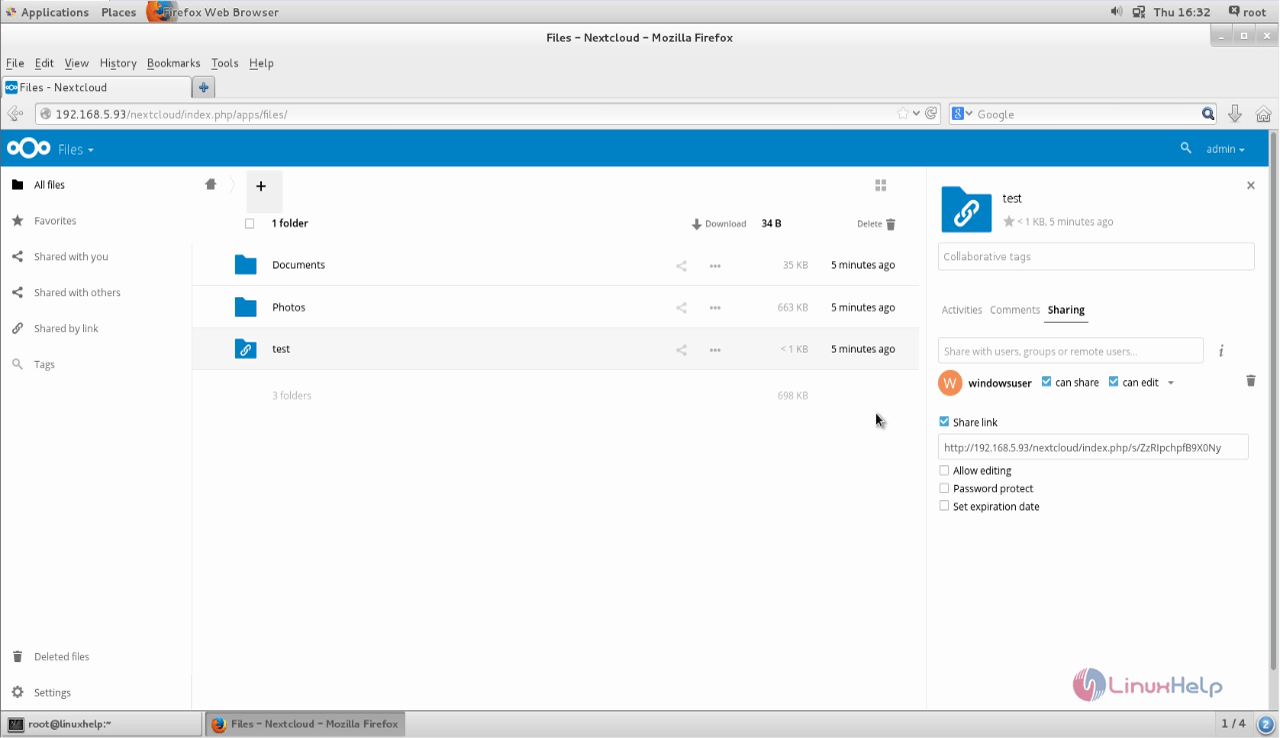
To share the folder with specified user, select the folder.
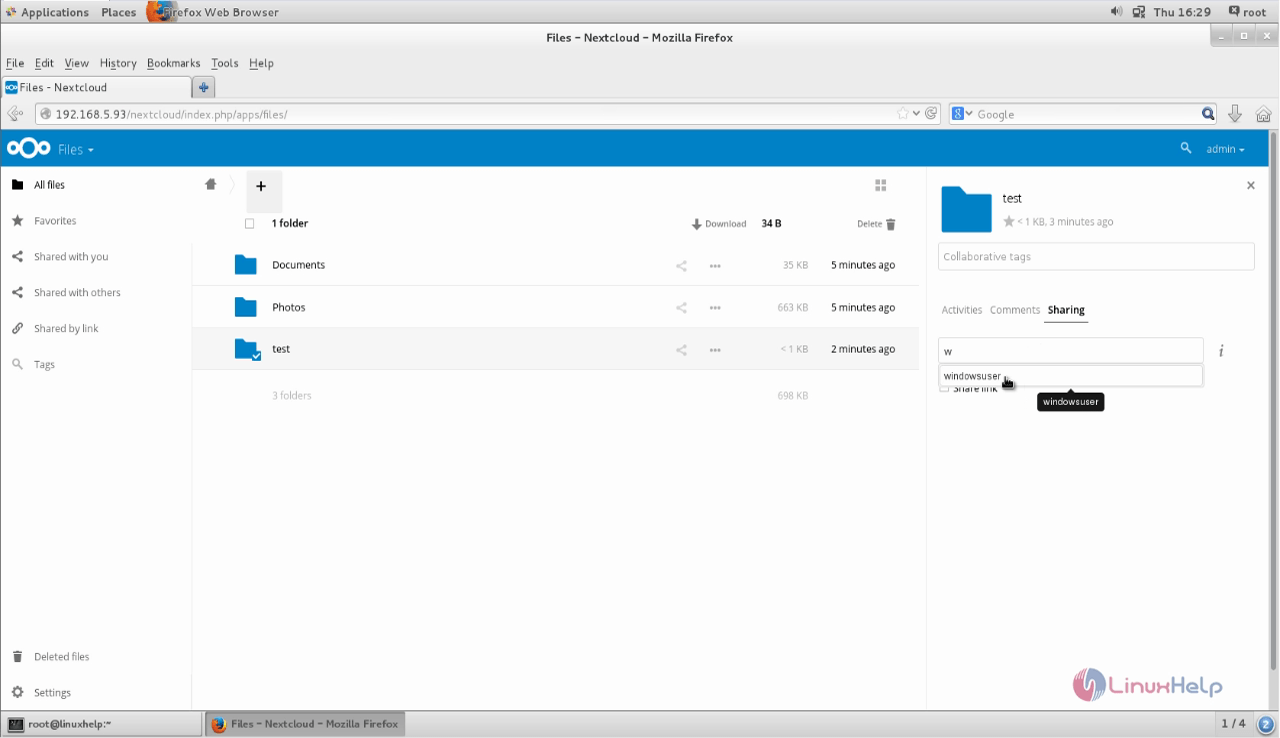
Click Share icon and choose the user.snap 15
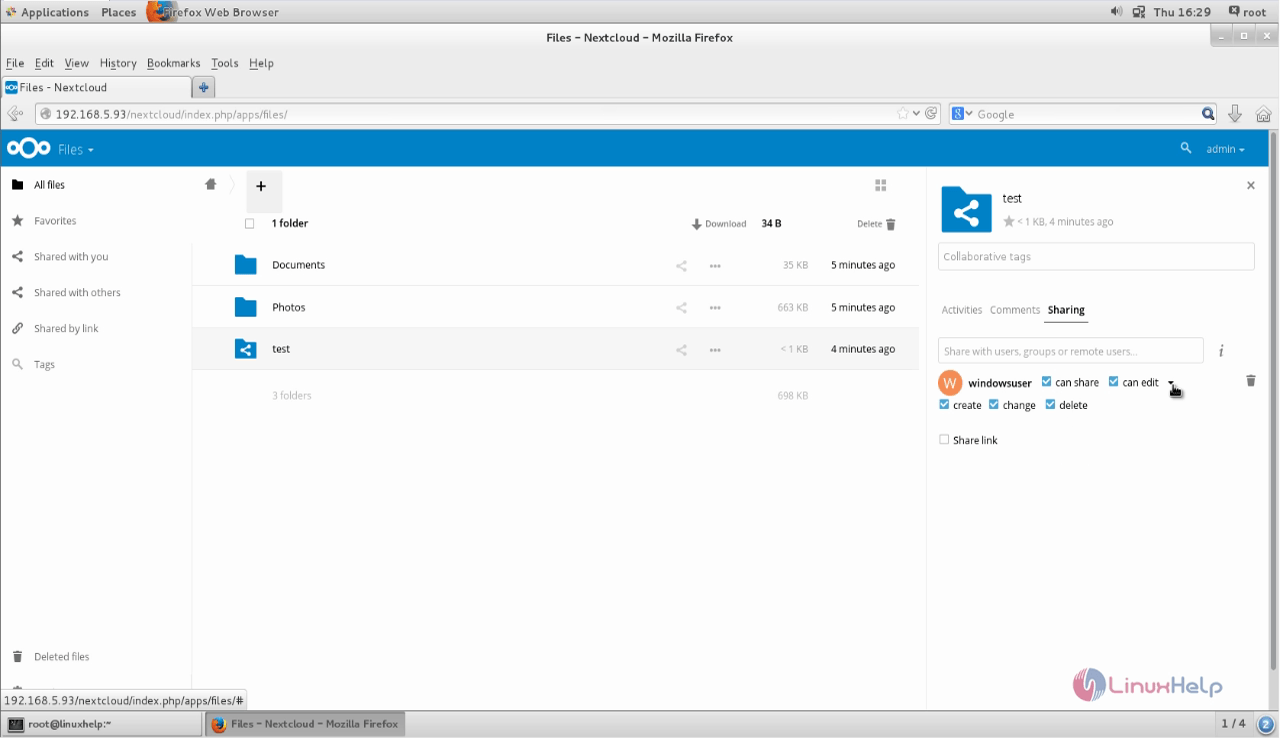
Click share link to share a link of the folder.
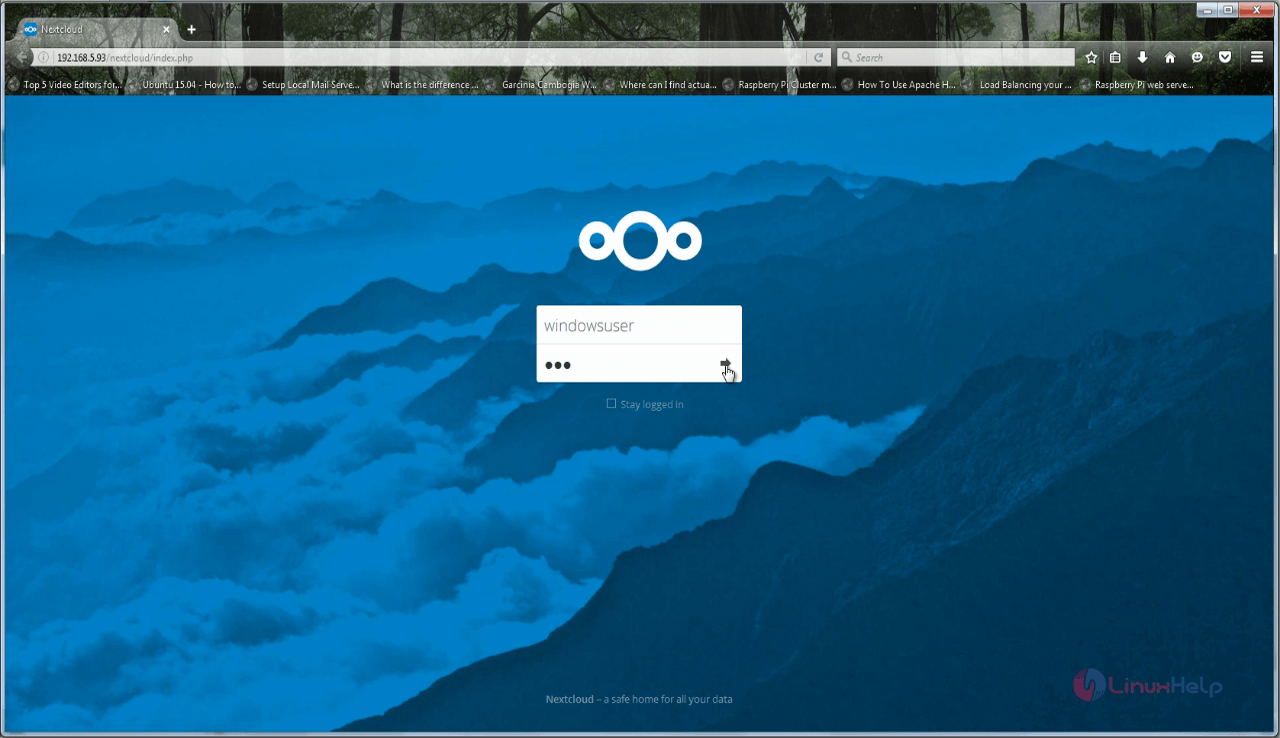
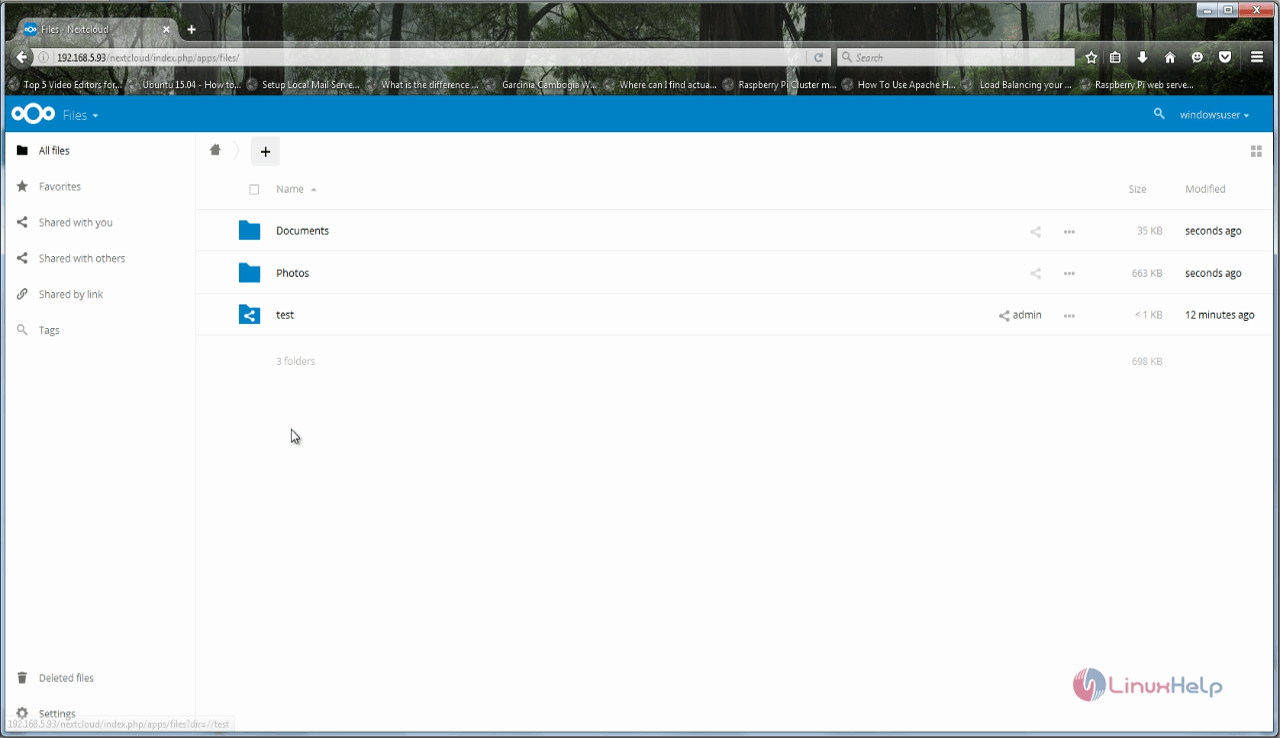
Now lets check it by accessing the nextcloud server with user name.
Comments ( 0 )
No comments available