How to Configure Windows Client Setup with Ansible on Oracle Linux 8.5
- 00:52 $PSVersionTable
- 01:17 https://github.com/ansible/ansible/blob/devel/examples/scripts/ConfigureRemotingForAnsible.ps1 , Paste 453 lines code in powershell
- 01:33 cat /etc/os-release
- 01:52 yum install python3-pip
- 02:17 pip3 install pywinrm
- 02:39 vim /etc/ansible/hosts
- 05:30 vim test.yml
- 07:36 ansible-playbook test.yml --syntax-check playbook: test.yml
- 07:59 ansible-playbook test.yml -v
To Configure Windows Client Setup with Ansible on Oracle Linux 8.5
Introduction:
Ansible is an open-source automation tool used to manage various configurations and application deployments. Both Unix-like and Windows-based systems can be configured with it. Prerequisite: Master Server Requirements: python3-pip pywinrm (python package)
Windows Requirements: powershell 3+ Dot net 4
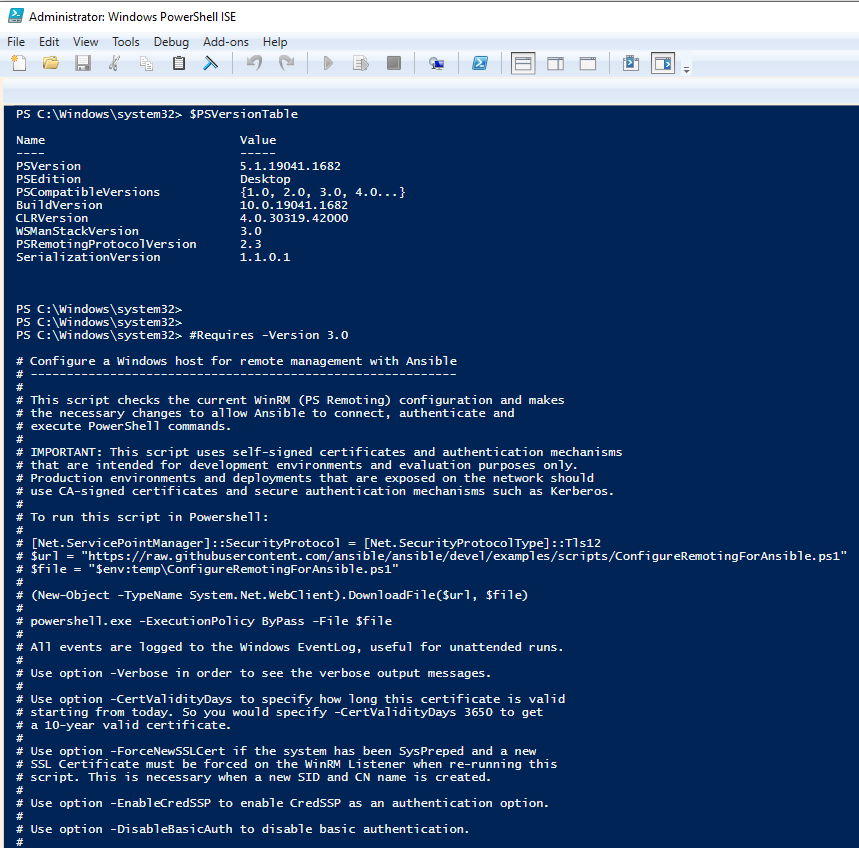
Step 1: Open the “Power Shell ISE” in windows as Administrator and check the version by using the below command
PS C:\Windows\system32> $PSVersionTable

Name                           Value
----                           -----
PSVersion                      5.1.19041.1682
PSEdition                      Desktop
PSCompatibleVersions           {1.0, 2.0, 3.0, 4.0...}
BuildVersion                   10.0.19041.1682
CLRVersion                     4.0.30319.42000
WSManStackVersion              3.0
PSRemotingProtocolVersion      2.3
SerializationVersion           1.1.0.1
Step 2: Copy the 453 lines of code by using the below command
PS C:\Windows\system32> https://github.com/ansible/ansible/blob/devel/examples/scripts/ConfigureRemotingForAnsible.ps1 , Paste 453 lines code in powershell
Step 3: Need to check the OS version
[linux@linuxhelp ~]$ cat /etc/os-release
NAME="Oracle Linux Server"

VERSION="8.5"
ID="ol"
ID_LIKE="fedora"
VARIANT="Server"
VARIANT_ID="server"
VERSION_ID="8.5"
PLATFORM_ID="platform:el8"
PRETTY_NAME="Oracle Linux Server 8.5"
ANSI_COLOR="0;31"
CPE_NAME="cpe:/o:oracle:linux:8:5:server"
HOME_URL="https://linux.oracle.com/"
BUG_REPORT_URL="https://bugzilla.oracle.com/"

ORACLE_BUGZILLA_PRODUCT="Oracle Linux 8"
ORACLE_BUGZILLA_PRODUCT_VERSION=8.5
ORACLE_SUPPORT_PRODUCT="Oracle Linux"
ORACLE_SUPPORT_PRODUCT_VERSION=8.5
Step 4: Next need to install python package by using the below command
[root@linuxhelp ~]# yum install python3-pip
Last metadata expiration check: 1 day, 4:20:38 ago on Fri 09 Sep 2022 11:55:10 AM IST.
Package python3-pip-9.0.3-20.el8.noarch is already installed.
Dependencies resolved.
================================================================================================
 Package                    Architecture  Version                Repository                Size
================================================================================================
Upgrading:
 platform-python-pip        noarch        9.0.3-22.el8           ol8_baseos_latest        1.6 M
 python3-pip                noarch        9.0.3-22.el8           ol8_appstream             20 k

Transaction Summary
================================================================================================
Upgrade  2 Packages


Total download size: 1.6 M
Is this ok [y/N]: y
Downloading Packages:
(1/2): python3-pip-9.0.3-22.el8.noarch.rpm                                 100 kB/s |  20 kB     00:00
(2/2): platform-python-pip-9.0.3-22.el8.noarch.rpm                         4.7 MB/s | 1.6 MB     00:00
---------------------------------------------------------------------------------------------------------
Total                                                                      4.7 MB/s | 1.6 MB     00:00
Running transaction check
Transaction check succeeded.
Running transaction test
Transaction test succeeded.
Running transaction
  Preparing        :                                                                                   1/1
  Upgrading        : platform-python-pip-9.0.3-22.el8.noarch                                           1/4
  Upgrading        : python3-pip-9.0.3-22.el8.noarch                                                   2/4
  Cleanup          : python3-pip-9.0.3-20.el8.noarch                                                   3/4
  Cleanup          : platform-python-pip-9.0.3-20.el8.noarch                                           4/4
  Running scriptlet: platform-python-pip-9.0.3-20.el8.noarch                                           4/4
  Verifying        : platform-python-pip-9.0.3-22.el8.noarch                                           1/4
  Verifying        : platform-python-pip-9.0.3-20.el8.noarch                                           2/4
  Verifying        : python3-pip-9.0.3-22.el8.noarch                                                   3/4
  Verifying        : python3-pip-9.0.3-20.el8.noarch                                                   4/4
Upgraded:
  platform-python-pip-9.0.3-22.el8.noarch                  python3-pip-9.0.3-22.el8.noarch

Complete!

 [root@linuxhelp ~]# pip3 install pywinrm
WARNING: Running pip install with root privileges is generally not a good idea. Try `pip3 install --user` instead.
Collecting pywinrm
  Downloading https://files.pythonhosted.org/packages/5c/1a/74bdbb7a3f8a6c1d2254c39c53c2d388529a314366130147d180522c59a3/pywinrm-0.4.3-py2.py3-none-any.whl (44kB)
    100% |████████████████████████████████| 51kB 1.4MB/s
Requirement already satisfied: six in /usr/lib/python3.6/site-packages (from pywinrm)
Collecting requests-ntlm>=1.1.0 (from pywinrm)
  Downloading https://files.pythonhosted.org/packages/03/4b/8b9a1afde8072c4d5710d9fa91433d504325821b038e00237dc8d6d833dc/requests_ntlm-1.1.0-py2.py3-none-any.whl
Requirement already satisfied: requests>=2.9.1 in /usr/lib/python3.6/site-packages (from pywinrm)
Collecting xmltodict (from pywinrm)
  Downloading https://files.pythonhosted.org/packages/94/db/fd0326e331726f07ff7f40675cd86aa804bfd2e5016c727fa761c934990e/xmltodict-0.13.0-py2.py3-none-any.whl
Requirement already satisfied: cryptography>=1.3 in /usr/lib64/python3.6/site-packages (from requests-ntlm>=1.1.0->pywinrm)
Collecting ntlm-auth>=1.0.2 (from requests-ntlm>=1.1.0->pywinrm)
  Downloading https://files.pythonhosted.org/packages/ff/84/97c550164b54942b0e908c31ef09d9469f3ba4cd7332a671e2125732f63b/ntlm_auth-1.5.0-py2.py3-none-any.whl
Requirement already satisfied: chardet<3.1.0,>=3.0.2 in /usr/lib/python3.6/site-packages (from requests>=2.9.1->pywinrm)
Requirement already satisfied: idna<2.8,>=2.5 in /usr/lib/python3.6/site-packages (from requests>=2.9.1->pywinrm)
Requirement already satisfied: urllib3<1.25,>=1.21.1 in /usr/lib/python3.6/site-packages (from requests>=2.9.1->pywinrm)
Requirement already satisfied: cffi!=1.11.3,>=1.8 in /usr/lib64/python3.6/site-packages (from cryptography>=1.3->requests-ntlm>=1.1.0->pywinrm)
Requirement already satisfied: pycparser in /usr/lib/python3.6/site-packages (from cffi!=1.11.3,>=1.8->cryptography>=1.3->requests-ntlm>=1.1.0->pywinrm)
Installing collected packages: ntlm-auth, requests-ntlm, xmltodict, pywinrm
Successfully installed ntlm-auth-1.5.0 pywinrm-0.4.3 requests-ntlm-1.1.0 xmltodict-0.13.0
Step 5 : next need to edit in the host file
[root@linuxhelp ~]# vim /etc/ansible/hosts
[windows]
192.168.6.51

[windows:vars]
ansible_user=Admin
ansible_password=Linuxc#4
ansible_port=5986
ansible_connection=winrm
ansible_winrm_server_cert_validation=ignore

[root@linuxhelp ~]# ansible windows -m win_ping
192.168.6.51 | SUCCESS => {
   "changed": false,
   "ping": "pong"
}
Step 6: Need to edit the yml file and give the windows location in the path
[root@linuxhelp ~]# vim test.yml
- hosts: windows
  gather_facts: true
  tasks:
  - name: create directory
    win_file:
            path: c:\Ansible
            state: directory
Step 7: Need to check the syntax by running the below command
[root@linuxhelp ~]# ansible-playbook test.yml --syntax-check
playbook: test.yml
Step 8: Run the test yml file by using the below command
[root@linuxhelp ~]# ansible-playbook test.yml -v
Using /etc/ansible/ansible.cfg as config file

PLAY [windows] ********************************************************************************************

TASK [Gathering Facts] ************************************************************************************
ok: [192.168.6.51]

TASK [create directory] ***********************************************************************************
ok: [192.168.6.51] => {"changed": false}

PLAY RECAP ************************************************************************************************
192.168.6.51               : ok=2    changed=0    unreachable=0    failed=0    skipped=0    rescued=0    ignored=0
Step 9: Hence a folder named “Ansible” is created in windows client system as shown in the below image
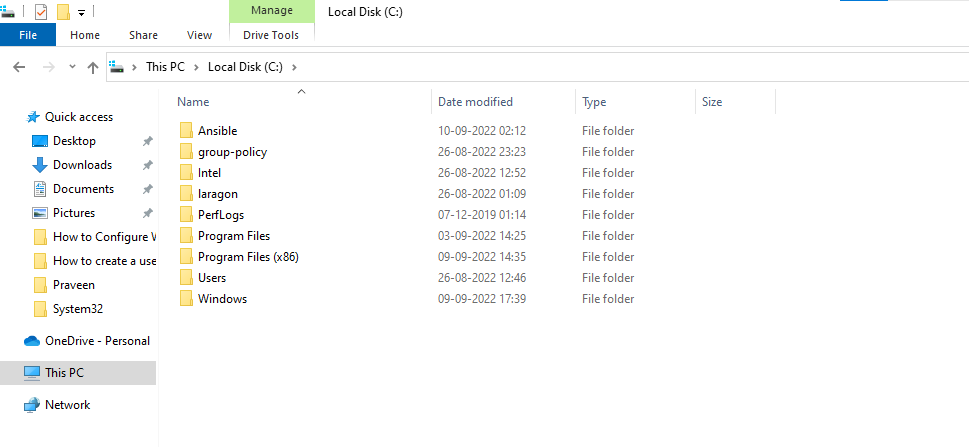
Conclusion:
By this how to Configure Windows Client Setup with Ansible on Oracle Linux 8.5 has come to an end.
Comments ( 0 )
No comments available