How to install and configure Pluck CMS on Fedora 34
To Install And Configure Pluck CMS On Fedora 34
Introduction:
Pluck is an open-source content management system written in the PHP scripting language that is used for creating web pages by people without advanced programming skills.
Step 1: Check the installed version of OS by using the below command
[root@linuxhelp html]# cat /etc/os-release
NAME=Fedora
VERSION="34 (Workstation Edition)"
ID=fedora
VERSION_ID=34
VERSION_CODENAME=""
PLATFORM_ID="platform:f34"
PRETTY_NAME="Fedora 34 (Workstation Edition)"
ANSI_COLOR="0;38;2;60;110;180"
LOGO=fedora-logo-icon
CPE_NAME="cpe:/o:fedoraproject:fedora:34"
HOME_URL="https://fedoraproject.org/"
DOCUMENTATION_URL="https://docs.fedoraproject.org/en-US/fedora/34/system-administrators-guide/"
SUPPORT_URL="https://fedoraproject.org/wiki/Communicating_and_getting_help"
BUG_REPORT_URL="https://bugzilla.redhat.com/"
REDHAT_BUGZILLA_PRODUCT="Fedora"
REDHAT_BUGZILLA_PRODUCT_VERSION=34
REDHAT_SUPPORT_PRODUCT="Fedora"
REDHAT_SUPPORT_PRODUCT_VERSION=34
PRIVACY_POLICY_URL="https://fedoraproject.org/wiki/Legal:PrivacyPolicy"
Step 2: Download the pluck CMS by using the below command
[root@linuxhelp ~]# wget https://github.com/pluck-cms/pluck/archive/master.zip
--2022-02-13 02:33:41--  https://github.com/pluck-cms/pluck/archive/master.zip
Resolving github.com (github.com)... 13.234.176.102
Connecting to github.com (github.com)|13.234.176.102|:443... connected.
HTTP request sent, awaiting response... 302 Found
Location: https://codeload.github.com/pluck-cms/pluck/zip/master [following]
--2022-02-13 02:33:42--  https://codeload.github.com/pluck-cms/pluck/zip/master
Resolving codeload.github.com (codeload.github.com)... 13.233.43.20
Connecting to codeload.github.com (codeload.github.com)|13.233.43.20|:443... connected.
HTTP request sent, awaiting response... 200 OK
Length: unspecified [application/zip]
Saving to: ‘master.zip’

master.zip                 [   <=>                     ]   1.67M  3.87MB/s    in 0.4s

2022-02-13 02:33:43 (3.87 MB/s) - ‘master.zip’ saved [1751078]
Step 3: Then unzip the downloaded file by using the below command
[root@linuxhelp ~]# unzip master.zip -d /var/www/html/
Archive:  master.zip
1d345ae8575835031fc09f237716b48521df06fa
   creating: /var/www/html/pluck-master/
  inflating: /var/www/html/pluck-master/README.md
  inflating: /var/www/html/pluck-master/SECURITY.md

 inflating: /var/www/html/pluck-master/admin.php
   creating: /var/www/html/pluck-master/data/
   creating: /var/www/html/pluck-master/data/image/
  inflating: /var/www/html/pluck-master/data/image/AUTHORS
 extracting: /var/www/html/pluck-master/data/image/add.png
 extracting: /var/www/html/pluck-master/data/image/add_small.png
  inflating: /var/www/html/pluck-master/data/image/back.jpg
  inflating: /var/www/html/pluck-master/data/image/back_hover.jpg
 extracting: /var/www/html/pluck-master/data/image/button_cancel.png
 extracting: /var/www/html/pluck-master/data/image/button_document_save.png
 extracting: /var/www/html/pluck-master/data/image/button_save.png
  inflating: /var/www/html/pluck-master/data/image/clone.png
 extracting: /var/www/html/pluck-master/data/image/credits.png
 extracting: /var/www/html/pluck-master/data/image/delete.png
 extracting: /var/www/html/pluck-master/data/image/delete_from_trash.png
 extracting: /var/www/html/pluck-master/data/image/delete_from_trash_small.png
 extracting: /var/www/html/pluck-master/data/image/down.png
 extracting: /var/www/html/pluck-master/data/image/download.png
 extracting: /var/www/html/pluck-master/data/image/download_small.png
 extracting: /var/www/html/pluck-master/data/image/edit.png
 extracting: /var/www/html/pluck-master/data/image/error.png
 extracting: /var/www/html/pluck-master/data/image/error_1.png
 extracting: /var/www/html/pluck-master/data/image/error_2.png
 extracting: /var/www/html/pluck-master/data/image/error_3.png
  inflating: /var/www/html/pluck-master/data/image/favicon.ico
extracting: /var/www/html/pluck-master/data/trash/.trash
   creating: /var/www/html/pluck-master/docs/
  inflating: /var/www/html/pluck-master/docs/CHANGES
  inflating: /var/www/html/pluck-master/docs/COPYING

 inflating: /var/www/html/pluck-master/docs/README
  inflating: /var/www/html/pluck-master/docs/UPDATING
  inflating: /var/www/html/pluck-master/docs/update.php
   creating: /var/www/html/pluck-master/files/
  inflating: /var/www/html/pluck-master/files/.htaccess
   creating: /var/www/html/pluck-master/images/
  inflating: /var/www/html/pluck-master/images/.htaccess
  inflating: /var/www/html/pluck-master/index.php
  inflating: /var/www/html/pluck-master/install.php
  inflating: /var/www/html/pluck-master/login.php
  inflating: /var/www/html/pluck-master/requirements.php
  inflating: /var/www/html/pluck-master/robots.txt
Step 4: Now change directory to html by using the below command
[root@linuxhelp ~]# cd /var/www/html/
Step 5: Now list the directory by using the below command
[root@linuxhelp html]# ls
pluck-master
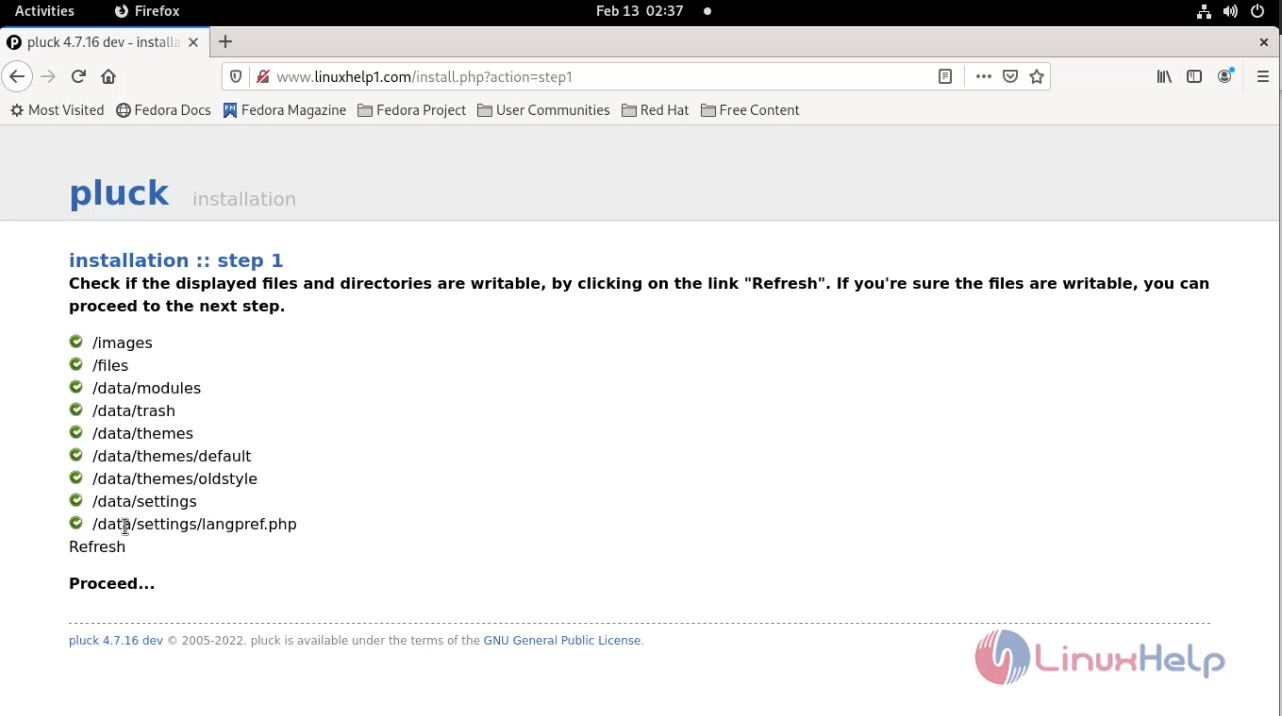
Step 6: Configure ownership and permission for directory by using the below command
[root@linuxhelp html]# chown -R apache. ./
[root@linuxhelp html]# chmod -R 755 ./
Step 7: Configure the virtualhost for pluck CMS by using the below command
[root@linuxhelp html]# vim /etc/httpd/conf.d/pluck.conf
<Virtualhost *:80>
  Servername www.linuxhelp1.com
        documentroot /var/www/html/pluck-master

<directory /var/www/html/pluck-master>
allowoverride all
allow from all
</directory>
</Virtualhost>
Step 8: After the virtualhost configuration, edit the host entry by using the below command
[root@linuxhelp html]# vim /etc/hosts
Step 9: Once all configuration done, restart the apache service to update the changes by using the below command
[root@linuxhelp html]# systemctl restart httpd
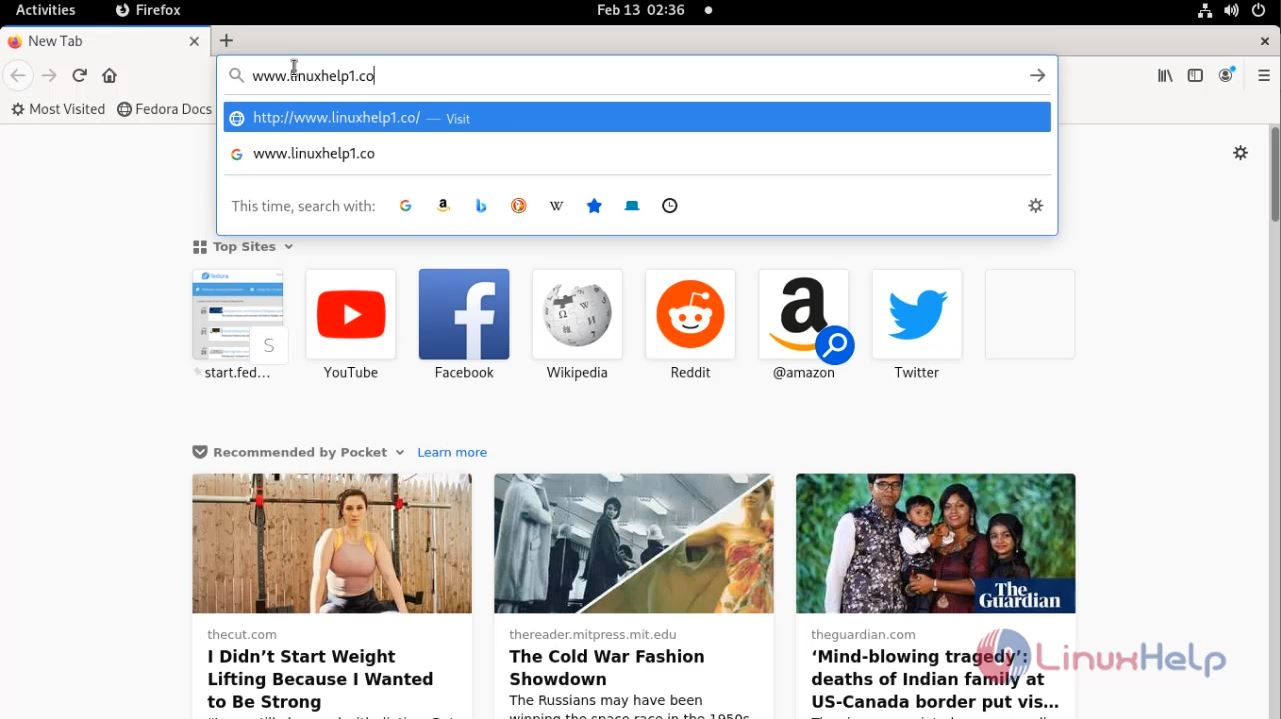
Step 10: Go to browser then provide your domain name as shown in the below image
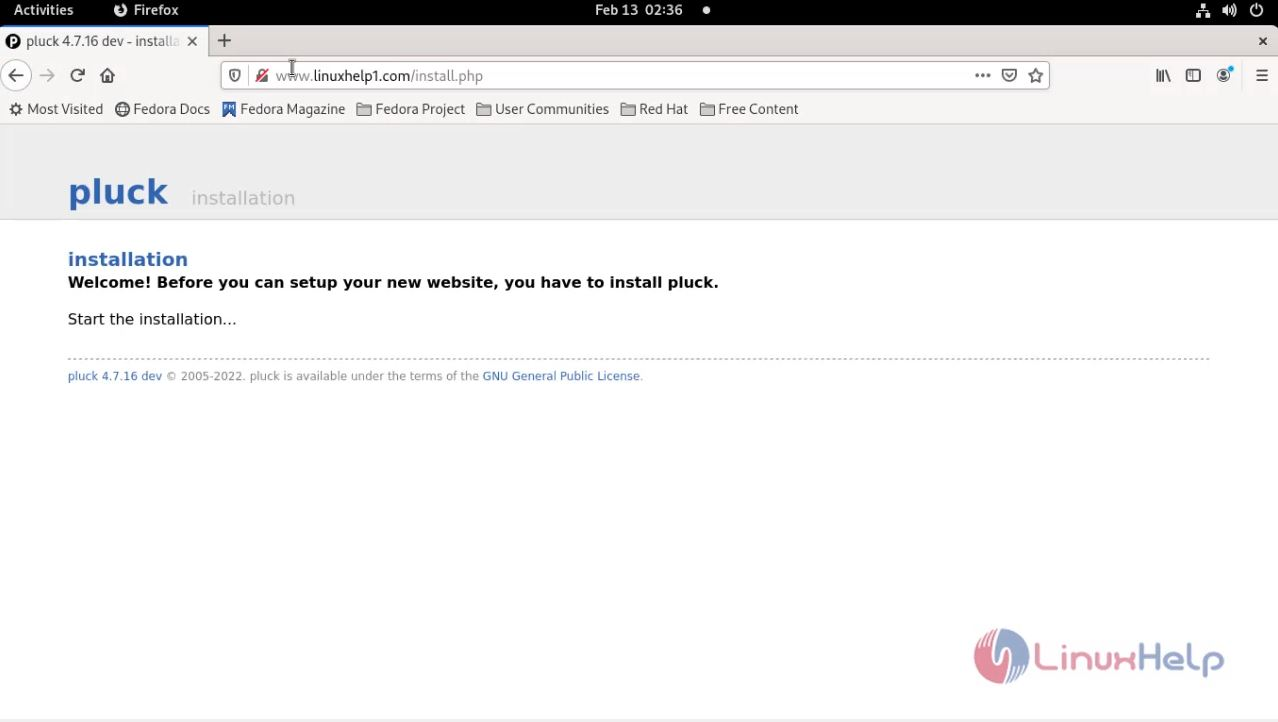
Step 11: Click on the option to start installation as shown in the below image
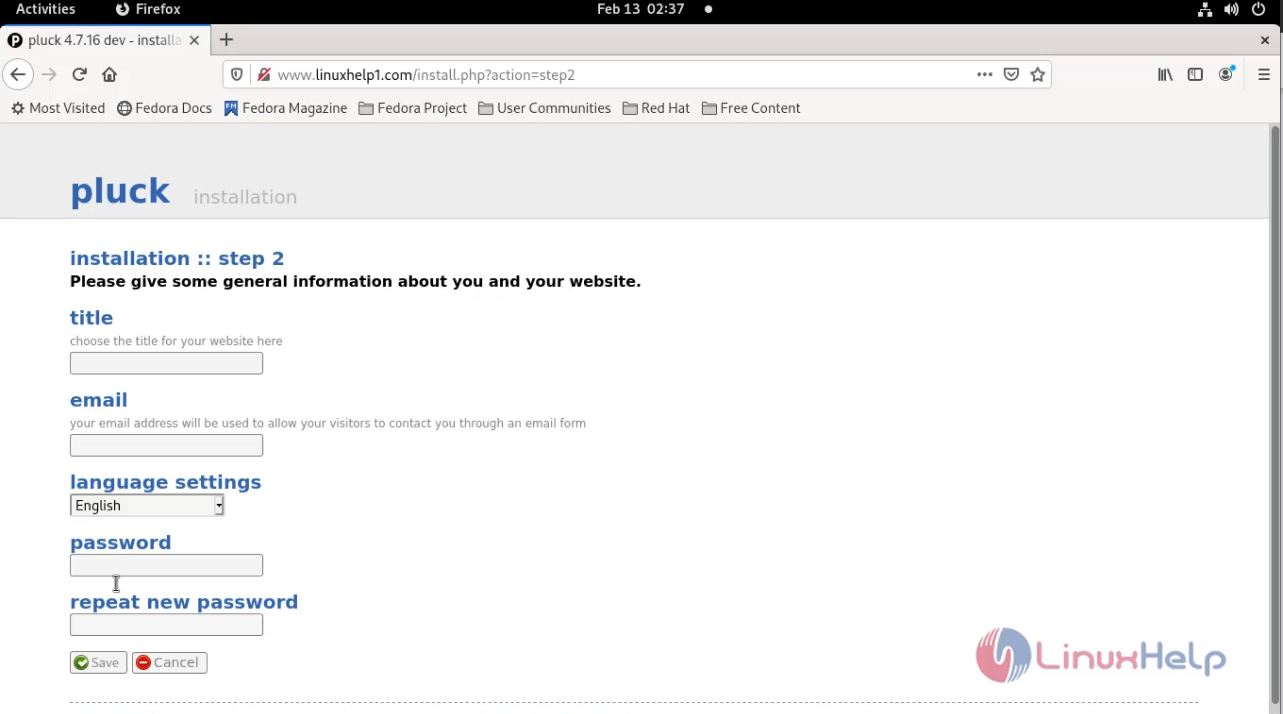
Step 12 Configure general information for your website then click on save as shown in the below image
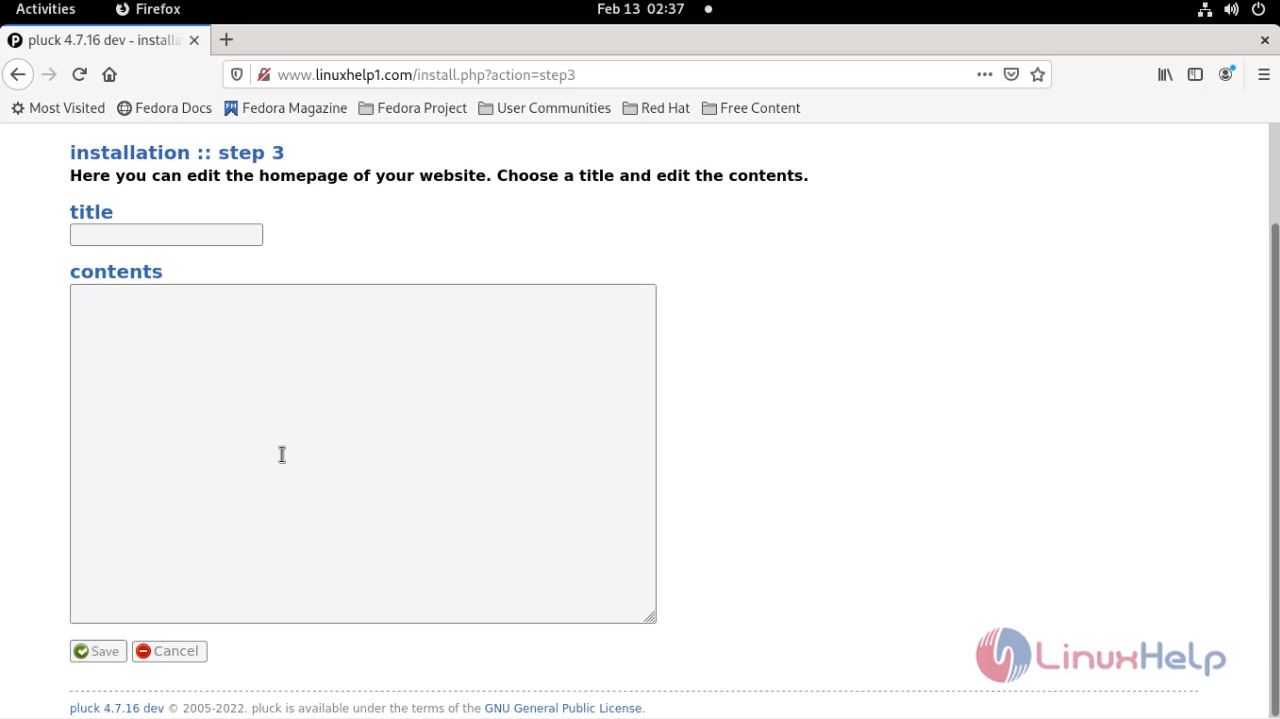
Step 13: Create homepage content then click on save as shown in the below image
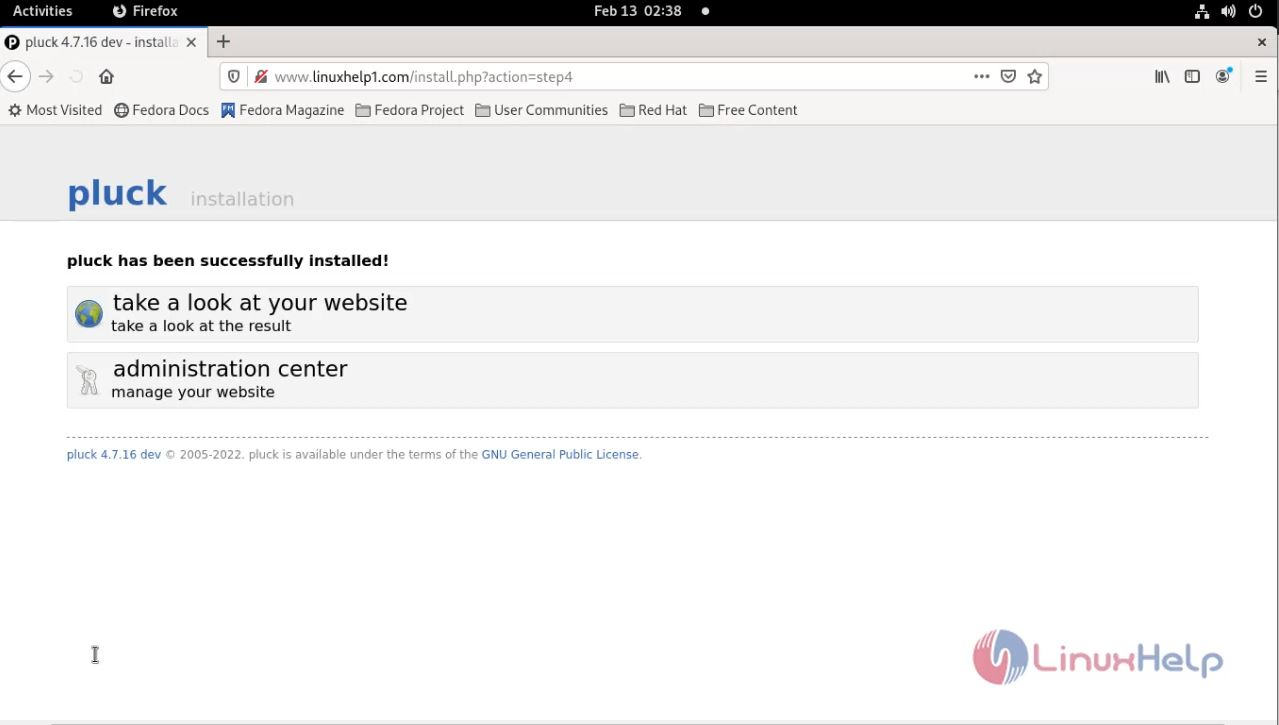
Step 14: Click here to visit login page as shown in the below image
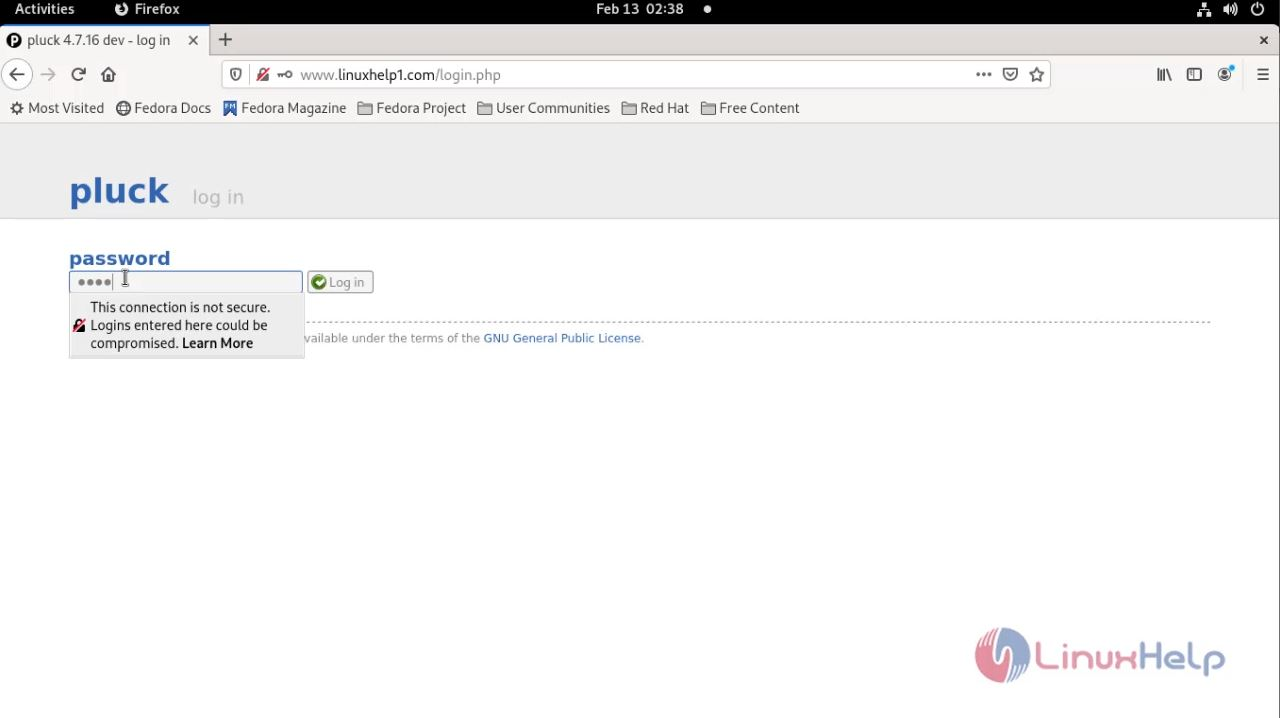
Step 15: Enter admin password as shown in the below image
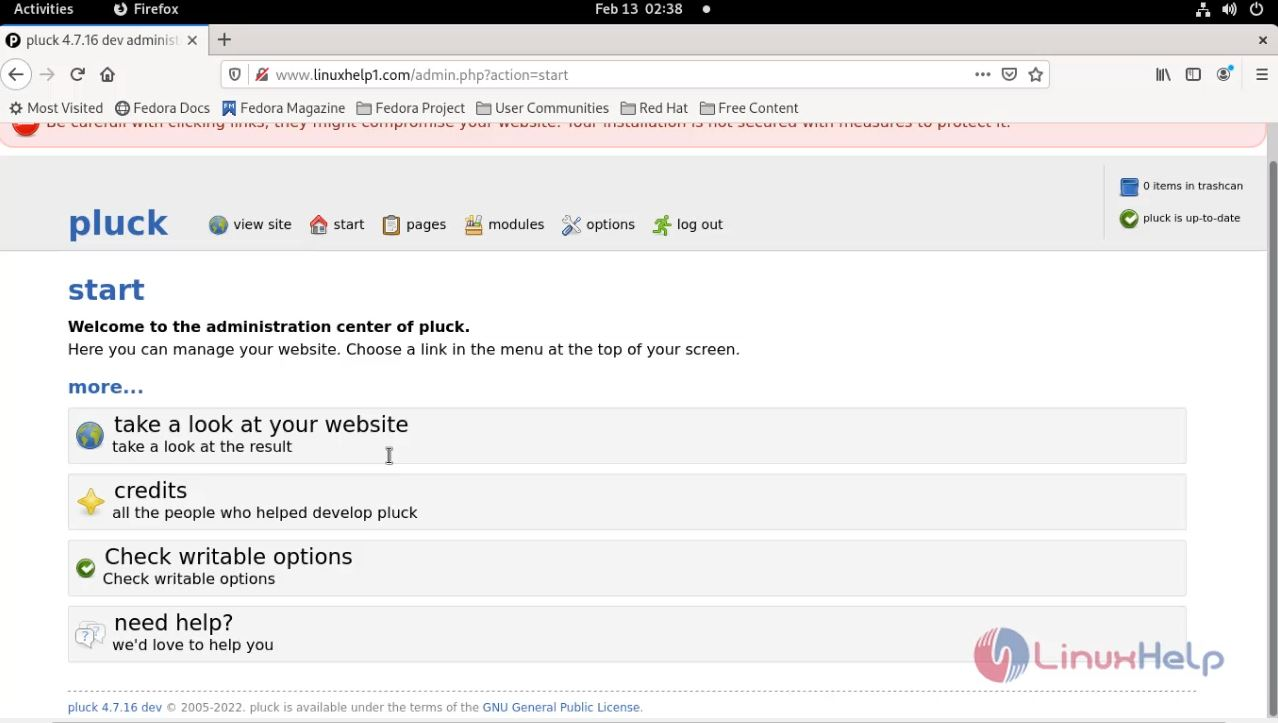
Step 16: Then Click to visit your home page as shown in the below image
With this, the method to install Pluck CMS on Fedora 34 comes to an end.
Comments ( 0 )
No comments available