How To Install and Configure SQUID - Part 1
To Install and Configure SQUID
Squid is a proxy/cache tool with a variety of acl configurations. This is used to reduce bandwidth and to increase response time. Used to filter traffic on HTTP, FTP and HTTPS. It also increase the speed for a web server via caching. Now we are going to see about the installation of squid proxy server in CentOS 6.
To Check the update
[root@linuxhelp user1]# yum update
To Install SQUID
Run the following command to install Squid.
[root@linuxhelp user1]# yum install squid
Resolving Dependencies
-->  Running transaction check
--->  Package squid.x86_64 7:3.1.23-16.el6_8.4 will be installed
-->  Finished Dependency Resolution
Dependencies Resolved
===================================================================================== Package                          Arch                              Version                                         Repository                          Size
=====================================================================================
Installing:
 squid                            x86_64                            7:3.1.23-16.el6_8.4                             updates                            1.8 M
Transaction Summary
=====================================================================================
Install       1 Package(s)
Total download size: 1.8 M
Installed size: 6.3 M
Is this ok [y/N]: y
Downloading Packages:
squid-3.1.23-16.el6_8.4.x86_64.rpm                                                                                                    | 1.8 MB     00:07
Running rpm_check_debug
Running Transaction Test
Transaction Test Succeeded
Running Transaction
  Installing : 7:squid-3.1.23-16.el6_8.4.x86_64                                                                                                          1/1
  Verifying  : 7:squid-3.1.23-16.el6_8.4.x86_64                                                                                                          1/1
Installed:
  squid.x86_64 7:3.1.23-16.el6_8.4
After installation, start the services.
[root@linuxhelp user1]# service squid start
Starting squid: .                                          [  OK  ]
To Configure SQUID
Open the squid.conf file located in /etc/squid/
[root@linuxhelp user1]# vim /etc/squid/squid.conf
Go to line No 49 and add your own rules to access.
Rules are always compiled using First come First serve method.
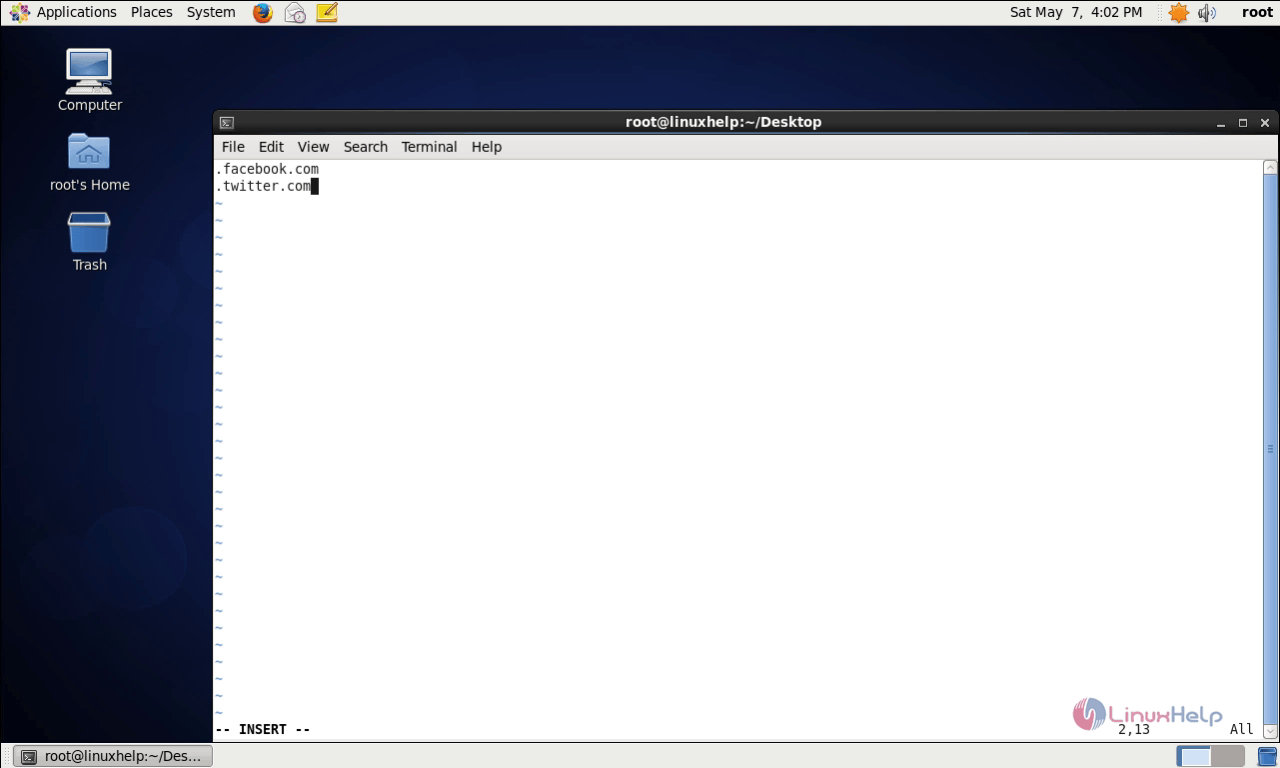
First create a text file with a list of domains that you want to block (or) allow. Here, we are going to block the following domains - Twitter and Facebook.
[root@linuxhelp user1]# vim /etc/squid/block.txt
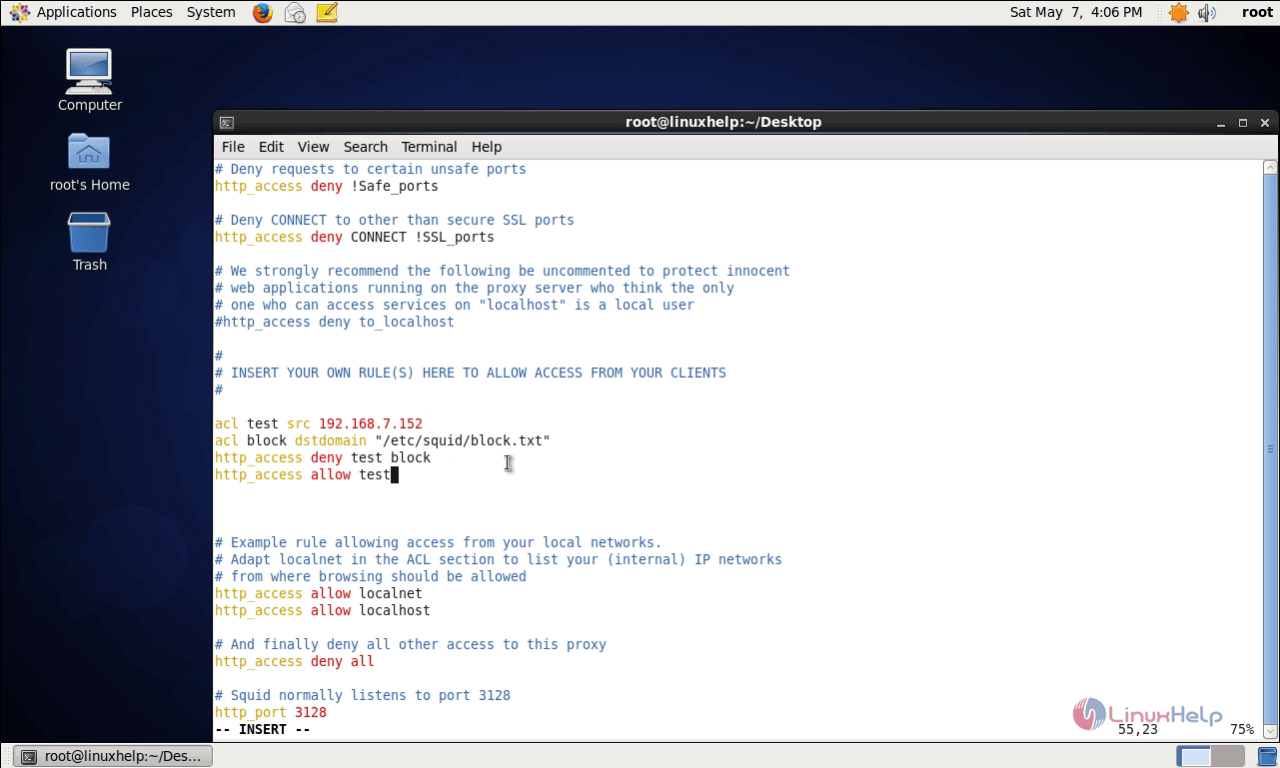
Now open the configuration file.
[root@linuxhelp user1]# vim /etc/squid/squid.conf
Add the acl rule to block the respective domains.
acl test src 192.168.7.152
acl block dstdomain " /etc/squid/block.txt"
http_access deny test block
http_access allow test
Explaination
1st line - Enter the source acl name as “ test” and entered the IP address/ network address (Ex : 192.168.7.0/24).
2nd line - Enter the acl name as “ block” and the path of the domain list file (/etc/squid/block.txt)
3rd line - Enter the “ deny” option along with acl name test and block. The domains mentioned in the file will be denied for the IP’ s in “ test” .
4th line - Enter “ allow test “ , to access all the other domains except the list in the file.
Save the file after entering the rule and reload the service.
[root@linuxhelp user1]# service squid reload
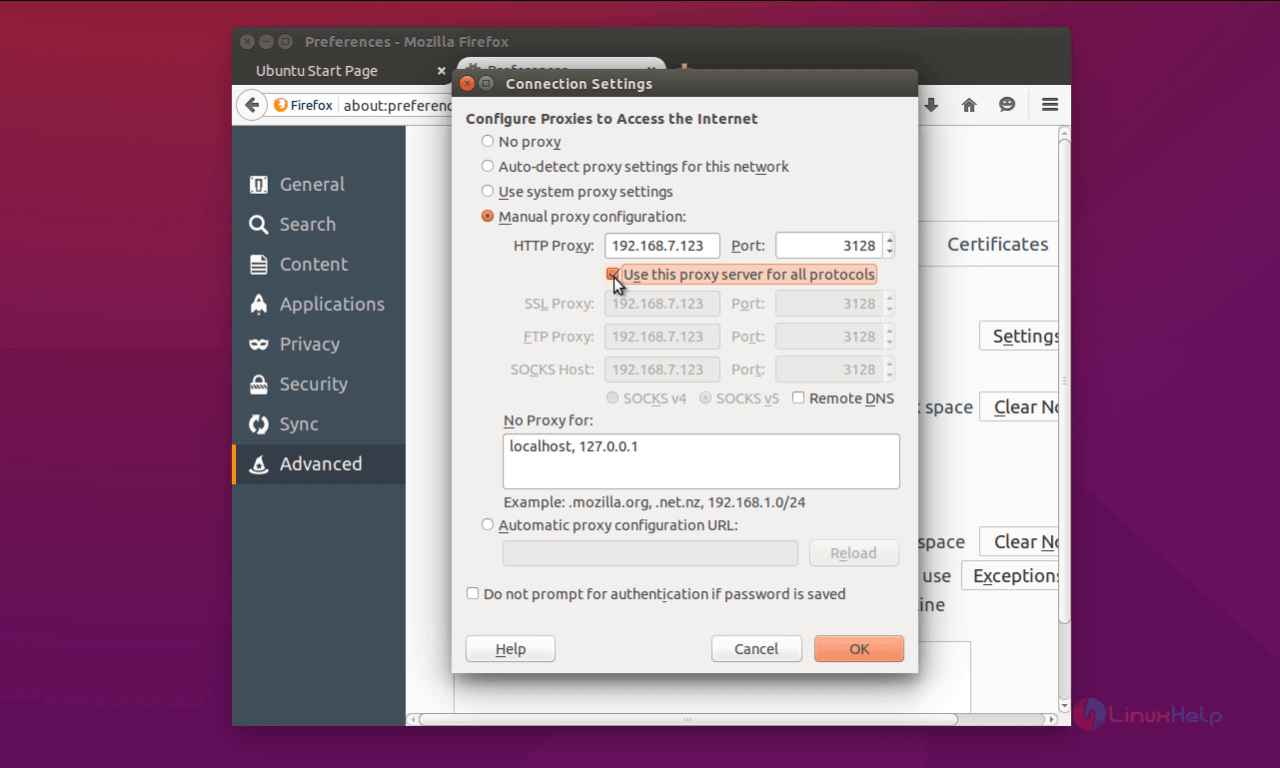
Open the browser and navigate to Options &rarr preferences &rarr Advanced &rarr Network tab &rarr Settings.
Select Manual proxy configuration. Enter the IP and port number of Squid server. Select use this proxy server for all protocols and click OK
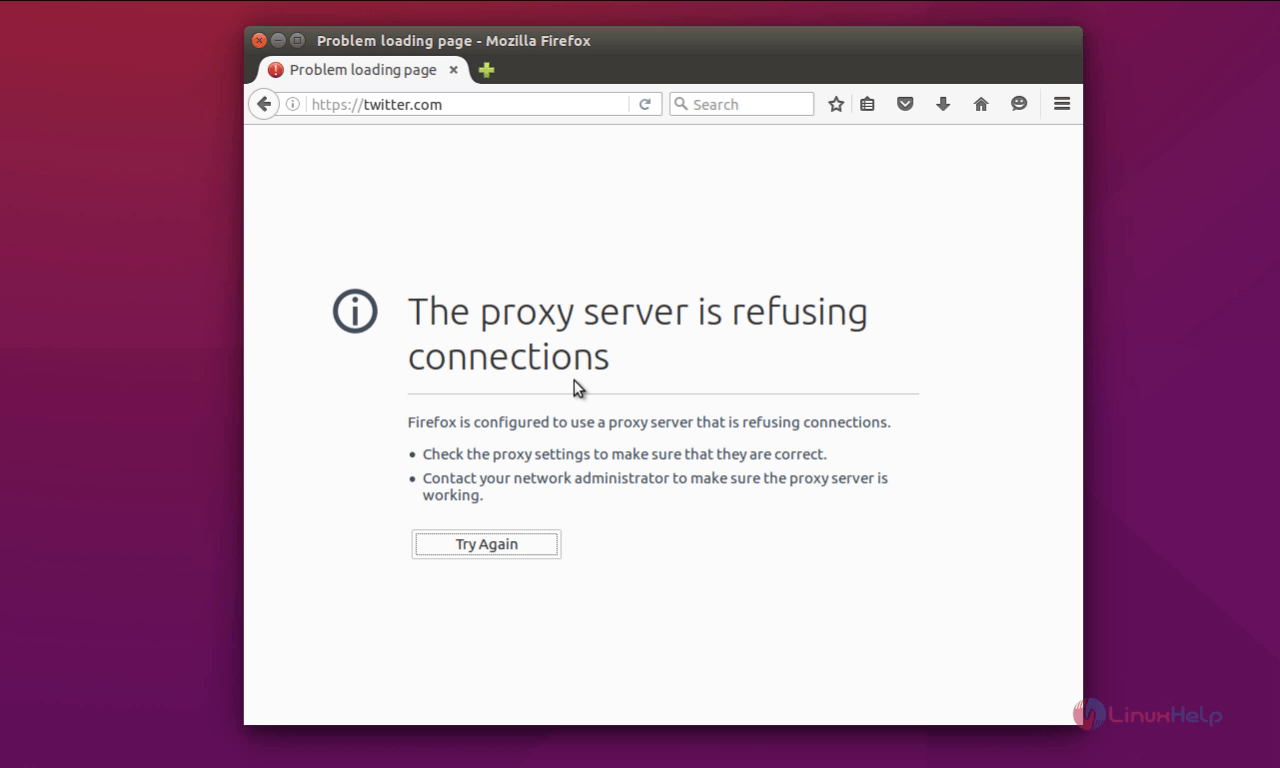
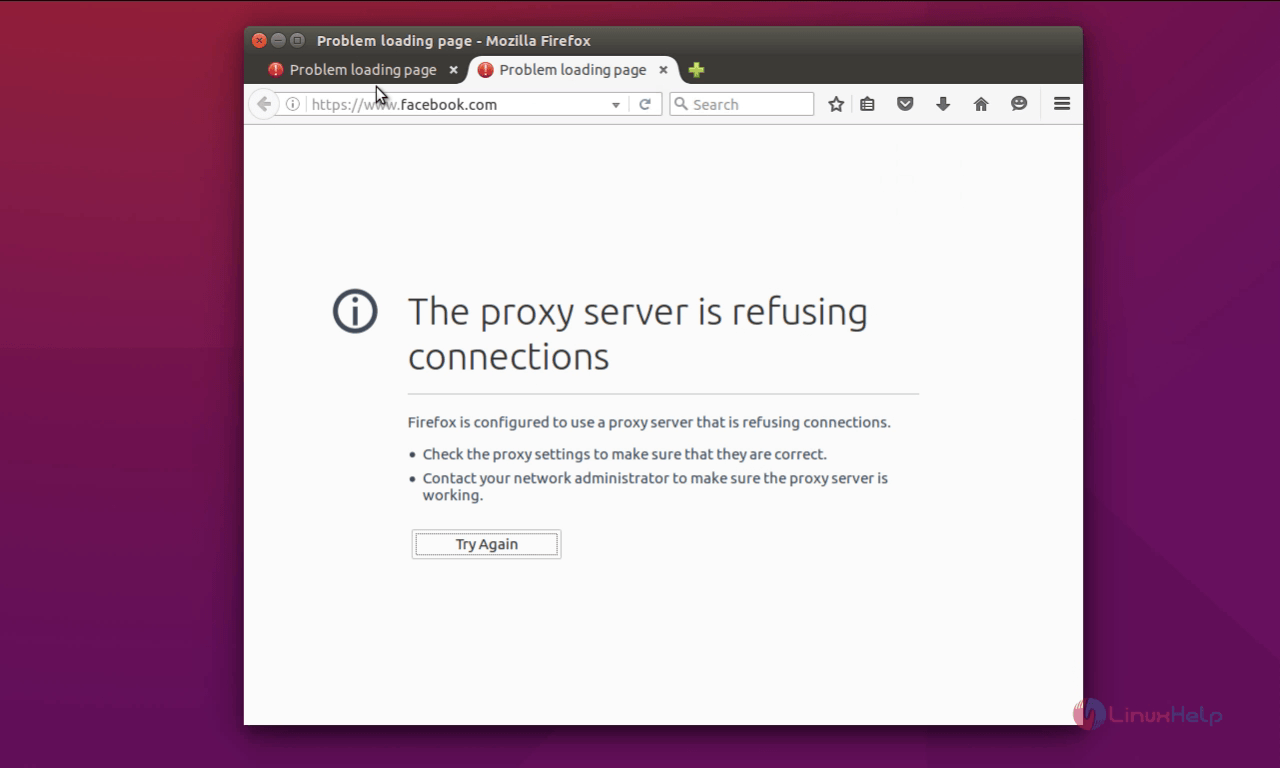
Enter the domain that we have blocked in the browser. Refusing connection message appears as shown below.
To block with keywords and extensions in Squid visit,
https://www.linuxhelp.com/how-to-block-keywords-and-extensions-in-squid-2/
To configure Squid visit,
https://www.linuxhelp.com/how-to-configure-acl-rule-by-timing-and-browser-in-squid/
To limit bandwidth in Squid visit,
https://www.linuxhelp.com/how-to-limit-bandwidth-squid/
Comments ( 0 )
No comments available