How to install Backdrop CMS with Nginx on CentOS 6.9
To install Backdrop CMS with Nginx on CentOS 6.9
In our previous post we have seen about the installation of Backdrop CMS on CentOS 6.9. For watching the mentioned tutorial, click on the https://www.linuxhelp.com/how-to-install-backdrop-cms-on-centos-6-9/. Now we are going to see about the installation procedure of Backdrop CMS with Nginx on CentOS 6.9. Backdrop CMS is a full-featured content management system that permits the non-technical users to manage wide variety of content. It can be used to create all kinds of websites including blogs, image galleries, social networks, intranets, and more. t is very simple to use, that even users with minimal technical knowledge can easily create a web content using this CMS tool.
Pre-Requisite
Before proceeding the installation process, check whether the target system has been installed with LEMP environment. Using MySQL create a database and an user for Backdrop CMS, also provide privileges for the created user.
Installation procedure
First go to Backdrop CMS official site and download the CMS package to the target system. Enter the prompt into the downloads directory by running the cd command as follows.
[root@linuxhelp1 ~]# cd /root/Downloads/
Extract the downloaded file using unzip command.
[root@linuxhelp1 Downloads]# unzip backdrop.zip
Archive:  backdrop.zip
  inflating: backdrop/files/.htaccess
  inflating: backdrop/files/README.md
  inflating: backdrop/core/includes/database/mysql/query.inc
  inflating: backdrop/core/includes/database/mysql/install.inc
  inflating: backdrop/core/includes/database/mysql/database.inc
.
.
inflating: backdrop/README.md
  inflating: backdrop/.gitignore
  inflating: backdrop/settings.php
Move the extracted directory to HTML location.
[root@linuxhelp1 Downloads]# mv backdrop /usr/share/nginx/html/
Now open the PHP configuration file using vim editor and add the time zone to the file. Save and exit the file.
[root@linuxhelp1 Downloads]# vim /etc/php.ini
date.timezone = Asia/Kolkata
Open and edit the php-fpm configuration file and make the following changes in the file. Save and exit the file.
[root@linuxhelp1 Downloads]# vim /etc/php-fpm.d/www.conf

listen = /var/run/php-fpm/php-fpm.sock
listen.owner = nginx
listen.group = nginx
user = nginx
group = nginx
Open and edit the Nginx configuration file using vim editor and enter the following content in the file. Save and exit the file.
[root@linuxhelp1 Downloads]# vim /etc/nginx/conf.d/default.conf

server {
    listen       80 default_server
    listen       [::]:80 default_server
    server_name  _
    root         /usr/share/nginx/html

    # Load configuration files for the default server block.
    include /etc/nginx/default.d/*.conf

    index index.html index.php
    location ~ \.php {
    fastcgi_index index.php
    fastcgi_split_path_info ^(.+\.php)(.*)$
    include /etc/nginx/fastcgi_params
    fastcgi_pass unix:/var/run/php-fpm/php-fpm.sock
    fastcgi_param SCRIPT_FILENAME $document_root$fastcgi_script_name
    }
   error_page 404 /404.html
        location = /40x.html {
    }
    error_page 500 502 503 504 /50x.html
        location = /50x.html {
   }
}
Change the ownership of php-fpm by executing the following command.
[root@linuxhelp1 Downloads]# chown nginx:nginx /var/run/php-fpm/php-fpm.sock
Change the ownership of the file in Nginx directory by running the following command.
[root@linuxhelp1 Downloads]# chown -R nginx:nginx /usr/share/nginx/html
Restart the php-fpm service.
[root@linuxhelp1 Downloads]# service php-fpm restart
Stopping php-fpm:                                          [  OK  ]
Starting php-fpm:                                          [  OK  ]
Restart the Nginx service.
[root@linuxhelp1 Downloads]# service nginx restart
Stopping nginx:                                            [  OK  ]
Starting nginx:                                            [  OK  ]
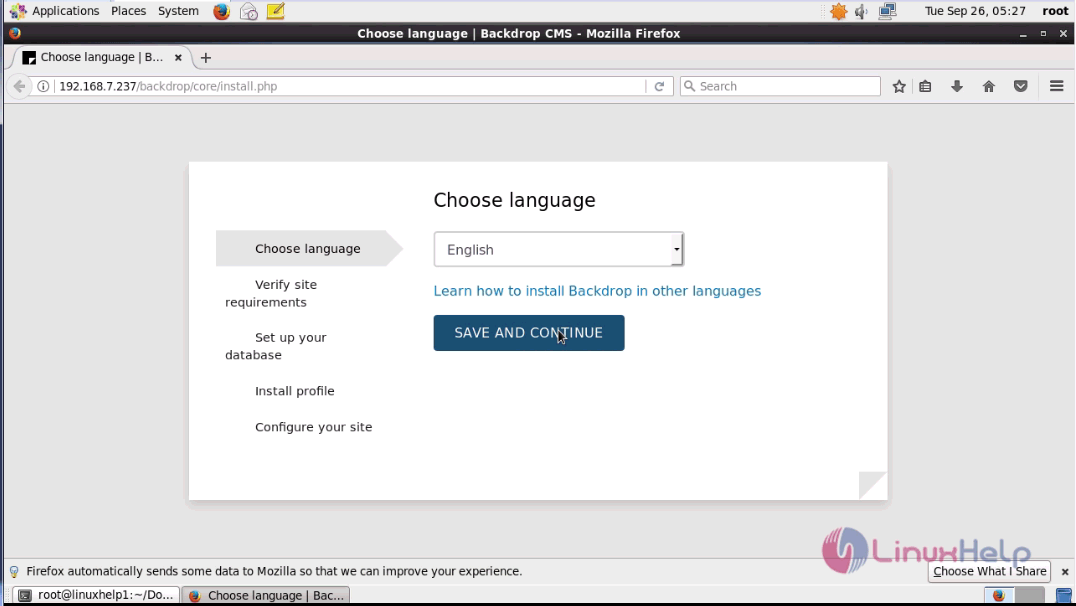
Switch over to the browser and give URL as http://machineip/backdrop. The installation setup appears on the screen. Choose the required language and click continue.
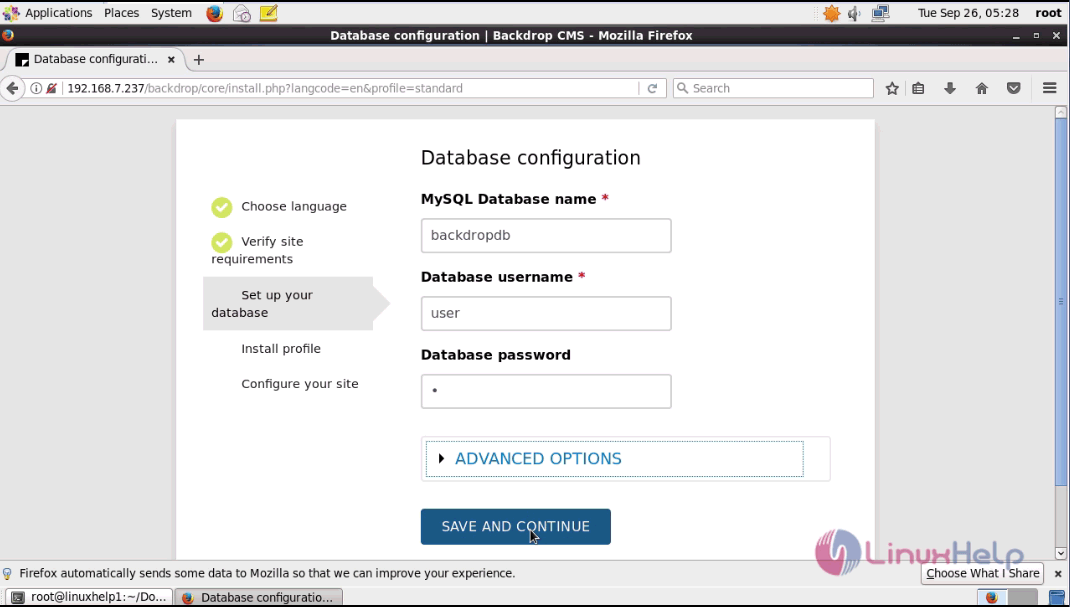
Fill the needed database details and click continue.
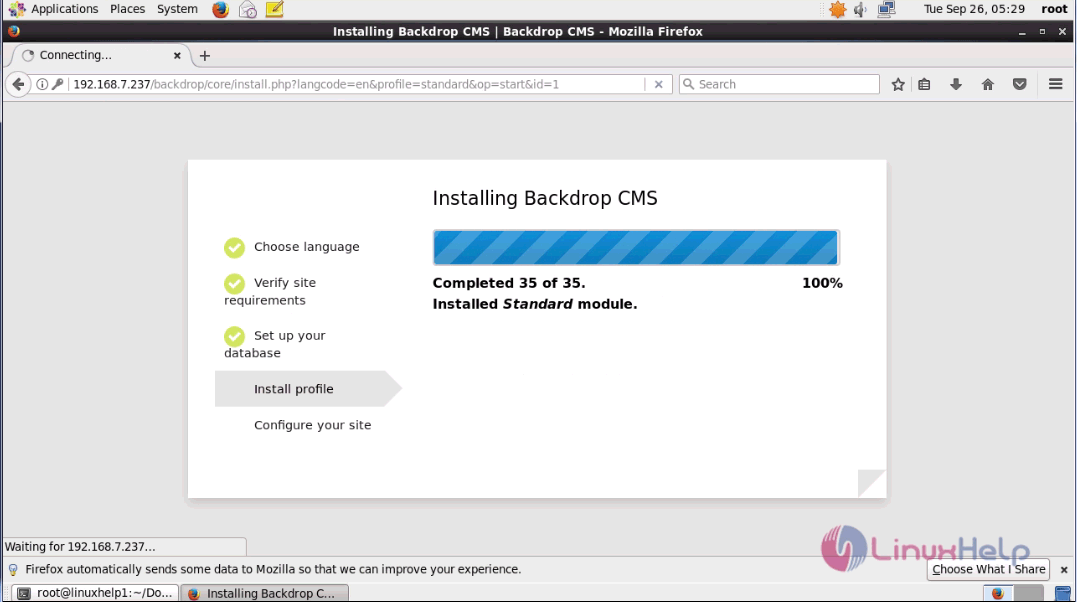
The installation is in progress by installing the required modules needed for Backdrop CMS.
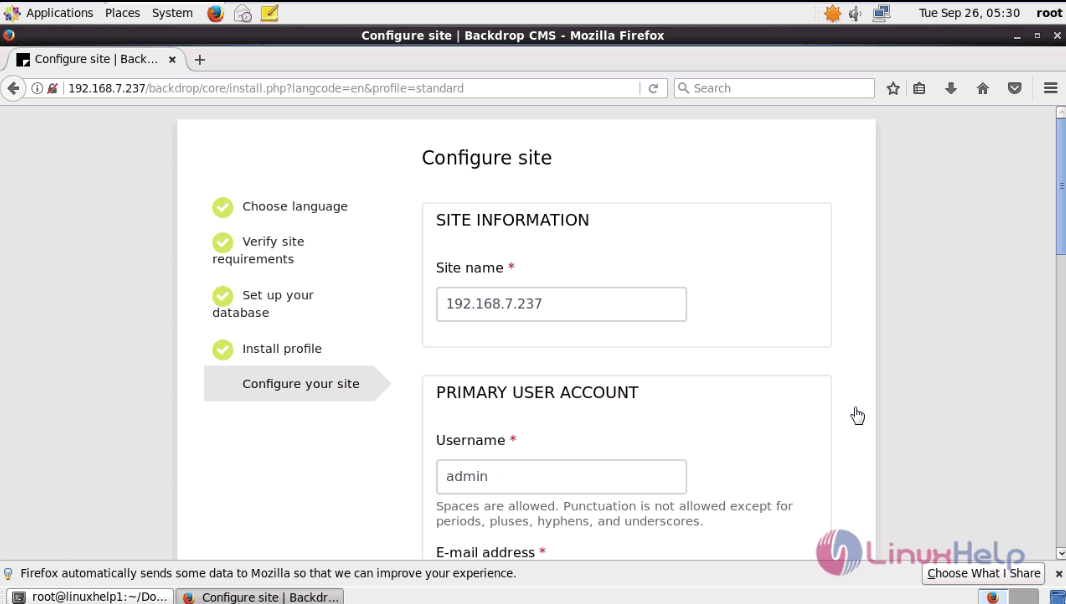
Next configure the site by filling the site information such as site name and user account name.
Enter the E-mail address and set the password for the admin side.

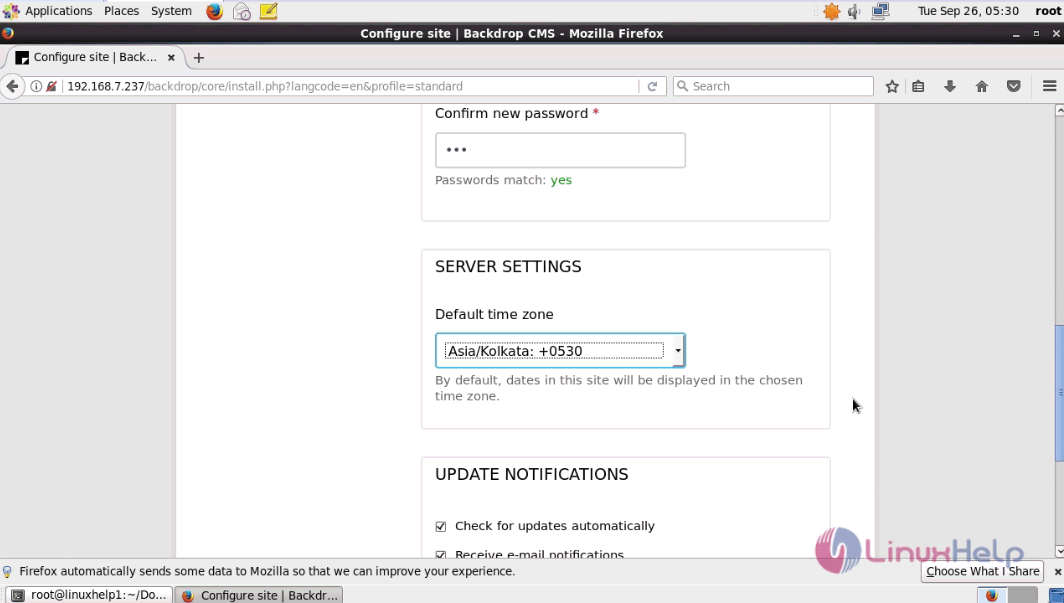
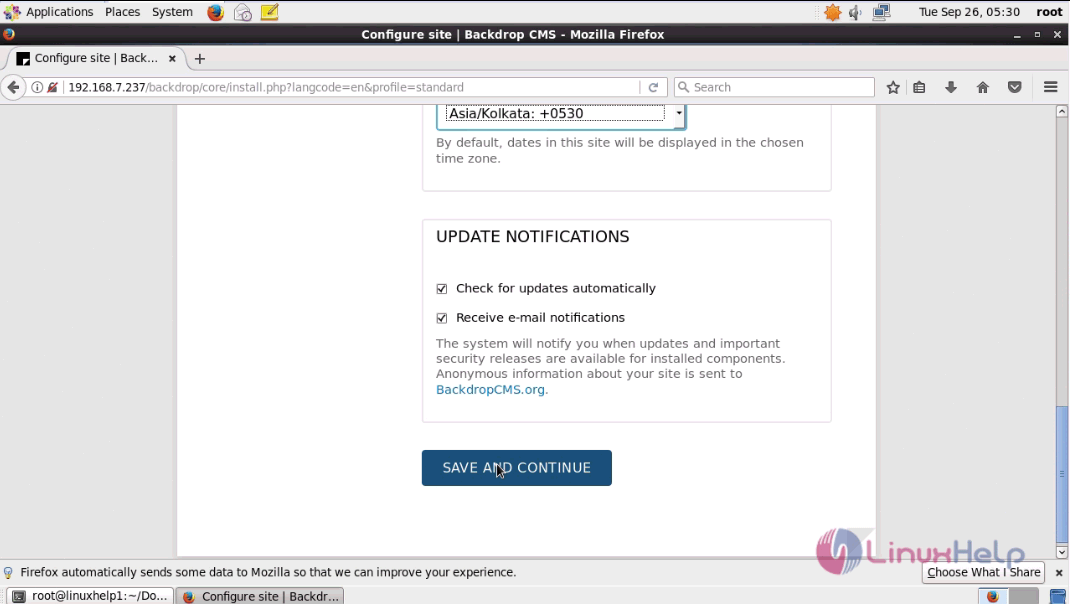
Next set the default timezone for the server settings.
Click Save and Continue option to save the changes in the settings.
The admin page of Backdrop CMS appears on the screen.
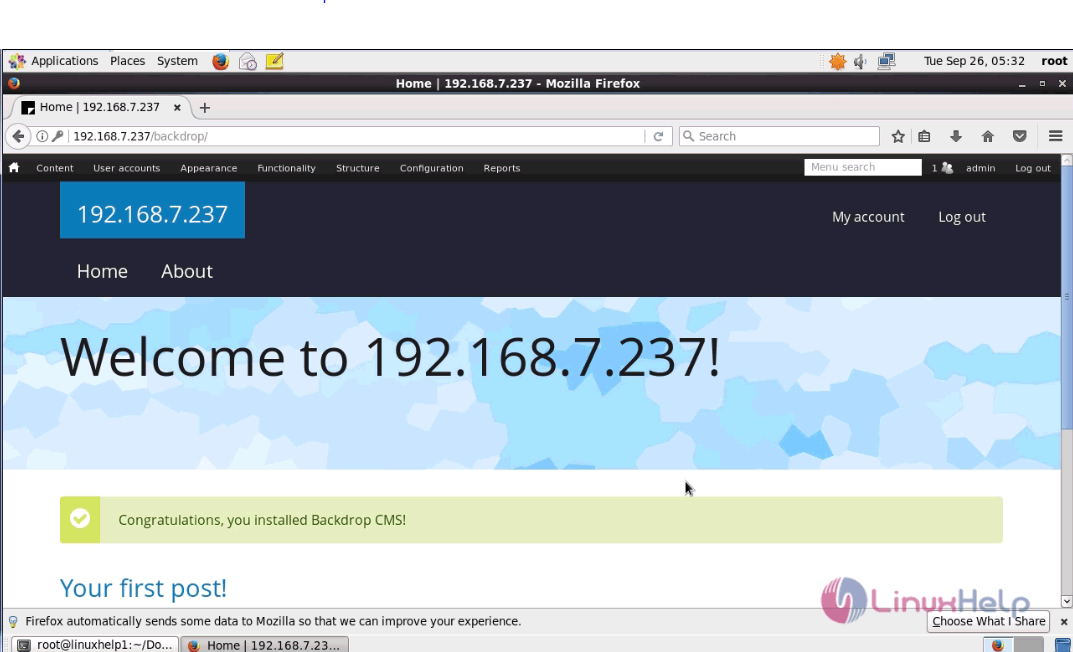
This concludes the installation procedure of Backdrop CMS with Nginx on CentOS 6.9.
Comments ( 0 )
No comments available