How to install BareOS in CentOS
To install Bareos in CentOS
BareOS is a free-ware, multi platform application for taking backups with the graphical front end. It creates backup and restores it. This tool can be configured and can be used to add the backups in any centralized medium. Installation of Bareos is explained in this article.
To install Bareos
Utilize the following command to download and add the Bareos repositories from it’ s official website.
[root@linuxhelp ~]# wget -O /etc/yum.repos.d/bareos.repo
http://download.bareos.org/bareos/release/latest/CentOS_7/bareos.repo
--2016-09-22 00:12:53--  http://download.bareos.org/bareos/release/latest/CentOS_7/bareos.repo
Resolving download.bareos.org (download.bareos.org)... 81.173.212.161
Connecting to download.bareos.org (download.bareos.org)|81.173.212.161|:80... connected.
HTTP request sent, awaiting response... 200 OK
Length: 266 [text/plain]
Saving to: ‘ /etc/yum.repos.d/bareos.repo’

100%[===================================================================================================================================================> ] 266         --.-K/s   in 0s

2016-09-22 00:12:54 (4.93 MB/s) - ‘ /etc/yum.repos.d/bareos.repo’  saved [266/266]
After adding the repositories, start installing Bareos.
[root@linuxhelp ~]# yum install bareos bareos-database-mysql -y
Loaded plugins: fastestmirror, langpacks
Determining fastest mirrors
 * base: mirror.fibergrid.in
 * extras: centos.excellmedia.net
 * updates: centos.excellmedia.net
bareos_bareos-15.2                                                                                                                                                                     41/41
Resolving Dependencies
-->  Running transaction check
--->  Package bareos.x86_64 0:15.2.2-37.1.el7 will be installed
-->  Processing Dependency: bareos-storage = 15.2.2 for package: bareos-15.2.2-37.1.el7.x86_64
-->  Processing Dependency: bareos-client = 15.2.2 for package: bareos-15.2.2-37.1.el7.x86_64
-->  Processing Dependency: bareos-director = 15.2.2 for package: bareos-15.2.2-37.1.el7.x86_64
--->  Package bareos-database-mysql.x86_64 0:15.2.2-37.1.el7 will be installed
.
.
.
Installed:
  bareos.x86_64 0:15.2.2-37.1.el7                                                       bareos-database-mysql.x86_64 0:15.2.2-37.1.el7
Dependency Installed:
  bareos-bconsole.x86_64 0:15.2.2-37.1.el7         bareos-client.x86_64 0:15.2.2-37.1.el7     bareos-common.x86_64 0:15.2.2-37.1.el7       bareos-database-common.x86_64 0:15.2.2-37.1.el7
  bareos-database-tools.x86_64 0:15.2.2-37.1.el7   bareos-director.x86_64 0:15.2.2-37.1.el7   bareos-filedaemon.x86_64 0:15.2.2-37.1.el7   bareos-storage.x86_64 0:15.2.2-37.1.el7
  libfastlz.x86_64 0:0.1-7.1.el7
Complete!
Setup the database for Bareos. Lets start with the installation of MariaDB and configure it.
[root@linuxhelp ~]# yum install mariadb-server -y
Loaded plugins: fastestmirror, langpacks
Loading mirror speeds from cached hostfile
 * base: mirror.fibergrid.in
 * extras: centos.excellmedia.net
 * updates: centos.excellmedia.net
Resolving Dependencies
-->  Running transaction check
--->  Package mariadb-server.x86_64 1:5.5.50-1.el7_2 will be installed
-->  Processing Dependency: mariadb-libs(x86-64) = 1:5.5.50-1.el7_2 for package: 1:mariadb-server-5.5.50-1.el7_2.x86_64
-->  Processing Dependency: mariadb(x86-64) = 1:5.5.50-1.el7_2 for package: 1:mariadb-server-5.5.50-1.el7_2.x86_64
-->  Processing Dependency: perl-DBI for package: 1:mariadb-server-5.5.50-1.el7_2.x86_64
-->  Processing Dependency: perl-DBD-MySQL for package: 1:mariadb-server-5.5.50-1.el7_2.x86_64
.
.
.
Dependency Installed:
  mariadb.x86_64 1:5.5.50-1.el7_2          perl-Compress-Raw-Bzip2.x86_64 0:2.061-3.el7        perl-Compress-Raw-Zlib.x86_64 1:2.061-4.el7        perl-DBD-MySQL.x86_64 0:4.023-5.el7
  perl-DBI.x86_64 0:1.627-4.el7            perl-Data-Dumper.x86_64 0:2.145-3.el7               perl-IO-Compress.noarch 0:2.061-2.el7              perl-Net-Daemon.noarch 0:0.48-5.el7
  perl-PlRPC.noarch 0:0.2020-14.el7

Dependency Updated:
  mariadb-libs.x86_64 1:5.5.50-1.el7_2
Complete!
Start and enable the MariaDB services.
[root@linuxhelp ~]# systemctl start mariadb
[root@linuxhelp ~]# systemctl enable mariadb
ln -s ' /usr/lib/systemd/system/mariadb.service'  ' /etc/systemd/system/multi-user.target.wants/mariadb.service'
[root@linuxhelp ~]# mysql_secure_installation
/usr/bin/mysql_secure_installation: line 379: find_mysql_client: command not found

NOTE: RUNNING ALL PARTS OF THIS SCRIPT IS RECOMMENDED FOR ALL MariaDB
      SERVERS IN PRODUCTION USE!  PLEASE READ EACH STEP CAREFULLY!

In order to log into MariaDB to secure it, we' ll need the current
password for the root user.  If you' ve just installed MariaDB, and
you haven' t set the root password yet, the password will be blank,
so you should just press enter here.

Enter current password for root (enter for none):
OK, successfully used password, moving on...

Setting the root password ensures that nobody can log into the MariaDB
root user without the proper authorisation.

Set root password? [Y/n] y
New password:
Re-enter new password:
Password updated successfully!
Reloading privilege tables..
 ... Success!

By default, a MariaDB installation has an anonymous user, allowing anyone
to log into MariaDB without having to have a user account created for
them.  This is intended only for testing, and to make the installation
go a bit smoother.  You should remove them before moving into a
production environment.

Remove anonymous users? [Y/n] y
 ... Success!

Normally, root should only be allowed to connect from ' localhost' .  This
ensures that someone cannot guess at the root password from the network.

Disallow root login remotely? [Y/n] y
 ... Success!

By default, MariaDB comes with a database named ' test'  that anyone can
access.  This is also intended only for testing, and should be removed
before moving into a production environment.

Remove test database and access to it? [Y/n] y
 - Dropping test database...
 ... Success!
 - Removing privileges on test database...
 ... Success!

Reloading the privilege tables will ensure that all changes made so far
will take effect immediately.

Reload privilege tables now? [Y/n] y
 ... Success!

Cleaning up...

All done!  If you' ve completed all of the above steps, your MariaDB
installation should now be secure.

Thanks for using MariaDB!
Edit the my.cnf file and append the following lines to it. This settings allows you to access the local Mysql server.
[root@linuxhelp ~]# vim /etc/my.cnf
[client]
host=localhost
user=root
password=root
Setup the Bareos database and tables by running the following commands.
[root@linuxhelp ~]# /usr/lib/bareos/scripts/create_bareos_database
Creating mysql database
Creating of bareos database succeeded.
[root@linuxhelp ~]# /usr/lib/bareos/scripts/make_bareos_tables
Making mysql tables
Creation of Bareos MySQL tables succeeded.
[root@linuxhelp ~]# /usr/lib/bareos/scripts/grant_bareos_privileges
Granting mysql tables
Privileges for user bareos granted ON database bareos.
Start the services for BareOS daemons by running the following command.
[root@linuxhelp ~]# systemctl start bareos-dir
[root@linuxhelp ~]# systemctl start bareos-sd
[root@linuxhelp ~]# systemctl start bareos-fd
Utilize the following command to enable the ports in firewall.
[root@linuxhelp ~]# firewall-cmd --permanent --add-port=9101-9103/tcp
success
[root@linuxhelp ~]# firewall-cmd --reload
success
Run the following commands to test Bareos director access.
[root@linuxhelp ~]# bconsole
Connecting to Director linuxhelp:9101
Install apache and php package by using the following command.
[root@linuxhelp ~]# yum install httpd php php-cli php-common -y
Loaded plugins: fastestmirror, langpacks
Loading mirror speeds from cached hostfile
 * base: mirror.fibergrid.in
 * extras: centos.excellmedia.net
 * updates: centos.excellmedia.net
Resolving Dependencies
-->  Running transaction check
--->  Package httpd.x86_64 0:2.4.6-40.el7.centos.4 will be installed
-->  Processing Dependency: httpd-tools = 2.4.6-40.el7.centos.4 for package: httpd-2.4.6-40.el7.centos.4.x86_64
-->  Processing Dependency: /etc/mime.types for package: httpd-2.4.6-40.el7.centos.4.x86_64
-->  Processing Dependency: libaprutil-1.so.0()(64bit) for package: httpd-2.4.6-40.el7.centos.4.x86_64
-->  Processing Dependency: libapr-1.so.0()(64bit) for package: httpd-2.4.6-40.el7.centos.4.x86_64
--->  Package php.x86_64 0:5.4.16-36.3.el7_2 will be installed
--->  Package php-cli.x86_64 0:5.4.16-36.3.el7_2 will be installed
--->  Package php-common.x86_64 0:5.4.16-36.3.el7_2 will be installed
.
.
.
Run the following command to install the epel repository as shown below.
[root@linuxhelp ~]# yum install epel-release -y
Loaded plugins: fastestmirror, langpacks
Loading mirror speeds from cached hostfile
 * base: mirror.fibergrid.in
 * extras: centos.excellmedia.net
 * updates: centos.excellmedia.net
Resolving Dependencies
-->  Running transaction check
--->  Package epel-release.noarch 0:7-6 will be installed
-->  Finished Dependency Resolution
.
.
.
Running transaction
  Installing : epel-release-7-6.noarch                                                                                                                                                   1/1
  Verifying  : epel-release-7-6.noarch                                                                                                                                                   1/1

Installed:
  epel-release.noarch 0:7-6

Complete
Then start installing the BareOS webui by running the following command.
[root@linuxhelp ~]# yum install bareos-webui -y
Loaded plugins: fastestmirror, langpacks
Loading mirror speeds from cached hostfile
 * base: mirror.fibergrid.in
 * epel: mirror01.idc.hinet.net
 * extras: centos.excellmedia.net
 * updates: centos.excellmedia.net
Resolving Dependencies
-->  Running transaction check
--->  Package bareos-webui.noarch 0:15.2.2-41.1.el7 will be installed
-->  Processing Dependency: php-ZendFramework2 > = 2.2.0 for package: bareos-webui-15.2.2-41.1.el7.noarch
-->  Running transaction check
--->  Package php-ZendFramework2.noarch 0:2.4.10-1.el7 will be installed
-->  Processing Dependency: php-composer(zendframework/zend-xmlrpc) = 2.4.10 for package: php-ZendFramework2-2.4.10-1.el7.noarch
-->  Processing Dependency: php-composer(zendframework/zend-view) = 2.4.10 for package: php-ZendFramework2-2.4.10-1.el7.noarch
-->  Processing Dependency: php-composer(zendframework/zend-version) = 2.4.10 for package: php-ZendFramework2-2.4.10-1.el7.noarch
.
.
.
php-phpunit-PHP-Timer.noarch 0:1.0.6-1.el7                    php-phpunit-PHP-TokenStream.noarch 0:1.4.8-1.el7               php-phpunit-PHPUnit.noarch 0:4.8.27-1.el7
  php-phpunit-PHPUnit-MockObject.noarch 0:2.3.8-1.el7           php-phpunit-Text-Template.noarch 0:1.2.0-5.el7                 php-phpunit-Version.noarch 0:1.0.5-1.el7
  php-phpunit-comparator.noarch 0:1.2.0-1.el7                   php-phpunit-diff.noarch 0:1.4.1-1.el7                          php-phpunit-environment.noarch 0:1.3.2-1.el7
  php-phpunit-exporter.noarch 0:1.2.2-1.el7                     php-process.x86_64 0:5.4.16-36.3.el7_2                         php-sebastian-global-state.noarch 0:1.1.1-1.el7
  php-sebastian-recursion-context.noarch 0:1.0.2-1.el7          php-soap.x86_64 0:5.4.16-36.3.el7_2                            php-symfony-class-loader.noarch 0:2.8.9-1.el7
  php-symfony-common.noarch 0:2.8.9-1.el7                       php-symfony-yaml.noarch 0:2.8.9-1.el7                          php-tidy.x86_64 0:5.4.16-4.el7
  php-xml.x86_64 0:5.4.16-36.3.el7_2                            php-zendframework-zendxml.noarch 0:1.0.2-2.el7                 t1lib.x86_64 0:5.1.2-14.el7

Complete!
Open the Bareos-webui configuration file and add the following lines into it.
[root@linuxhelp ~]# vim /etc/bareos/bareos-dir.conf
@/etc/bareos/bareos-dir.d/webui-consoles.conf
@/etc/bareos/bareos-dir.d/webui-profiles.conf
Also open and check the “ webui-consoles.conf” and “ webui-profiles.conf” files.
vim /etc/bareos/bareos-dir.d/webui-consoles.conf
vim /etc/bareos/bareos-dir.d/webui-profiles.conf
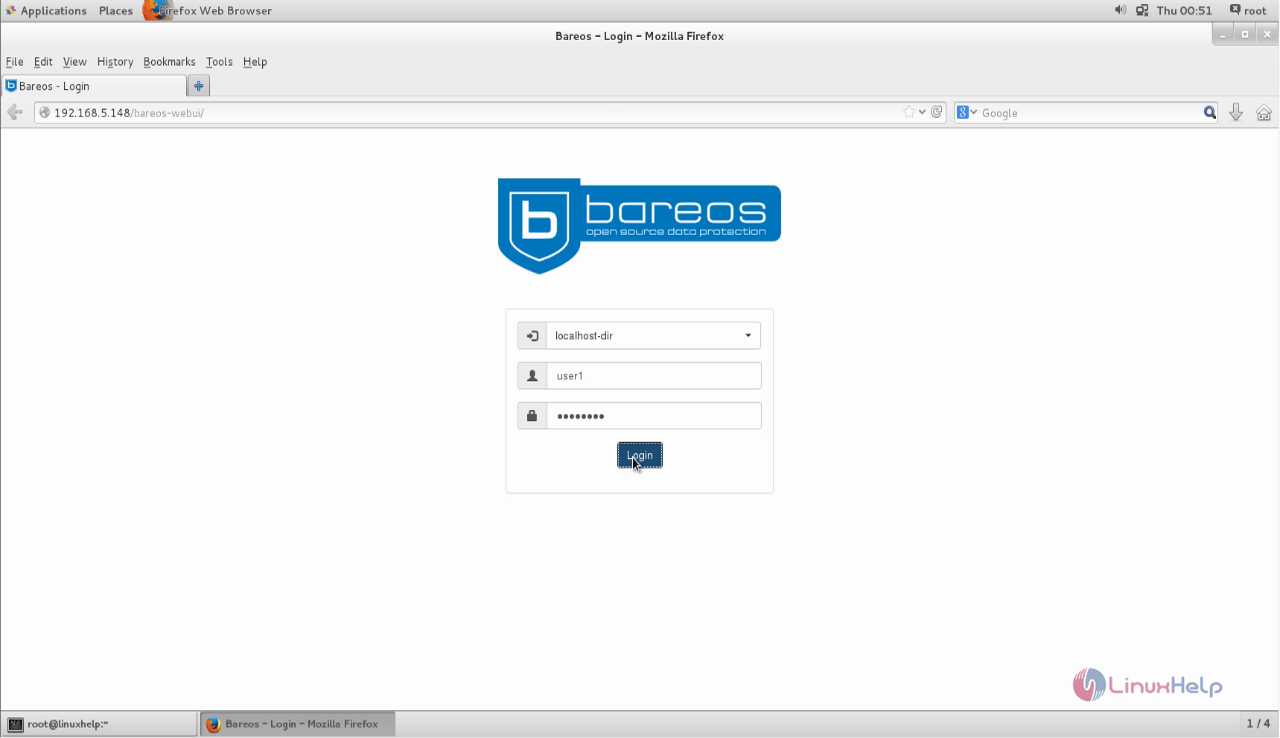
Configure the Bareos login by changing the username and password in the file “ webui-consoles.conf”
Now view the configuration file “ directories.ini” , it should look similar as shown below.
  Section localhost-dir

[localhost-dir]

  Enable or disable section. Possible values are “ yes”  or “ no” , the default is “ yes” .
enabled = “ yes”
  Fill in the IP-Address or FQDN of you director.
diraddress = “ localhost”
  Default value is 9101
dirport = 9101
  Section another-host-dir

[another-host-dir]
enabled = “ no”
diraddress = “ ”
dirport = 9101
Run the following command to restart the services.
[root@linuxhelp ~]# systemctl restart httpd
[root@linuxhelp ~]# systemctl restart bareos-dir
Set selinux Boolean value as shown below.
[root@linuxhelp ~]# setsebool -P httpd_can_network_connect on
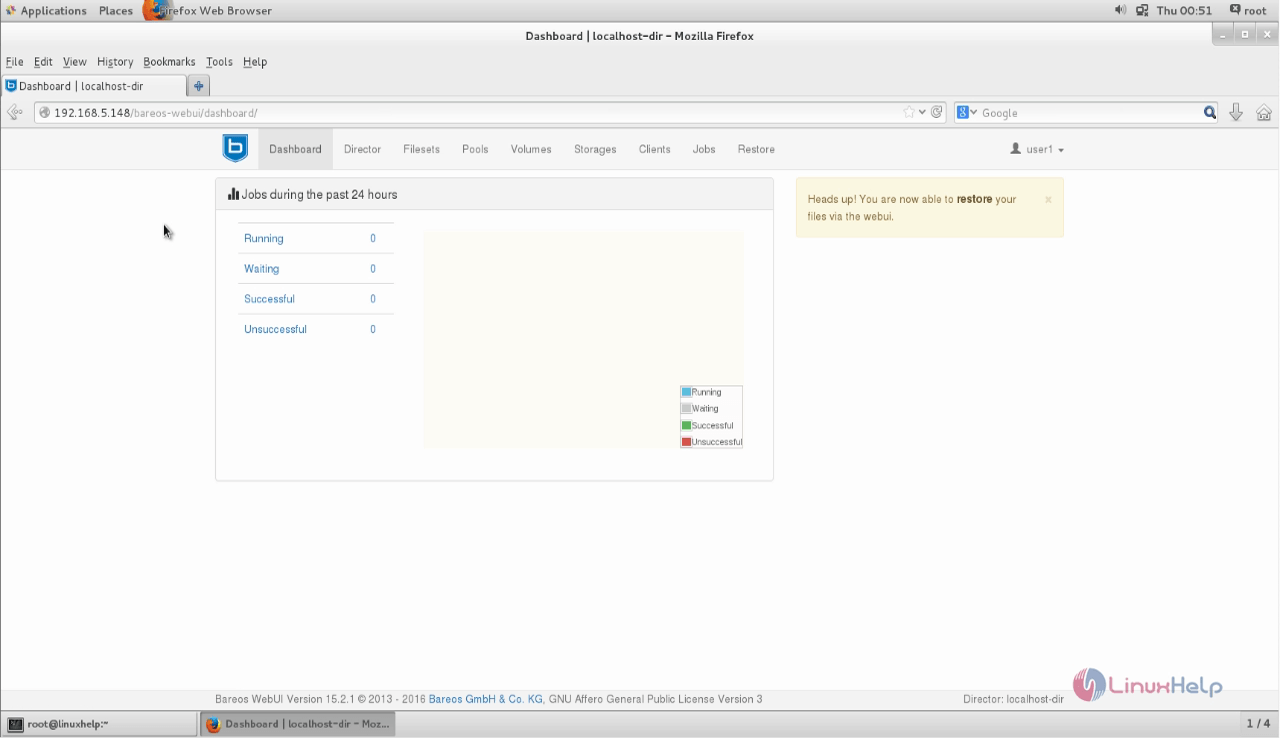
Open the browser and point to the URL http://< IP address> /bareos-webui/
Comments ( 3 )