• Categories
    Category
    {{ postCtrl.tags }}
    • {{ category.tag_type }}

      • {{tag.tag_name}}
      • View more
  • Categories
    Category
    {{ postCtrl.tags }}
    • {{ category.tag_type }}

      • {{tag.tag_name}}
      • View more
  • News
  • Tutorials
  • Forums
  • Tags
  • Users
Tutorial News Comments FAQ Related Articles

How to install Bunsenlabs linux

{{postValue.id}}

To install bunsenlabs linux (bl-hydrogen)

BunsenLabs Linux is a free-ware, light-weight and easily customizable open-box desktop. It is a continuation of CrunchBang Linux. Installation of bunsenlabs linux is explained in this manual.

To install bunsenlabs linux

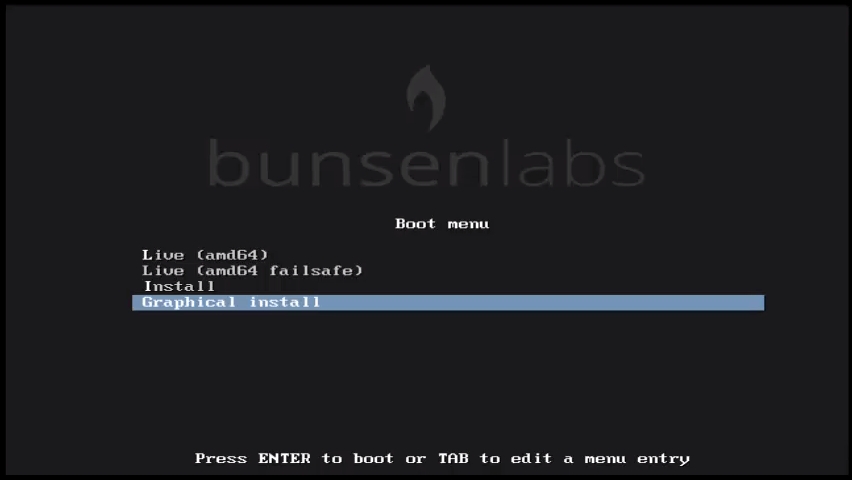
Download the ISO file from official site, make it bootable and then restart the system.
After restarting, click install in the installation window.
Installation_screen
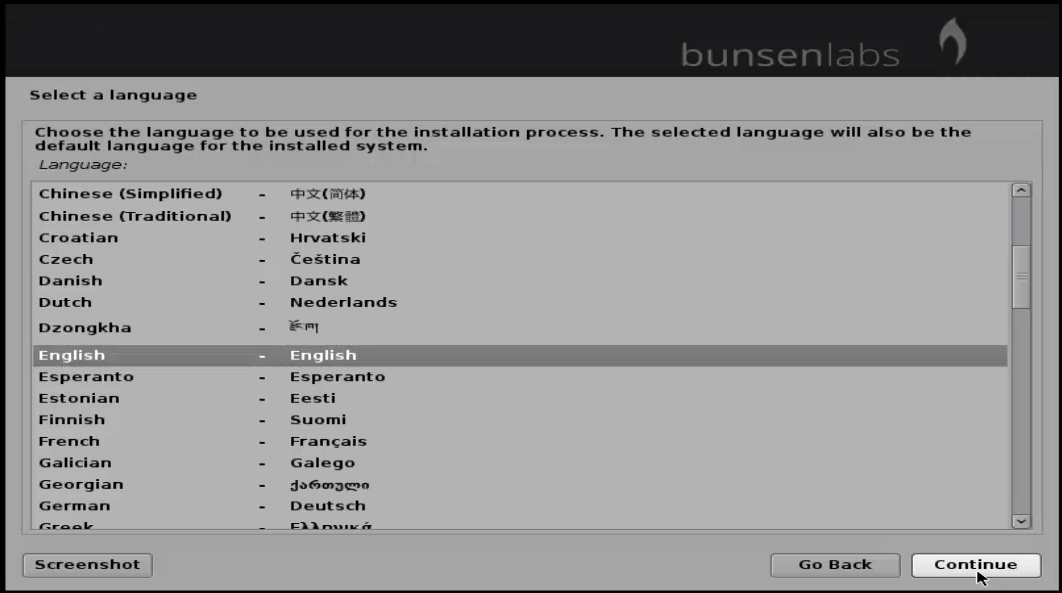
Select your preferred language and click “ continue”
Language
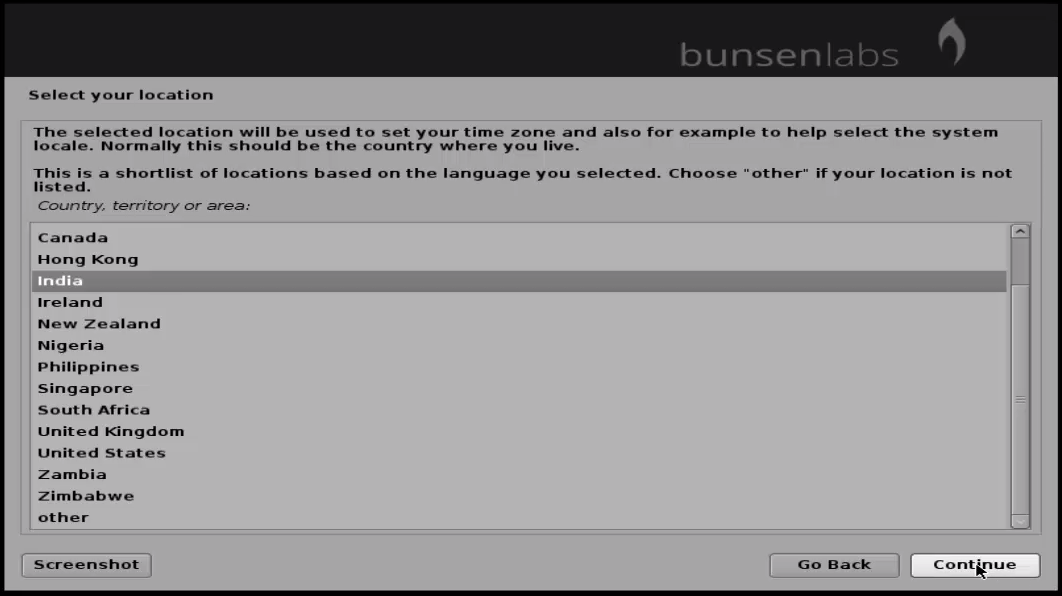
Choose the location you belong to and click “ continue”
location
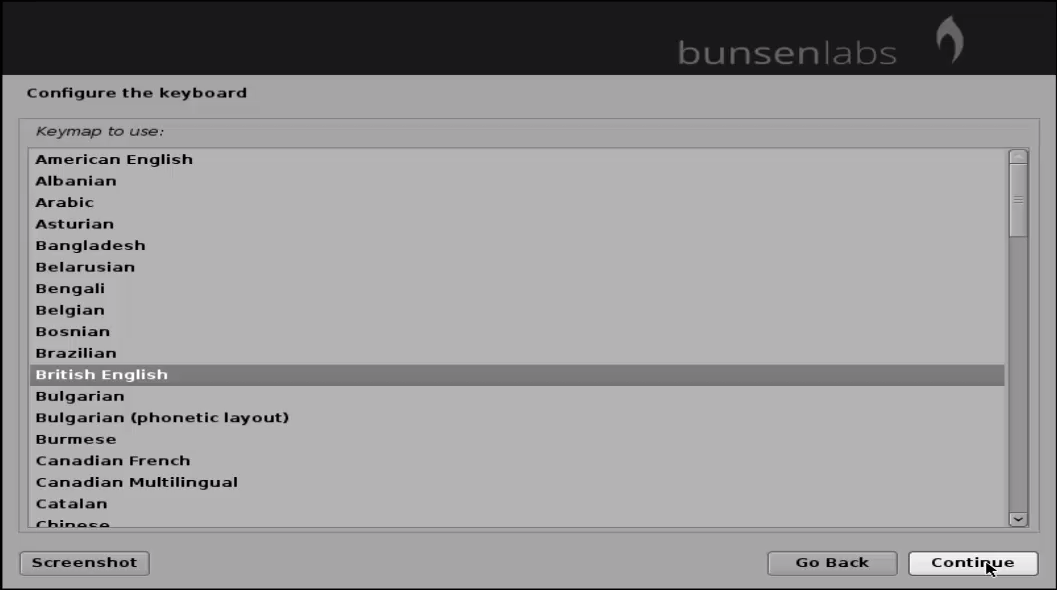
Select the type of keyboard you prefer and click continue to proceed further.
Keyboard_Layout
Configure_network
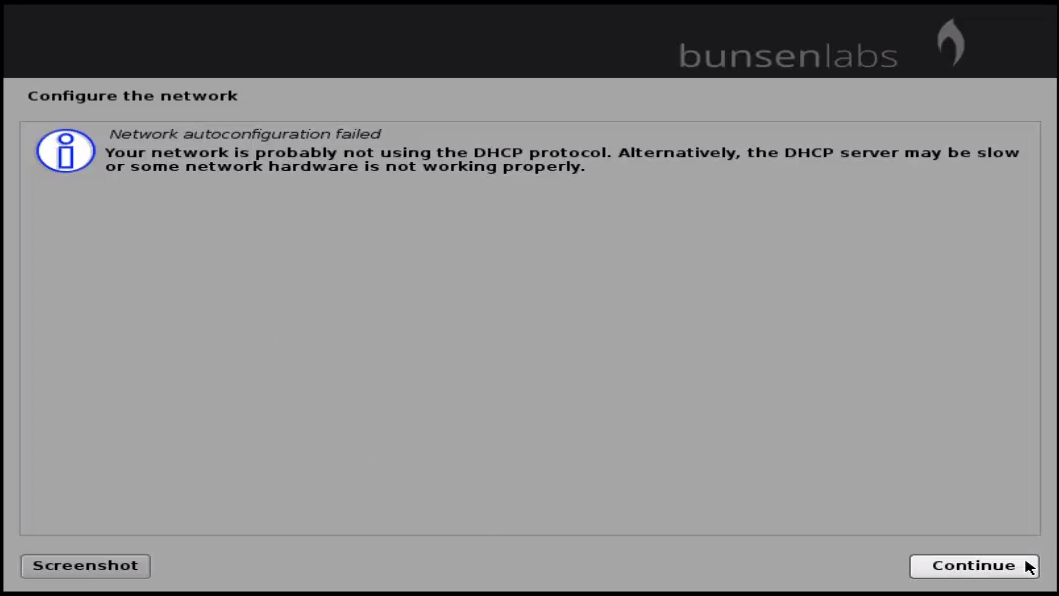
Next start with the network manually, click “ configure network manually” .
configure_network_manually

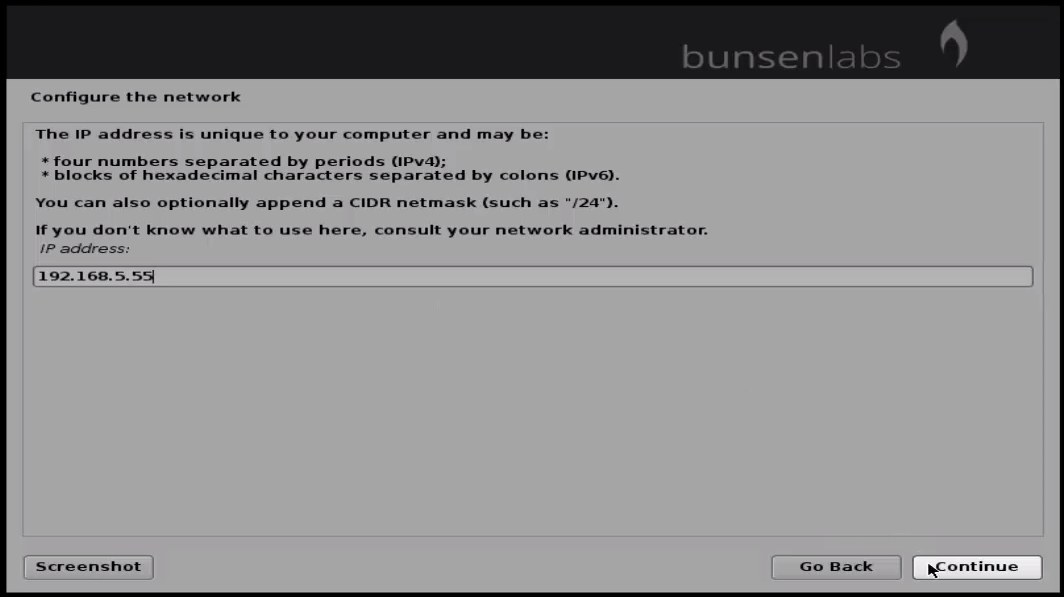
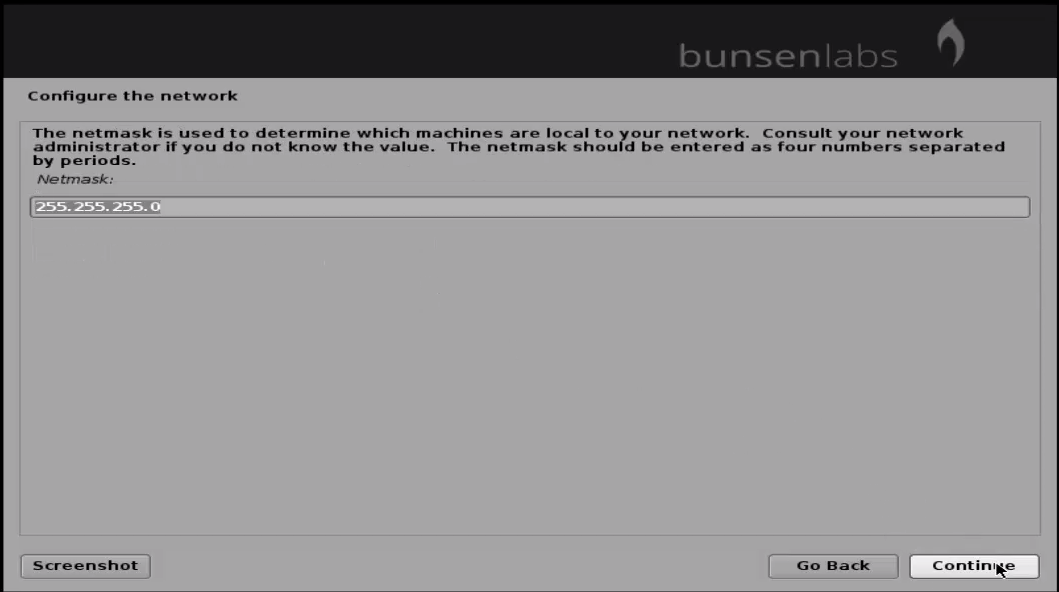
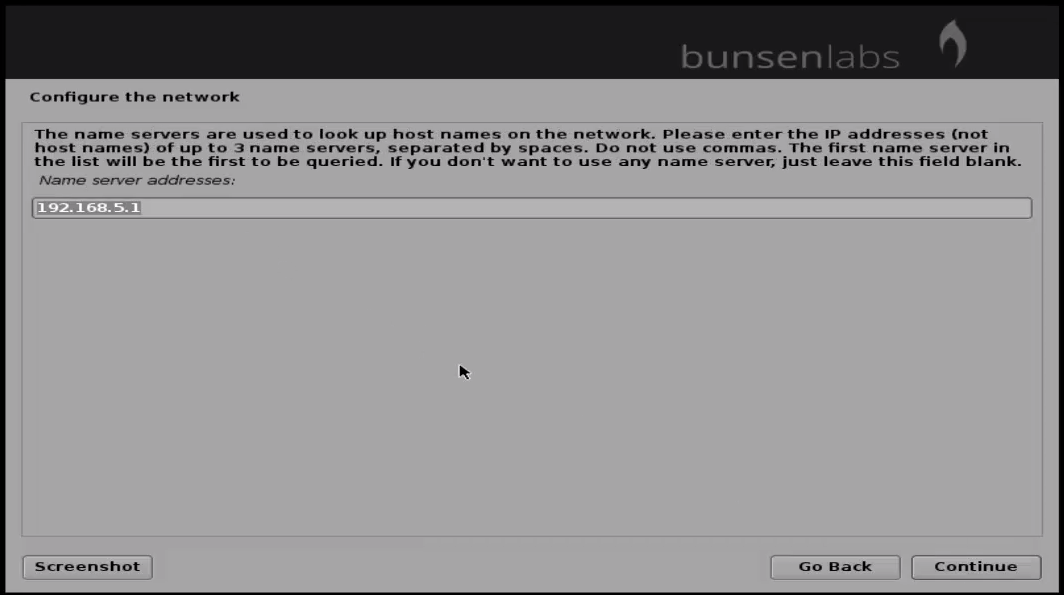
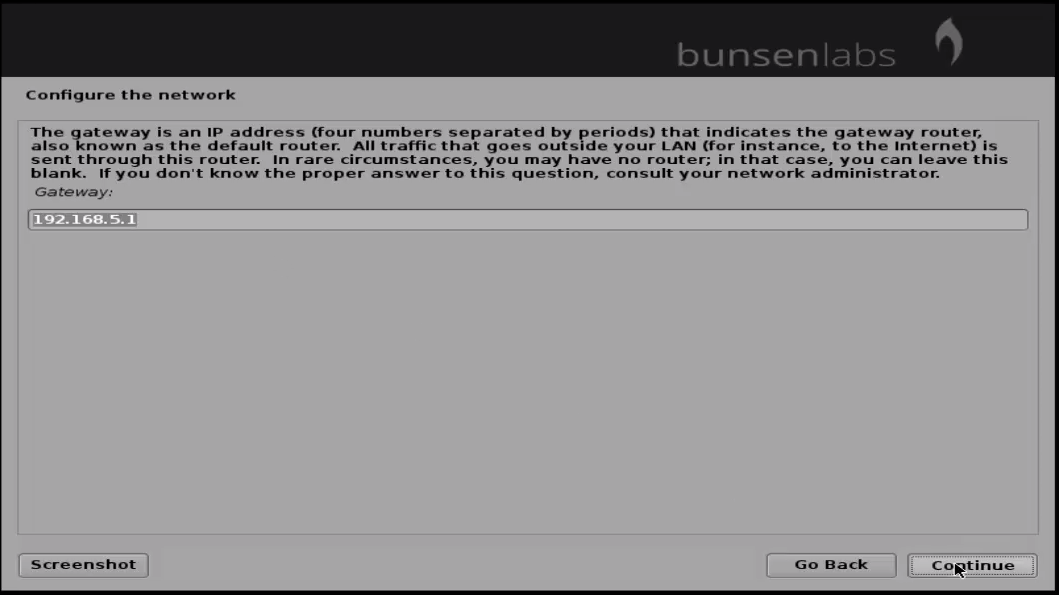
Set IP address, net mask, gateway and name server.
Set_IP
Netmask
Name_server
Gateway
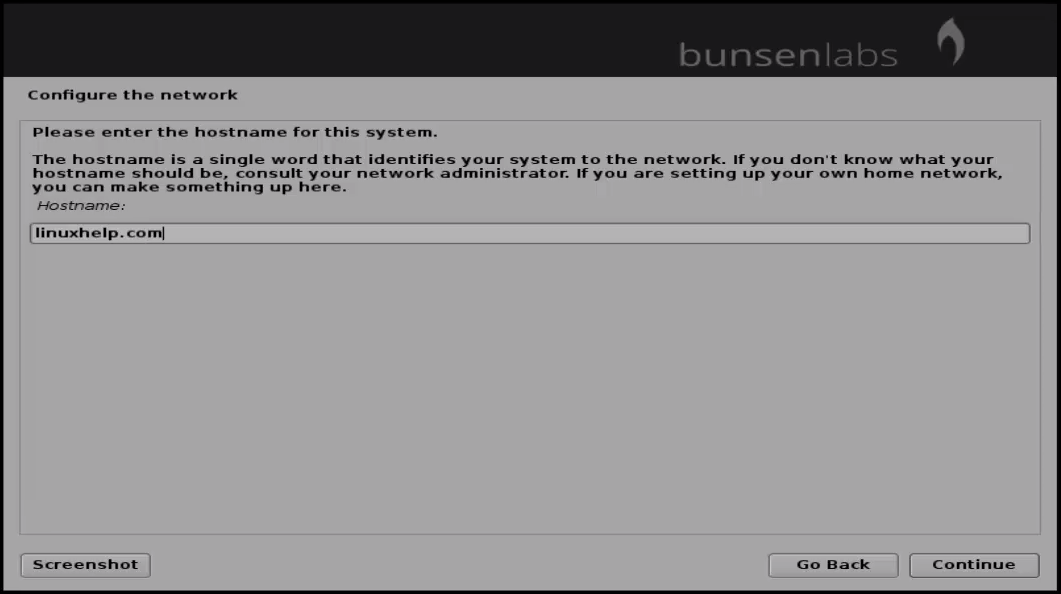
Set the host name, click continue for further progress.
Hostname
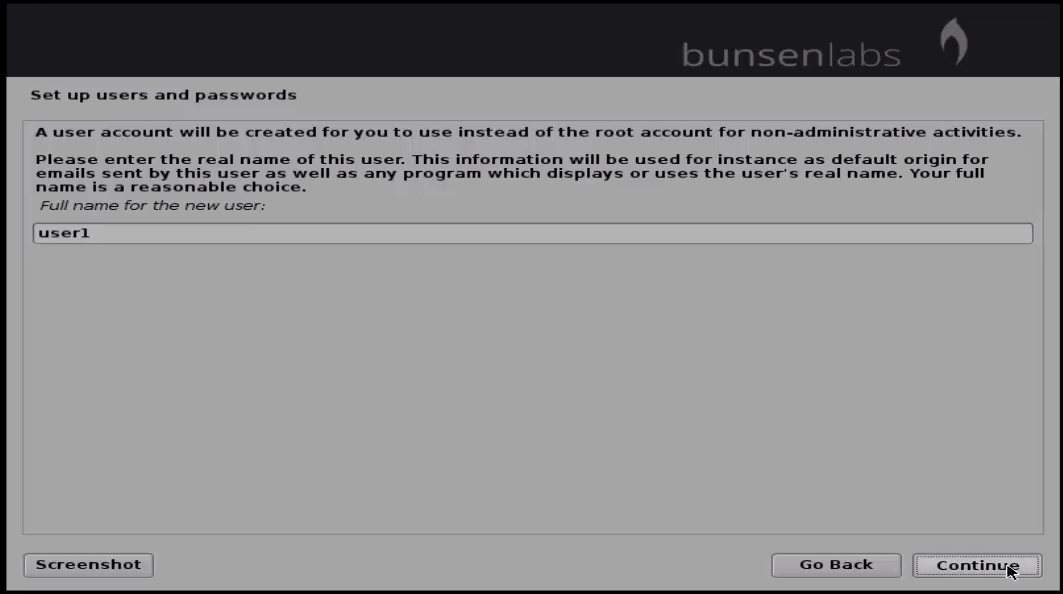
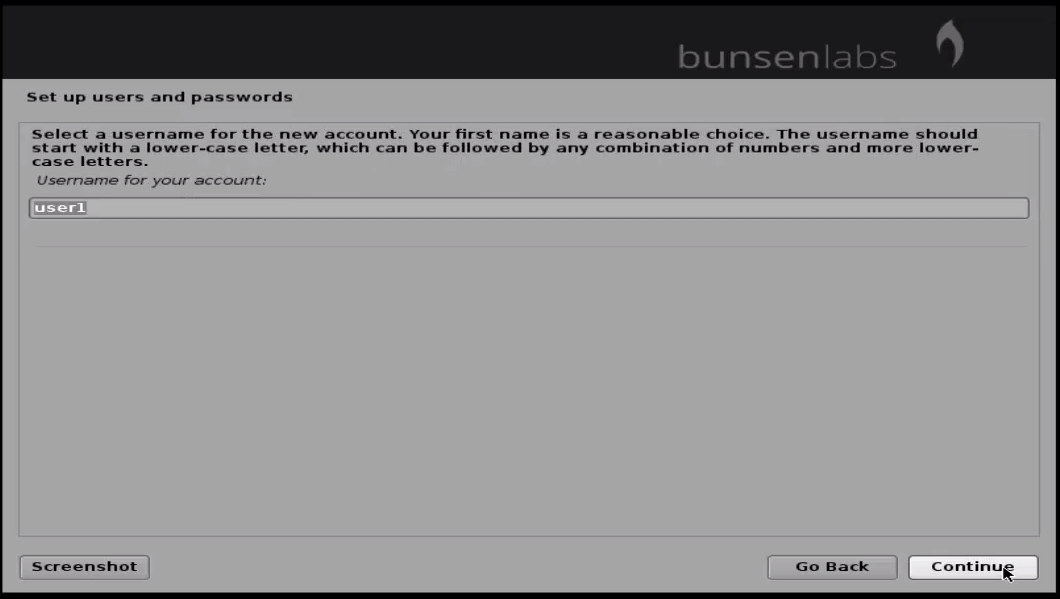
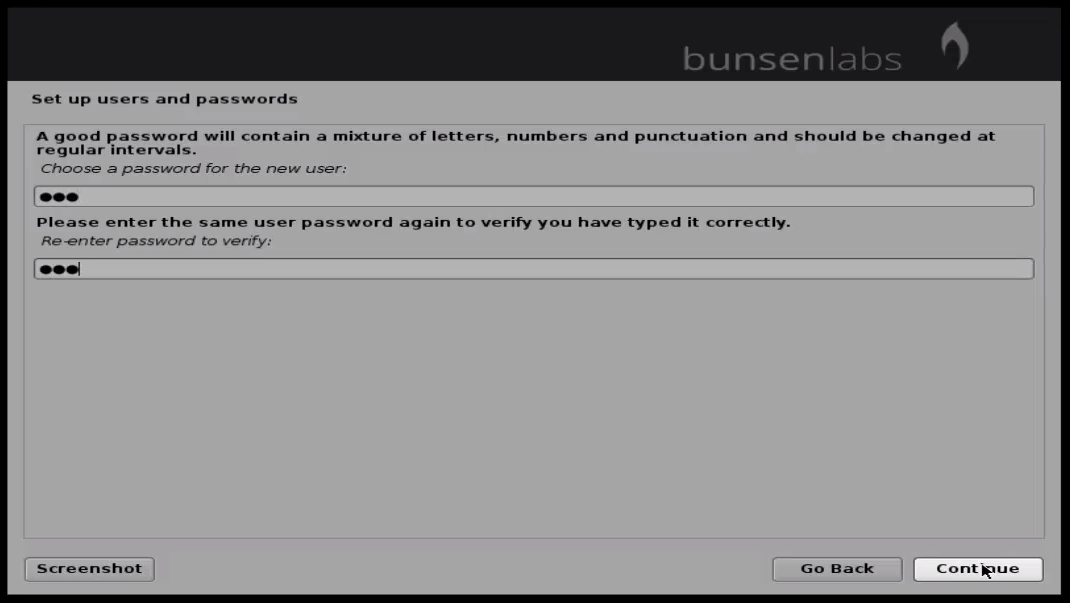
Create a new user and set user password.
new_user
account_username
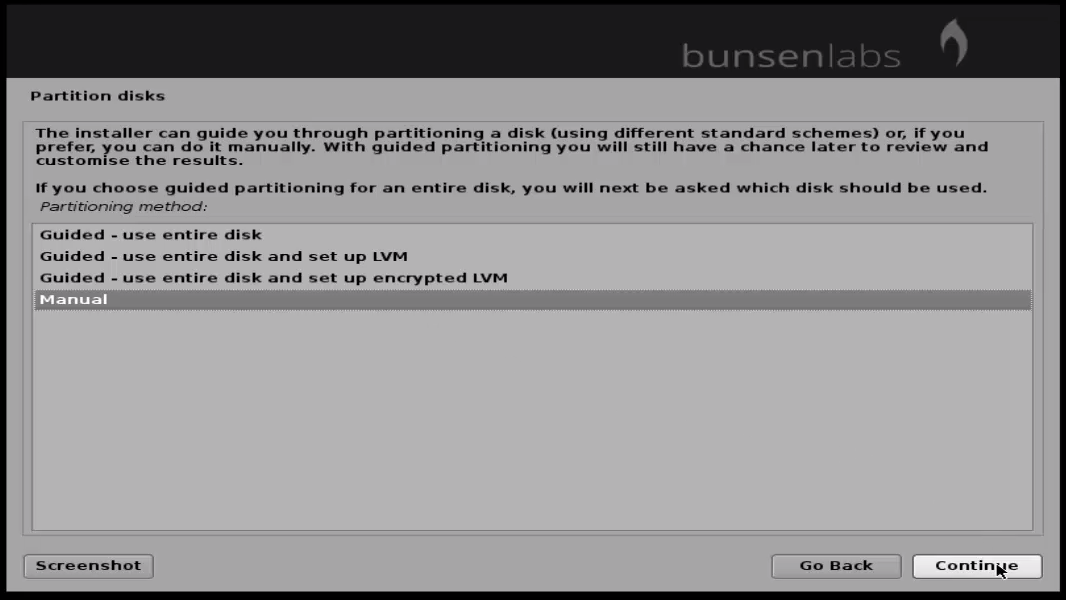
To partition manually, select Manual and click “ continue”
manual_partition
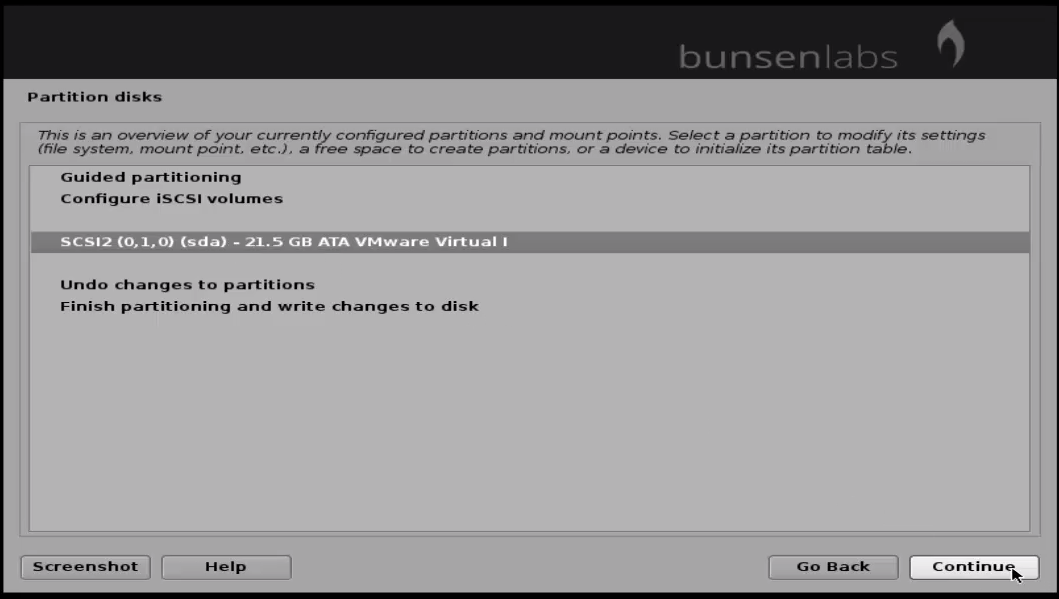
Choose the disk to be partitioned and click “ Continue” .
partition_disk
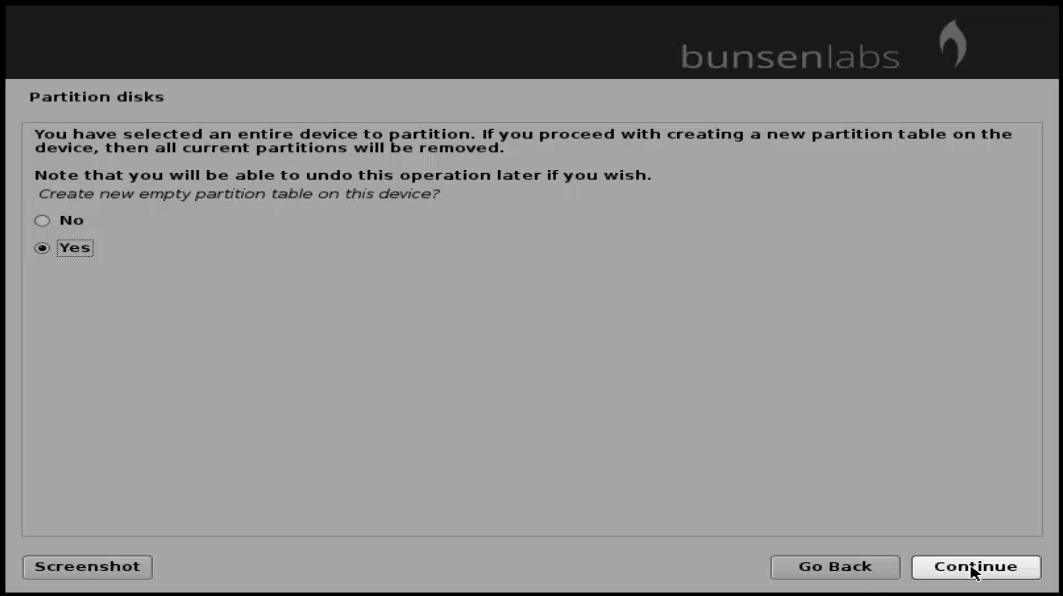
Select “ yes” to click “ continue” .
continue_partition
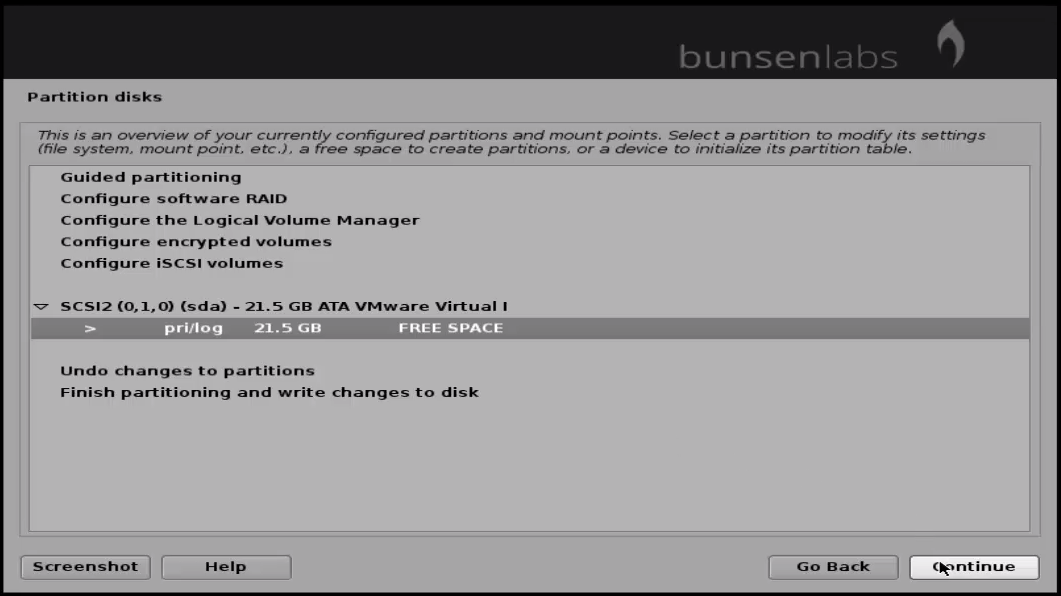
To add a new partition, select the disk to be partitioned.
add_new_partition
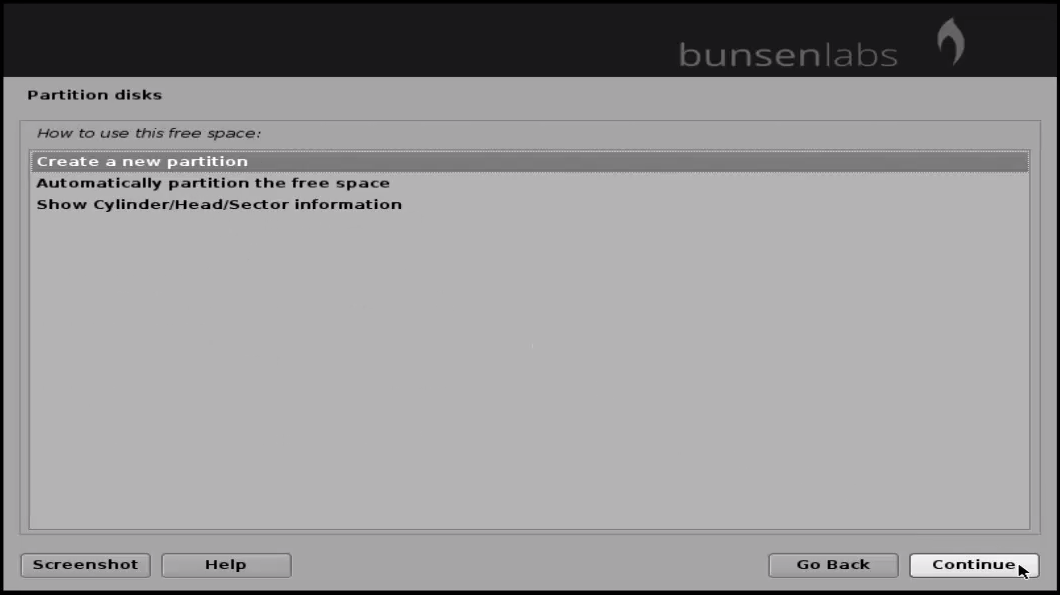
Choose “ create a new partition” and click “ continue”
create_a_new_partition
Set the first partition size and click “ continue”
continue
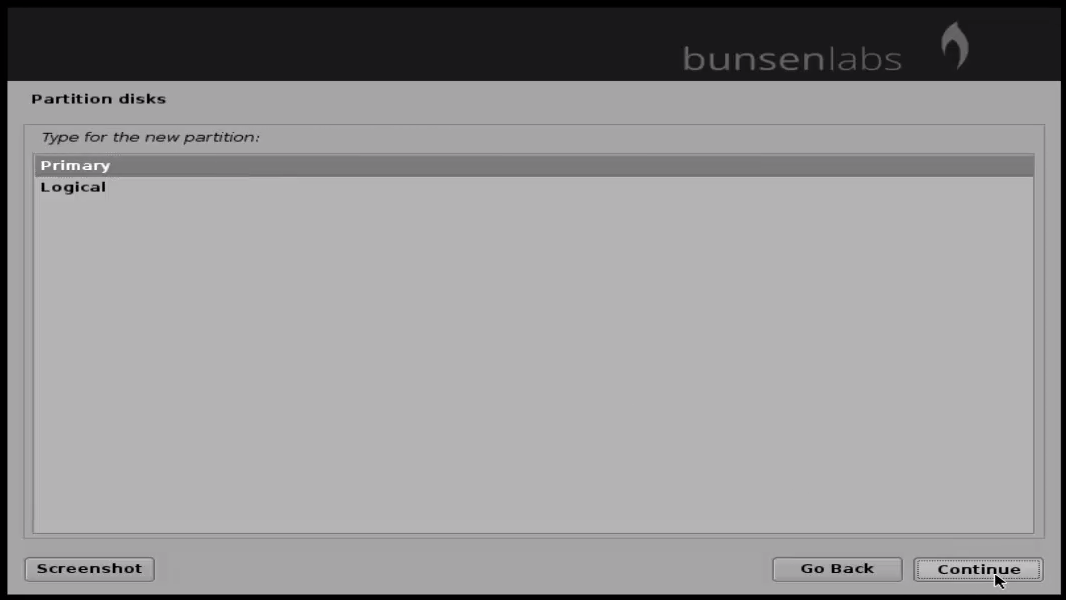
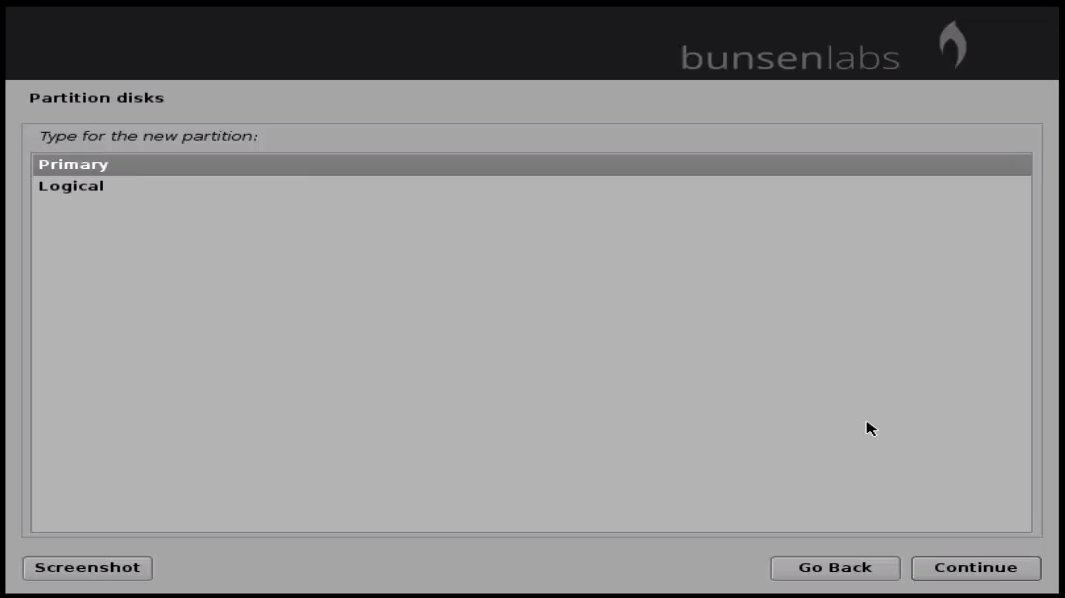
Choose the partition type as “ primary” and click continue.
primary_partition

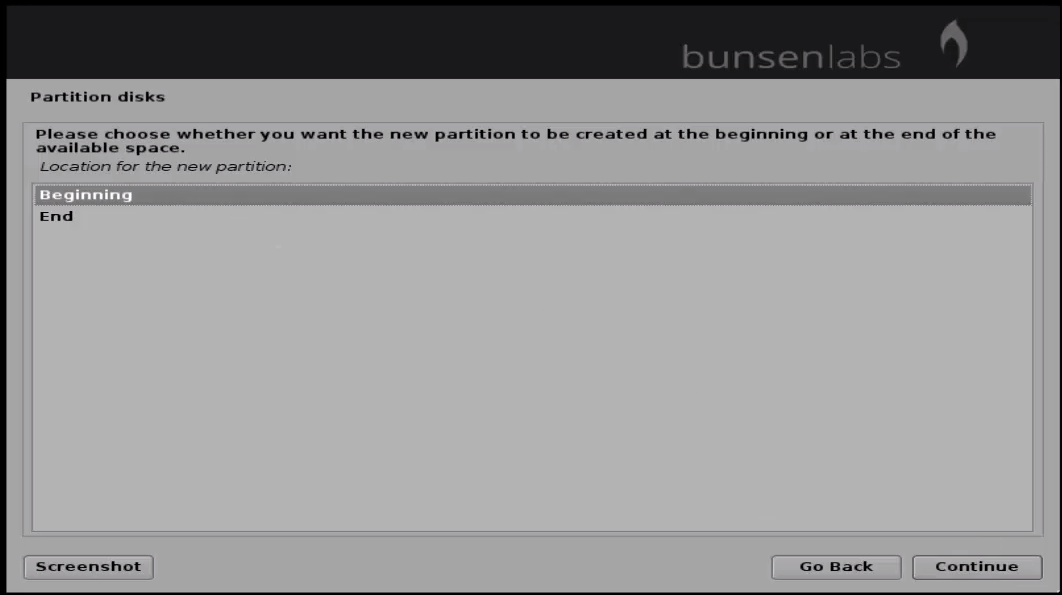
Select the location of the partition as “ Beginning ” and click “ continue”
Begining_location
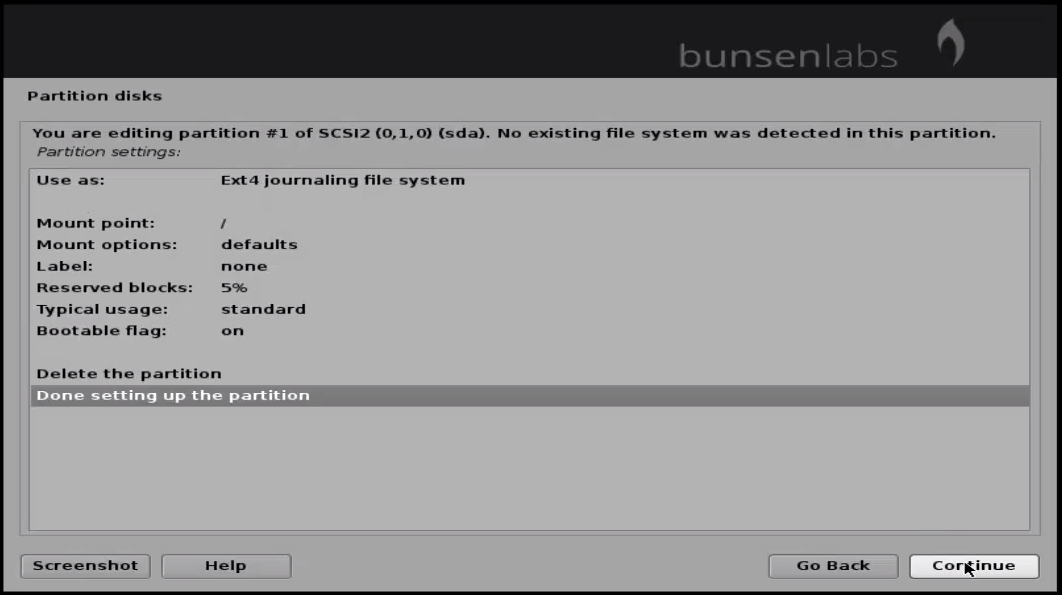
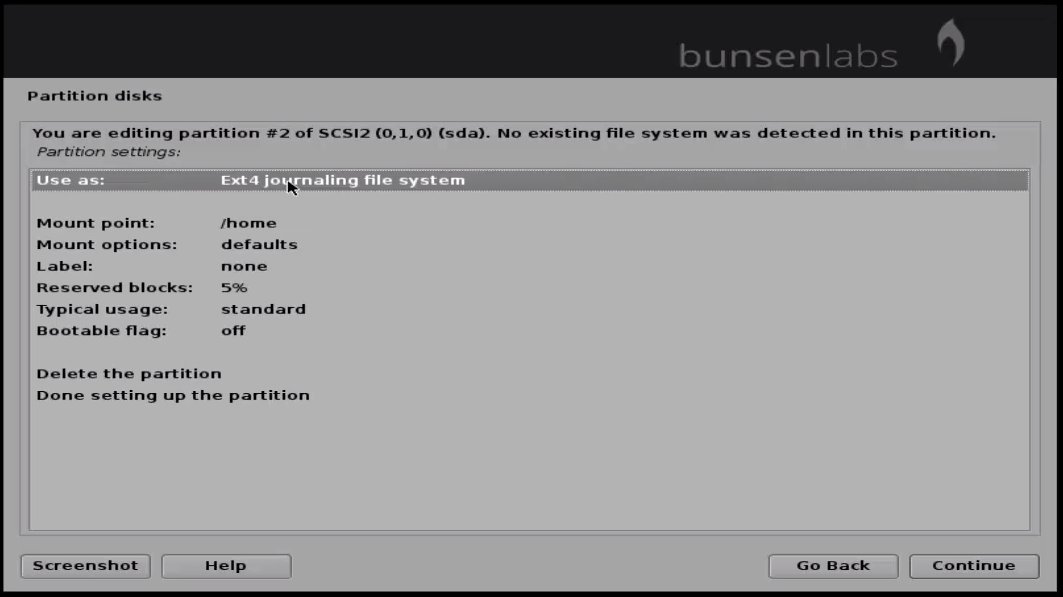
Check the preview of your partition and select “ Done setting up the partition” .
Done_setting_oartition
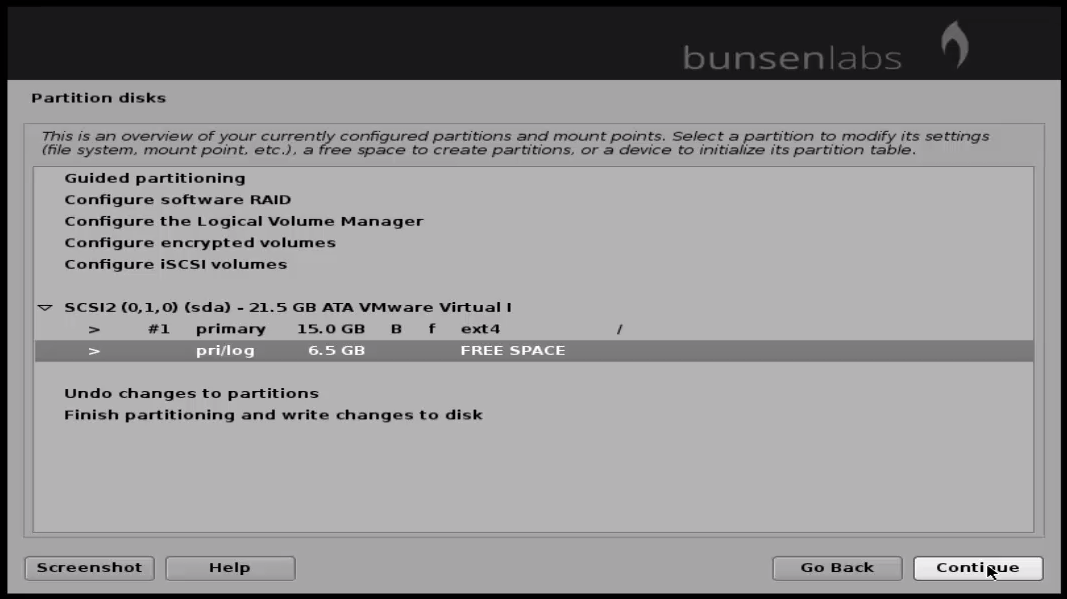
Select the free space for creating swap partition.
free_space
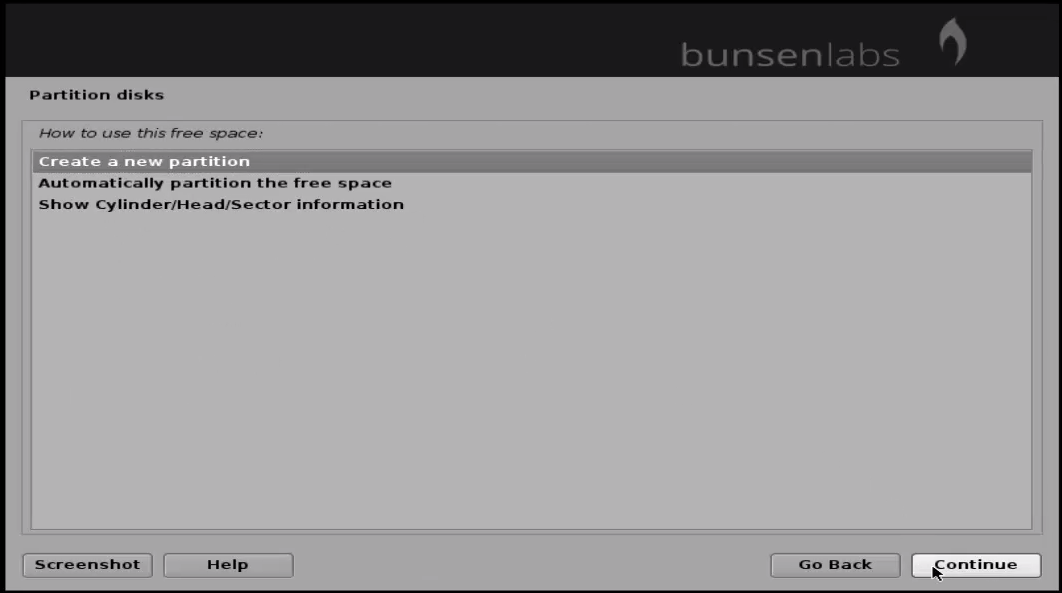
Then click “ create new partition” and click “ continue”
new_partition
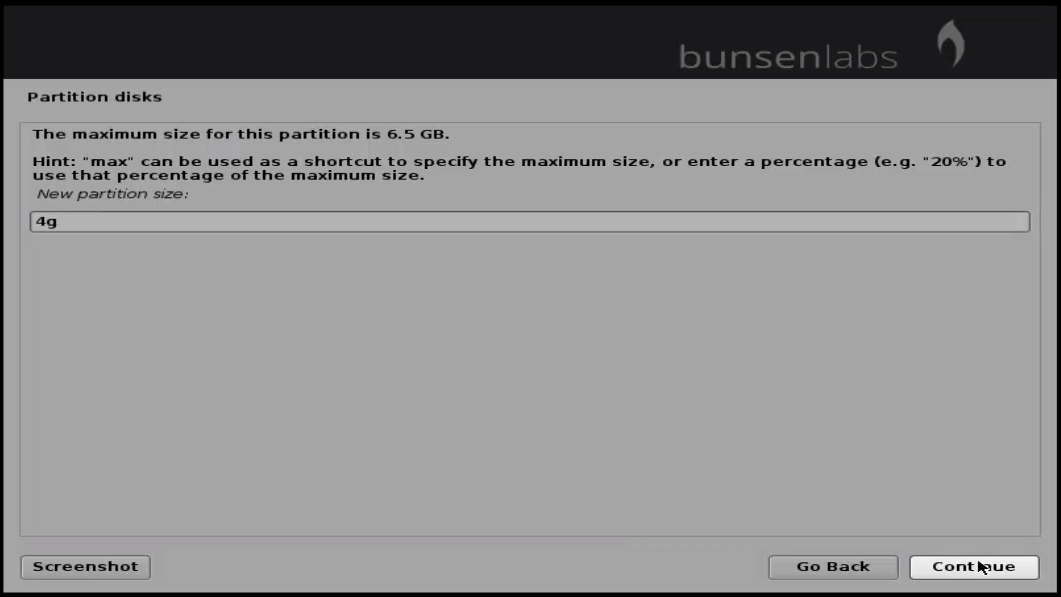
Set size for swap memory and the partition type as primary.
partition_size
primary
Verify the partitions preview and click continue to proceed further.
Ext4

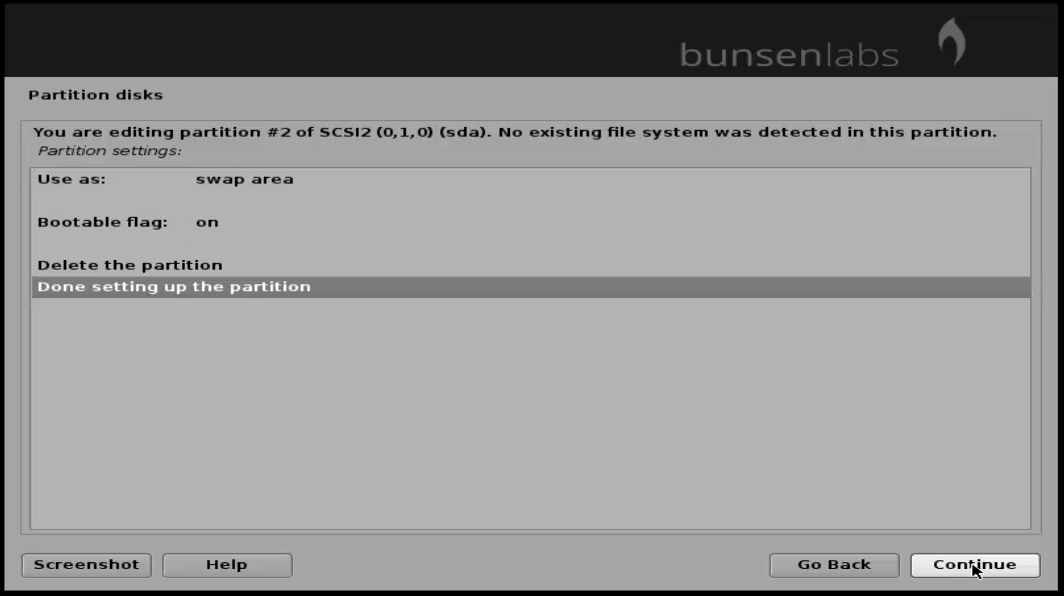
Then select swap area option and click continue.
swap_area
Click “ Done setting up the partition” to apply the changes.
apply_changes
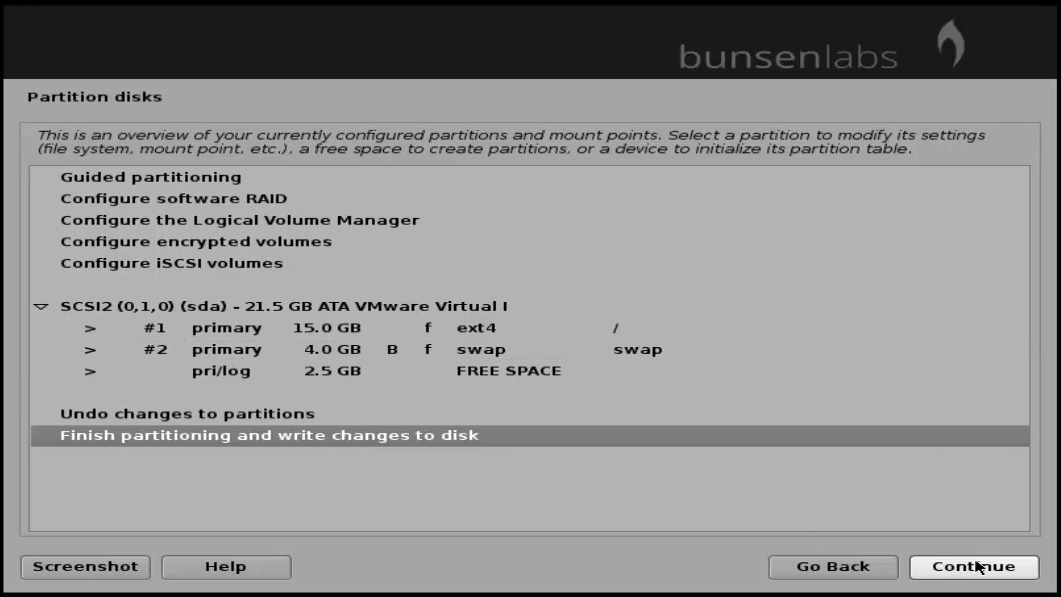
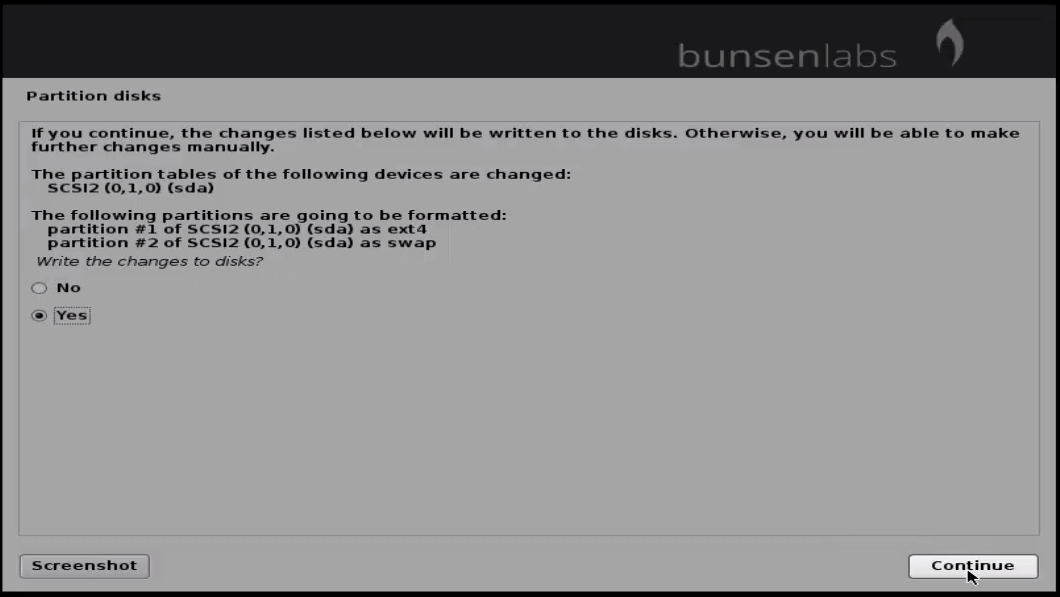
Select “ Finish partitioning and write changes to disk” and click “ continue” .
finish_partitioning
In the confirmation window, click “ yes” and then “ continue” .
continue
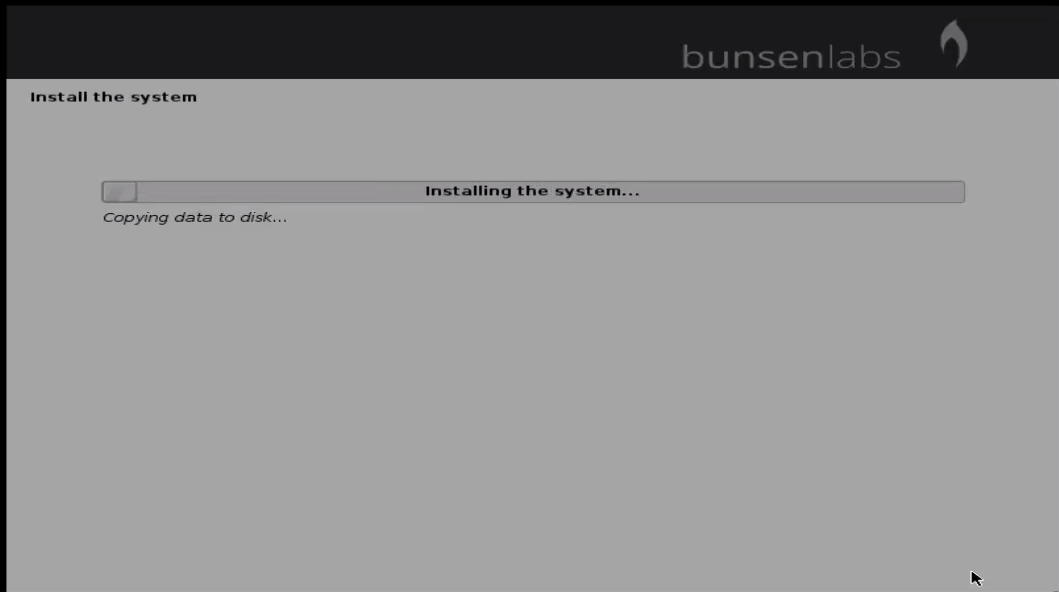
Now installation process has started.
installation_started
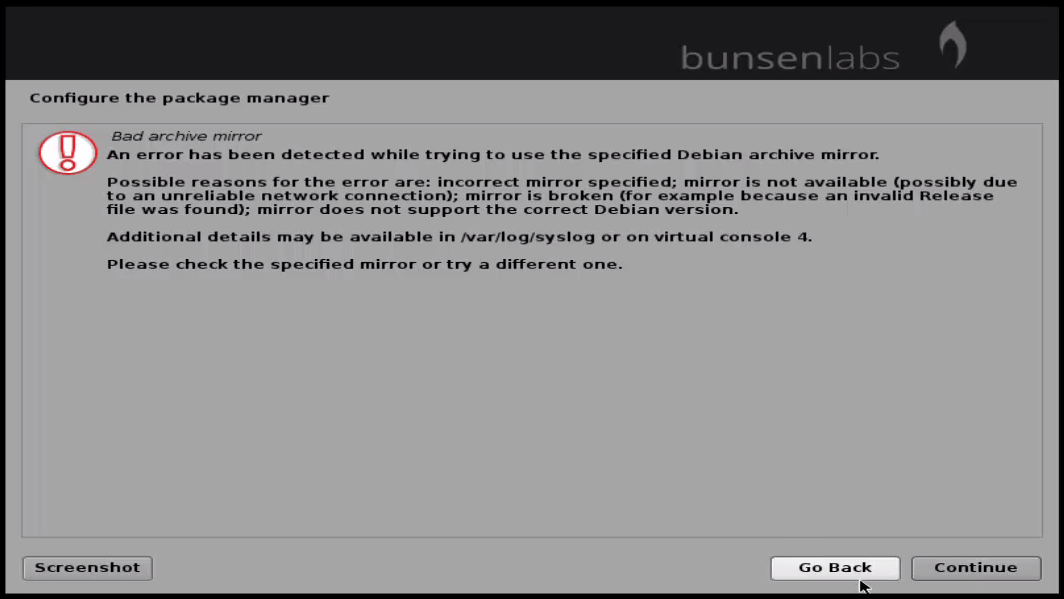
Next the configuration package manager wizard will appear, click “ Go back” .
go_back
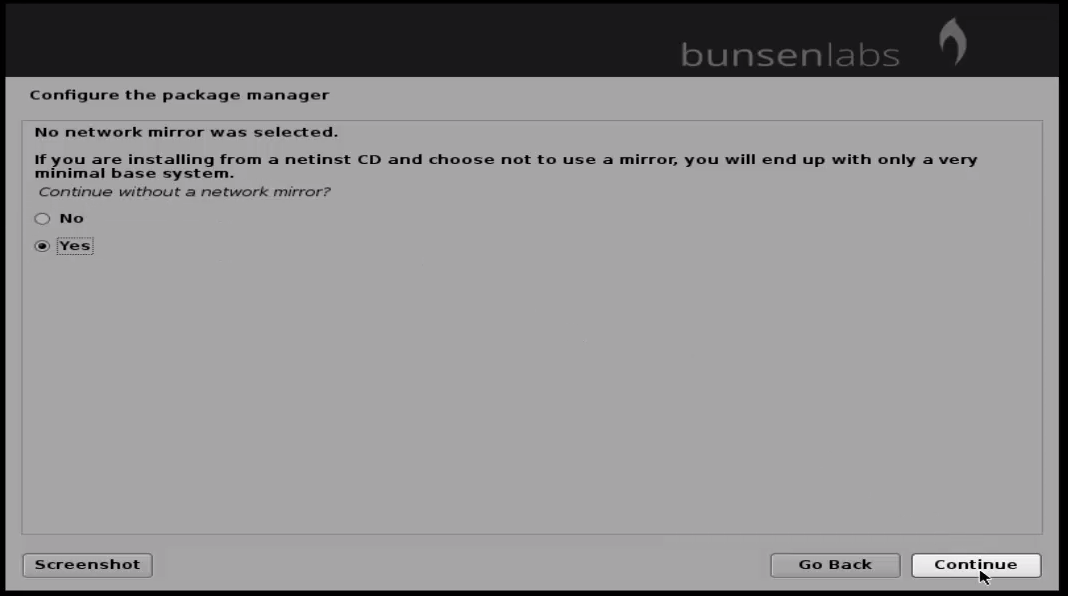
Choose “ yes” to continue without network mirror.
network mirror
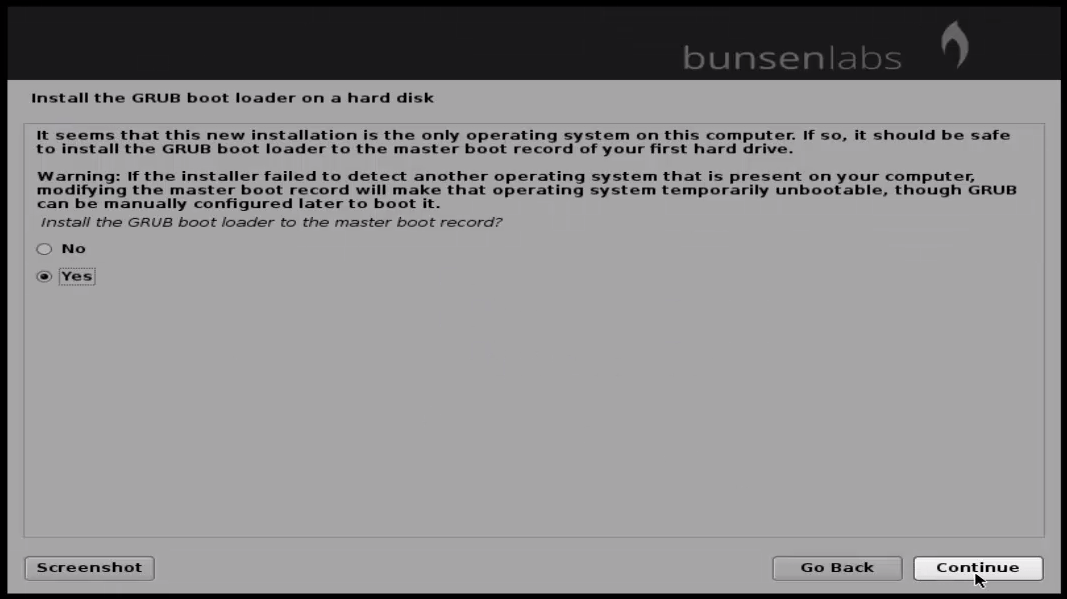
Select “ yes” to install the grub boot loader and click “ continue” .
grub
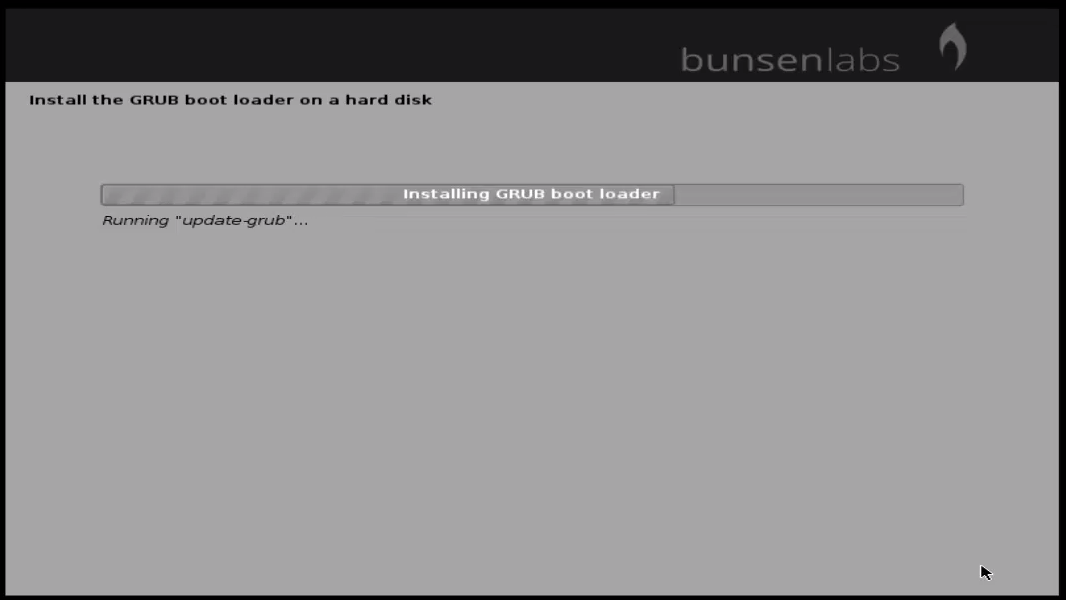
Select hard disk for grub root installation and click “ continue” .
grub_root_installation
Grub boot loader installation started.
Grub boot loader installation
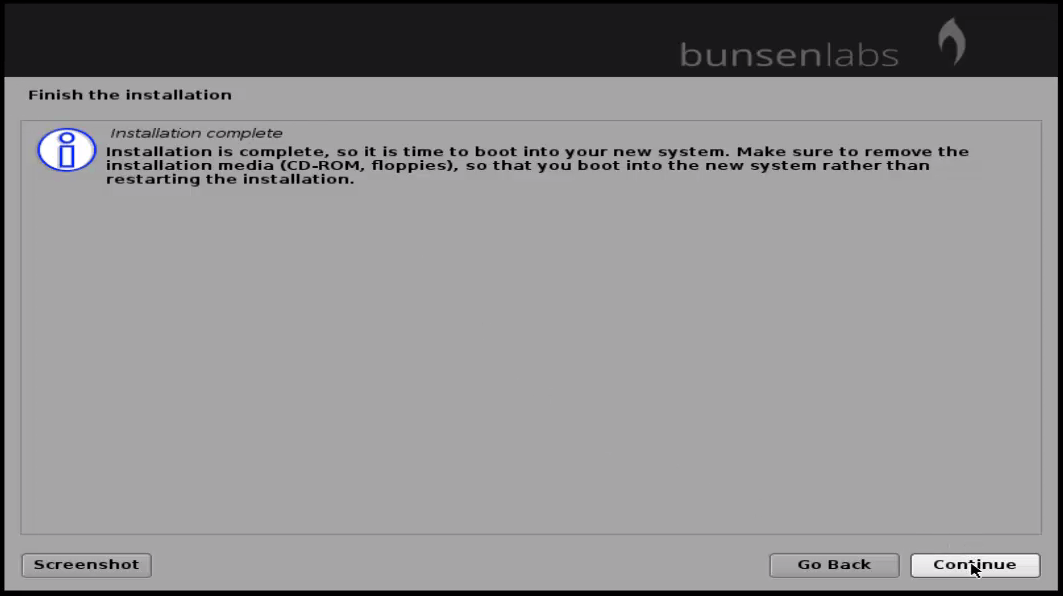
After installation, remove the installation media and click “ continue” .
remove_installation_media

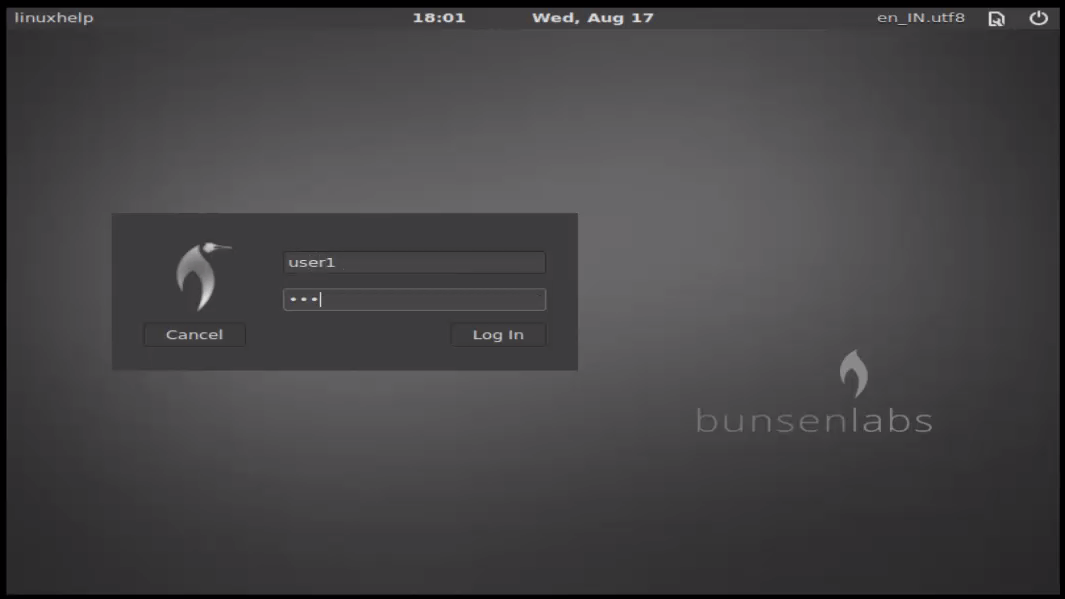
After restart, Login to the bunsenlabs.
login
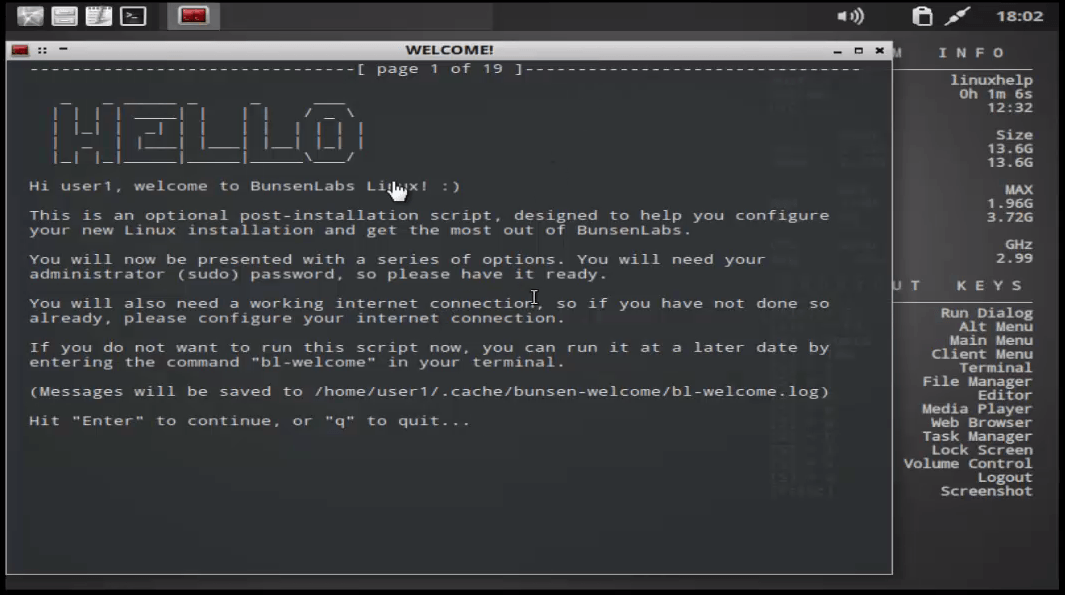
After login, the post installation wizard appears as shown below.
welcome
system_info
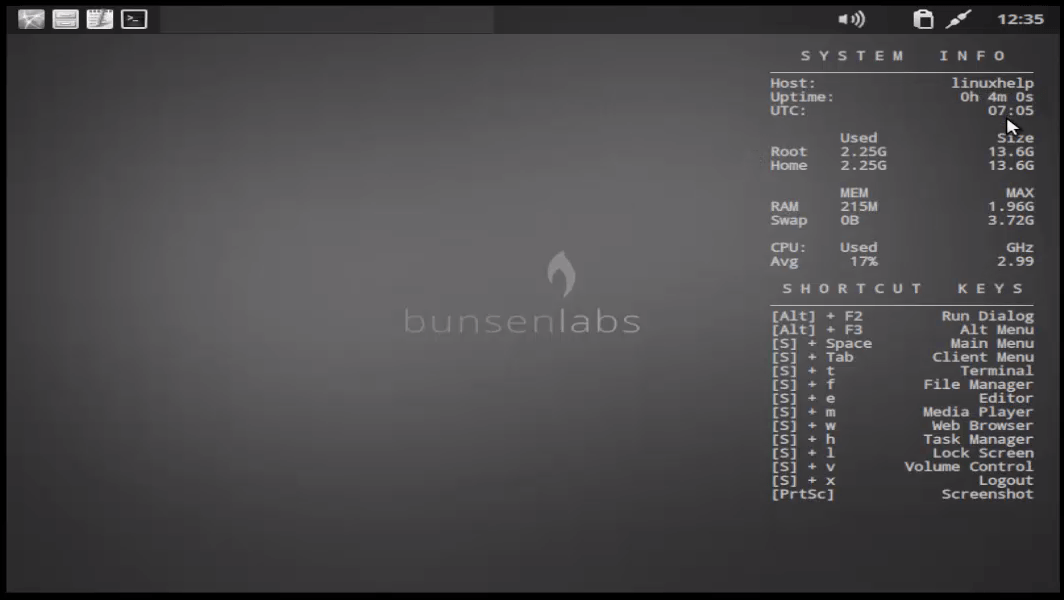
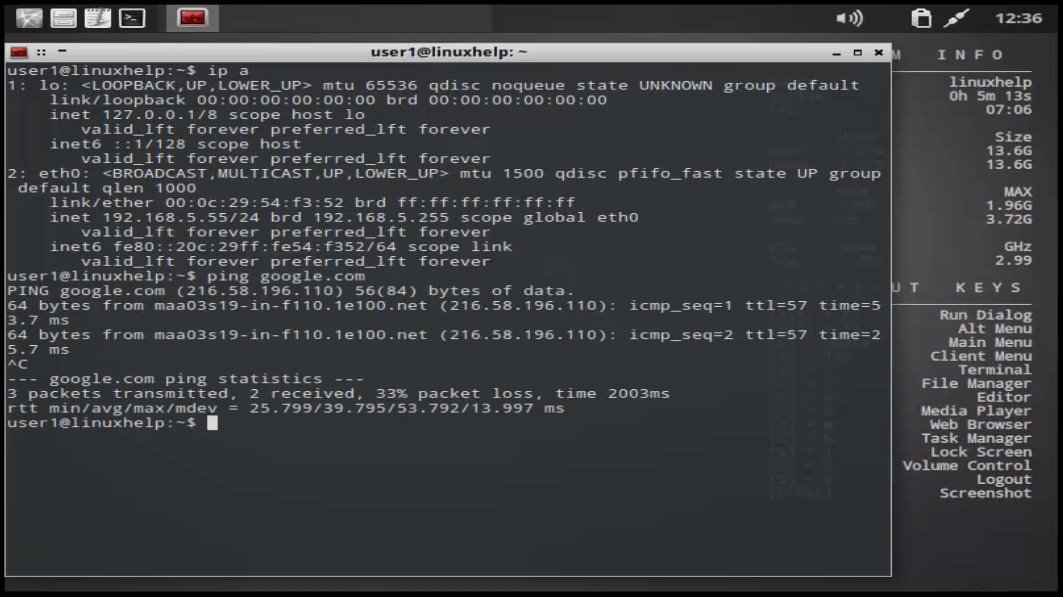
Open the terminal and start working.!!!
start_working

Tags:
jayce
Author: 

Comments ( 0 )

No comments available

Add a comment
{{postCtrl.cmtErrMsg}}

Frequently asked questions ( 5 )

Q

How can I get my desktop to look like the ones on the front page’s slideshow?

A

You can start by tracking down the original posts on our forums and looking up what the respective user has done or used to produce the pictured result.

Q

Does it possible to configure wireless network during installation?

A

yes If you have a Wifi Device on your Desktop

Q

Why it Is hostname similar to the username?

A

No, they both are very different actually

Q

Why it is possible to setup LVM?

A

Yes, you have an option on partitioning with LVM using Busenlabs Linux.

Q

Why do I keep getting a 403 Access Denied error when trying to access?

A

This is because your IP address is on an IP block list. Please refer to the Forums 403 FAQ for more information and how to resolve this kind of problem.

Back To Top!
Rank
User
Points

Top Contributers

userNamenaveelansari
135850

Top Contributers

userNameayanbhatti
92510

Top Contributers

userNamehamzaahmed
32150

Top Contributers

1
userNamelinuxhelp
31040

Top Contributers

userNamemuhammadali
24500
Can you help legeek ?
Installation of the call center module

hello

I wish to install a call center in virtual with issabel, I downloaded the latest version of it , but I don' t arrive to install the call center module in issabel. please help me

thanks!

Networking
  • Routing
  • trunk
  • Netmask
  • Packet Capture
  • domain
  • HTTP Proxy
Server Setup
  • NFS
  • KVM
  • Memory
  • Sendmail
  • WebDAV
  • LXC
Shell Commands
  • Cloud commander
  • Command line archive tools
  • last command
  • Shell
  • terminal
  • Throttle
Desktop Application
  • Linux app
  • Pithos
  • Retrospect
  • Scribe
  • TortoiseHg
  • 4Images
Monitoring Tool
  • Monit
  • Apache Server Monitoring
  • EtherApe 
  • Arpwatch Tool
  • Auditd
  • Barman
Web Application
  • Nutch
  • Amazon VPC
  • FarmWarDeployer
  • Rukovoditel
  • Mirror site
  • Chef
Contact Us | Terms of Use| Privacy Policy| Disclaimer
© 2025 LinuxHelp.com All rights reserved. Linux™ is the registered trademark of Linus Torvalds. This site is not affiliated with linus torvalds in any way.