How to install Clion 2018.1 on ubuntu 18.04
To install CLion 2018.1 on Ubuntu 18.04
CLion is a free IntelliJ Platform. It supports HTML, CSS, JavaScript, and XML. Languages can also be added via plugins. Installation of CLion in Ubuntu is explained in this tutorial. Some of CLion 2018.1 features are covered below.
Features
&bull Easy start
&bull Smart editor
&bull Navigation & Search
&bull On-the-fly code analysis
&bull Editor customization
&bull Code generation & refactorings
Installing CLion
CLion requires java to be installed on the machine so let' s first install java through the repository.
root@linuxhelp:~# add-apt-repository ppa:webupd8team/java
 Oracle Java (JDK) Installer (automatically downloads and installs Oracle JDK7 / JDK8 / JDK9). There are no actual Java files in this PPA.

Important ->  Why Oracle Java 7 And 6 Installers No Longer Work: http://www.webupd8.org/2017/06/why-oracle-java-7-and-6-installers-no.html

Ubuntu 16.10 Yakkety Yak is no longer supported by Canonical (and thus, Launchpad and this PPA). The PPA supports Ubuntu 17.10, 17.04, 16.04, 14.04 and 12.04.

More info (and Ubuntu installation instructions):
- for Oracle Java 7: http://www.webupd8.org/2012/01/install-oracle-java-jdk-7-in-ubuntu-via.html
- for Oracle Java 8: http://www.webupd8.org/2012/09/install-oracle-java-8-in-ubuntu-via-ppa.html

Debian installation instructions:
- Oracle Java 7: http://www.webupd8.org/2012/06/how-to-install-oracle-java-7-in-debian.html
- Orac
.
.
Get:7 http://ppa.launchpad.net/webupd8team/java/ubuntu bionic/main i386 Packages [1,556 B]
Get:8 http://ppa.launchpad.net/webupd8team/java/ubuntu bionic/main Translation-en [1,036 B]
Fetched 20.0 kB in 3s (6,177 B/s)
Reading package lists... Done
After adding the repository, install Java using “ apt-get install” command.
root@linuxhelp:~# apt-get install java-common oracle-java9-installer
Reading package lists... Done
Building dependency tree
Reading state information... Done
The following packages were automatically installed and are no longer required:
  apache2-bin apache2-data apache2-utils libapr1 libaprutil1 libaprutil1-dbd-sqlite3 libaprutil1-ldap
Use ' apt autoremove'  to remove them.
The following additional packages will be installed:
  gsfonts-x11 oracle-java9-set-default
.
.
update-alternatives: using /usr/lib/jvm/java-9-oracle/lib/jexec to provide /usr/bin/jexec (jexec) in auto mode
update-alternatives: using /usr/lib/jvm/java-9-oracle/bin/javaws.real to provide /usr/bin/javaws.real (javaws.real) in auto mode

Oracle JDK 9 installed
Verify the installation of java by the following command
root@linuxhelp:~# java -version
java version " 9.0.4"
Java(TM) SE Runtime Environment (build 9.0.4+11)
Java HotSpot(TM) 64-Bit Server VM (build 9.0.4+11, mixed mode)
And then download “ CLion” from official site with the help of “ wget” command from the terminal.
root@linuxhelp:~# wget https://download.jetbrains.com/cpp/CLion-2018.1.tar.gz
--2018-04-13 05:51:00--  https://download.jetbrains.com/cpp/CLion-2018.1.tar.gz
Resolving download.jetbrains.com (download.jetbrains.com)... 52.50.13.42, 52.18.241.155, 2a05:d018:93b:d103:7563:e3f4:7486:c368, ...
Connecting to download.jetbrains.com (download.jetbrains.com)|52.50.13.42|:443... connected.
HTTP request sent, awaiting response... 302 Moved Temporarily
Location: https://download-cf.jetbrains.com/cpp/CLion-2018.1.tar.gz [following]
--2018-04-13 05:51:01--  https://download-cf.jetbrains.com/cpp/CLion-2018.1.tar.gz
Resolving download-cf.jetbrains.com (download-cf.jetbrains.com)... 52.222.128.103, 52.222.128.120, 52.222.128.35, ...
Connecting to download-cf.jetbrains.com (download-cf.jetbrains.com)|52.222.128.103|:443... connected.
HTTP request sent, awaiting response... 200 OK
Length: 333789580 (318M) [binary/octet-stream]
Saving to: ‘ CLion-2018.1.tar.gz’

CLion-2018.1.tar.gz            100%[====================================================> ] 318.33M  1.11MB/s    in 4m 50s

2018-04-13 05:55:51 (1.10 MB/s) - ‘ CLion-2018.1.tar.gz’  saved [333789580/333789580]
After the download, extract that downloaded tar file using “ tar” command.
root@linuxhelp:~# tar xfz CLion-2018.1.tar.gz
Set execute permission to that extracted directory using “ chmod” command.
root@linuxhelp:~# chmod -R 0755 clion-2018.1/
navigate to bin directory in the clion
root@linuxhelp:~# cd clion-2018.1/
root@linuxhelp:~/clion-2018.1# cd bin
root@linuxhelp:~/clion-2018.1/bin# ll
total 7564
drwxr-xr-x 6 root root    4096 Apr 13 05:56 ./
drwxr-xr-x 8 root root    4096 Apr 13 05:56 ../
drwxr-xr-x 2 root root    4096 Apr 13 05:56 clang/
-rwxr-xr-x 1 root root     374 Mar 27 00:19 clion64.vmoptions*
-rwxr-xr-x 1 root root   12190 Mar 27 00:19 clion.png*
-rwxr-xr-x 1 root root    6740 Mar 27 00:19 clion.sh*
-rwxr-xr-x 1 root root    2727 Mar 27 00:19 clion.svg*
-rwxr-xr-x 1 root root     337 Mar 27 00:19 clion.vmoptions*
drwxr-xr-x 5 root root    4096 Apr 13 05:56 cmake/
-rwxr-xr-x 1 root root     217 Mar 27 00:19 format.sh*
-rwxr-xr-x 1 root root   23072 Mar 27 00:19 fsnotifier*
-rwxr-xr-x 1 root root   29648 Mar 27 00:19 fsnotifier64*
-rwxr-xr-x 1 root root   26453 Mar 27 00:19 fsnotifier-arm*
drwxr-xr-x 6 root root    4096 Apr 13 05:56 gdb/
-rwxr-xr-x 1 root root   10936 Mar 27 00:19 idea.properties*
-rwxr-xr-x 1 root root     268 Mar 27 00:19 inspect.sh*
-rwxr-xr-x 1 root root 3654864 Mar 27 00:19 libyjpagent-linux64.so*
-rwxr-xr-x 1 root root 3908380 Mar 27 00:19 libyjpagent-linux.so*
drwxr-xr-x 6 root root    4096 Apr 13 05:56 lldb/
-rwxr-xr-x 1 root root    2236 Mar 27 00:19 log.xml*
-rwxr-xr-x 1 root root     410 Mar 27 00:19 printenv.py*
-rwxr-xr-x 1 root root     708 Mar 27 00:19 restart.py*
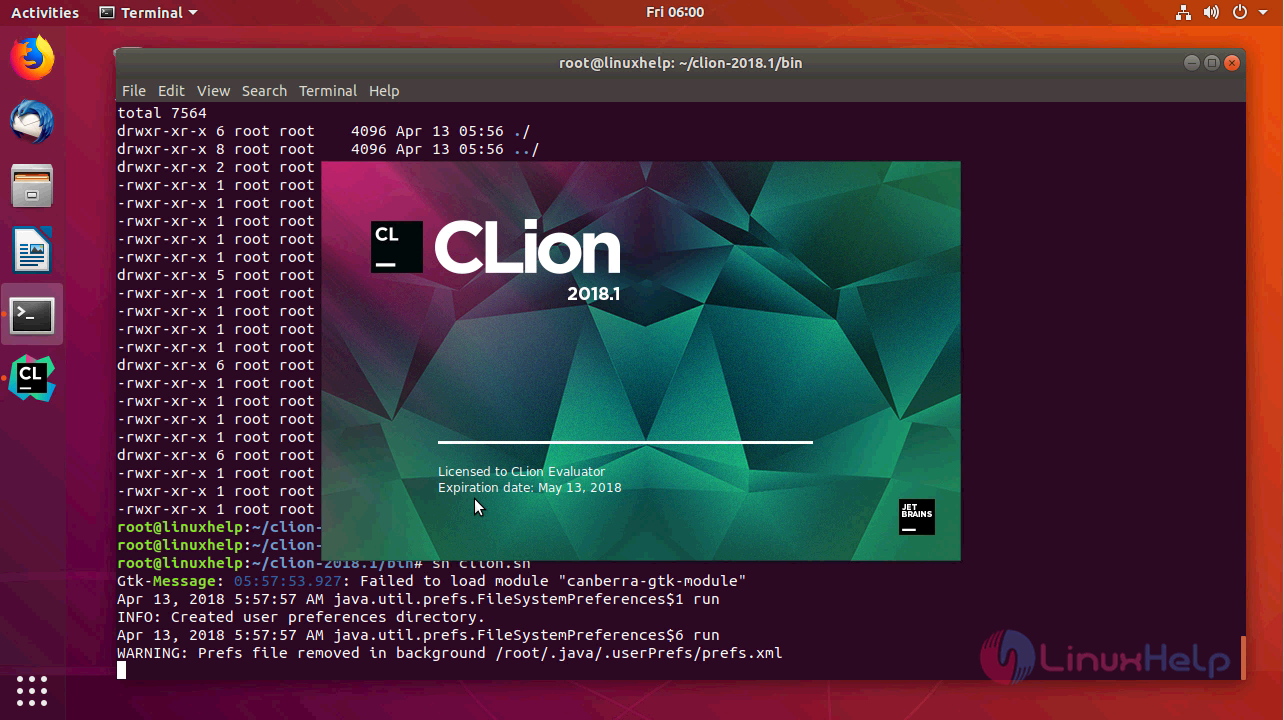
Now Run the clion.sh file to start the setup.
root@linuxhelp:~/clion-2018.1/bin# sh clion.sh
Gtk-Message: 05:57:53.927: Failed to load module " canberra-gtk-module"
Apr 13, 2018 5:57:57 AM java.util.prefs.FileSystemPreferences$1 run
INFO: Created user preferences directory.
Apr 13, 2018 5:57:57 AM java.util.prefs.FileSystemPreferences$6 run
WARNING: Prefs file removed in background /root/.java/.userPrefs/prefs.xml
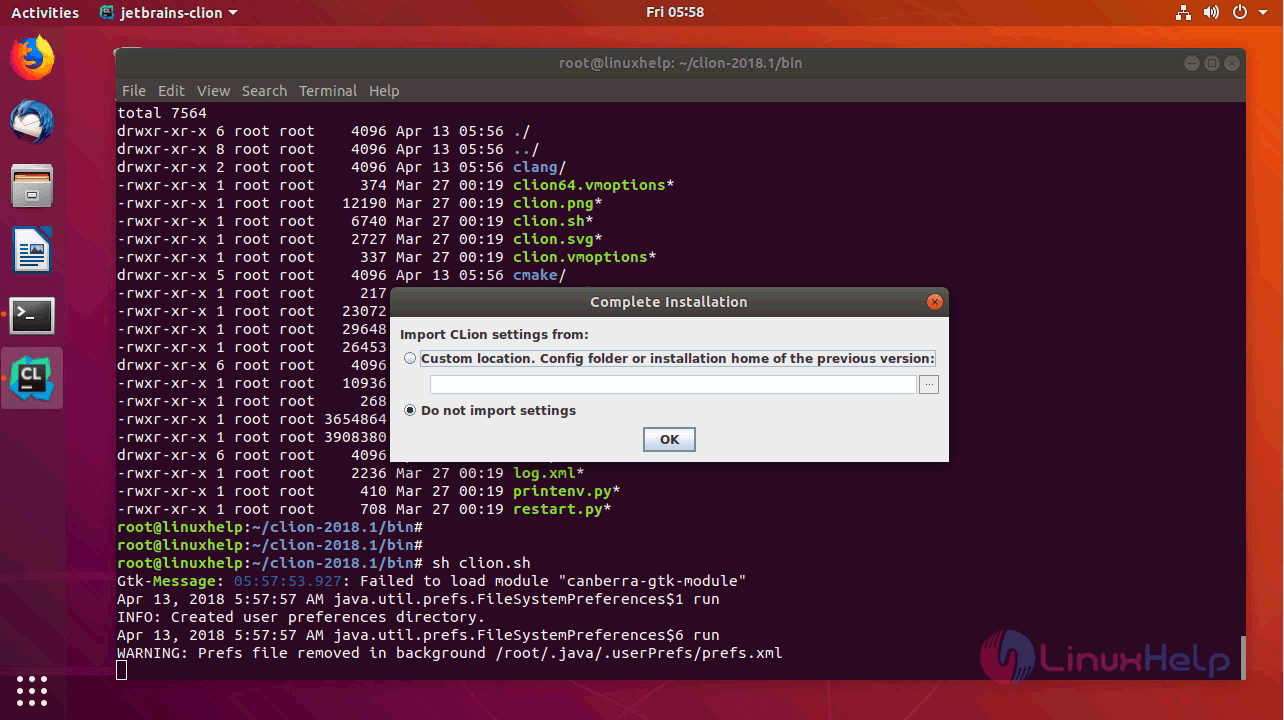
if you are installing for a first time Click “ ok” for a fresh installation.
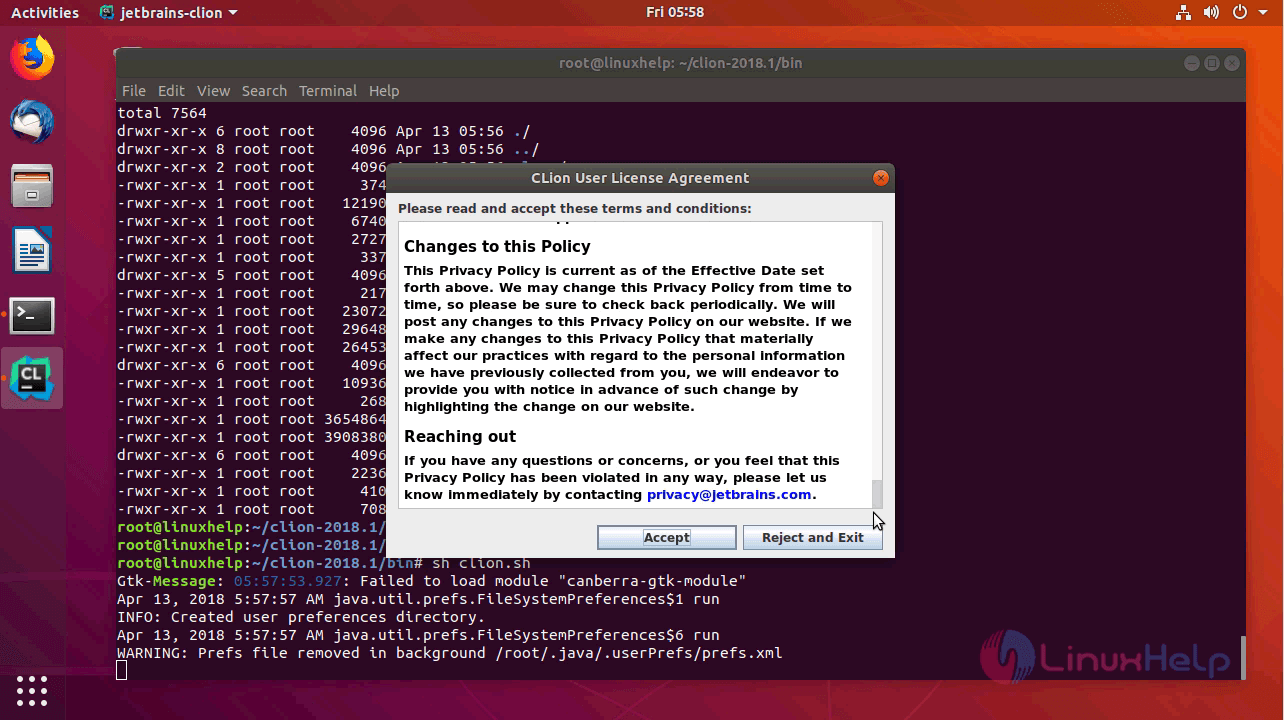
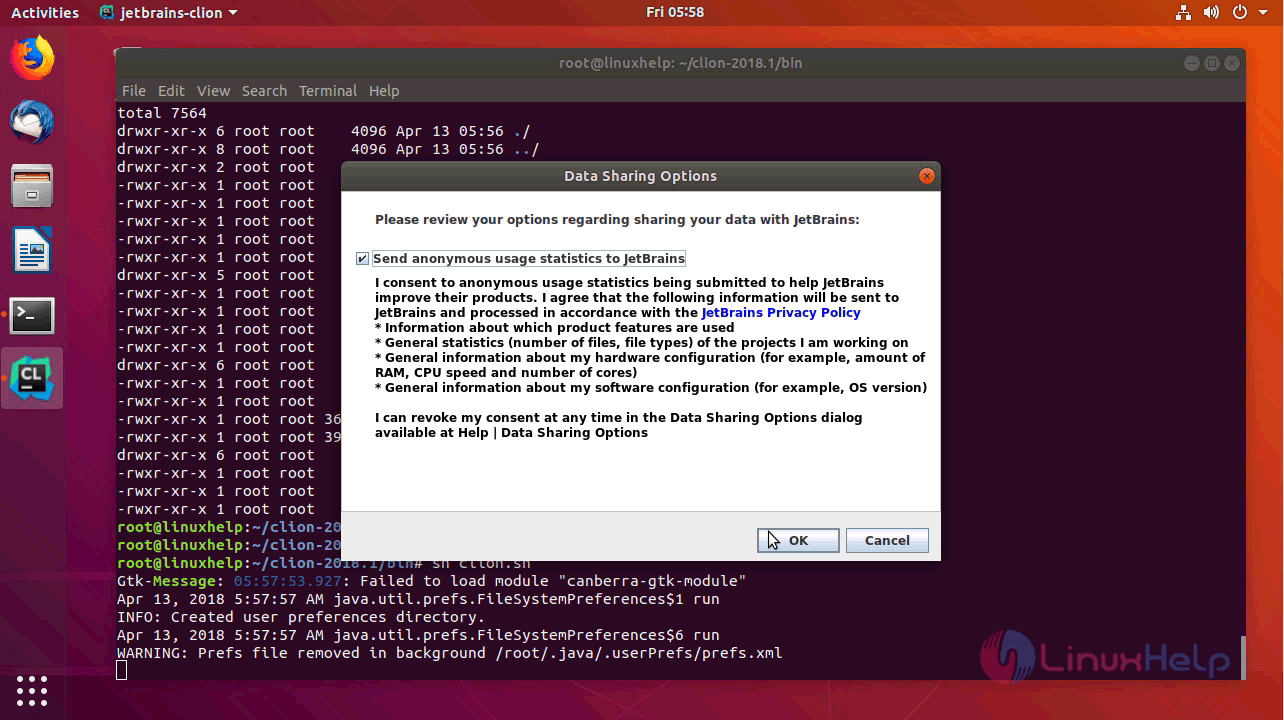
Read all the privacy policy and click “ accept” to enter into next step and share option.
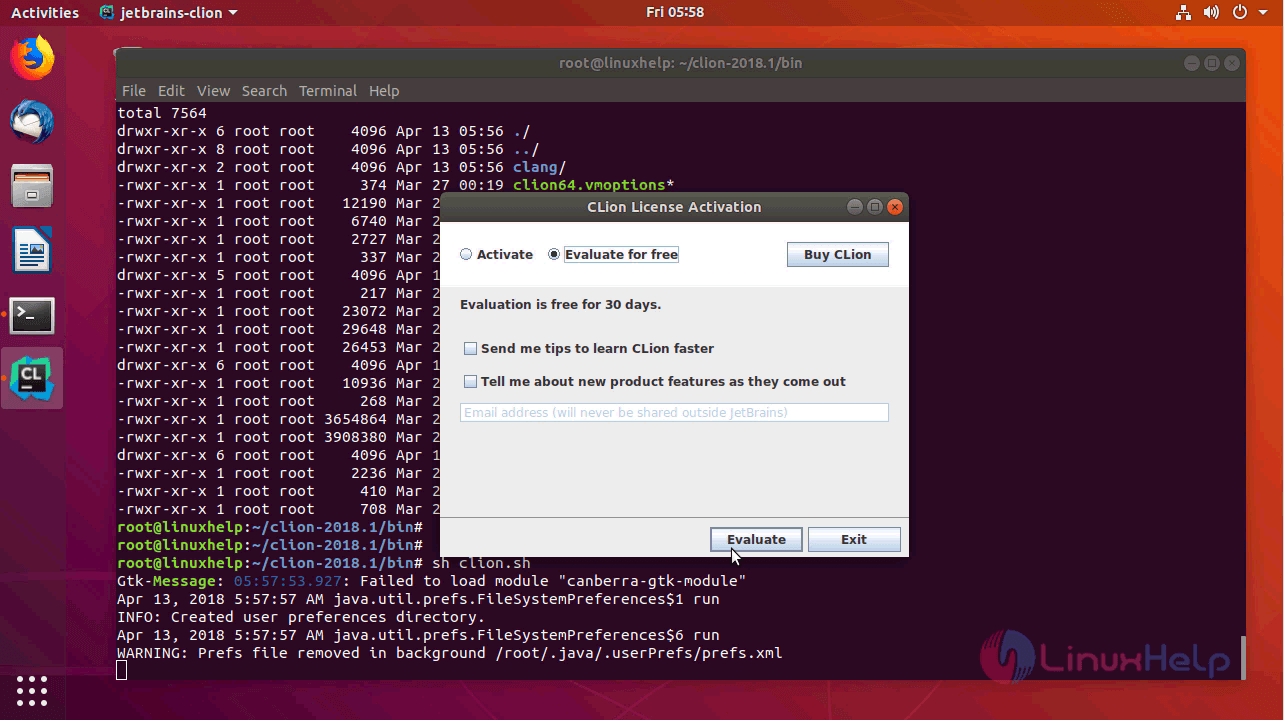
Select the type of License to be owned and click OK to continue.
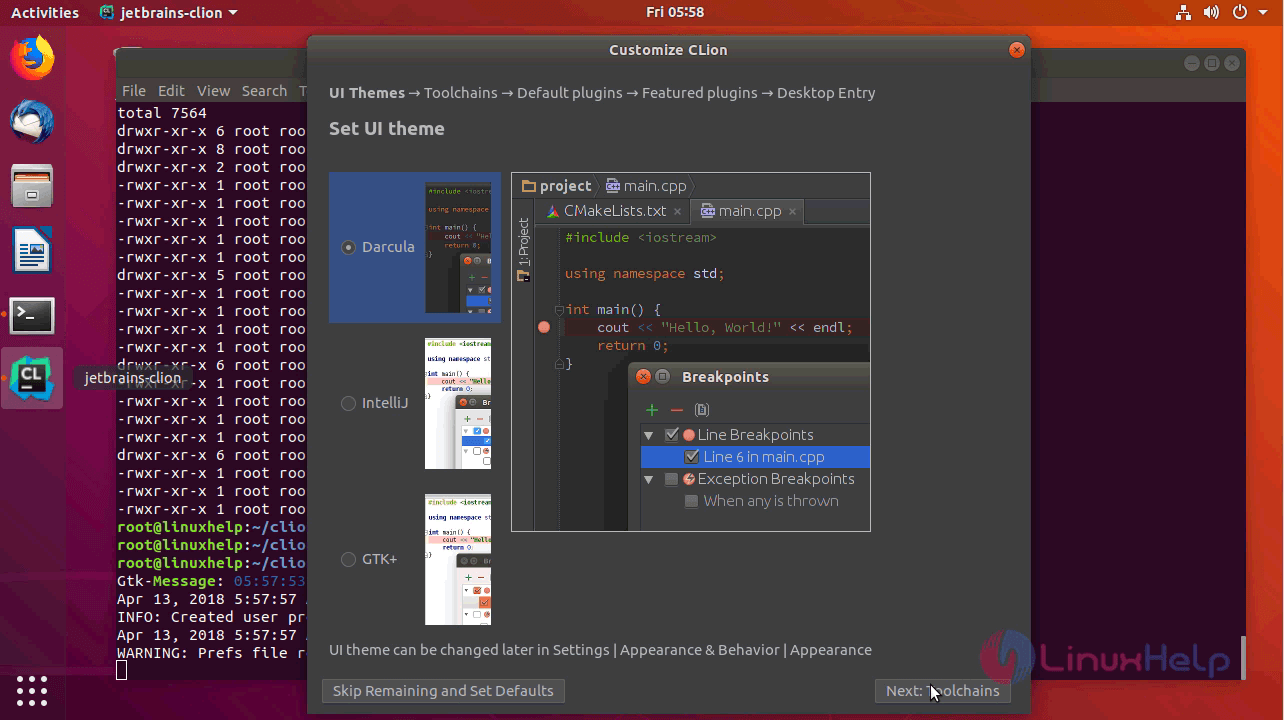
Set the UI theme and click “ Next"
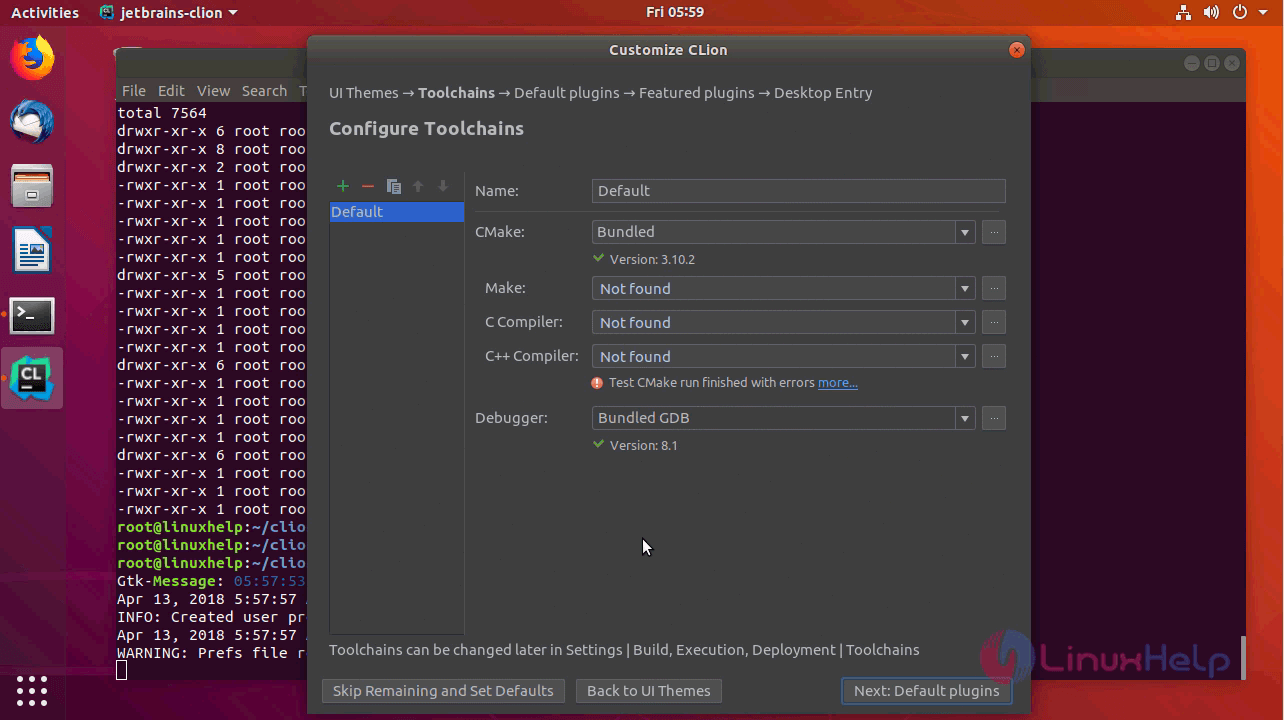
Configure “ Cmake” and “ debugger” then click for configuring " Next default Plugins"
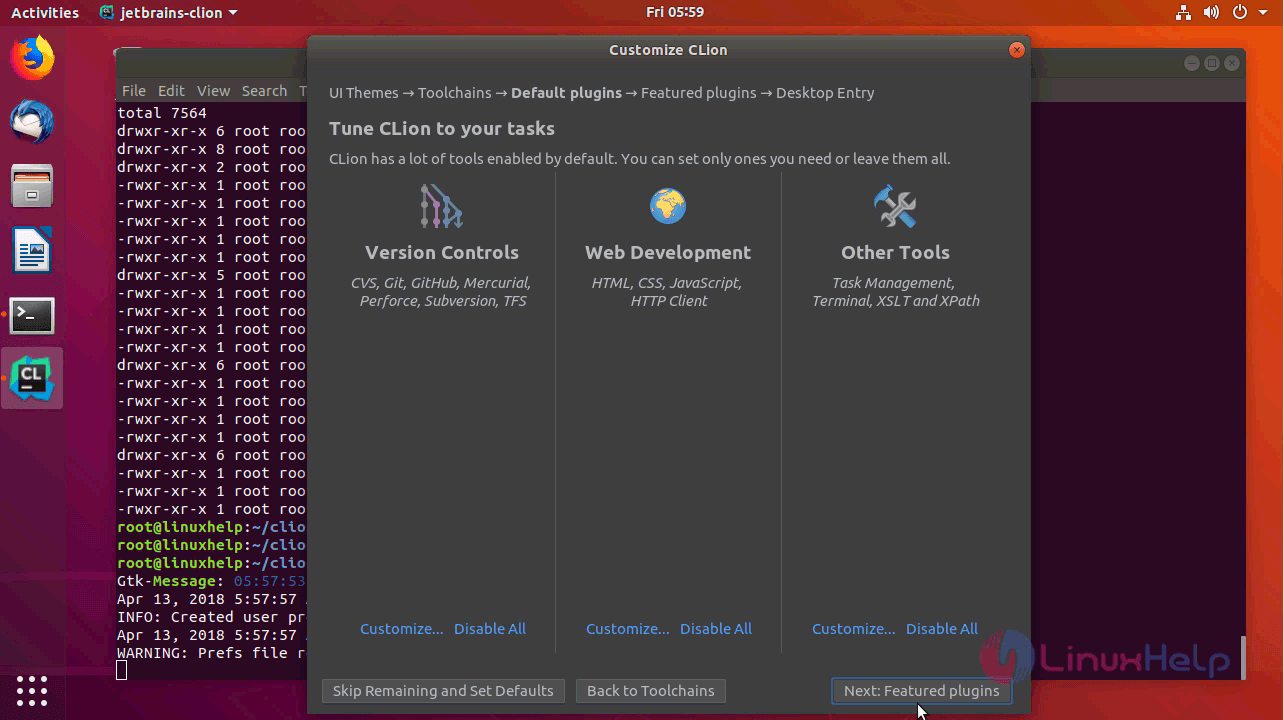
You can customize the default plugins here and once done click to see " Next featured Plugins."
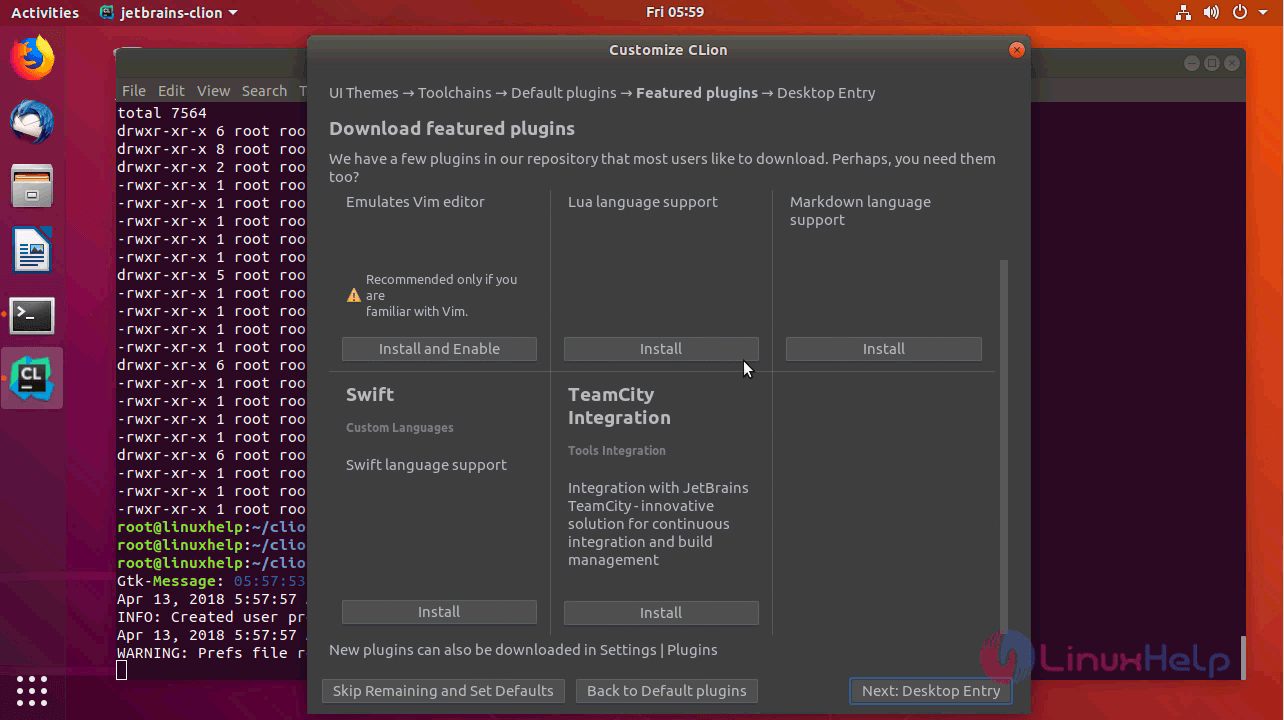
Install the required plugins if you need any and click " Next: Desktop entries."
Here we are creating a Desktop entry to access from the desktop.
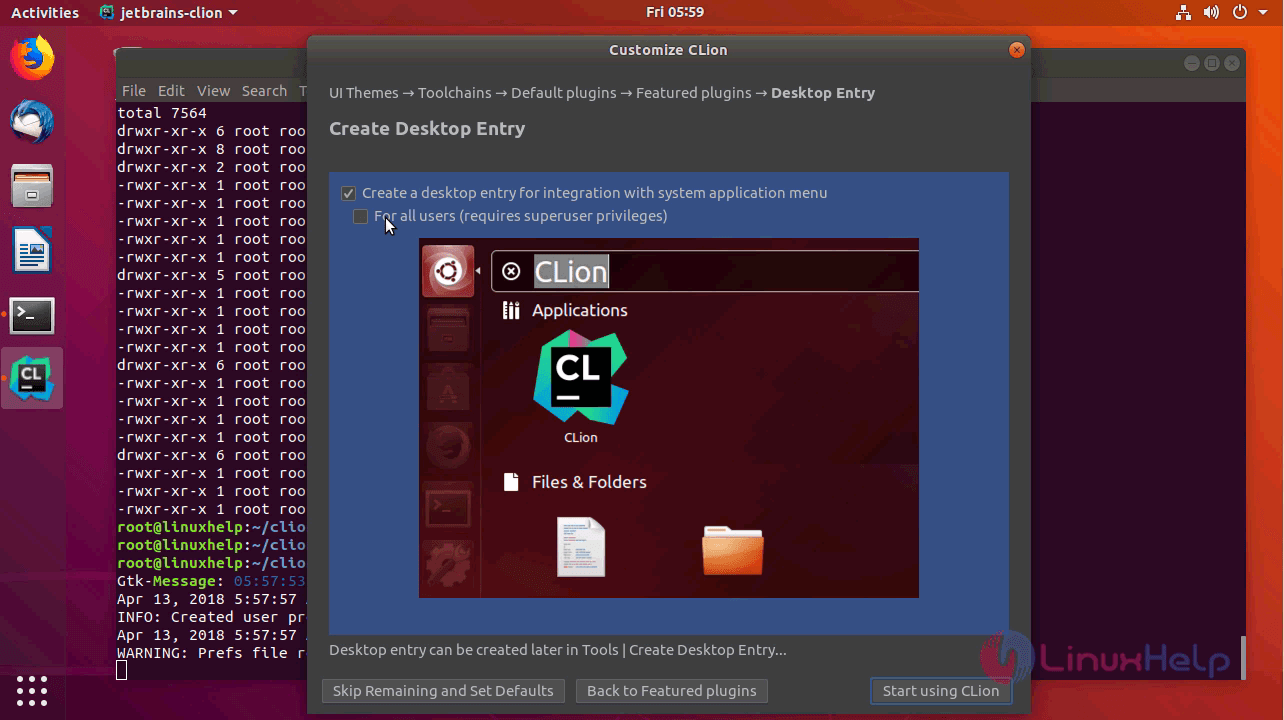
Finally, click “ start using CLion”
Next welcome page opens and Select “ New project”

Set project path location and platform and click create.

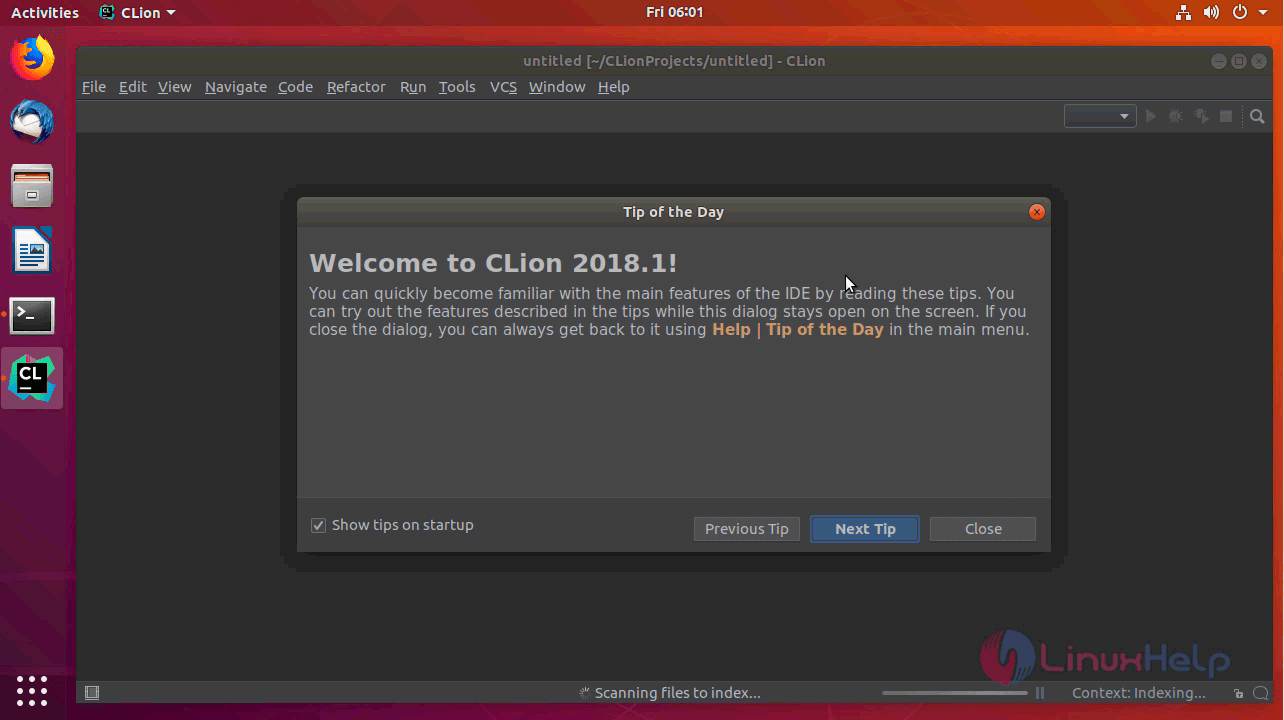
This is the workspace of the CLION where you gets a daily tip on startup, you can turn off this feature by making untick on the same dialog box.

With this, the method to install CLion 2018.1 on Ubuntu 18.04 comes to an end.
Comments ( 0 )
No comments available