How to install Clion in Ubuntu
To install CLion in Ubuntu 16.04
CLion is a free IntelliJ Platform. It supports HTML, CSS, JavaScript, and XML. Languages can also be added via plugins. Installation of CLion in Ubuntu is explained in this article.
Features
- Easy start
- Smart editor
- Navigation & Search
- On-the-fly code analysis
- Editor customization
- Code generation & refactorings
To Install CLion
Add java repo file using “ add-apt-repository” .
root@linuxhelp:~# add-apt-repository ppa:webupd8team/java
 Oracle Java (JDK) Installer (automatically downloads and installs Oracle JDK7 / JDK8 / JDK9). There are no actual Java files in this PPA.

More info (and Ubuntu installation instructions):
- for Oracle Java 7: http://www.webupd8.org/2012/01/install-oracle-java-jdk-7-in-ubuntu-via.html
- for Oracle Java 8: http://www.webupd8.org/2012/09/install-oracle-java-8-in-ubuntu-via-ppa.html

Debian installation instructions:
- Oracle Java 7: http://www.webupd8.org/2012/06/how-to-install-oracle-java-7-in-debian.html
- Oracle Java 8: http://www.webupd8.org/2014/03/how-to-install-oracle-java-8-in-debian.html

Oracle Java 9 (for both Ubuntu and Debian): http://www.webupd8.org/2015/02/install-oracle-java-9-in-ubuntu-linux.html

For JDK9, the PPA uses standard builds from: https://jdk9.java.net/download/ (and not the Jigsaw builds!).
Important!!! For now, you should continue to use Java 8 because Oracle Java 9 is available as an early access release (it should be released in 2016)! You should only use Oracle Java 9 if you explicitly need it, because it may contain bugs and it might not include the latest security patches! Also, some Java options were removed in JDK9, so you may encounter issues with various Java apps. More information and installation instructions (Ubuntu / Linux Mint / Debian): http://www.webupd8.org/2015/02/install-oracle-java-9-in-ubuntu-linux.html
 More info: https://launchpad.net/~webupd8team/+archive/ubuntu/java
Press [ENTER] to continue or ctrl-c to cancel adding it

gpg: keyring `/tmp/tmpw9zot6qc/secring.gpg'  created
gpg: keyring `/tmp/tmpw9zot6qc/pubring.gpg'  created
gpg: requesting key EEA14886 from hkp server keyserver.ubuntu.com
gpg: /tmp/tmpw9zot6qc/trustdb.gpg: trustdb created
gpg: key EEA14886: public key " Launchpad VLC"  imported
gpg: no ultimately trusted keys found
gpg: Total number processed: 1
gpg:               imported: 1  (RSA: 1)
OK
Update apt repo by using “ apt-get update” command.
root@linuxhelp:~# apt-get update
Hit:1 http://security.ubuntu.com/ubuntu xenial-security InRelease
Hit:2 http://in.archive.ubuntu.com/ubuntu xenial InRelease
Hit:3 http://in.archive.ubuntu.com/ubuntu xenial-updates InRelease
Hit:4 http://ppa.launchpad.net/webupd8team/java/ubuntu xenial InRelease
Hit:5 http://in.archive.ubuntu.com/ubuntu xenial-backports InRelease
Reading package lists... Done
Install java using “ apt-get install” command.
root@linuxhelp:~# apt-get install java-common oracle-java8-installer
Reading package lists... Done
Building dependency tree
Reading state information... Done
The following additional packages will be installed:
  gsfonts-x11
Suggested packages:
  binfmt-support visualvm ttf-baekmuk | ttf-unfonts | ttf-unfonts-core
  ttf-kochi-gothic | ttf-sazanami-gothic ttf-kochi-mincho | ttf-sazanami-mincho
  ttf-arphic-uming
The following NEW packages will be installed:
  gsfonts-x11 java-common oracle-java8-installer
0 upgraded, 3 newly installed, 0 to remove and 302 not upgraded.
Need to get 38.2 kB of archives.
.
.
.
.
update-alternatives: using /usr/lib/jvm/java-8-oracle/jre/lib/amd64/libnpjp2.so to provide /usr/lib/mozilla/plugins/libjavaplugin.so (mozilla-javaplugin.so) in auto mode
Oracle JRE 8 browser plugin installed
Setting up gsfonts-x11 (0.24) ...
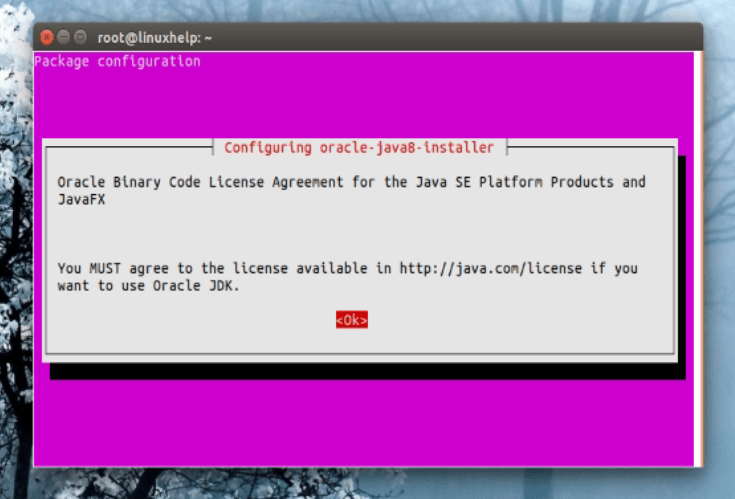
During the java installation, the license agreement page appears. click OK to proceed further.
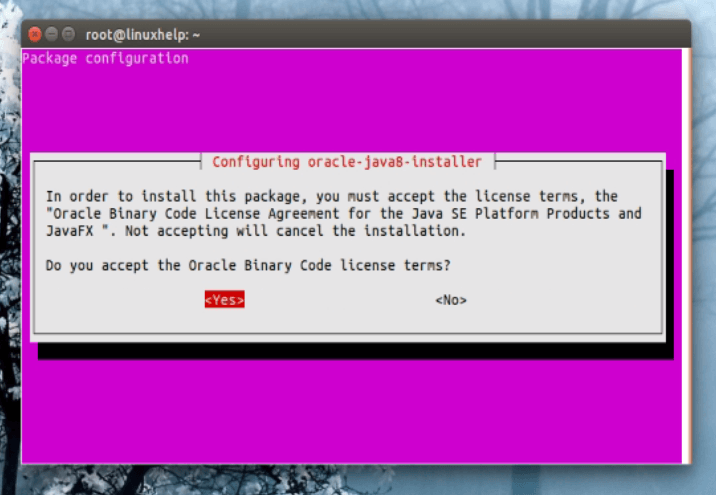
Next click “ yes” to accept the license.
Go to “ /home/user1/Downloads/” directory and then download “ CLion” from official site with the help of “ wget” command.
root@linuxhelp:~# cd /home/user1/Downloads/
root@linuxhelp:/home/user1/Downloads# wget https://download.jetbrains.com/cpp/CLion-2016.1.3.tar.gz
--2016-07-19 01:08:04--  https://download.jetbrains.com/cpp/CLion-2016.1.3.tar.gz
Resolving download.jetbrains.com (download.jetbrains.com)... 54.217.236.18
Connecting to download.jetbrains.com (download.jetbrains.com)|54.217.236.18|:443... connected.
HTTP request sent, awaiting response... 302 Moved Temporarily
Location: https://download-cf.jetbrains.com/cpp/CLion-2016.1.3.tar.gz [following]
--2016-07-19 01:08:04--  https://download-cf.jetbrains.com/cpp/CLion-2016.1.3.tar.gz
Resolving download-cf.jetbrains.com (download-cf.jetbrains.com)... 54.230.190.248, 54.230.190.170, 54.230.190.54, ...
Connecting to download-cf.jetbrains.com (download-cf.jetbrains.com)|54.230.190.248|:443... connected.
HTTP request sent, awaiting response... 200 OK
Length: 245457031 (234M) [binary/octet-stream]
Saving to: ‘ CLion-2016.1.3.tar.gz’

CLion-2016.1.3.tar.g 100%[=====================> ] 234.09M   504KB/s    in 8m 36s

2016-07-19 01:16:42 (465 KB/s) - ‘ CLion-2016.1.3.tar.gz’  saved [245457031/245457031]
root@linuxhelp:/home/user1/Downloads#
After download, extracted that downloaded tar file using “ tar” command.
root@linuxhelp:/home/user1/Downloads# tar zfx CLion-2016.1.3.tar.gz
root@linuxhelp:/home/user1/Downloads# ls
clion-2016.1.3  CLion-2016.1.3.tar.gz
Set execute permission to that extract directory using “ chmod” command.
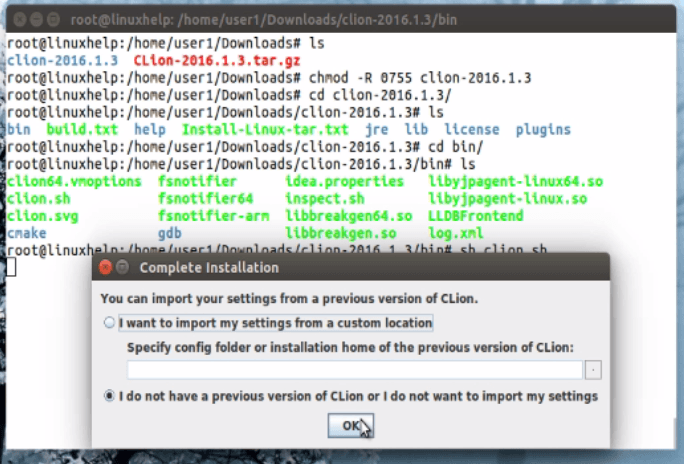
root@linuxhelp:/home/user1/Downloads# chmod -R 0755 clion-2016.1.3
Open the extracted folder using the following command.
root@linuxhelp:/home/user1/Downloads# cd clion-2016.1.3/
root@linuxhelp:/home/user1/Downloads/clion-2016.1.3# ls
bin  build.txt  help  Install-Linux-tar.txt  jre  lib  license  plugins
Run the following command to enter into “ bin” directory.
root@linuxhelp:/home/user1/Downloads/clion-2016.1.3# cd bin/
root@linuxhelp:/home/user1/Downloads/clion-2016.1.3/bin# ls
clion64.vmoptions  fsnotifier      idea.properties   libyjpagent-linux64.so
clion.sh           fsnotifier64    inspect.sh        libyjpagent-linux.so
clion.svg          fsnotifier-arm  libbreakgen64.so  LLDBFrontend
cmake              gdb             libbreakgen.so    log.xml
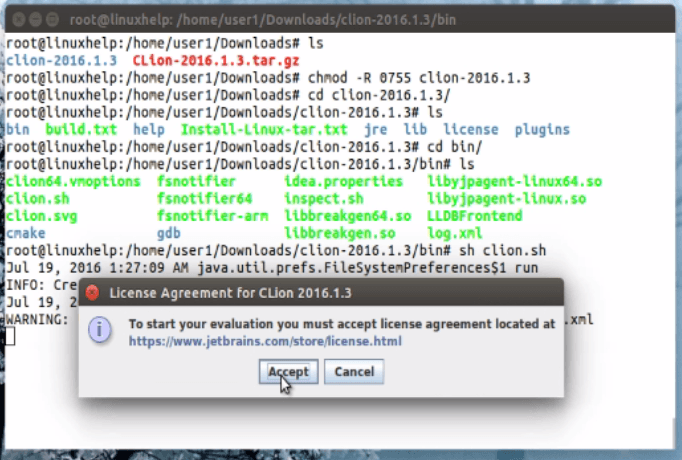
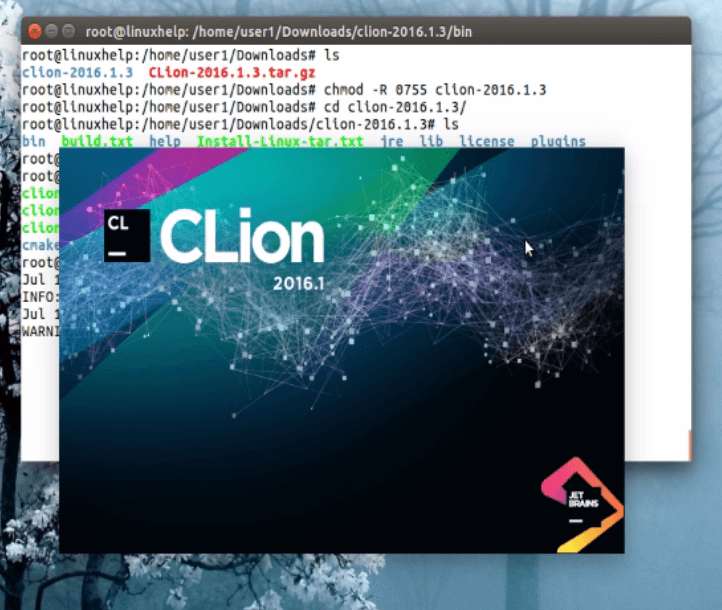
Run the clion.sh file.
root@linuxhelp:/home/user1/Downloads/clion-2016.1.3/bin# sh clion.sh
Click “ ok” for fresh installation.
Read all the privacy policy and click “ accept” to enter into next step.

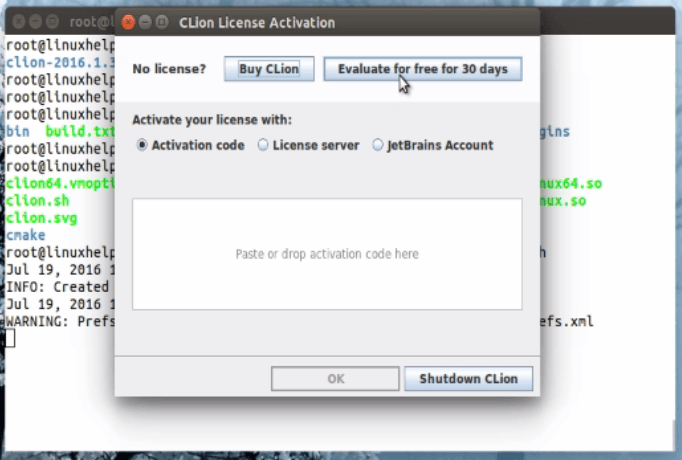
Select the type of License to be owned and Click OK to continue.
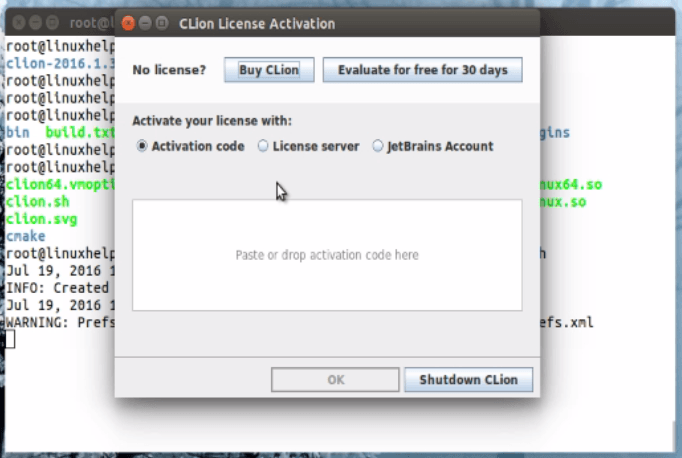
Here I am choosing “ evaluate for free for 30 days” it gives 30 days trail.
Next click “ accept” for license.
Set the UI theme and click “ next” .

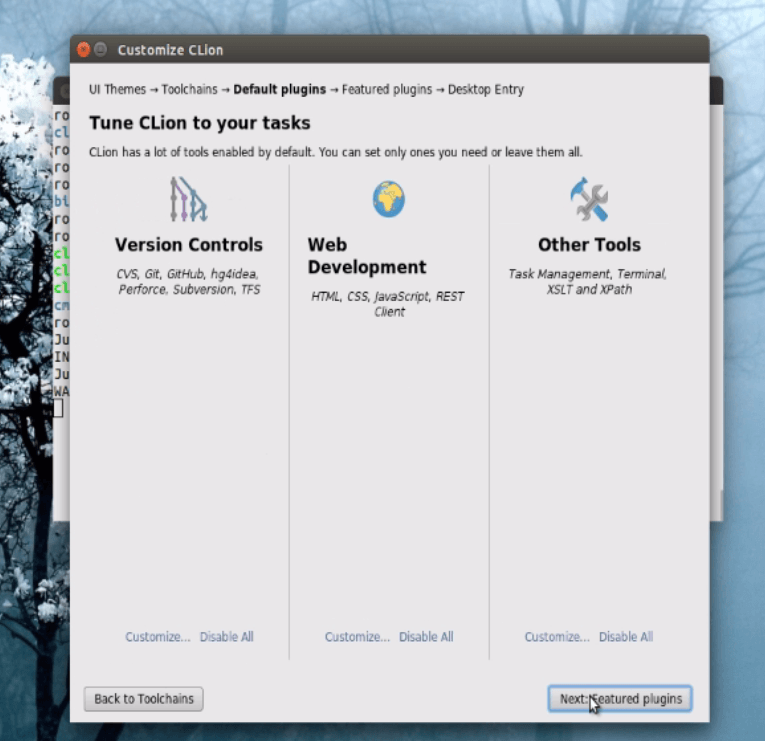
Configure “ Cmake” and “ debugger” then bang " Next default Plugins"

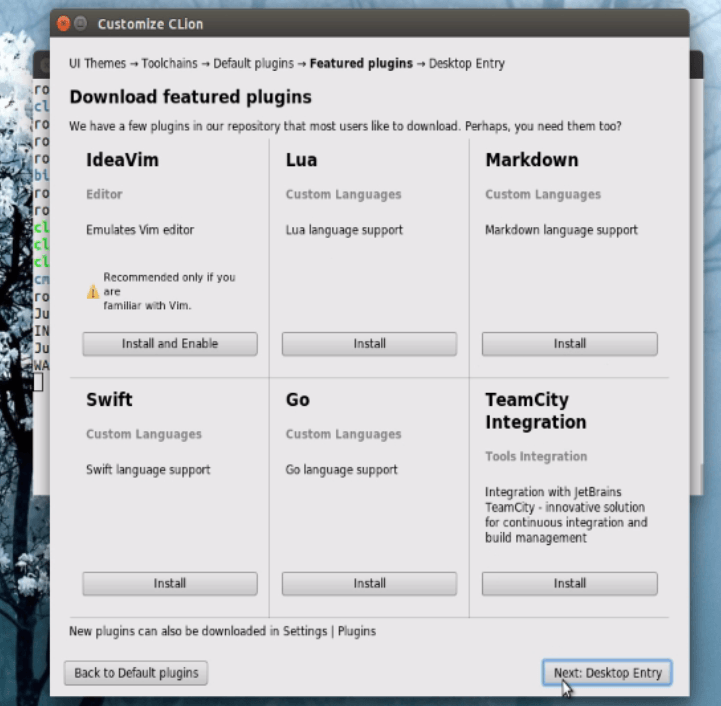
click " Next featured Plugins"
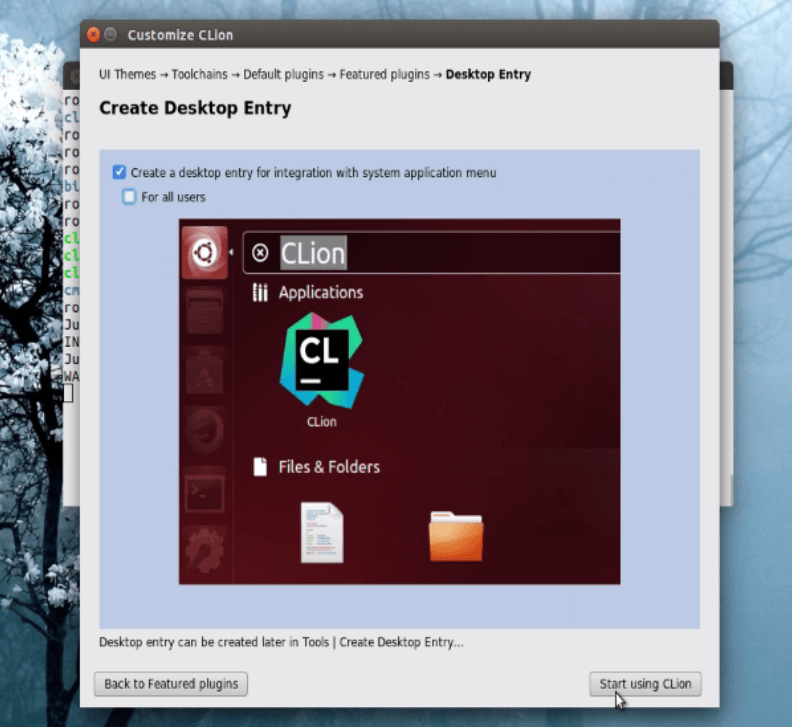
Install the required plugins if any and click " Next:Desktop entries"
Finally click “ start using Clion”
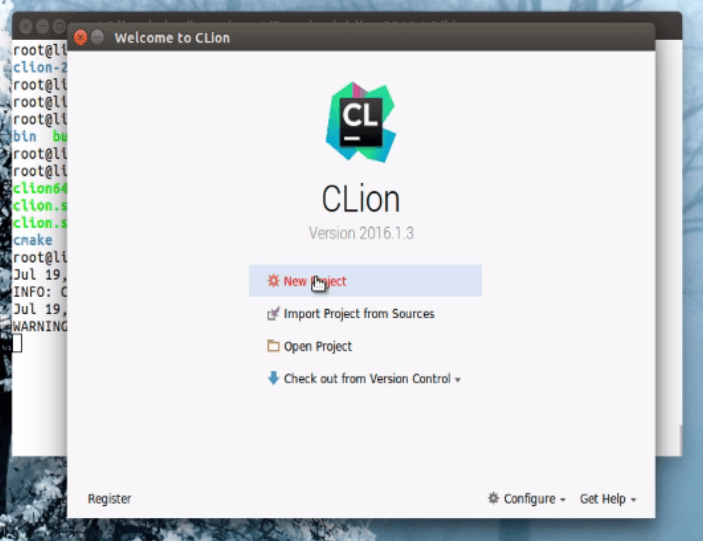
Next welcome to Clion page opens. Select “ New project”
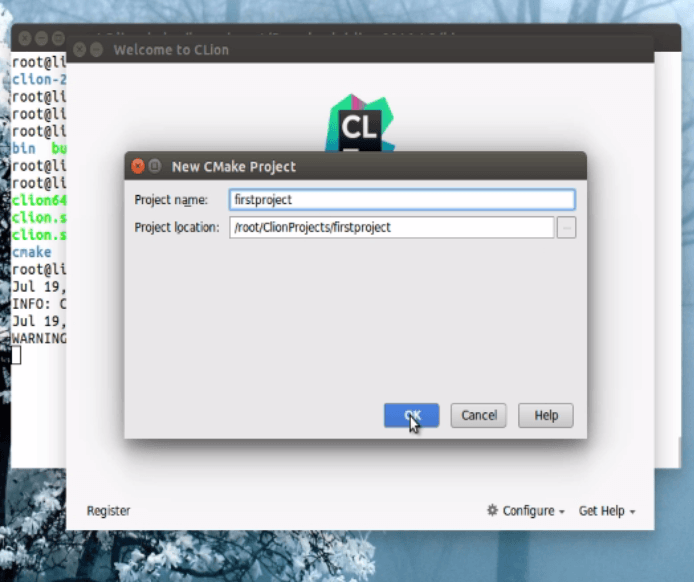
Set project name and path. Then click “ ok” .
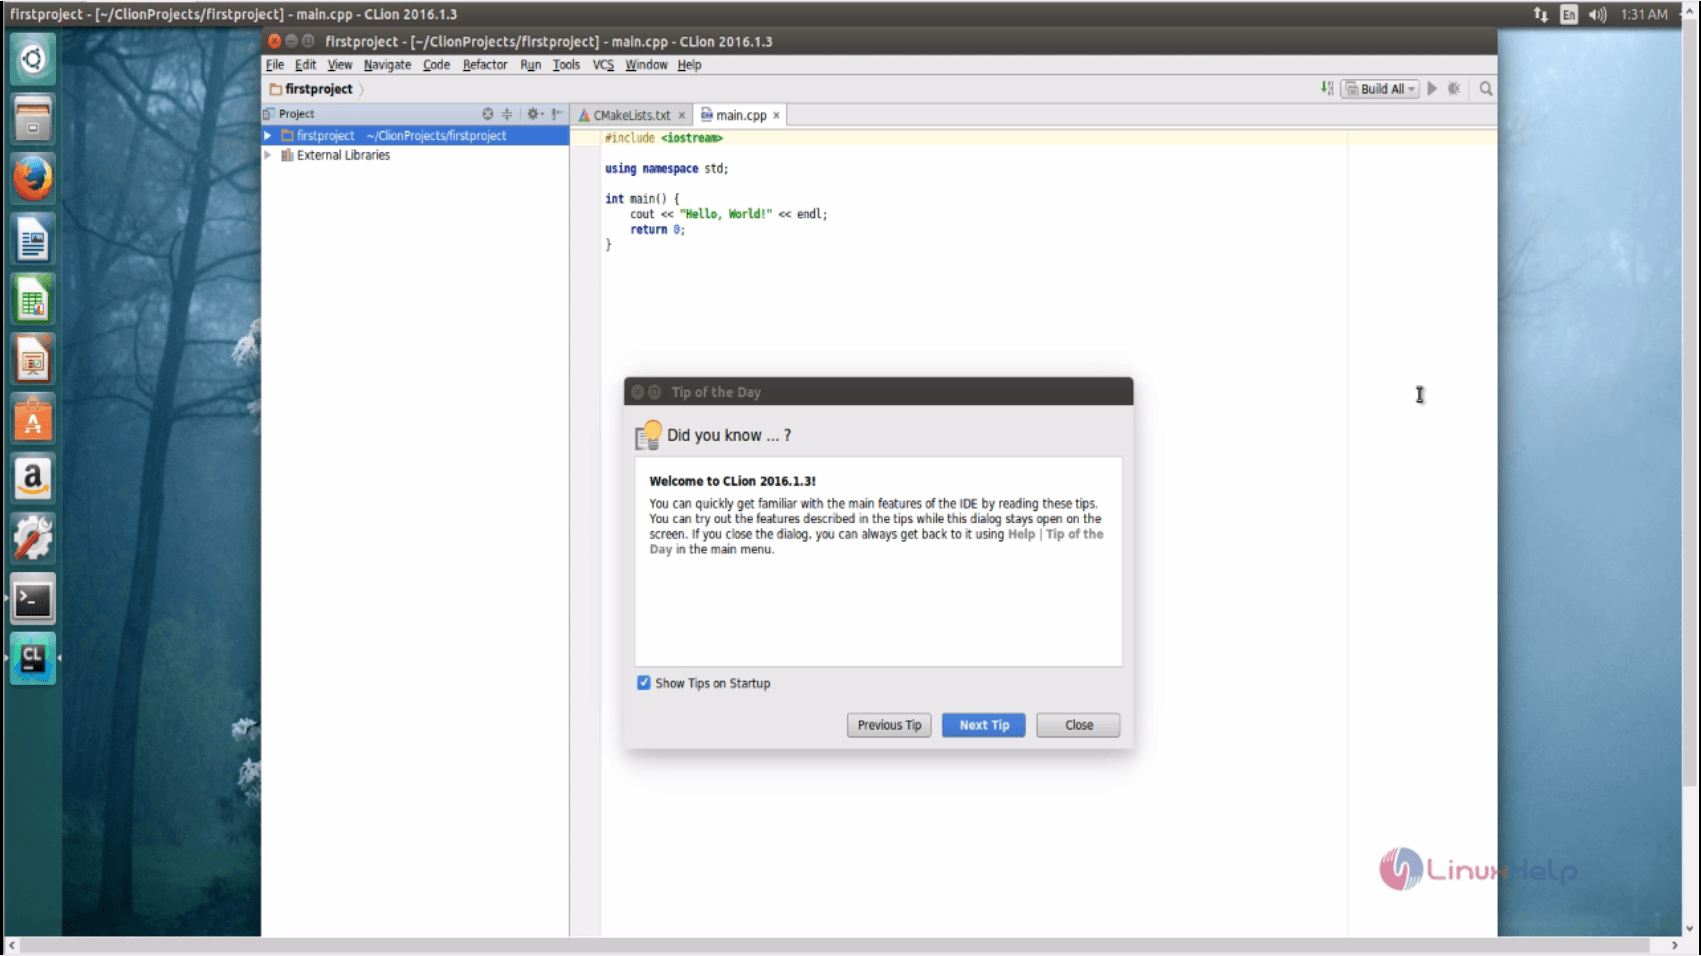
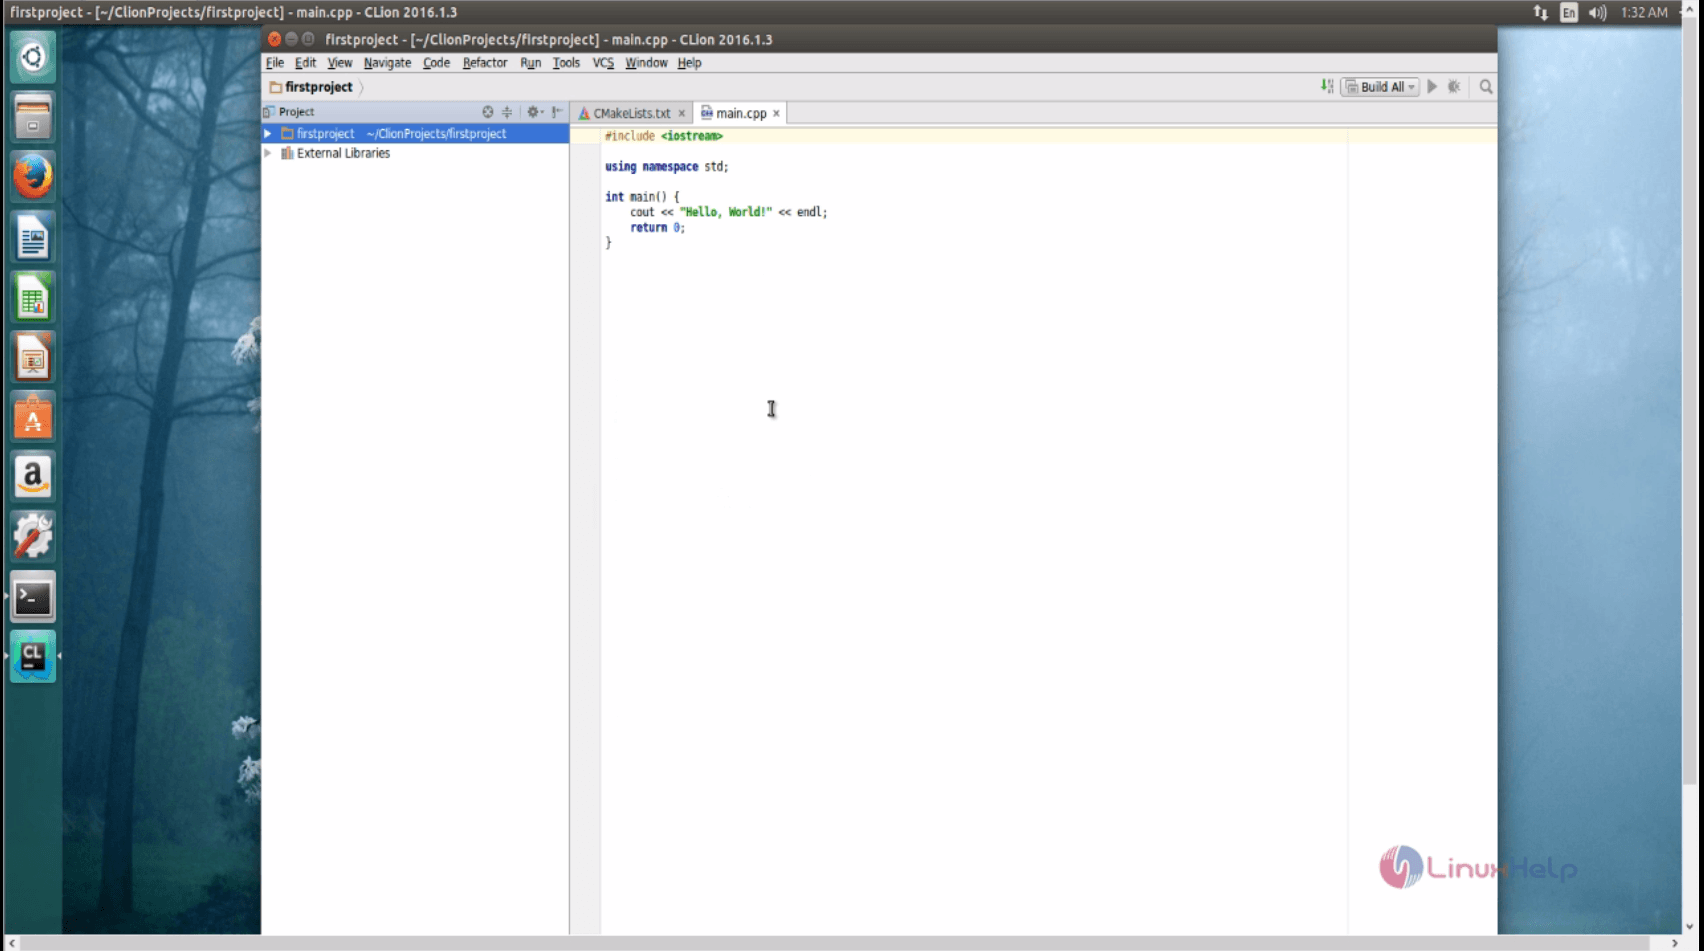
The project source editing terminal page appears as follows.
Comments ( 1 )