How to Install Clipper CMS 1.3.3 on CentOS 7.5
- 00:53 rpm -q centos-release
- 01:10 mysql -u root -p
- 02:40 wget https://github.com/ClipperCMS/ClipperCMS/archive/clipper_1.3.3.zip
- 02:56 unzip clipper_1.3.3.zip
- 03:08 mv ClipperCMS-clipper_1.3.3 /var/www/clipper
- 03:22 chown -R apache:apache /var/www/clipper
- 03:34 chmod -R 755 /var/www/clipper
- 03:51 vim /etc/httpd/conf.d/clipper.conf
- 04:46 systemctl restart httpd
Installation of clipper cms 1.3.3 on centos 7.5
Requirements for clipper cms: Apache Mariadb Php 5.6 and its modules (php php-mbstring php-xml php-gd php-curl php-common php-mysql php-soap php-mysql php-mcrypt)
Installation proccedure
You need to configure the LAMP setup For the Installation of clipper CMS If you dont have the Lamp setup Refer Here
Check the centos version using the following command
[root@linuxhelp ~]# rpm -q centos-release
centos-release-7-5.1804.el7.centos.x86_64
configure the MySQL database. Log into MySQL as a root user and make the necessary settings.
[root@linuxhelp ~]# mysql -u root -p
Enter password:
Welcome to the MariaDB monitor.  Commands end with ; or \g.
Your MariaDB connection id is 10
Server version: 5.5.60-MariaDB MariaDB Server
Copyright (c) 2000, 2018, Oracle, MariaDB Corporation Ab and others.
Type 'help;' or '\h' for help. Type '\c' to clear the current input statement.
MariaDB [(none)]> create database clipper;
Query OK, 1 row affected (0.00 sec)
MariaDB [(none)]> create user 'clipperuser'@localhost identified by '123456';
Query OK, 0 rows affected (0.00 sec)
MariaDB [(none)]> grant all privileges on clipper.* to 'clipperuser'@localhost;
Query OK, 0 rows affected (0.00 sec)
MariaDB [(none)]> flush privileges;
Query OK, 0 rows affected (0.00 sec)
MariaDB [(none)]> Ctrl-C -- exit!
Aborted
Once the database configuration is done, you shall download the clipper cms with the help of the following command.
[root@linuxhelp ~]# wget https://github.com/ClipperCMS/ClipperCMS/archive/clipper_1.3.3.zip
--2019-04-21 02:01:02--  https://github.com/ClipperCMS/ClipperCMS/archive/clipper_1.3.3.zip
Resolving github.com (github.com)... 192.30.253.112, 192.30.253.113
Connecting to github.com (github.com)|192.30.253.112|:443... connected.
HTTP request sent, awaiting response... 302 Found
Location: https://codeload.github.com/ClipperCMS/ClipperCMS/zip/clipper_1.3.3 [following]
--2019-04-21 02:01:03--  https://codeload.github.com/ClipperCMS/ClipperCMS/zip/clipper_1.3.3
Resolving codeload.github.com (codeload.github.com)... 192.30.253.121, 192.30.253.120
Connecting to codeload.github.com (codeload.github.com)|192.30.253.121|:443... connected.
HTTP request sent, awaiting response... 200 OK
Length: unspecified [application/zip]
Saving to: ‘clipper_1.3.3.zip’
    [                              <=>                          ] 6,173,410   1.12MB/s   in 6.7s
2019-04-21 02:01:11 (903 KB/s) - ‘clipper_1.3.3.zip’ saved [6173410]
Once the download is completed extract the download package using unzip command
[root@linuxhelp ~]# unzip clipper_1.3.3.zip
Archive:  clipper_1.3.3.zip
0ee9f2cb5bafc683fb7424d484669356c0662ac4
   creating: ClipperCMS-clipper_1.3.3/
  inflating: ClipperCMS-clipper_1.3.3/.gitignore
  inflating: ClipperCMS-clipper_1.3.3/README.md
   creating: ClipperCMS-clipper_1.3.3/assets/
   creating: ClipperCMS-clipper_1.3.3/assets/cache/
 extracting: ClipperCMS-clipper_1.3.3/assets/cache/.gitignore
  inflating: ClipperCMS-clipper_1.3.3/assets/cache/index.html
   creating: ClipperCMS-clipper_1.3.3/assets/cache/rss/
.
.
.
 inflating: ClipperCMS-clipper_1.3.3/manager/processors/save_snippet.processor.php
  inflating: ClipperCMS-clipper_1.3.3/manager/processors/save_template.processor.php
  inflating: ClipperCMS-clipper_1.3.3/manager/processors/save_tmplvars.processor.php
  inflating: ClipperCMS-clipper_1.3.3/manager/processors/save_user.processor.php
  inflating: ClipperCMS-clipper_1.3.3/manager/processors/save_web_user.processor.php
  inflating: ClipperCMS-clipper_1.3.3/manager/processors/undelete_content.processor.php
  inflating: ClipperCMS-clipper_1.3.3/manager/processors/unpublish_content.processor.php
  inflating: ClipperCMS-clipper_1.3.3/manager/processors/user_documents_permissions.class.php
  inflating: ClipperCMS-clipper_1.3.3/manager/processors/web_access_groups.processor.php
  inflating: ClipperCMS-clipper_1.3.3/sample-robots.txt
Move the clipper cms directory to apache root directory
[root@linuxhelp ~]# mv ClipperCMS-clipper_1.3.3 /var/www/clipper
Set the ownership and permission for clipper cms by using the following command
[root@linuxhelp ~]# chown -R apache:apache /var/www/clipper
[root@linuxhelp ~]# chmod -R 755 /var/www/clipper
Configure the virtualhost for accesing the clipper cms
[root@linuxhelp ~]# vim /etc/httpd/conf.d/clipper.conf
<Virtualhost *:80>
        servername www.linuxhelp1.com
        documentroot /var/www/clipper
</Virtualhost>
Restart the apache service by using the following command
[root@linuxhelp ~]# systemctl restart httpd
Switch to your browser and enter your domain name
 Choose the language for the Clipper CMS
 Configure the database information
 Configure the admin steup
 setup the optional items such as site modules, timezone, and Locales
 Verify the pre-install validation
 you will see the installation results of clipper cms
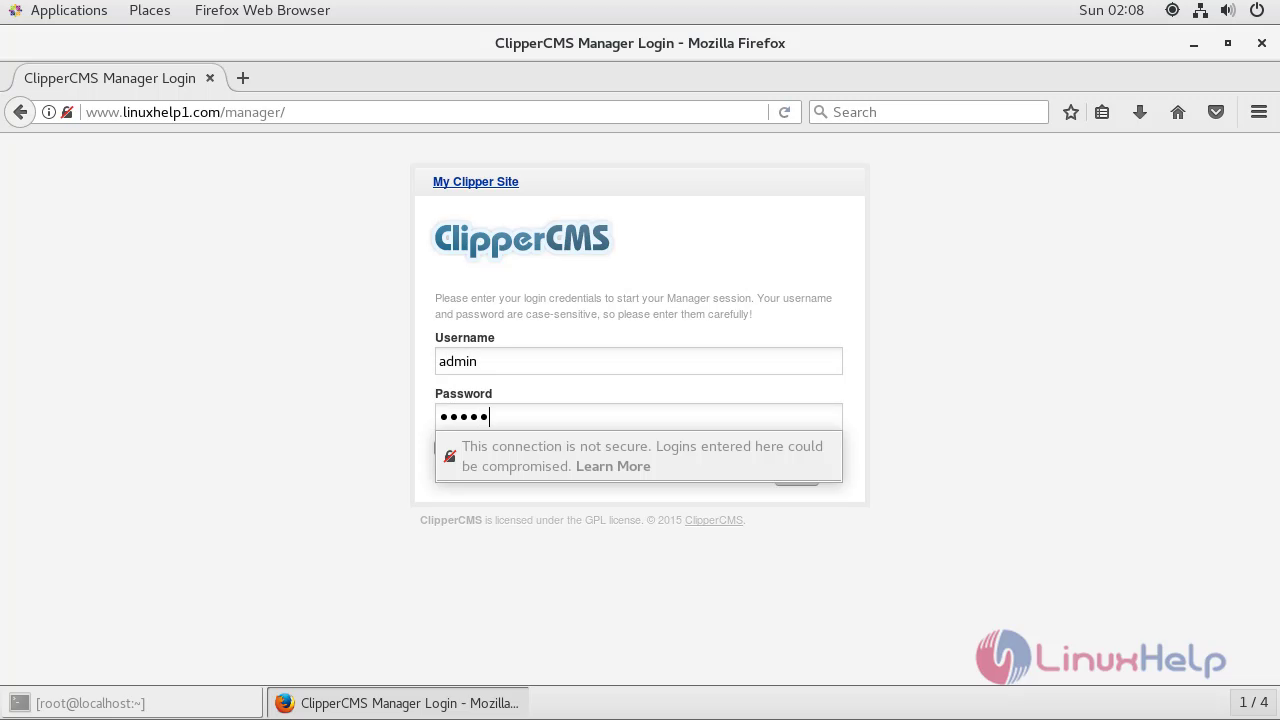
 Now, log in using the Admin user credential of clipper CMS
 After the successful login, you will see the Homepage of Clipper CMS

With this, the method to install Clipper CMS 1.3.3 on CentOS 7.5 comes to an end.
Comments ( 0 )
No comments available