How to install Elxis CMS on CentOS 7
How to install Elxis CMS on CentOS 7
In today' s world of blogs and visitors visiting websites, it is imperative that good content and interactive UI is a must for any website. Elxis CMS is a free and open source CMS application that allows you to create websites within a few clicks from a personal website to blogs to complex corporate website without the need for any programming skills. This article will explain the installation procedure of Elxis CMS on CentOS 7.
Pre-Requisite
Before starting the installation procedure, Setup LAMP environment and create a database with password protection in MariaDB for Elxis CMS application.
Installation procedure
After setting up the LAMP environment, update your system by running the update command as follows.
[root@linuxhelp1 ~]# yum update
Next, create a directory by executing the mkdir command in the following path location.
[root@linuxhelp1 ~]# mkdir -p/var/www/html/elxis
Download the Elxis latest version on its official page and extract the package by using the following unzip command.
[root@linuxhelp1 ~]# unzip elxis package -d /var/www/html/elxis
Now you will need to create an Apache virtual host directive for Elxis. Create an elxis.conf file inside /etc/httpd/conf.d/ directory using vim editor. Enter the following contents in the configuration file. Save and exit the file.
[root@linuxhelp1 ~]# vim /etc/httpd/conf.d/elxis.conf

< VirtualHost *:80>
DocumentRoot " /var/www/html/elxis"
ServerName 192.168.7.231
ServerAlias www.linuxhelp1.com
ErrorLog " /var/log/httpd/elxis-error_log"
CustomLog " /var/log/httpd/elxis-access_log"  combined
< Directory " /var/www/html/elxis/" >
DirectoryIndex index.php
Options FollowSymLinks
AllowOverride All
Require all granted
< /Directory>
< /VirtualHost>
Change the owner permission and set execute permission for the document root directory.
[root@linuxhelp1 ~]# chown -R apache:apache /var/www/html/elxis
[root@linuxhelp1 ~]# chmod 775 /var/www/html/elxis
Restart the Apache web server for the change to take effect by running the following command.
[root@linuxhelp1 ~]# systemctl restart httpd
You can also set the Firewall Settings by executing the following commands.
[root@linuxhelp1 ~]# firewall-cmd --permanent --zone=public --add-port=80/tcp
success
[root@linuxhelp1 ~]# firewall-cmd --reload
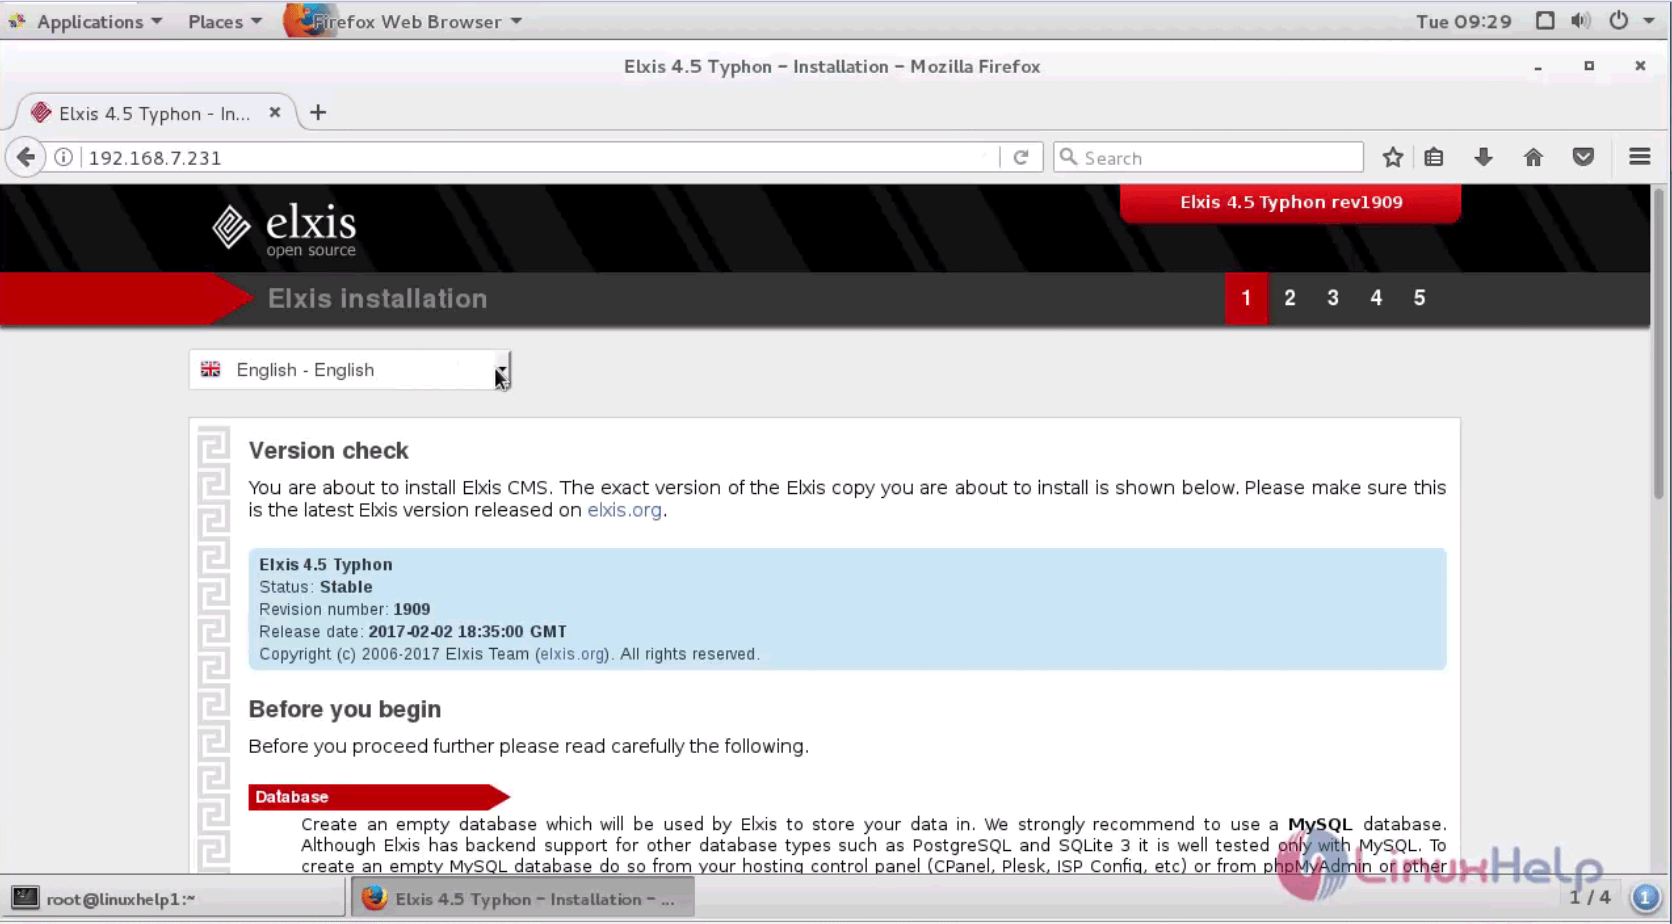
Once the settings are finished, you can proceed to access Elxis web interface. Provide your machine IP http://192.168.7.231 and run it. The home page of Elxis CMS is shown below.
Next, the Public License agreement is shown to the user. Click Agree option and continue to the next page. 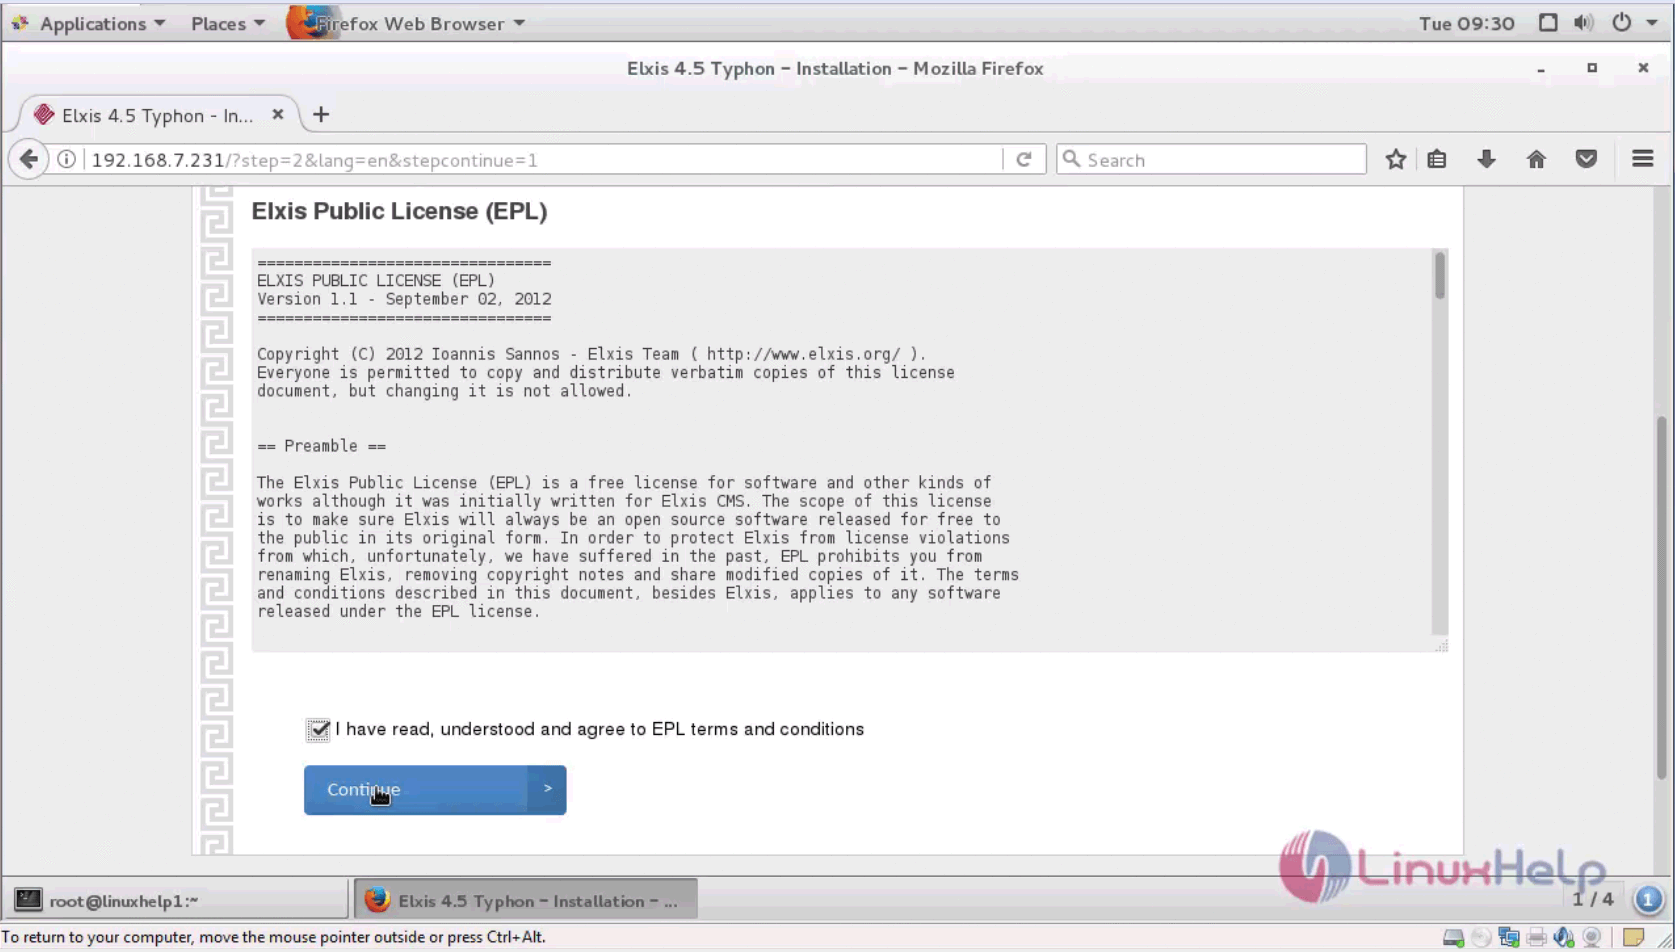
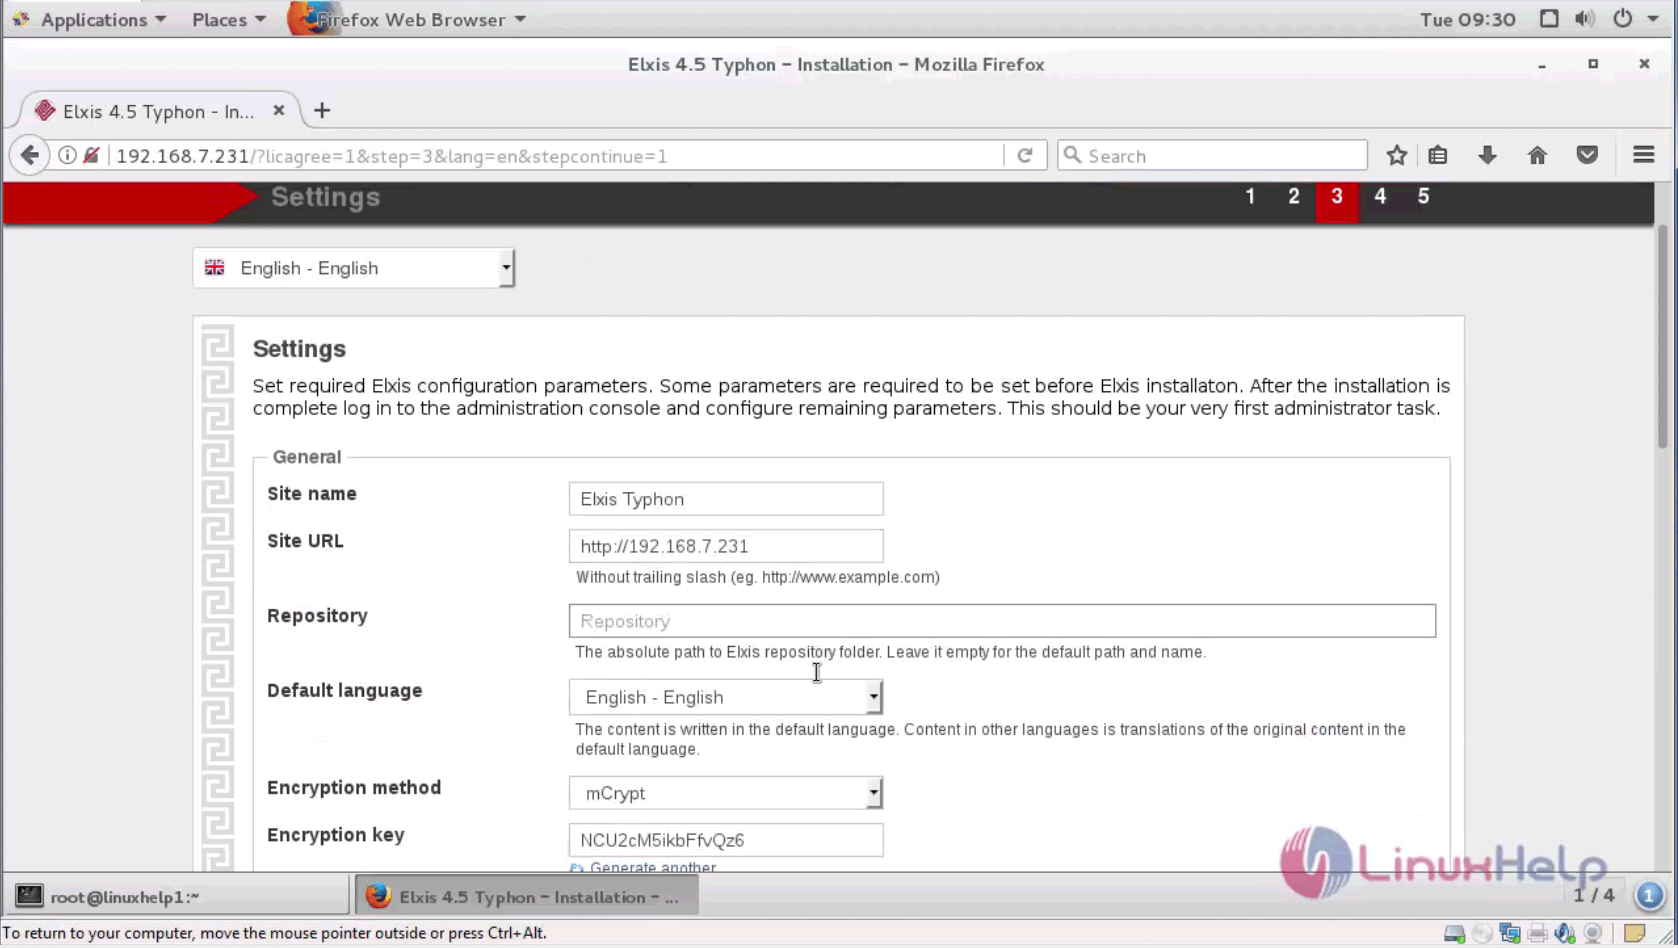
The settings page contains the configuration parameters for the website to be set with site' s name and the URL to be used.
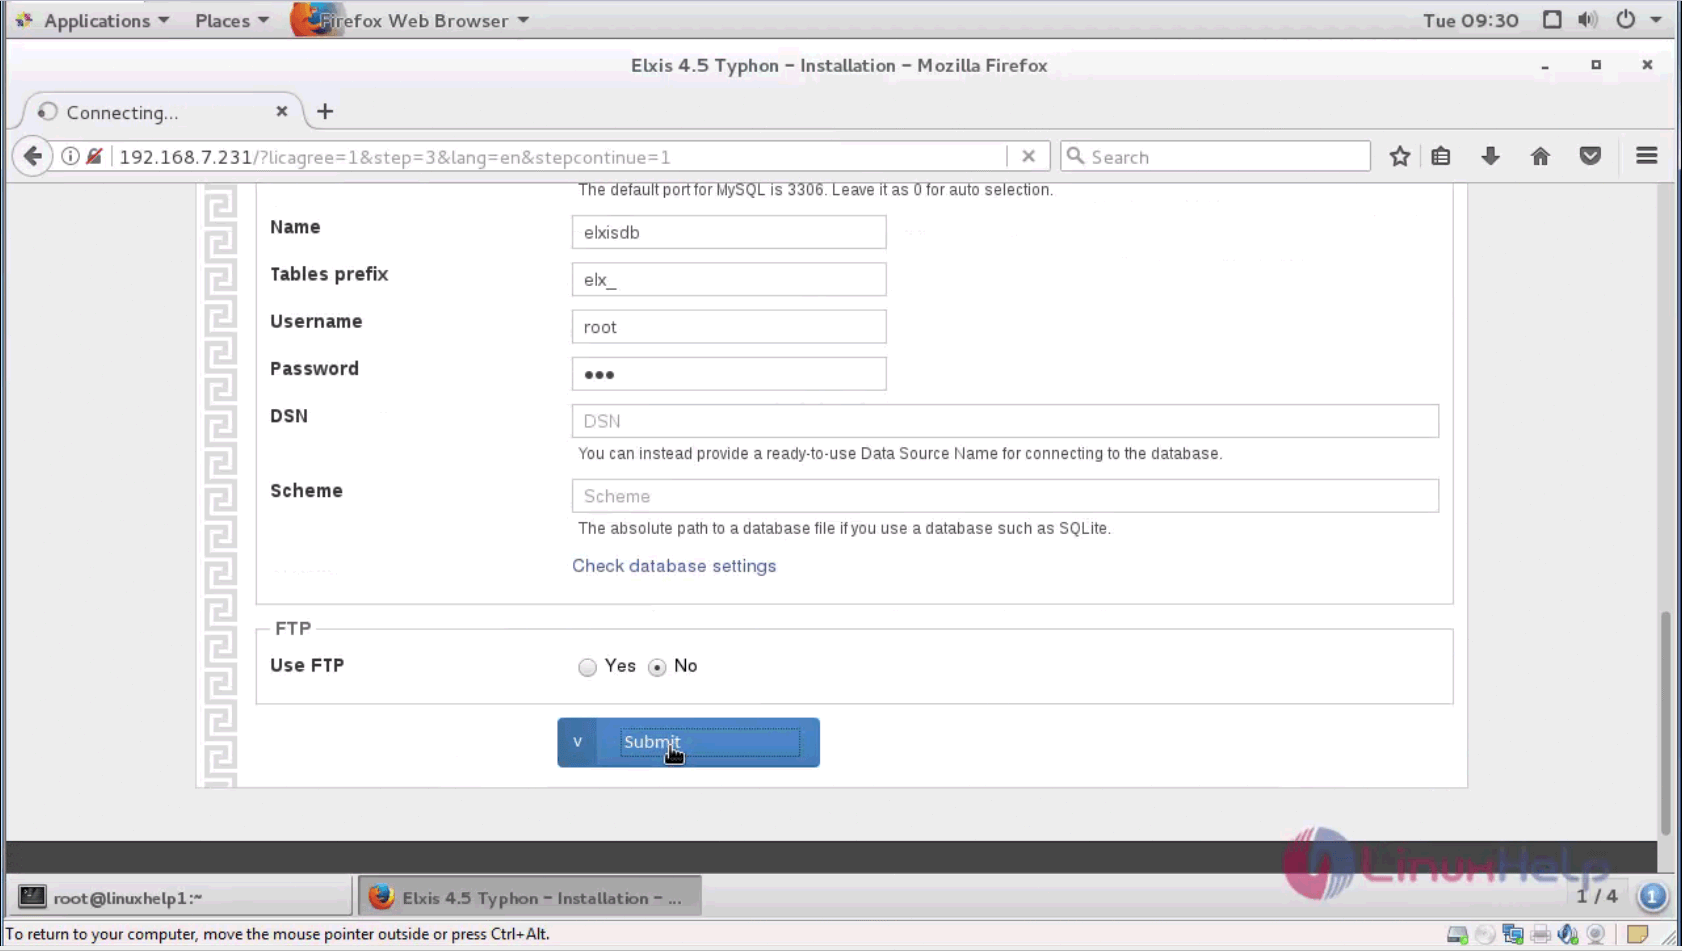
Now the user should enter the database details and submit the following changes.
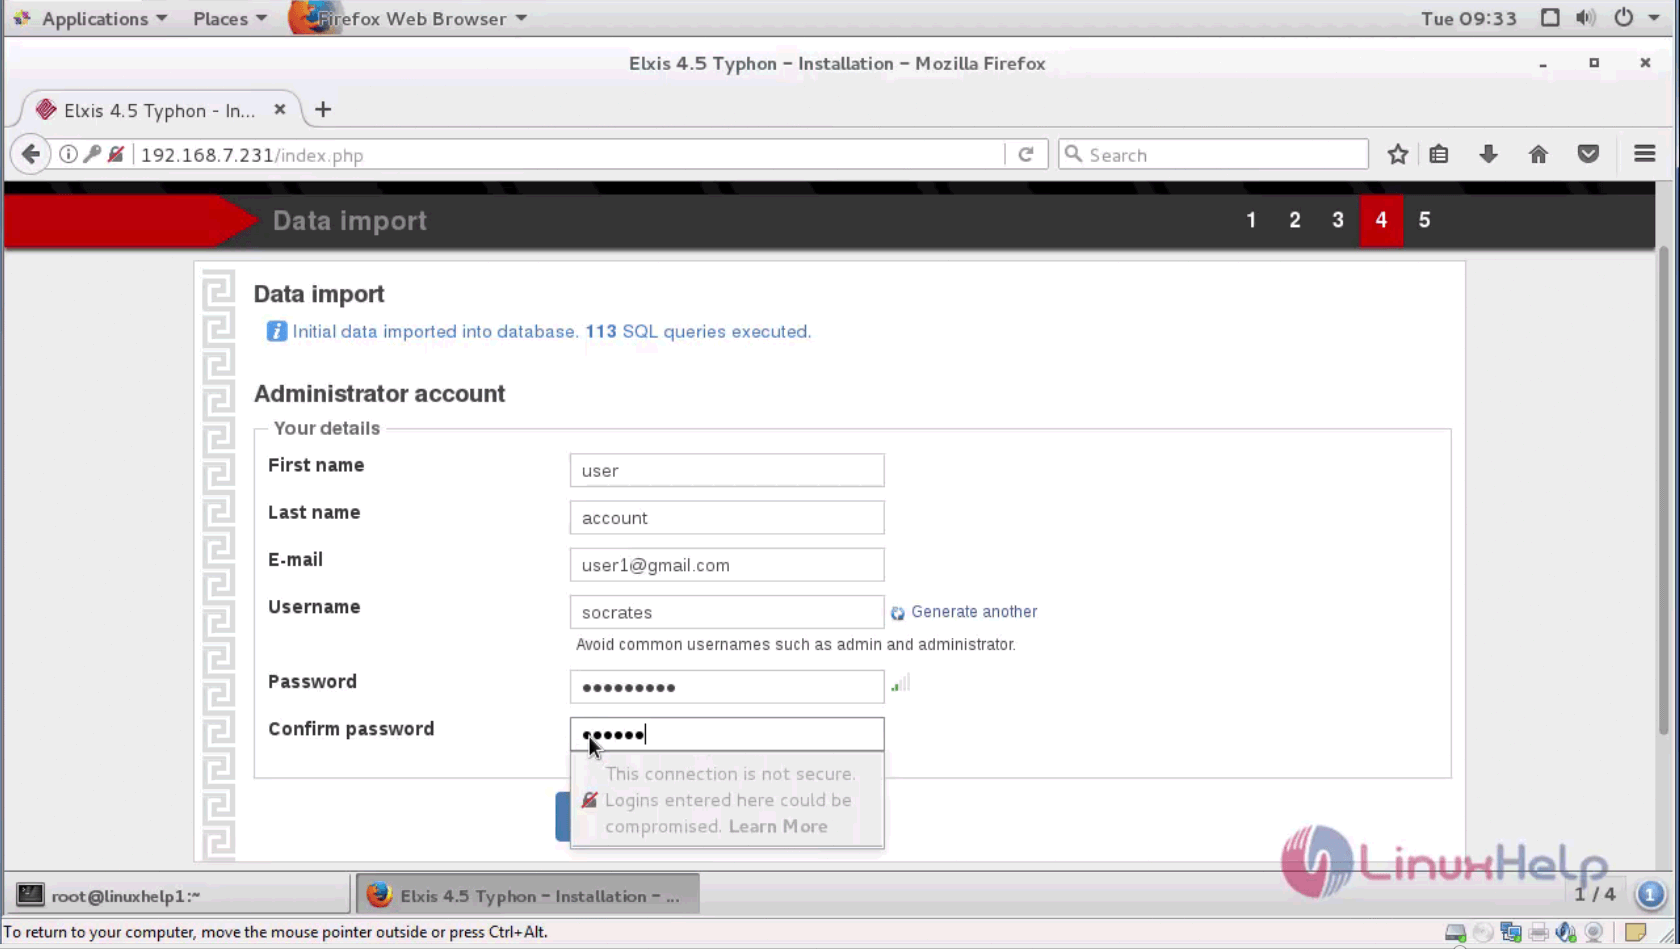
Create an administrator account with first name, last name and password for authentication procedure.
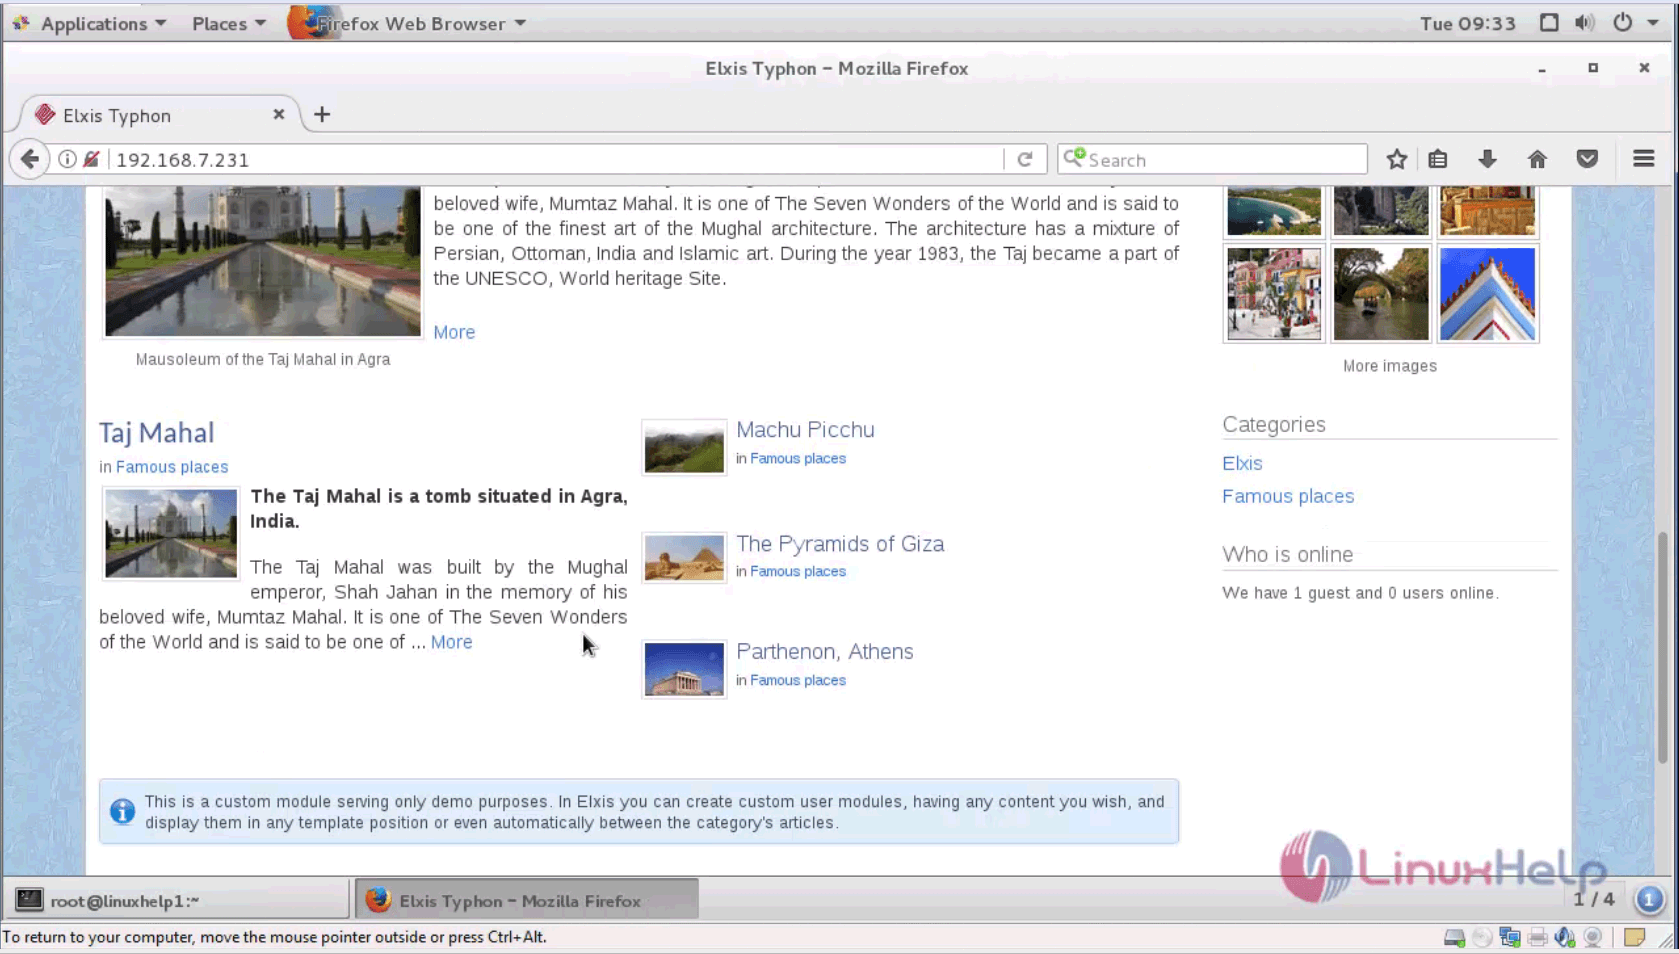
Now you can see the demo for the new site which you have created in Elxis CMS.
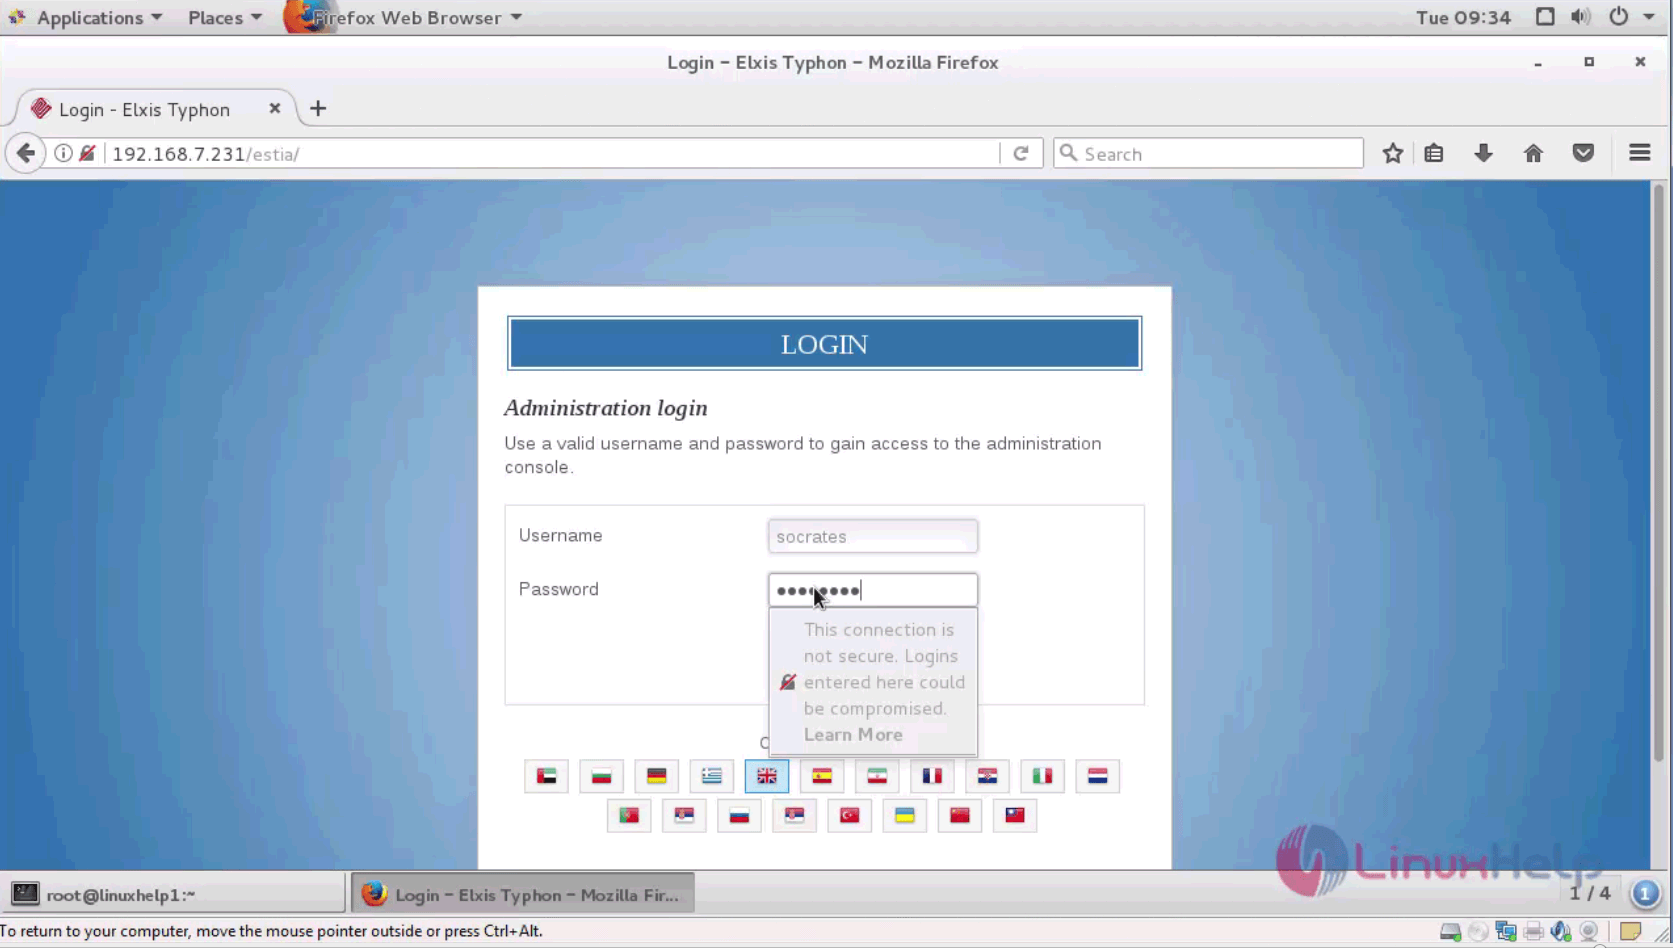
To enter into the administrator account, provide your admin login details and enter.
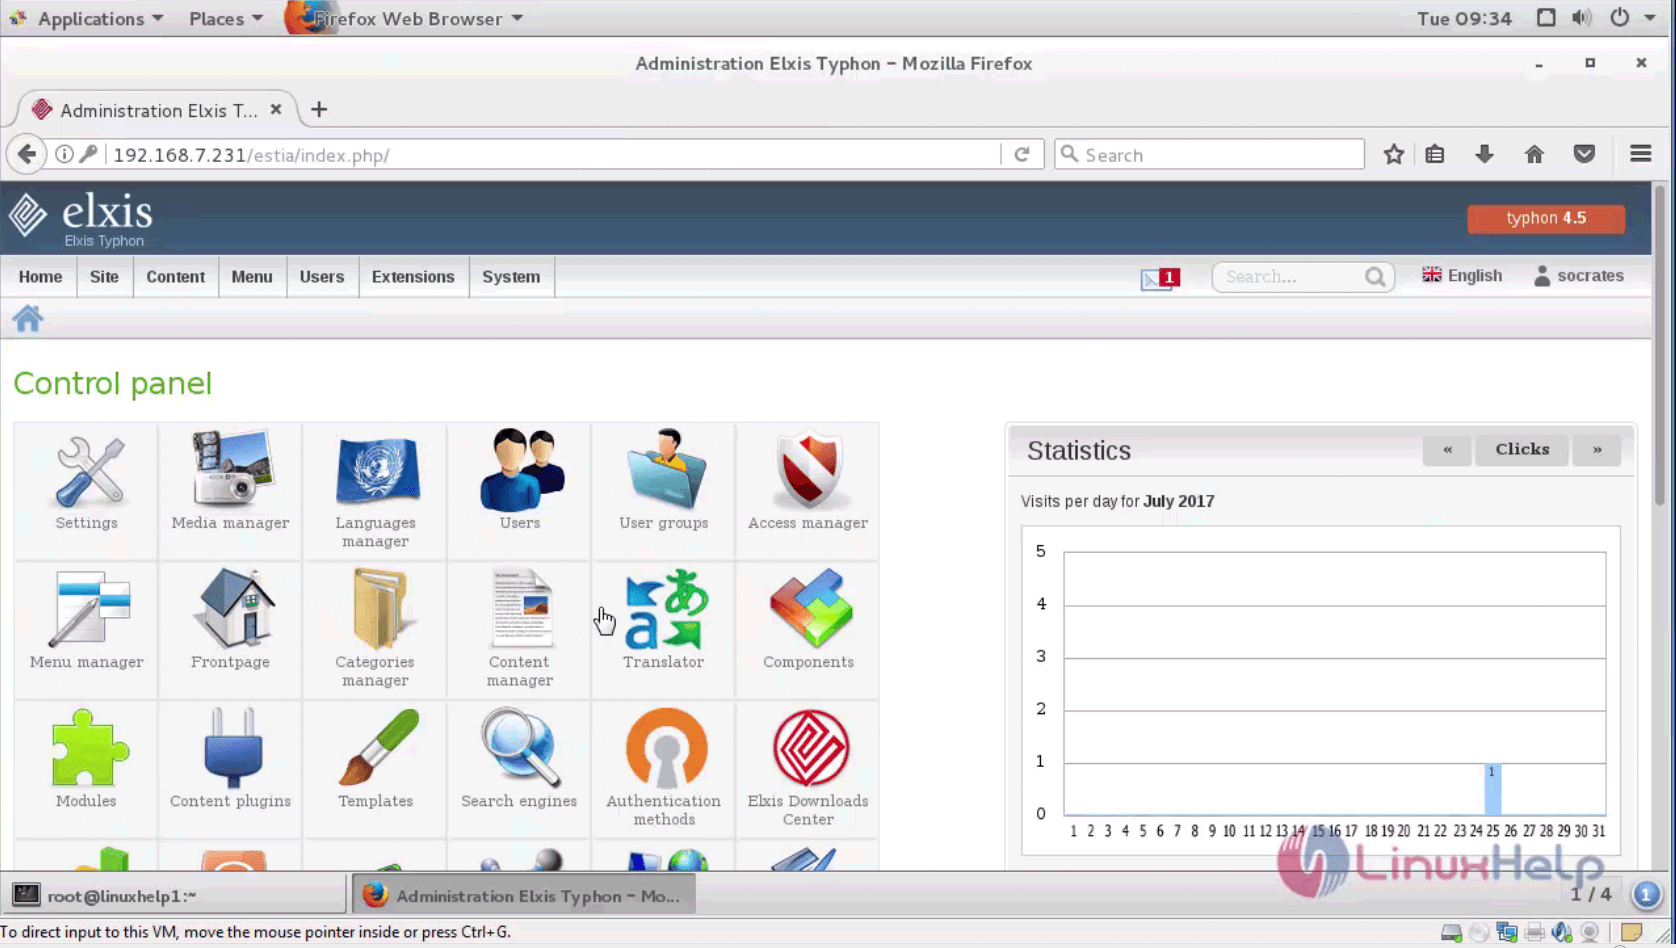
The administration page contains the control panel for the administration of your website.
The installation procedure is complete. Now you can create a whole new number of websites with Elxis CMS.

Comments ( 0 )
No comments available