How to Install Grand Cms On linux Mint 20.2
- 00:35 lsb_release -a
- 00:52 mysql -u root -p
- 01:13 create database grand;
- 01:39 grant all on grand.* to guser@localhost identified by 'linuxc';
- 01:48 flush privileges;
- 01:53 exit
- 02:03 wget http://downloads.sourceforge.net/project/grandcms/grandcms_v0.2.0.1.1.zip
- 02:18 unzip grandcms_v0.2.0.1.1.zip -d grand
- 02:27 mv grandcms_v0.2.0.1.1.zip grand
- 02:38 mv grand /var/www/
- 03:02 chown -R www-data. /var/www/grand/
- 03:25 chmod -R 775 /var/www/grand/
- 03:56 vi /etc/apache2/sites-available/grand.conf
- 04:31 a2dissite 000-default.conf
- 04:31 a2dissite 000-default.conf
- 04:51 a2ensite grand.conf
- 05:01 a2enmod rewrite
- 05:16 systemctl restart apache2
- 05:26 vi /etc/hosts
To Install Grand CMS On Linux Mint 20.2
Introduction :
Grand CMS is a content management system. GrandCMS with or without SP1 has an ajax autocomplete feature that is open source, unlimited categories, and unlimited information. All you need to do is install the software and select the template to add information.
Installation Procedure:
Step 1 : To check the OS Version by using the following commands
root@linuxhelp:~# lsb_release -a
No LSB modules are available.
Distributor ID:	Linuxmint
Description:	Linux Mint 20.2
Release:	20.2
Codename:	uma
Step 2 : Login to the mysql root path by using the following commands
root@linuxhelp:~# mysql -u root -p
Enter password:
Welcome to the MariaDB monitor.  Commands end with ; or \g.
Your MariaDB connection id is 57
Server version: 10.3.32-MariaDB-0ubuntu0.20.04.1 Ubuntu 20.04

Copyright (c) 2000, 2018, Oracle, MariaDB Corporation Ab and others.
Type 'help;' or '\h' for help. Type '\c' to clear the current input statement.
Step 3 : To create the database in the name of grand by using the following command
MariaDB [(none)]> create database grand;
Query OK, 1 row affected (0.001 sec)
Step 4 : Grant all privileges and create the user and give password by using the below command
MariaDB [(none)]> grant all on grand.* to guser@localhost identified by 'linuxc';
Query OK, 0 rows affected (0.001 sec)
Step 5 : Flush the privileges by using the below command
MariaDB [(none)]> flush privileges;
Query OK, 0 rows affected (0.001 sec)
Step 6 : Exit the shell by using the below commands.
MariaDB [(none)]> exit
Bye
Step 7 : Download the Grand CMS by using the below command
root@linuxhelp:~# wget http://downloads.sourceforge.net/project/grandcms/grandcms_v0.2.0.1.1.zip
--2022-01-07 03:39:49--  http://downloads.sourceforge.net/project/grandcms/grandcms_v0.2.0.1.1.zip
Resolving downloads.sourceforge.net (downloads.sourceforge.net)... 204.68.111.105
Connecting to downloads.sourceforge.net (downloads.sourceforge.net)|204.68.111.105|:80... connected.
HTTP request sent, awaiting response... 302 Found
Location: http://master.dl.sourceforge.net/project/grandcms/grandcms_v0.2.0.1.1.zip?viasf=1 [following]
--2022-01-07 03:39:50--  http://master.dl.sourceforge.net/project/grandcms/grandcms_v0.2.0.1.1.zip?viasf=1
Resolving master.dl.sourceforge.net (master.dl.sourceforge.net)... 216.105.38.12
Connecting to master.dl.sourceforge.net (master.dl.sourceforge.net)|216.105.38.12|:80... connected.
HTTP request sent, awaiting response... 200 OK
Length: 5606378 (5.3M) [application/octet-stream]
Saving to: ‘grandcms_v0.2.0.1.1.zip’

grandcms_v0.2.0.1.1.zip           100%[============================================================>]   5.35M  2.12MB/s    in 2.5s

2022-01-07 03:39:53 (2.12 MB/s) - ‘grandcms_v0.2.0.1.1.zip’ saved [5606378/5606378]
Step8 : Extract the package by using the below command
root@linuxhelp:~# unzip grandcms_v0.2.0.1.1.zip
Archive:  grandcms_v0.2.0.1.1.zip
   creating: upload/
  inflating: upload/.htaccess.txt
   creating: upload/admin/
  inflating: upload/admin/config-dist.php
   creating: upload/admin/controller/
   creating: upload/admin/controller/catalog/
  inflating: upload/admin/controller/catalog/download.php
  inflating: upload/admin/controller/catalog/information.php
  inflating: upload/admin/controller/catalog/information_category.php
  inflating: upload/admin/controller/catalog/menu.php
   creating: upload/admin/language/english/sale/
  inflating: upload/admin/language/english/sale/customer.php
  inflating: upload/admin/language/english/setting/setting.php
  inflating: upload/admin/language/english/setting/store.php
   creating: upload/admin/language/english/tool/
  inflating: upload/admin/language/english/tool/backup.php
  inflating: upload/admin/language/english/tool/error_log.php
  inflating: upload/admin/language/english/tool/file_manager.php
Step 9 : Rename the package by using the below command
root@linuxhelp:~# mv grandcms_v0.2.0.1.1.zip grand
Step 10 : Move the package to apache home directory by using the below command
root@linuxhelp:~# mv grand /var/www/
Step 11 : Change the ownership to the directory by using the below command
root@linuxhelp:~# chown -R www-data. /var/www/grand
Step 12 : change the permissions by using the below command
root@linuxhelp:~# chmod -R 775 /var/www/grand
Step 13 : Edit the virtual host in the apache hoe directory by using the below command
root@linuxhelp:~# nano /etc/apache2/sites-available/grand.conf
Step 14 : Disable the default virtualhost by using the below command
root@linuxhelp:~# a2dissite 000-default.conf
Site 000-default disabled.
To activate the new configuration, you need to run:
  systemctl reload apache2
Step 15 : Enable the grand.conf file by using the below command
root@linuxhelp:~# a2ensite grand.conf
Enabling site grand.
To activate the new configuration, you need to run:
  systemctl reload apache2
Step 16 : Enable the rewrite module by using the below command
root@linuxhelp:~# a2enmod rewrite
Enabling module rewrite.
To activate the new configuration, you need to run:
  systemctl restart apache2
Step 17 : Restart the Apache2 web service by using the below command
root@linuxhelp:~# systemctl restart apache2
Step 18 : Edit the Host Entry by using the below command
root@linuxhelp:~# nano /etc/hosts
Step 19 : Installation page of grand CMS
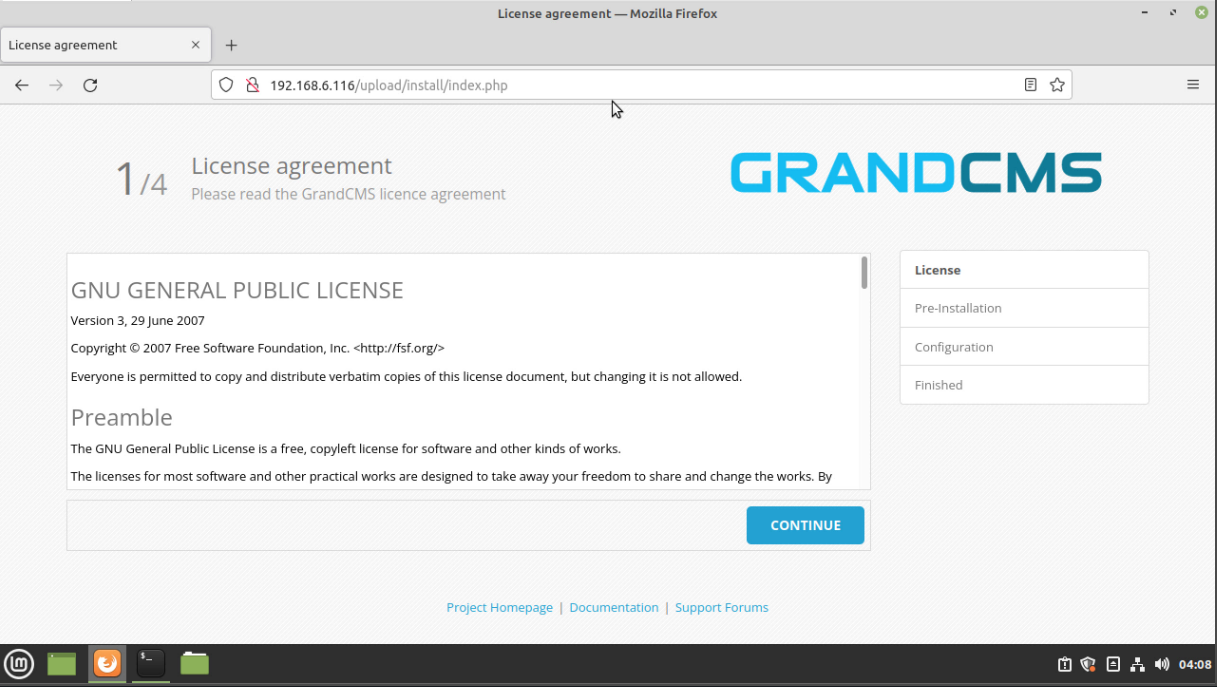
With this process, the installation of Grand CMS on Linux mint 20.2 comes to an end.

Comments ( 0 )
No comments available