How to install HumHub in Ubuntu
To install HumHub in Ubuntu - To create Social Network sites
Humhub is an open source tool that is user for creating Social Media websites like Facebook, Twitter, Google+ and so on. It is programmed in PHP language. Installation of HumHub is explained in this manual.
To Set up LAMP Server
Before starting with the HumHub installation, setup LAMP by following the below steps.
root@linuxhelp:~# apt-get install lamp-server^
Reading package lists... Done
Building dependency tree
Reading state information... Done
libwrap0 is already the newest version.
libwrap0 set to manually installed.
ssl-cert is already the newest version.
ssl-cert set to manually installed.
tcpd is already the newest version.
.
.
.

Module mpm_event disabled.
Enabling module mpm_prefork.
apache2_switch_mpm Switch to prefork
apache2_invoke: Enable module php5
Processing triggers for libc-bin (2.21-0ubuntu4) ...
Processing triggers for ureadahead (0.100.0-19) ...
Processing triggers for systemd (225-1ubuntu9) ...
Install PHP, once the LAMP server is installed.
root@linuxhelp:~# apt-get install php5-curl php5-gd -y
Reading package lists... Done
Building dependency tree
Reading state information... Done
The following NEW packages will be installed:
php5-curl php5-gd
0 upgraded, 2 newly installed, 0 to remove and 252 not upgraded.
Need to get 56.8 kB of archives.
After this operation, 248 kB of additional disk space will be used.
.
.
.
php5_invoke: Enable module gd for apache2 SAPI
php5_invoke: Enable module gd for cli SAPI
Processing triggers for libapache2-mod-php5 (5.6.11+dfsg-1ubuntu3.4) ...
Run the following command to start and enable the apache service.
root@linuxhelp:~# systemctl restart apache2
root@linuxhelp:~# systemctl enable apache2
apache2.service is not a native service, redirecting to systemd-sysv-install
Executing /lib/systemd/systemd-sysv-install enable apache2
Now login to the MySQL Database to create database and user for Humhub.
root@linuxhelp:~# mysql -u root -p
Enter password:
Welcome to the MySQL monitor. Commands end with   or g.
Your MySQL connection id is 2
Server version: 5.6.31-0ubuntu0.15.10.1 (Ubuntu)

Copyright (c) 2000, 2016, Oracle and/or its affiliates. All rights reserved.

Oracle is a registered trademark of Oracle Corporation and/or its
affiliates. Other names may be trademarks of their respective
owners.

Type ' help '  or ' h'  for help. Type ' c'  to clear the current input statement.

mysql>  create database humhub
Query OK, 1 row affected (0.00 sec)

mysql>  CREATE USER ' humhub' @' localhost'  IDENTIFIED BY ' 123'
Query OK, 0 rows affected (0.00 sec)

mysql>  GRANT ALL ON humhub.* TO ' humhub' @' localhost'
Query OK, 0 rows affected (0.00 sec)

mysql>  flush privileges
Query OK, 0 rows affected (0.00 sec)

mysql>  exit
Bye
To install HumHub
Download the Humhub package by running the following command.
root@linuxhelp:~# wget http://liquidtelecom.dl.sourceforge.net/project/humhub/humhub-1.1.0.tar.gz
--2016-08-20 10:50:32-- http://liquidtelecom.dl.sourceforge.net/project/humhub/humhub-1.1.0.tar.gz
Resolving liquidtelecom.dl.sourceforge.net (liquidtelecom.dl.sourceforge.net)... 197.155.77.8
Connecting to liquidtelecom.dl.sourceforge.net (liquidtelecom.dl.sourceforge.net)|197.155.77.8|:80... connected.
HTTP request sent, awaiting response... 200 OK
Length: 17163688 (16M) [application/x-gzip]
Saving to: ‘ humhub-1.1.0.tar.gz’

humhub-1.1.0.tar.gz 100%[==========================================================================================> ] 16.37M 543KB/s in 45s

2016-08-20 10:51:17 (376 KB/s) - ‘ humhub-1.1.0.tar.gz’  saved [17163688/17163688]
Move the downloaded package into the default document root of your webserver.
root@linuxhelp:~# mv humhub-1.1.0.tar.gz /var/www/html
root@linuxhelp:~# cd /var/www/html
Extract the downloaded package by running the belowcommand.
root@linuxhelp:/var/www/html# ls
humhub-1.1.0.tar.gz index.html
root@linuxhelp:/var/www/html# tar -zxvf humhub-1.1.0.tar.gz
humhub-1.1.0/
humhub-1.1.0/composer.lock
humhub-1.1.0/.htaccess.dist
humhub-1.1.0/fonts/
humhub-1.1.0/fonts/glyphicons-halflings-regular.ttf
humhub-1.1.0/fonts/glyphicons-halflings-regular.eot
humhub-1.1.0/fonts/glyphicons-halflings-regular.svg
.
.
.
humhub-1.1.0/ico/favicon-16x16.png
humhub-1.1.0/ico/favicon-32x32.png
humhub-1.1.0/ico/favicon-96x96.png
humhub-1.1.0/ico/ms-icon-144x144.png
humhub-1.1.0/ico/apple-icon-152x152.png
humhub-1.1.0/ico/android-icon-192x192.png
humhub-1.1.0/ico/ms-icon-70x70.png
humhub-1.1.0/ico/ms-icon-150x150.png
humhub-1.1.0/ico/android-icon-144x144.png
Rename the directory that is created after the extraction.
root@linuxhelp:/var/www/html# mv humhub-1.1.0 humhub
root@linuxhelp:/var/www/html# ls
humhub humhub-1.1.0.tar.gz index.html
Set the full permissions for the HumHub directory using chmod command.
root@linuxhelp:/var/www/html# chmod -R 777 humhub
Open the browser and enter the URL https://< IP_address> /humhub

The Welcome screen of HumHub appears, choose the language and Click “ Next” to start with the configuration.

Click Next to check the missing PHP extensions.

Open the terminal and run the following command to install the missing PHP extensions.
root@linuxhelp:/var/www/html# apt-get install php5-intl php5-ldap php5-sqlite php-apc -y
Reading package lists... Done
Building dependency tree
Reading state information... Done
The following extra packages will be installed:
php5-apcu
The following NEW packages will be installed:
php-apc php5-apcu php5-intl php5-ldap php5-sqlite
0 upgraded, 5 newly installed, 0 to remove and 252 not upgraded.
Need to get 240 kB of archives.
After this operation, 978 kB of additional disk space will be used.
Get:1 http://in.archive.ubuntu.com/ubuntu/ wily/universe php5-apcu amd64 4.0.7-1build1 [78.7 kB]
Get:2 http://in.archive.ubuntu.com/ubuntu/ wily/universe php-apc all 4.0.7-1build1 [2,706 B]
Get:3 http://in.archive.ubuntu.com/ubuntu/ wily-updates/universe php5-intl amd64 5.6.11+dfsg-1ubuntu3.4 [112 kB]
Get:4 http://in.archive.ubuntu.com/ubuntu/ wily-updates/main php5-ldap amd64 5.6.11+dfsg-1ubuntu3.4 [22.2 kB]
Get:5 http://in.archive.ubuntu.com/ubuntu/ wily-updates/main php5-sqlite amd64 5.6.11+dfsg-1ubuntu3.4 [24.7 kB]
.
.
.
Creating config file /etc/php5/mods-available/pdo_sqlite.ini with new version
php5_invoke: Enable module pdo_sqlite for apache2 SAPI
php5_invoke: Enable module pdo_sqlite for cli SAPI
Processing triggers for libapache2-mod-php5 (5.6.11+dfsg-1ubuntu3.4) ...
Then restart the apache services by running the following command.
root@linuxhelp:/var/www/html# systemctl restart apache2
After adding the plugins, go back to the browser and click “ Check again” .

Click “ Next” to continue the installation process.

Then fill the database connection details and click Next

Give a name for your site.

Choose the type of configuration you want to perform and click “ Next” .

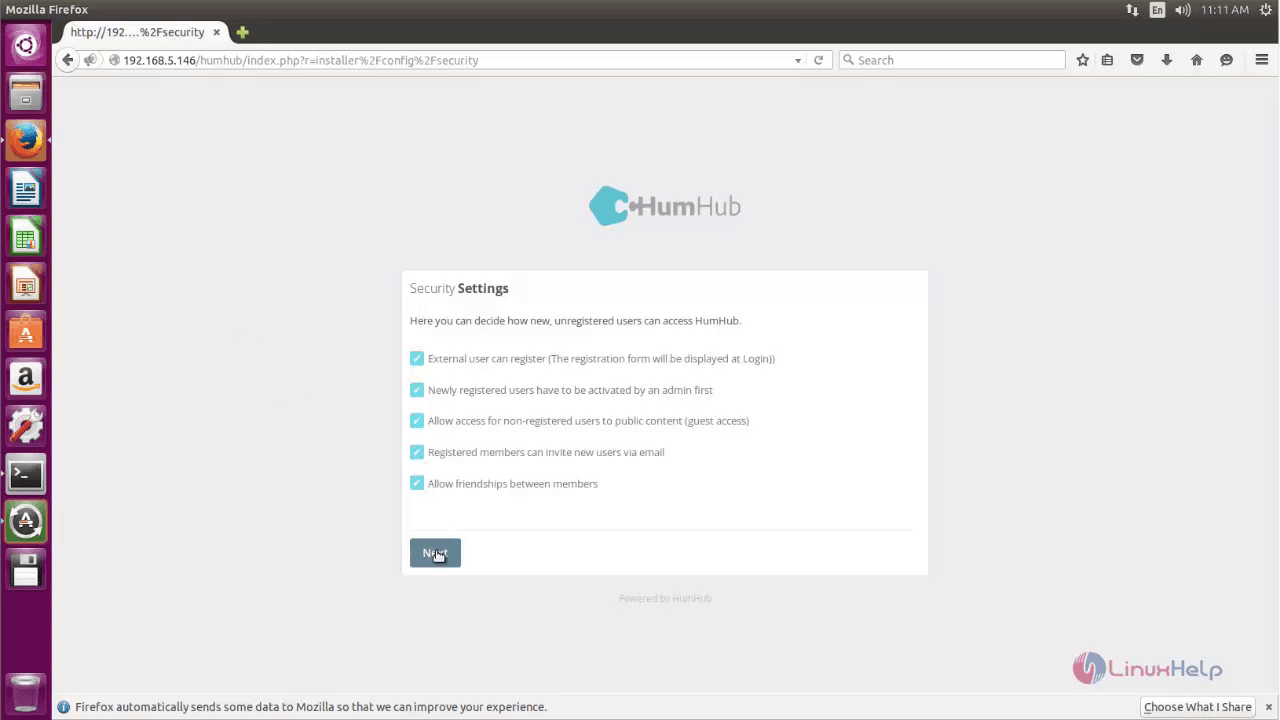
Select the necessary security settings and click Next.
Set up the recommended Modules for your web site and click Next.

Create an Admin account to manage the whole network.

Set up the recommended example content if required.

Once the installation process is successfully completed, click “ Sign in” .

Again “ Sign in” to start using your own social media.


Click Dashboard to view all the recent activities.

Click Messages to view the message conversation.

Click Directory to view the members in your network.

Choose Welcome Space to create your new welcome page.


To edit your profile, click Profile.
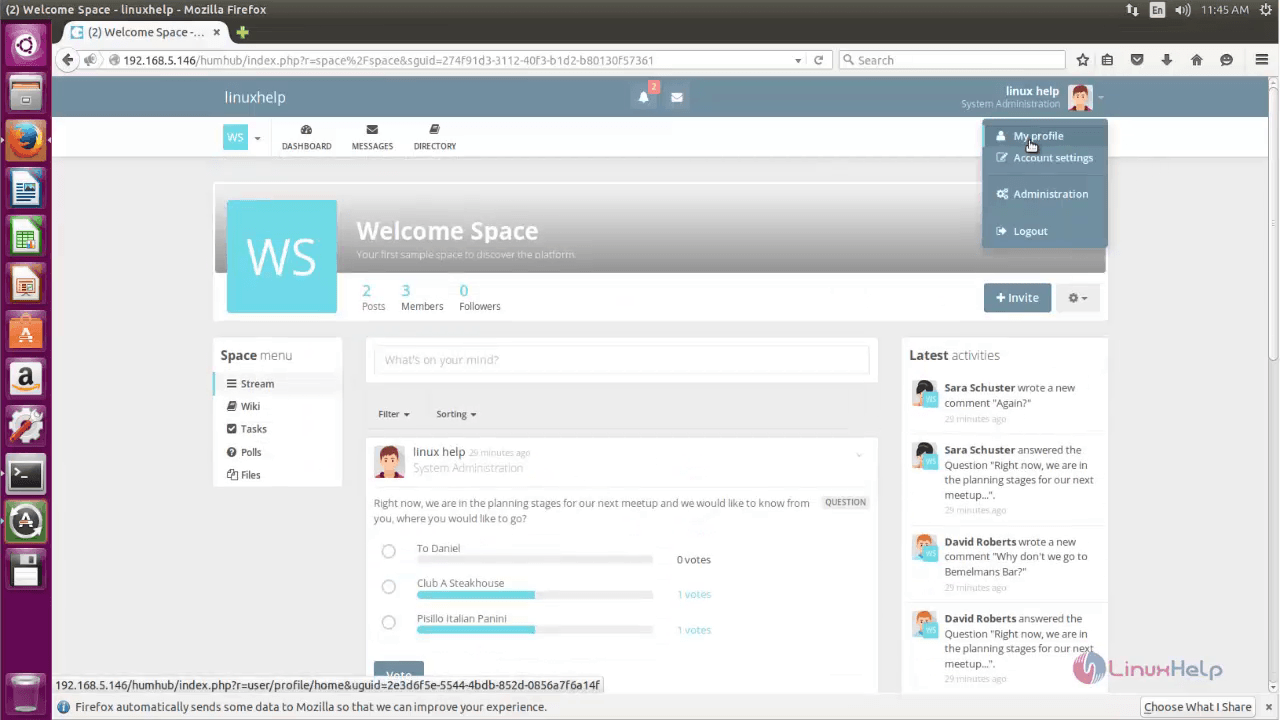

To change Account Settings, click Account settings.


Click Administration option to create user or other administrative tasks.

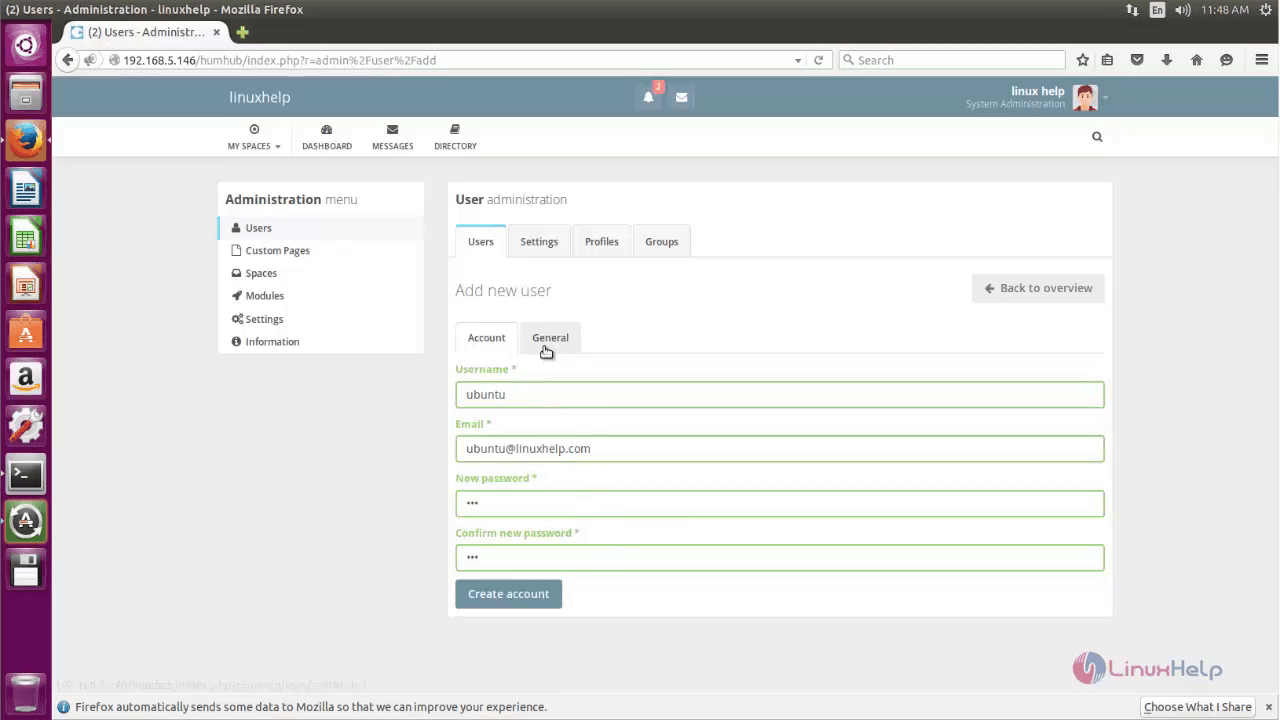
To Create New User, click Add New user.

Fill the user details and click Create account.


Move to Directory, to send any friend Request.


Now we will try to access from our windows client machine with the newly created credentials.

To view notification, click Notification.

You can start accepting the friend request.

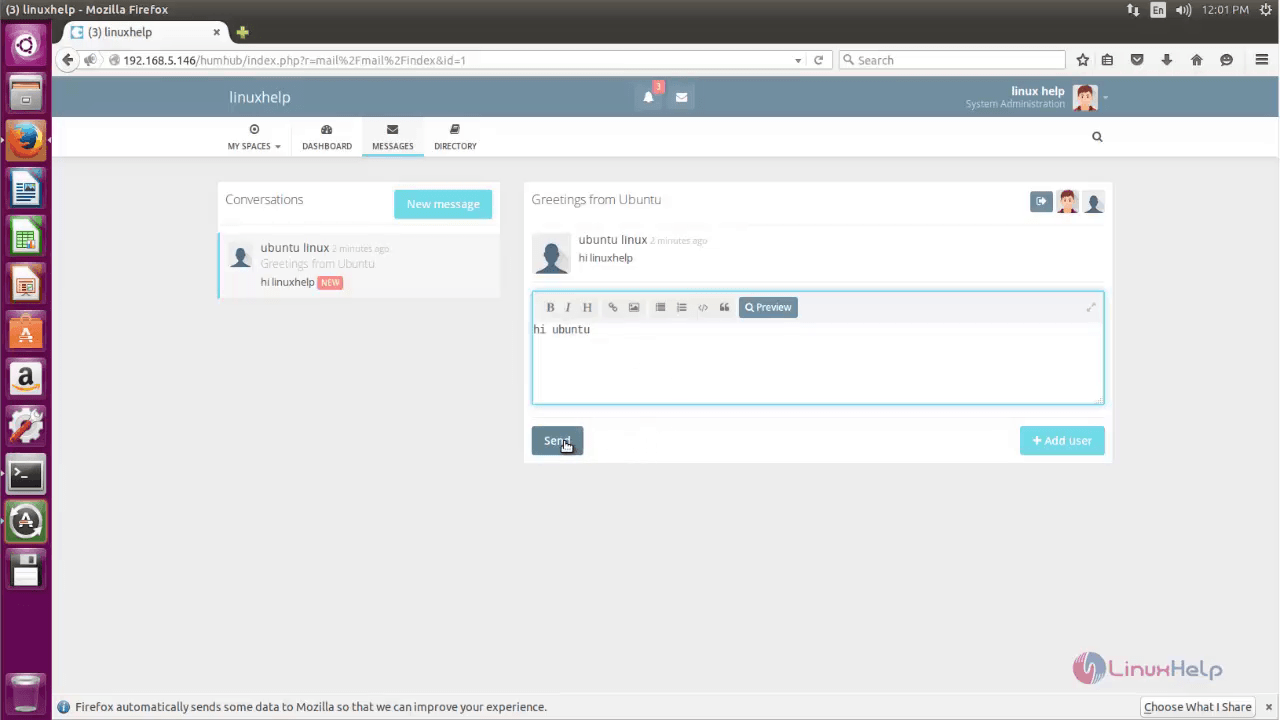
You can send message request to your friends!

Now lets open and verify the notification from another user account.


Comments ( 2 )