How to Install Lamp on Ubuntu 20.4.1
- 00:46 lsb_release -a
- 01:09 apt install apache2
- 01:41 systemctl start apache2
- 02:04 systemctl status apache2
- 02:28 systemctl enable apache2
- 03:24 apt install mysql-server
- 04:18 systemctl start mysql
- 04:35 systemctl enable mysql
- 05:06 sudo mysql_secure_installation
- 06:02 apt install php libapache2-mod-php php-mysql
- 06:59 cd /var/www/html/
- 07:13 vi phpinfo.php
- 08:02 systemctl restart apache2
To Install LAMP on Ubuntu 20.4.1
Introduction:
LAMP stands for Linux, Apache, MySQL, and PHP. It is a stack of open source software which are used to enable a server to host dynamic websites and web applications. The most important part of LAMP is "AMP" which is Apache, or "Apache HTTP Server". Apache is the software that delivers webpages through the Internet via the HTTP protocol. MySQL is an open source database management system (DBMS) and PHP is a server scripting language.
Installation Process:
Run lsb_release command to check the installed version of OS as follows.
root@linuxhelp:~#  lsb_release -a
No LSB modules are available.
Distributor ID:	Ubuntu
Description:	Ubuntu 20.04.1 LTS
Release:	20.04
Codename:	focal
Install Apache:
To install Apache Software type the mentioned command:
root@linuxhelp:~# apt install apache2
Reading package lists... Done
Building dependency tree
Reading state information... Done
The following additional packages will be installed:
  apache2-bin apache2-data apache2-utils libapr1 libaprutil1 libaprutil1-dbd-sqlite3 libaprutil1-ldap
  liblua5.2-0
Suggested packages:
  apache2-doc apache2-suexec-pristine | apache2-suexec-custom
….
….
After completing the above step, start the Apache by using the following command:
root@linuxhelp:~# systemctl start apache2
Once the apache service is started, then check the status by using the below command:
root@linuxhelp:~# systemctl status apache2
  apache2.service - The Apache HTTP Server
     Loaded: loaded (/lib/systemd/system/apache2.service; enabled; vendor preset: enabled)
     Active: active (running) since Thu 2020-10-29 21:01:02 PDT; 16min ago
       Docs: https://httpd.apache.org/docs/2.4/
   Main PID: 10583 (apache2)
      Tasks: 55 (limit: 2285)
     Memory: 5.5M
     CGroup: /system.slice/apache2.service
             ├─10583 /usr/sbin/apache2 -k start
             ├─11384 /usr/sbin/apache2 -k start
             └─11385 /usr/sbin/apache2 -k start
Let enable the Apache service by using the following command:
root@linuxhelp:~# systemctl enable apache2
Synchronizing state of apache2.service with SysV service script with /lib/systemd/systemd-sysv-install.
Executing: /lib/systemd/systemd-sysv-install enable apache2
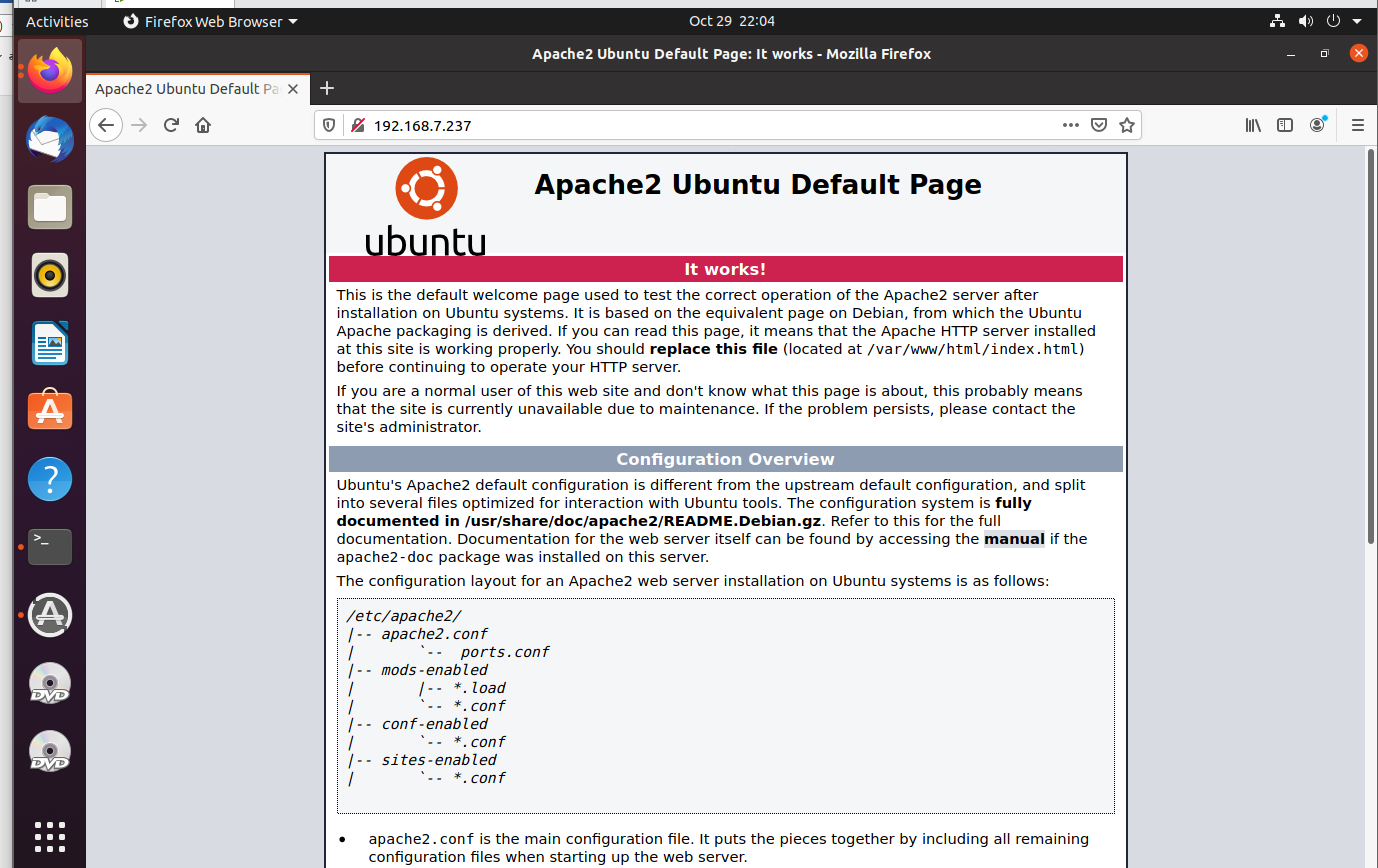
After completed the above steps switch-over to browser and type the IP address to check the Apache test page:
Install the mysql by using the below command:
root@linuxhelp:~# apt install mysql-server
Reading package lists... Done
Building dependency tree
Reading state information... Done
The following additional packages will be installed:
  libaio1 libcgi-fast-perl libcgi-pm-perl libevent-core-2.1-7 libevent-pthreads-2.1-7 libfcgi-perl
  libhtml-template-perl libmecab2 mecab-ipadic mecab-ipadic-utf8 mecab-utils mysql-client-8.0 mysql-client-core-8.0
  mysql-server-8.0 mysql-server-core-8.0
Suggested packages:
  libipc-sharedcache-perl mailx tinyca
The following NEW packages will be installed:
  libaio1 libcgi-fast-perl libcgi-pm-perl libevent-core-2.1-7 libevent-pthreads-2.1-7 libfcgi-perl
  libhtml-template-perl libmecab2 mecab-ipadic mecab-ipadic-utf8 mecab-utils mysql-client-8.0 mysql-client-core-8.0
  mysql-server mysql-server-8.0 mysql-server-core-8.0
0 upgraded, 16 newly installed, 0 to remove and 152 not upgraded.
Need to get 30.4 MB of archives.
After this operation, 248 MB of additional disk space will be used.
Do you want to continue? [Y/N] y
Get:1 http://us.archive.ubuntu.com/ubuntu focal/main amd64 libaio1 amd64 0.3.112-5 [7,184 B]
Get:2 http://us.archive.ubuntu.com/ubuntu focal/main amd64 libevent-core-2.1-7 amd64 2.1.11-stable-1 [89.1 kB]
…………………..
Get:9 http://us.archive.ubuntu.com/ubuntu focal/main amd64 libhtml-template-perl all 2.97-1 [59.0 kB]
done!
update-alternatives: using /var/lib/mecab/dic/ipadic to provide /var/lib/mecab/dic/debian (mecab-dictionary) in auto mode
Setting up libcgi-fast-perl (1:2.15-1) ...
Setting up mysql-server-core-8.0 (8.0.22-0ubuntu0.20.04.2) ...
Setting up mecab-ipadic-utf8 (2.7.0-20070801+main-2.1) ...
Compiling IPA dictionary for Mecab.  This takes long time...
reading /usr/share/mecab/dic/ipadic/unk.def ... 40
emitting double-array: 100% |###########################################|
reading /usr/share/mecab/dic/ipadic/matrix.def ... 1316x1316
emitting matrix      : 100% |###########################################|
done!
Once the above step is completed, Start the mysql service by using the following command:
root@linuxhelp:~# systemctl start mysql
Then enable the mysql service by using the below command:
root@linuxhelp:~# systemctl enable mysql
Synchronizing state of mysql.service with SysV service script with /lib/systemd/systemd-sysv-install.
Executing: /lib/systemd/systemd-sysv-install enable mysql
Let use this mysql command to Enable the secure installation:
root@linuxhelp:~# mysql_secure_installation

Securing the MySQL server deployment.
Connecting to MySQL using a blank password.

Please set the password here.
New password:
Re-enter new password:

Remove anonymous users? (Press y|Y for Yes, any other key for No) : y
Success.

Normally, root should only be allowed to connect from
'localhost'. This ensures that someone cannot guess at
the root password from the network.

Disallow root login remotely? (Press y|Y for Yes, any other key for No) : y
Success.

By default, MySQL comes with a database named 'test' that
anyone can access. This is also intended only for testing,
and should be removed before moving into a production
environment.
Remove test database and access to it? (Press y|Y for Yes, any other key for No) : y
 - Dropping test database...
Success.
 - Removing privileges on test database...
Success.
Reloading the privilege tables will ensure that all changes
made so far will take effect immediately.
Reload privilege tables now? (Press y|Y for Yes, any other key for No) : y
Success.

All done!
Installing php modules by using below command:
root@linuxhelp:~# apt install php libapache2-mod-php php-mysql
Reading package lists... Done
Building dependency tree
Reading state information... Done
The following additional packages will be installed:
  libapache2-mod-php7.4 php-common php7.4 php7.4-cli php7.4-common php7.4-json php7.4-mysql php7.4-opcache
  php7.4-readline
Suggested packages:
  php-pear
The following NEW packages will be installed:
  libapache2-mod-php libapache2-mod-php7.4 php php-common php-mysql php7.4 php7.4-cli php7.4-common php7.4-json
  php7.4-mysql php7.4-opcache php7.4-readline
0 upgraded, 12 newly installed, 0 to remove and 152 not upgraded.
Need to get 4,144 kB of archives.
After this operation, 18.5 MB of additional disk space will be used.
Do you want to continue? [Y/n] y
Get:1 http://us.archive.ubuntu.com/ubuntu focal/main amd64 php-common all 2:75 [11.9 kB]
Get:2 http://us.archive.ubuntu.com/ubuntu focal-updates/main amd64 php7.4-common amd64 7.4.3-4ubuntu2.4 [979 kB]
Get:3 http://us.archive.ubuntu.com/ubuntu focal-updates/main amd64 php7.4-json amd64 7.4.3-4ubuntu2.4 [19.2 kB]
…………….
Creating config file /etc/php/7.4/apache2/php.ini with new version
Module mpm_event disabled.
Enabling module mpm_prefork.
apache2_switch_mpm Switch to prefork
………………………
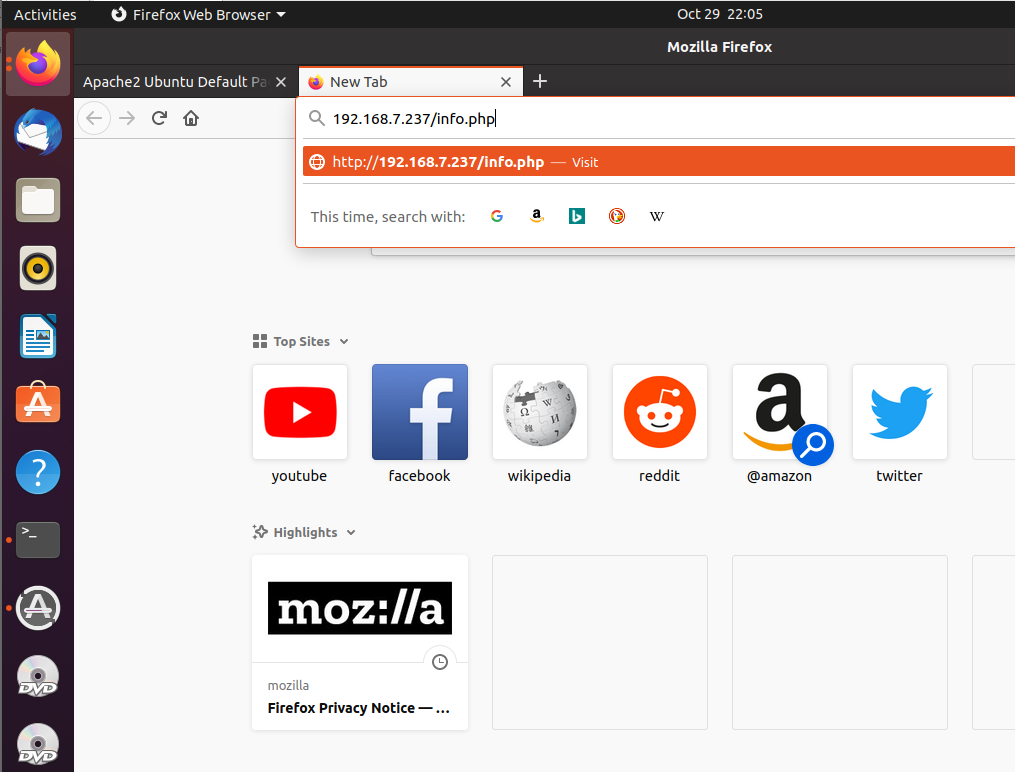
Configure the info.php by using the following command:
[root@linuxhelp ~]# vi /var/www/html/info.php
<?
Phpinfo();
?>
Once the following step is completed, restart the apache service
[root@linuxhelp ~]# systemctl restart apache2
Navigate to the Browser, where Enter IP address of your system with php filename
Here you can see installed php information

The Installation process of LAMP on Ubuntu comes to end.
Comments ( 0 )
No comments available