How to install Naemon on CentOS 7
How to install Naemon on CentOS 7
Naemon is free and open source network monitoring tool based on Nagios. It monitors network and infrastructure monitoring software application. It also offers monitoring and alerting services for servers, switches, application and services. This tutorial explains the installation procedure of Naemon on CentOS 7.
To know about the installation procedure of Naemon on Ubuntu, visit
https://www.linuxhelp.com/how-to-install-naemon-on-ubuntu/
Installation procedure
For Naemon to run in CentOS, it is required to setup LAMP server environment. Install and configure the LAMP server in the target machine and then follow the below steps to install Naemon. Add the Consol Labs repository before installing Naemon
[root@linuxhelp ~]# rpm -Uvh " https://labs.consol.de/repo/stable/rhel7/i386/labs-consol-stable.rhel7.noarch.rpm"
Retrieving https://labs.consol.de/repo/stable/rhel7/i386/labs-consol-stable.rhel7.noarch.rpm
warning: /var/tmp/rpm-tmp.9WGdlX: Header V4 RSA/SHA1 Signature, key ID a57b9ed7: NOKEY
Preparing...                          ################################# [100%]
Updating / installing...
   1:labs-consol-stable-1.4-1         ################################# [100%]
Now install Naemon package by executing the following command and press y to continue with the installation.
[root@linuxhelp ~]# yum install naemon* -y
Loaded plugins: fastestmirror, langpacks
base                                                                                                                              | 3.6 kB  00:00:00
extras                                                                                                                            | 3.4 kB  00:00:00
labs_consol_stable                                                                                                                | 1.1 kB  00:00:00
updates                                                                                                                           | 3.4 kB  00:00:00
(1/3): labs_consol_stable/x86_64/primary                                                                                          | 9.3 kB  00:00:00
(2/3): extras/7/x86_64/primary_db                                                                                                 | 151 kB  00:00:00
(3/3): updates/7/x86_64/primary_db                                                                                                | 4.8 MB  00:00:42
Loading mirror speeds from cached hostfile
 * base: centos.excellmedia.net
 * extras: centos.excellmedia.net
 * updates: centos.excellmedia.net
labs_consol_stable                                                                                                                                 22/22
Resolving Dependencies
-->  Running transaction check
--->  Package naemon.x86_64 0:1.0.6-1.el7.centos will be installed
--->  Package naemon-core.x86_64 0:1.0.6-1.el7.centos will be installed
-->  Processing Dependency: libnaemon.so.0()(64bit) for package: naemon-core-1.0.6-1.el7.centos.x86_64
--->  Package naemon-core-dbg.x86_64 0:1.0.6-1.el7.centos will be installed
--->  Package naemon-devel.x86_64 0:1.0.6-1.el7.centos will be installed
-->  Processing Dependency: glib2-devel for package: naemon-devel-1.0.6-1.el7.centos.x86_64
--->  Package naemon-livestatus.x86_64 0:1.0.6-1.el7.centos will be installed
.
.
.
Dependency Installed:
  glib2-devel.x86_64 0:2.46.2-4.el7   libnaemon.x86_64 0:1.0.6-1.el7.centos   libthruk.x86_64 0:2.14-1.el7.centos      mod_fcgid.x86_64 0:2.3.9-4.el7
  thruk.x86_64 0:2.14-1               thruk-base.x86_64 0:2.14-1              thruk-plugin-reporting.x86_64 0:2.14-1
Dependency Updated:
  glib2.x86_64 0:2.46.2-4.el7
Complete!
To disable the SELINUX run the following command to open the configuration file and change the SELINUX to disabled. Save and exit from the file.
[root@linuxhelp ~]# setenforce 0
[root@linuxhelp ~]# vim /etc/sysconfig/selinux
Selinux=disabled
Execute the following commands to start and enable the httpd and also the Naemon services. After enabling the services, start and enable the thruk services which runs the Naemon services.
[root@linuxhelp ~]# systemctl start httpd
[root@linuxhelp ~]# systemctl enable httpd
[root@linuxhelp ~]# systemctl start naemon
[root@linuxhelp ~]# systemctl enable naemon
ln -s ' /usr/lib/systemd/system/naemon.service'  ' /etc/systemd/system/multi-user.target.wants/naemon.service'
[root@linuxhelp ~]# systemctl start thruk
[root@linuxhelp ~]# systemctl enable thruk
thruk.service is not a native service, redirecting to /sbin/chkconfig.
Executing /sbin/chkconfig thruk on
The unit files have no [Install] section. They are not meant to be enabled
using systemctl.
Possible reasons for having this kind of units are:
1) A unit may be statically enabled by being symlinked from another unit' s
   .wants/ or .requires/ directory.
2) A unit' s purpose may be to act as a helper for some other unit which has
   a requirement dependency on it.
3) A unit may be started when needed via activation (socket, path, timer,
   D-Bus, udev, scripted systemctl call, ...).
Now change the default thrukadmin password to any password the user desires by executing the following command.
[root@linuxhelp ~]# htpasswd /etc/thruk/htpasswd thrukadmin
New password:
Re-type new password:
Updating password for user thrukadmin
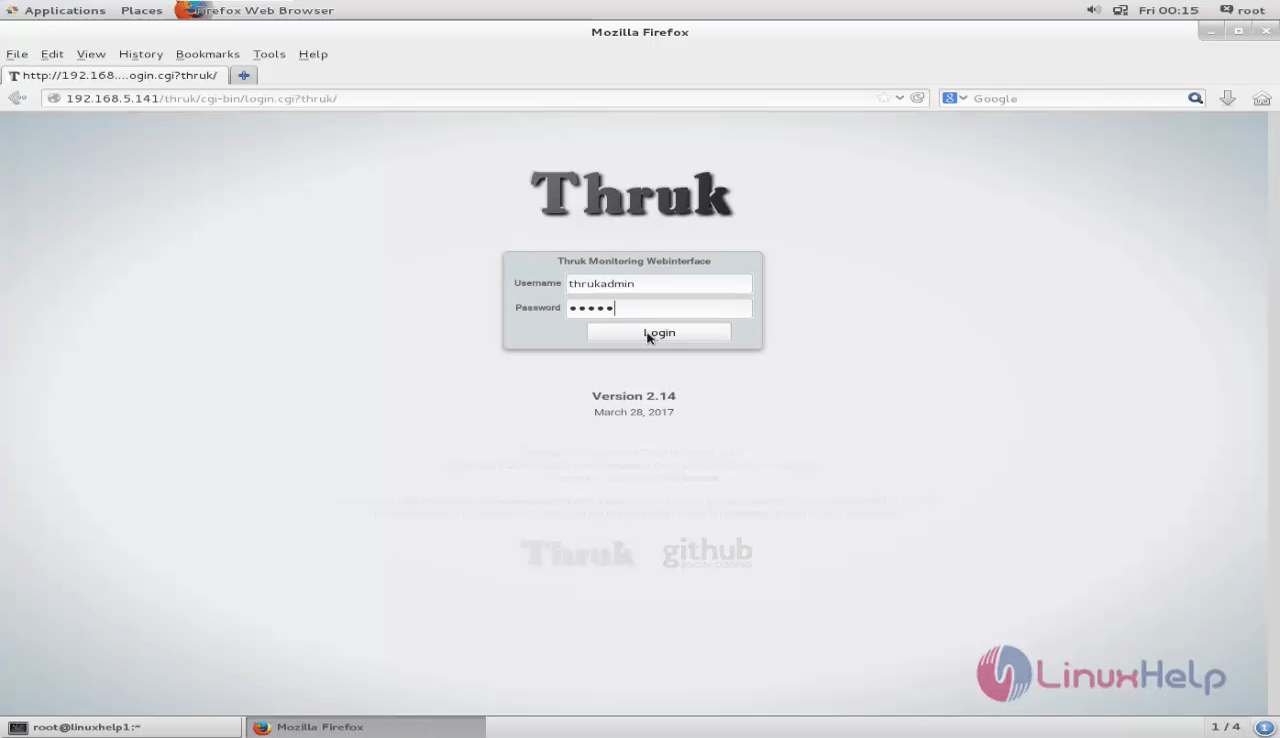
To access the web UI of Naemon open the browser of the user' s choice and enter the URL that has been configured earlier http://192.168.5.152/naemon. Enter the required username and password.
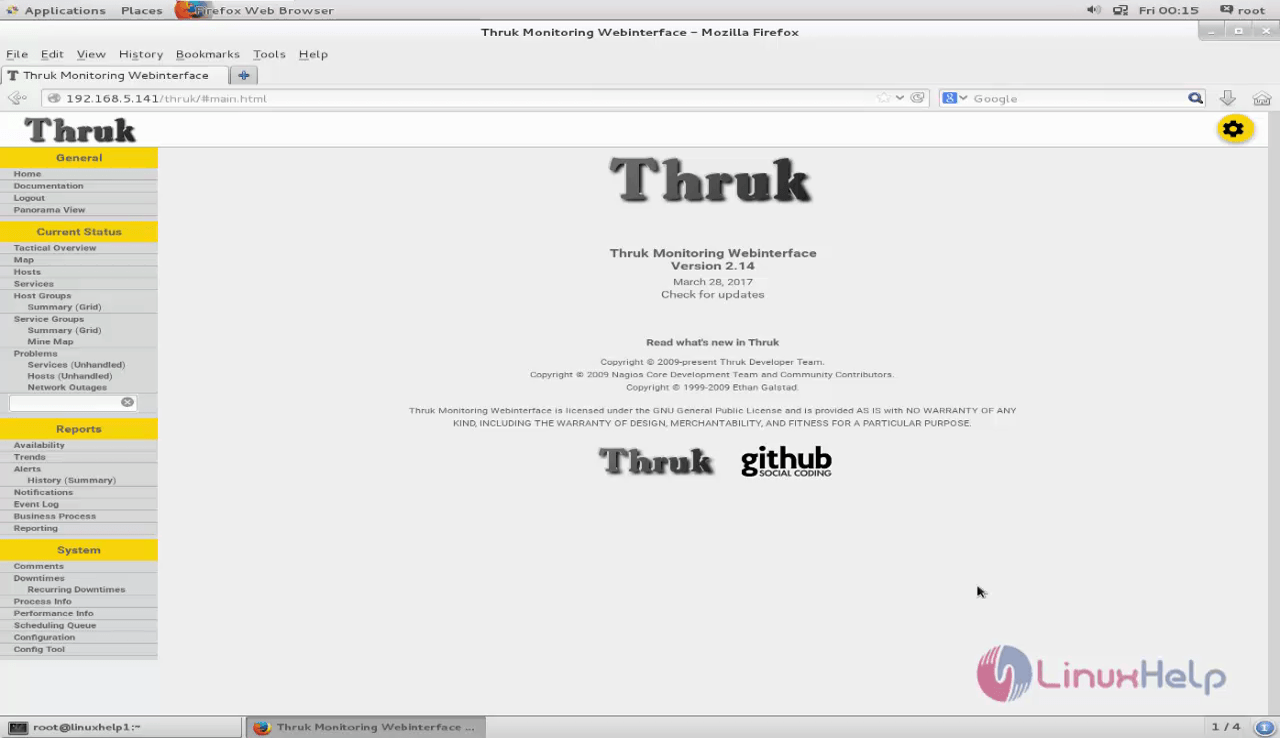
The application is running successfully. Now the user can monitor the network more easily.
Wasn' t that an easy installation procedure? The Naemon is has the ability to define network host hierarchies using ' parent' hosts, allowing the detection of and distinction between hosts that are down or unreachable.
Comments ( 2 )