How to install PmWiki in CentOS 6
How to install PmWiki in CentOS 6
PmWiki is a wiki-based content management system used for collaborative creation and maintenance of websites. The web-pages created using PmWiki looks like normal web pages, but they also have the edit link to modify existing pages and add new pages in the website. It is very simple to install PmWiki on CentOS 6, and this article covers the ground on the same process.
Installing PmWiki
Since the PmWiki depends on LAMP make sure you install the stack prior to the installation process. If you want to download the PmWiki package, you shall use the wget command as follows.
[root@linuxhelp1 Desktop]# wget http://www.pmwiki.org/pub/pmwiki/pmwiki-latest.zip
--2017-11-09 06:00:05-- http://www.pmwiki.org/pub/pmwiki/pmwiki-latest.zip
Resolving www.pmwiki.org... 74.200.73.219
Connecting to www.pmwiki.org|74.200.73.219|:80... connected.
HTTP request sent, awaiting response... 200 OK
Length: 574496 (561K) [application/zip]
Saving to: “ pmwiki-latest.zip”
100%[=====================================================================================> ] 574,496 --.-K/s in 0.01s
2017-11-09 06:00:08 (46.7 MB/s) - “ pmwiki-latest.zip”  saved [574496/574496]
Once the package is downloaded, you shall extract the package with the help of the following command.
[root@linuxhelp1 Desktop]# unzip pmwiki-latest.zip -d /var/www/html/
Archive: pmwiki-latest.zip
creating: /var/www/html/pmwiki-2.2.105/
inflating: /var/www/html/pmwiki-2.2.105/README.txt
creating: /var/www/html/pmwiki-2.2.105/cookbook/
&hellip
&hellip
&hellip
inflating: /var/www/html/pmwiki-2.2.105/wikilib.d/PmWiki.BasicEditing
inflating: /var/www/html/pmwiki-2.2.105/wikilib.d/PmWiki.Uploads
inflating: /var/www/html/pmwiki-2.2.105/wikilib.d/SiteAdmin.GroupAttributes
Once it is done, you can rename the pmwiki-2.2.105 directory to pmwiki. You can do that with the help of the following command.
[root@linuxhelp1 Desktop]# mv /var/www/html/pmwiki-2.2.105 /var/www/html/pmwiki
Next, create wiki.d directory inside pmwiki directory as follows.
[root@linuxhelp1 Desktop]# mkdir /var/www/html/pmwiki/wiki.d
And then, you need to change the ownership for the pmwiki directory. You shall use the following command for the same purpose.
[root@linuxhelp1 Desktop]# chown -R apache.apache /var/www/html/pmwiki/
Also, you need to create a directory index file in pmwiki directory as follows.
[root@linuxhelp1 Desktop]# cd /var/www/html/pmwiki/
[root@linuxhelp1 pmwiki]# vim index.php
Once the file is created, add the following line to the file.
< ?php include(' pmwiki.php' )
Save and exit the file after adding it.
Now, restart the Apache web server.
[root@linuxhelp1 pmwiki]# service httpd restart
Stopping httpd: [ OK ]
Starting httpd: [ OK ]
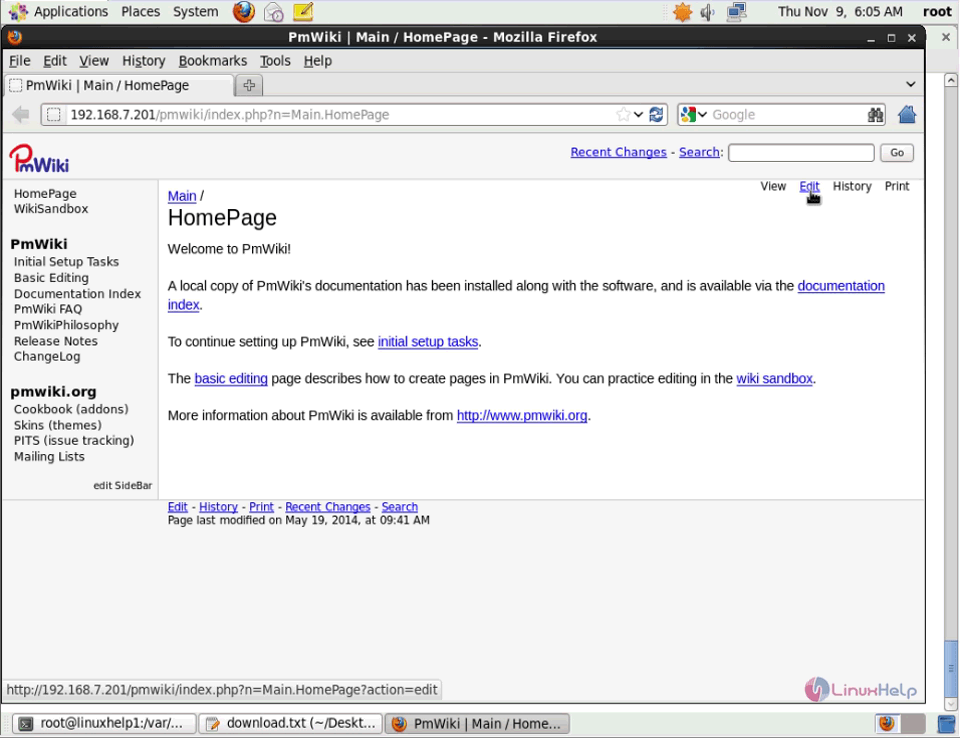
We shall now check the installation via the browser. So, switch over to your browser and navigate to http://192.168.7.201/pmwiki. The home page of PmWiki appears on the screen.
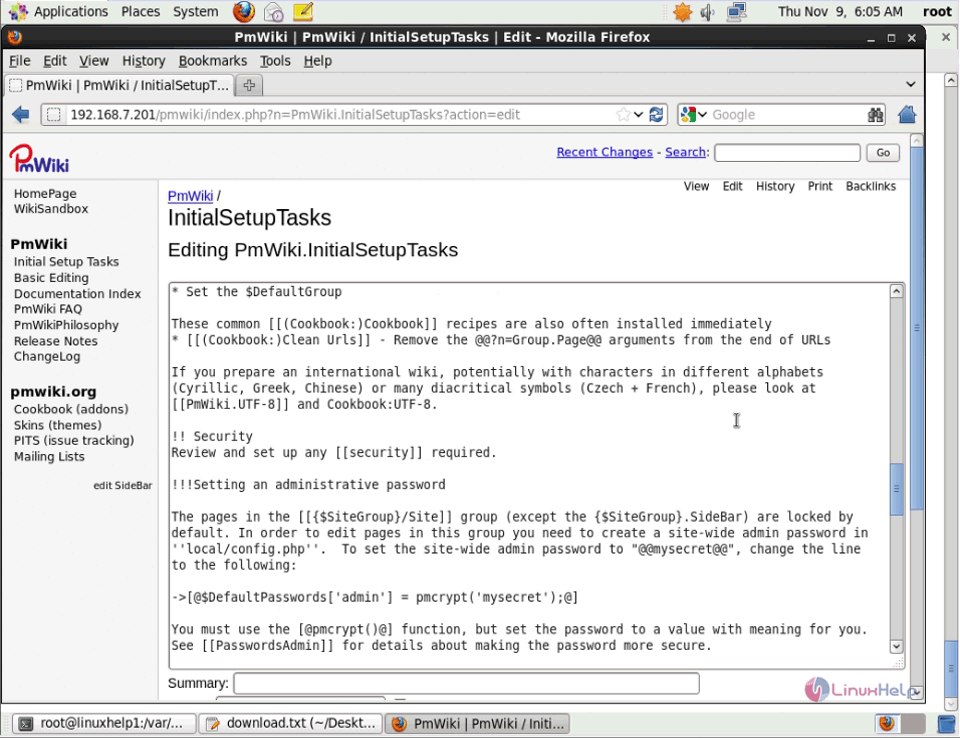
You can easily edit the existing pages.
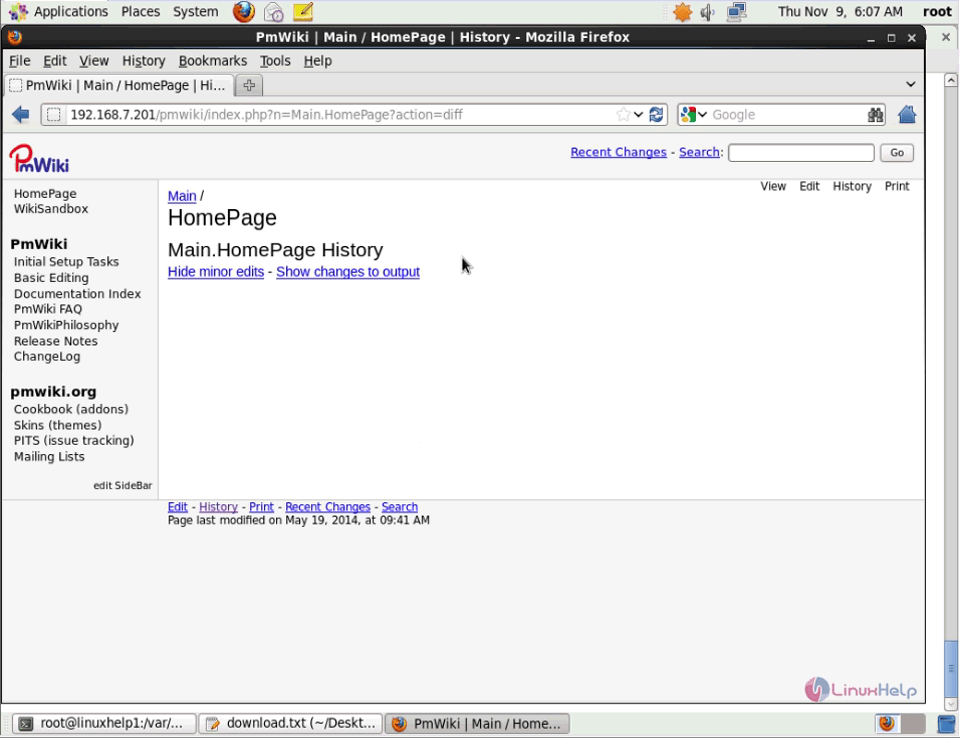
You can view the page history.
With this the installation of PmWiki comes to an end.
Comments ( 0 )
No comments available