• Categories
    Category
    {{ postCtrl.tags }}
    • {{ category.tag_type }}

      • {{tag.tag_name}}
      • View more
  • Categories
    Category
    {{ postCtrl.tags }}
    • {{ category.tag_type }}

      • {{tag.tag_name}}
      • View more
  • News
  • Tutorials
  • Forums
  • Tags
  • Users
Tutorial News Comments FAQ Related Articles

How to install Scientific Linux 7.2

{{postValue.id}}

Scientific Linux 7.2

Scientific Linux is a free and open source operating system. It is produced by Fermi National Accelerator Laboratory. It based on Red Hat Enterprise Linux. Here we will discuss how to install scientific linux 7.2 OS.

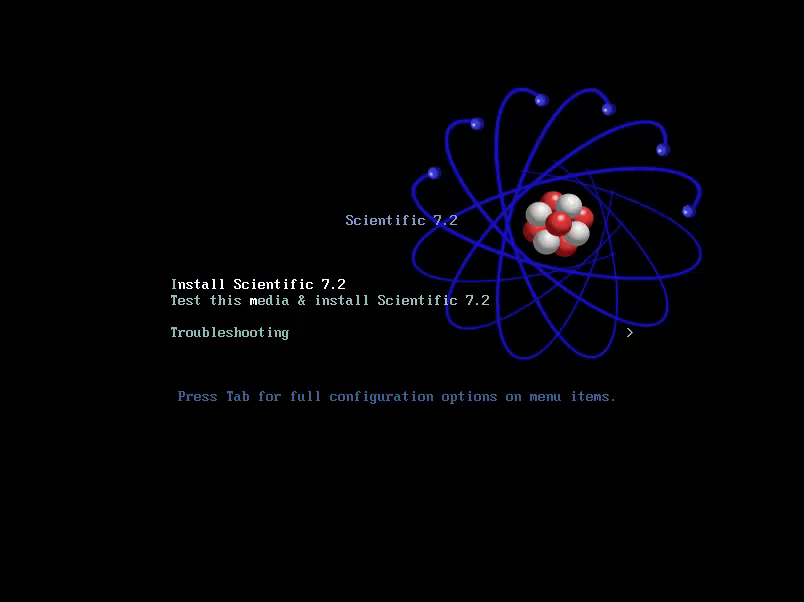
First download the ISO file from official web site and then make bootable disk or flash drive. Next insert your disk on your system. After inserting you can see following screen.

ios file

Install scientific Linux 7.2

Next you select Install scientific Linux 7.2 by using Arrow keys. Then press Enter key and again press Enter.

install scientific 7.2

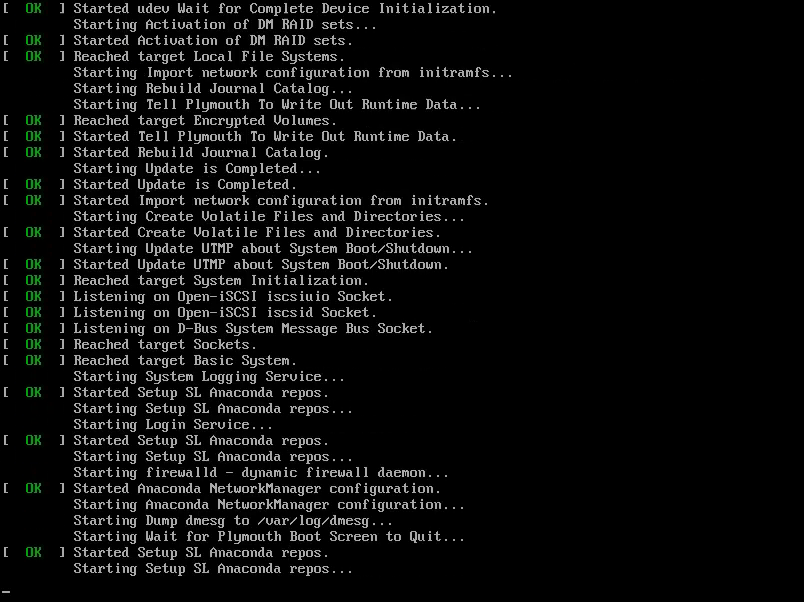
Now the installation has been started.

installation started

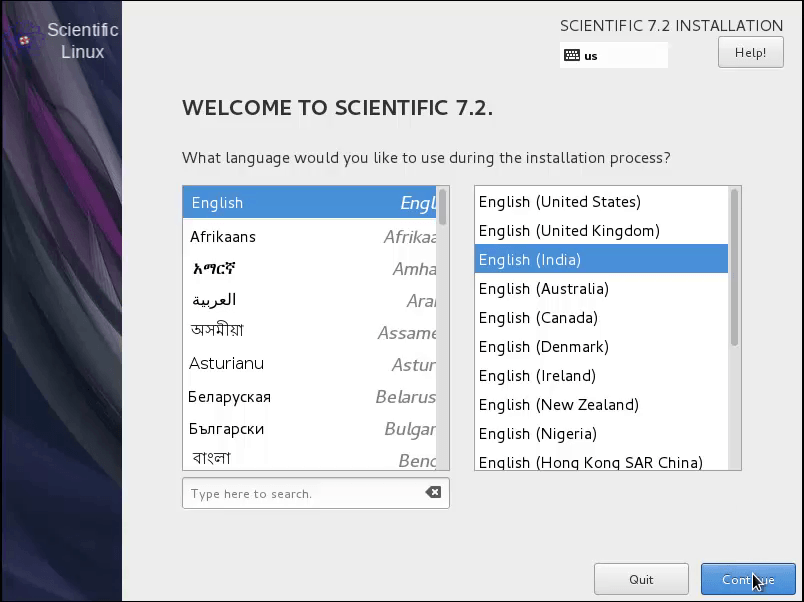
After installation starting you can able to see welcome to scientific Linux 7.2 Screen.

welcome scientific7.2

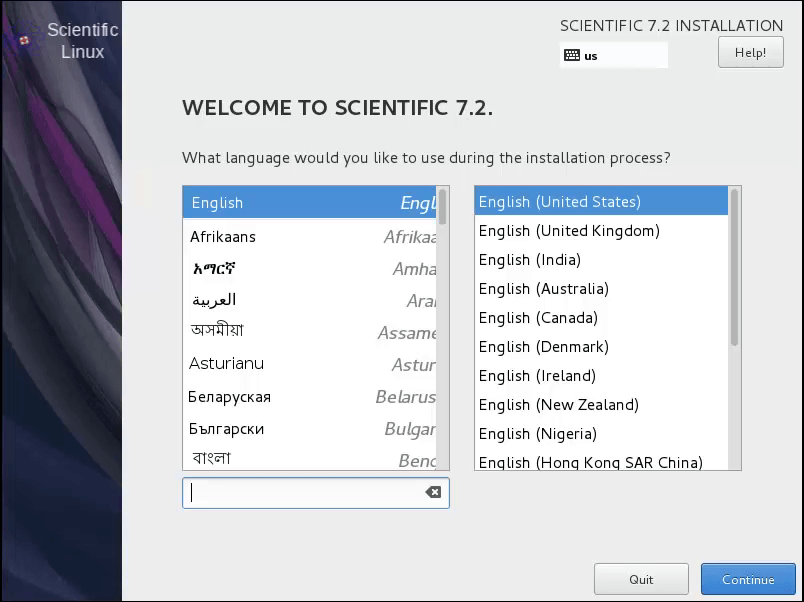
First choose your language with country. Then click continue.

language

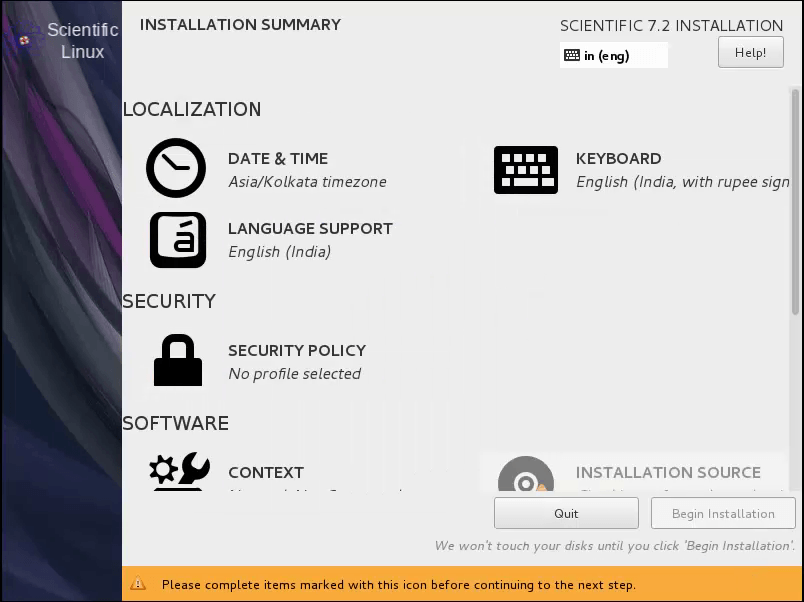
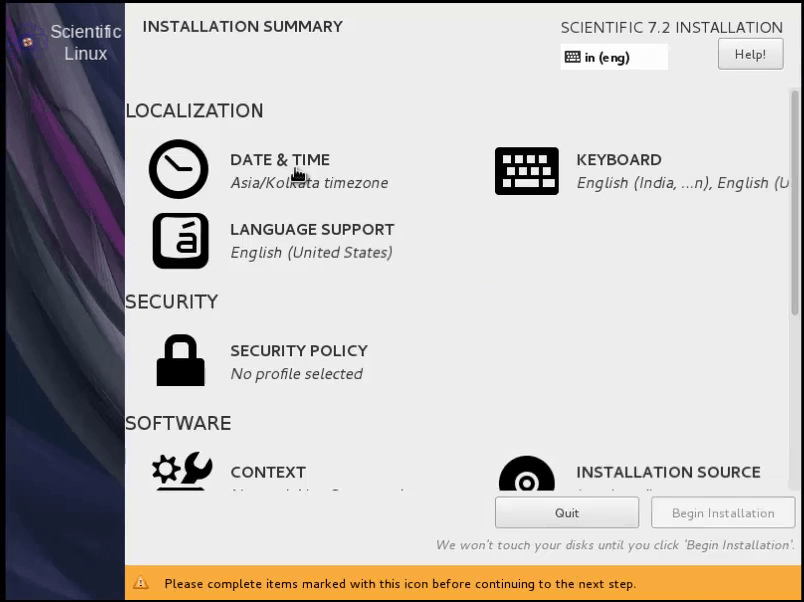
Next you can able to see Installation Summary wizard.

INSTALLATION SUMMARY

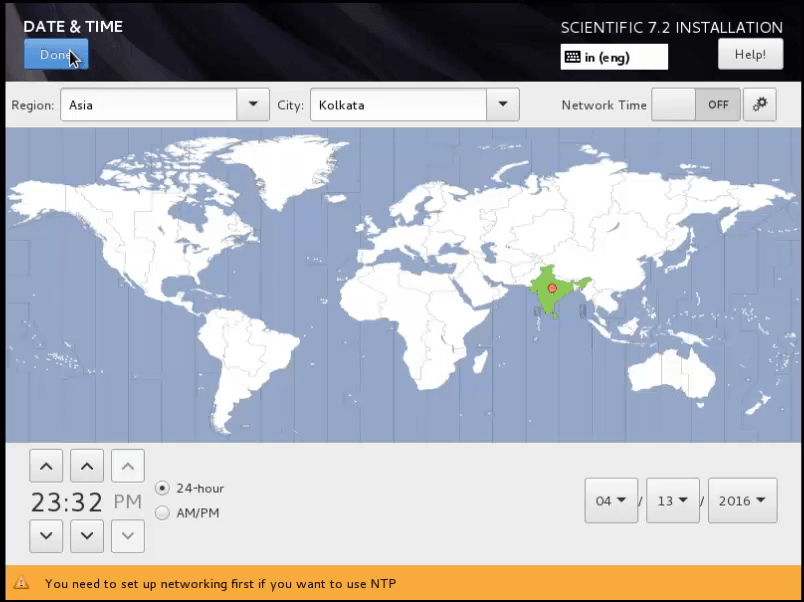
Here select Date & Time followed by country and click Done button.

DATE TIME

COUNTRY

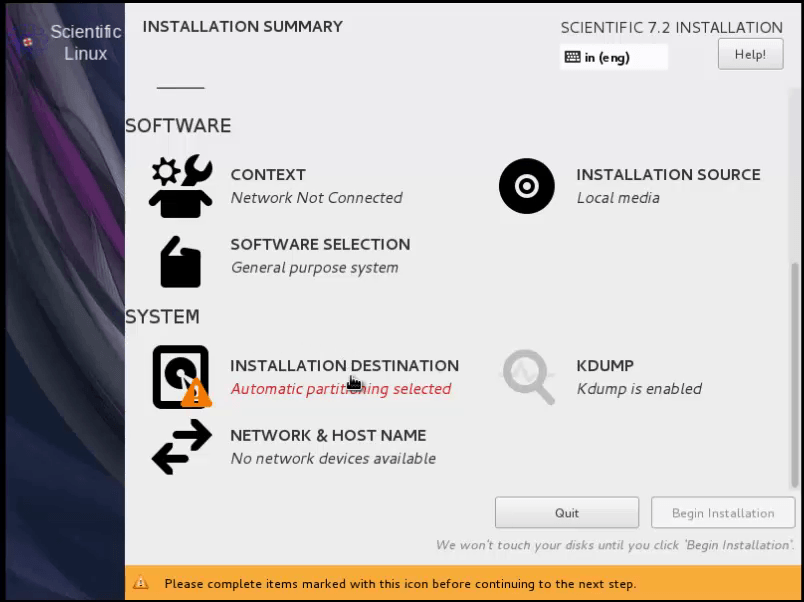
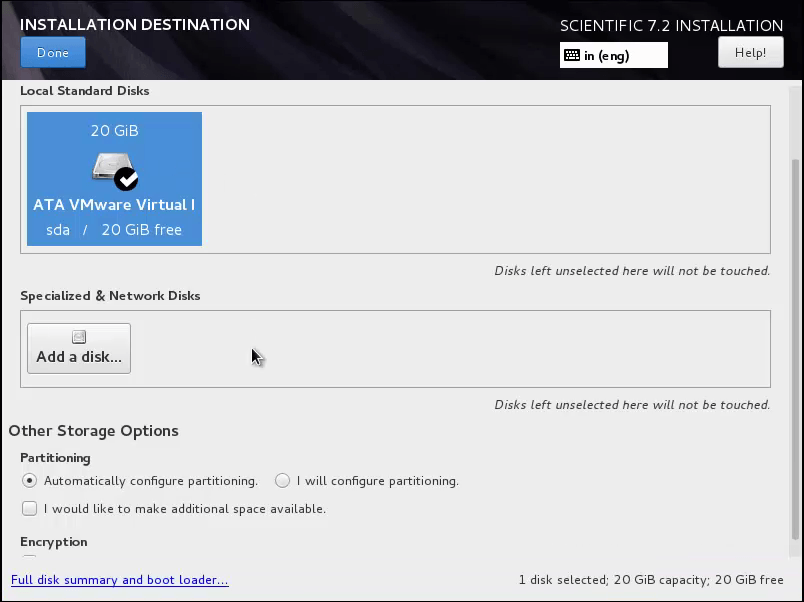
Once again Installation Summary Wizard appears. Now Select Installation destination.

INSTALLATION DESTINATION

Now Installation Destination Wizard appears and click the hard disk icon.
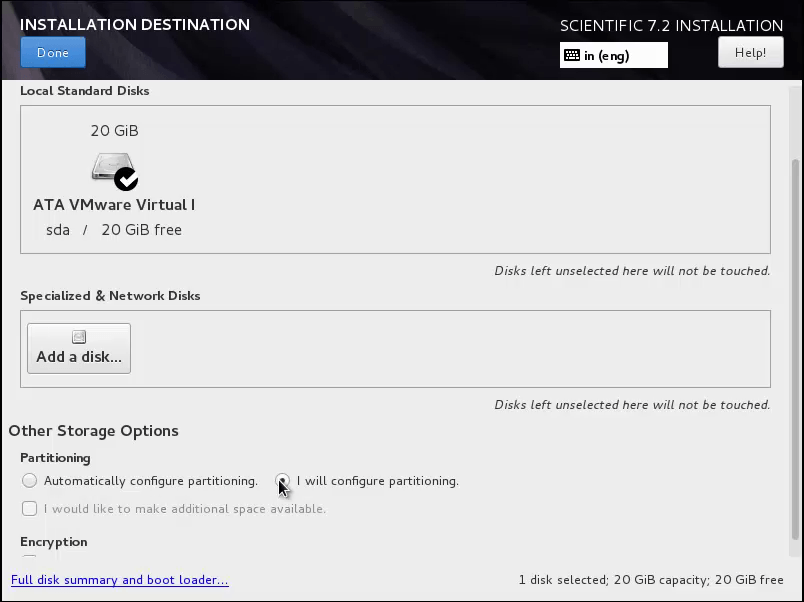
INSTALLATION DESTINATION wizard

Partitioning

Select I will configure partitioning radio button. Then click Done button.

CONFIGURE PARTITION

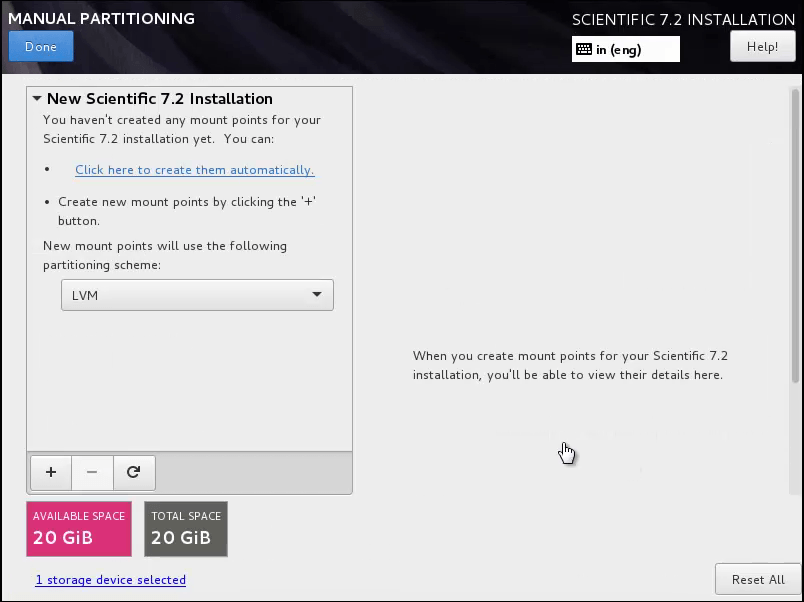
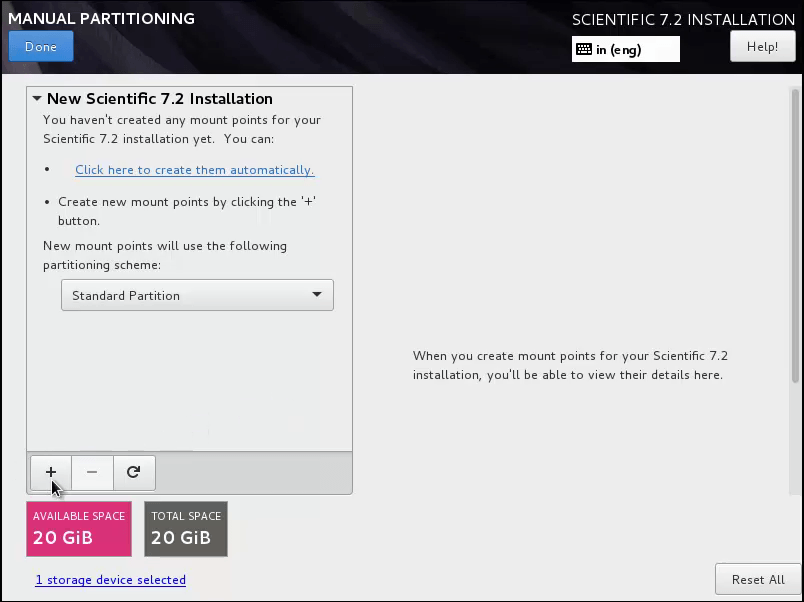
Now you can get Manual partitioning window.

MANUAL PARTIONING

Here you select Standard partitioning in drop down selection.

STANDARD PARTITIONING

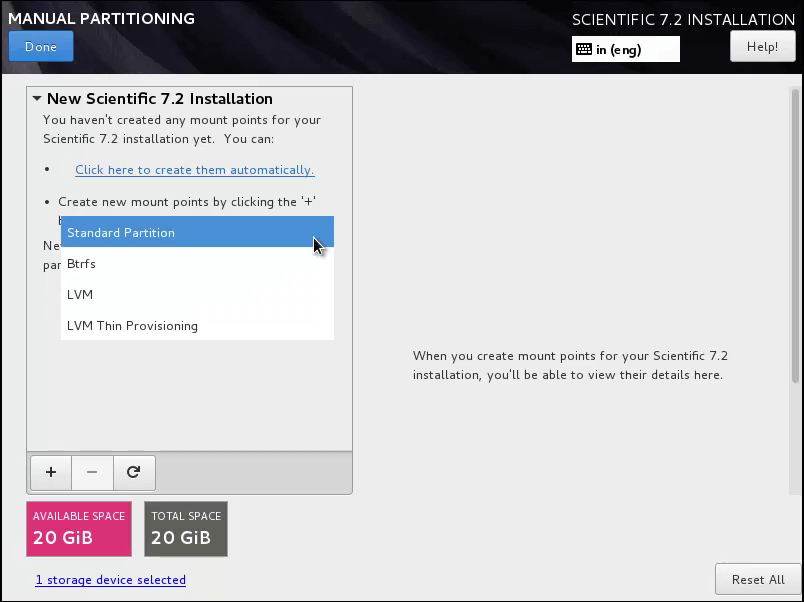
Then next you click plus " +" symbol button for creating new mount point.

NEW MOUNT POINT

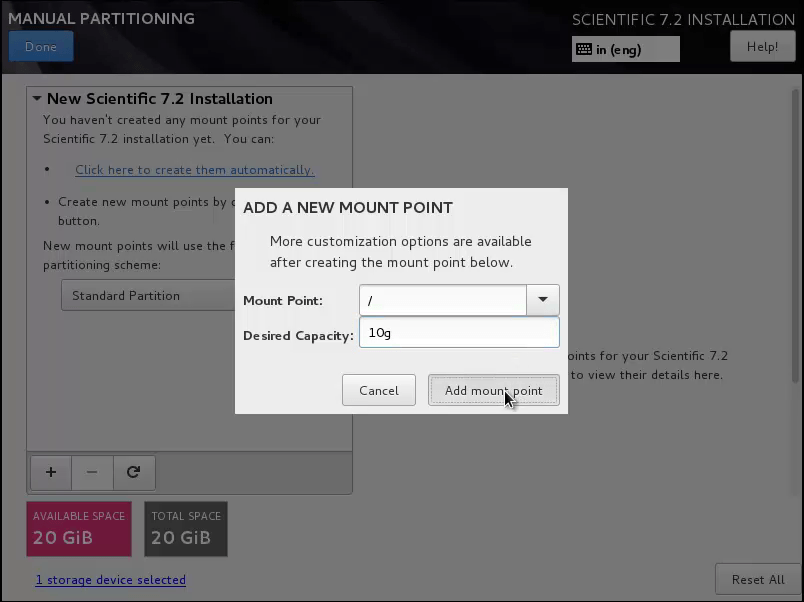
Then you can get Add a new mount point popup window.

ADD MOUNT POINT

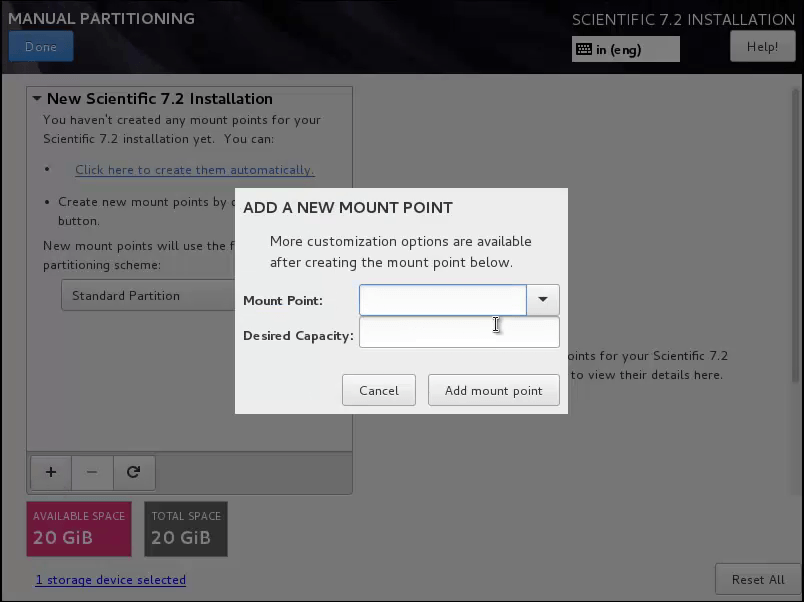
Next you choose / mount point in mount point drop down selection box.
And give its size and then click add mount point.

ADD MOUNT POINT /

Specify_the_mount_point

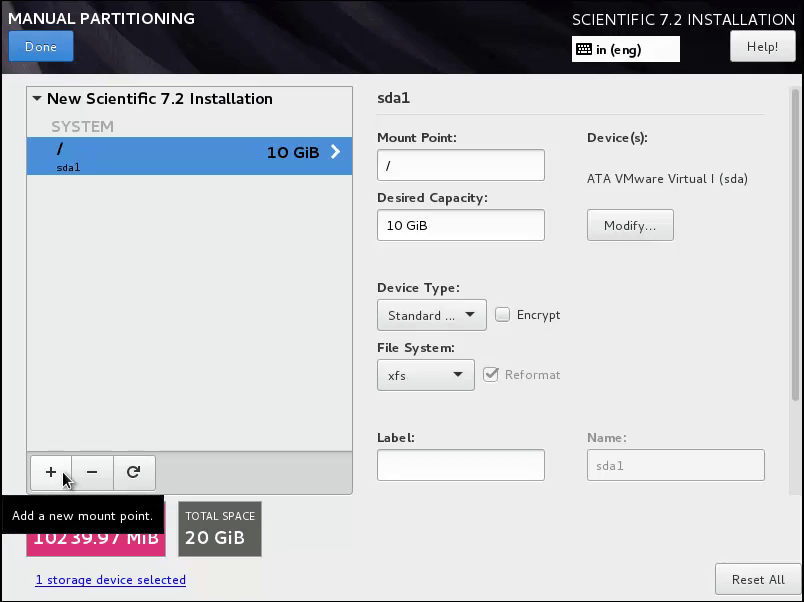
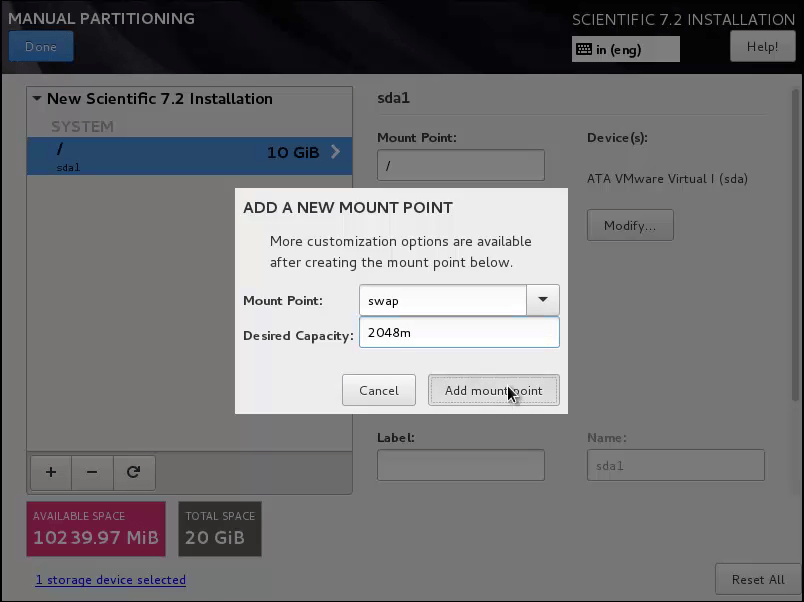
Next again you select “ + ” symbol button to do the next partition.

new mount point 2

Now you can get add a new mount point popup window. Now you select swap in mount point selection box. And you give swap memory size. Here you must give double of your RAM size for swap. Next you click add mount point.

add mount point swap

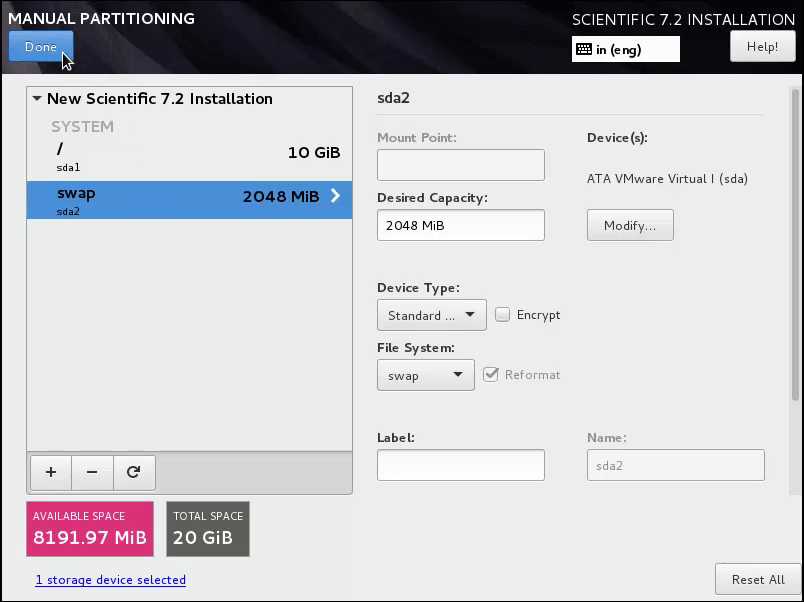
Now you can get Manual partitioning wizard again. Now you click Done button.

maual partioning

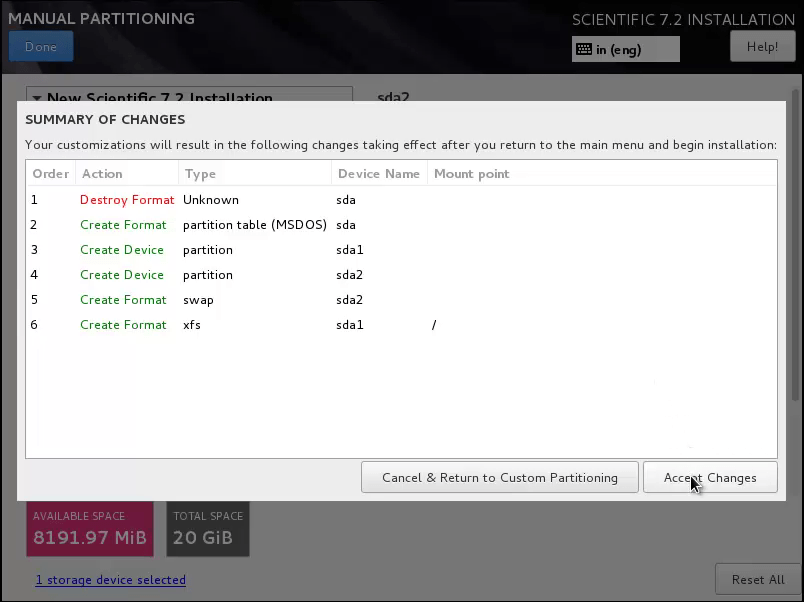
Then you can get summary of changes confirmation popup window.
If you want to modify you choose cancel & return to custom partitioning.
Next you select accept changes button

summary of changes

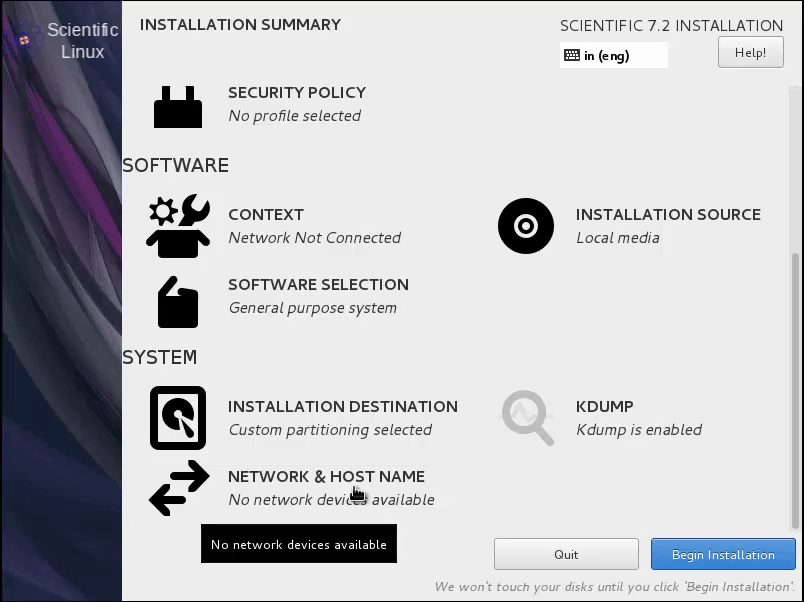
Next in Installation summary window select Network & Hostname.

installation summary

Now Network & Hostname window appears.
Enter your host name in host name text box then click Done button.

network and host name

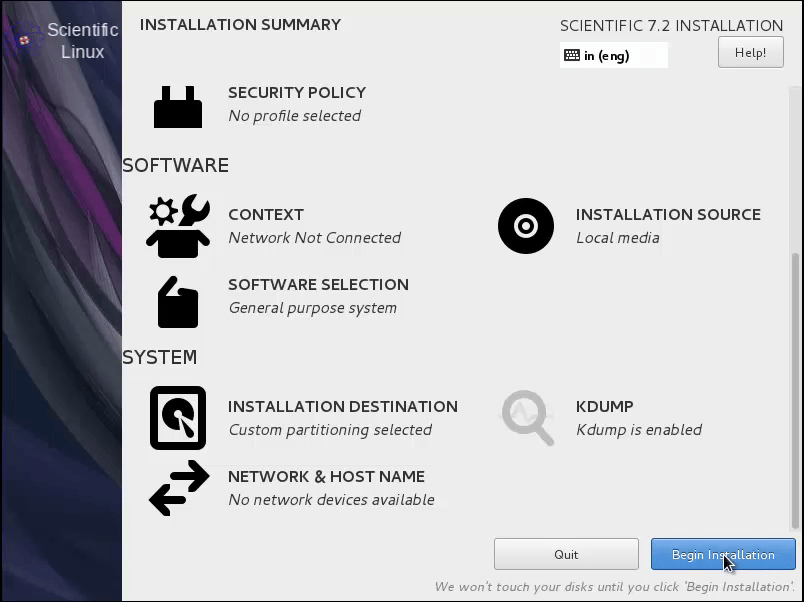
Now in Installation summary wizard again select begin installation button

Begin installation

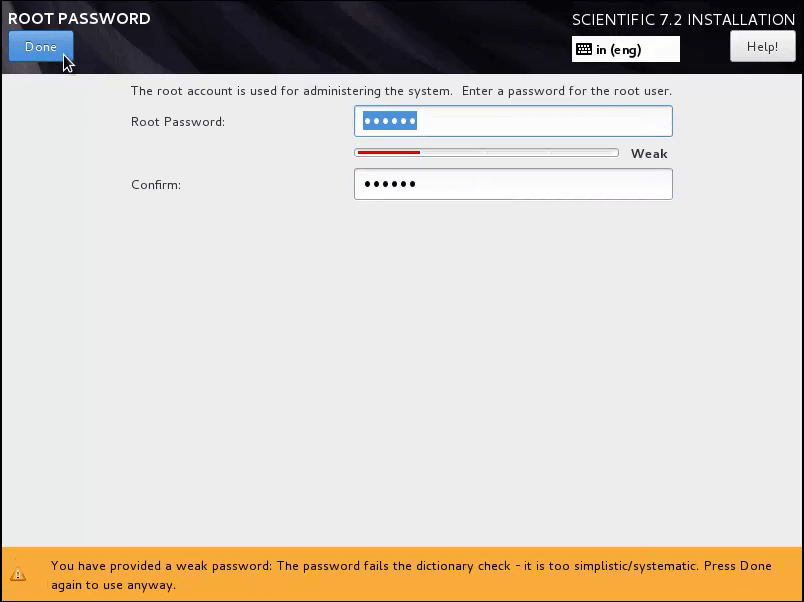
Now the installation process is started. Here you need to set the root password in root password settings.

root password

Now in root password wizard, set your password and then click Done button.

conform root password

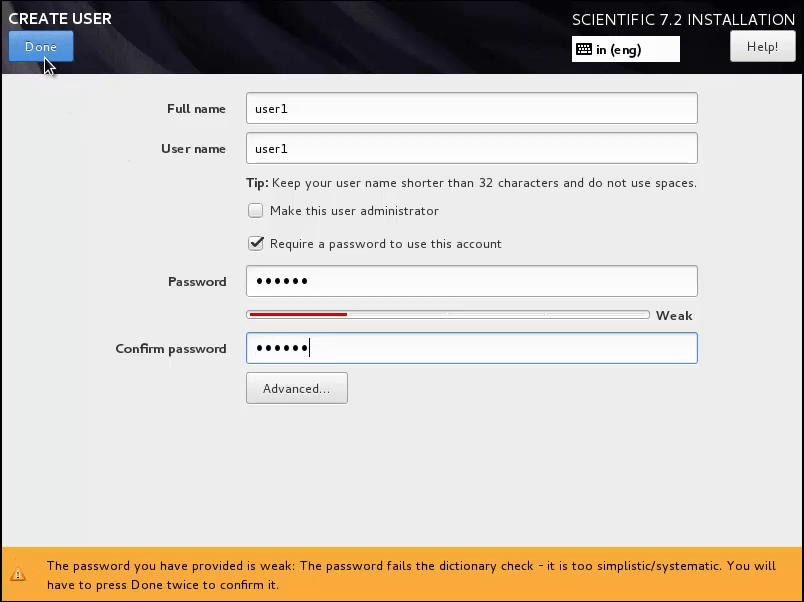
Next to add user, click user creation setting.

user creation

Now in create user wizard, add user and set password. Then click Done button.

create user wizard

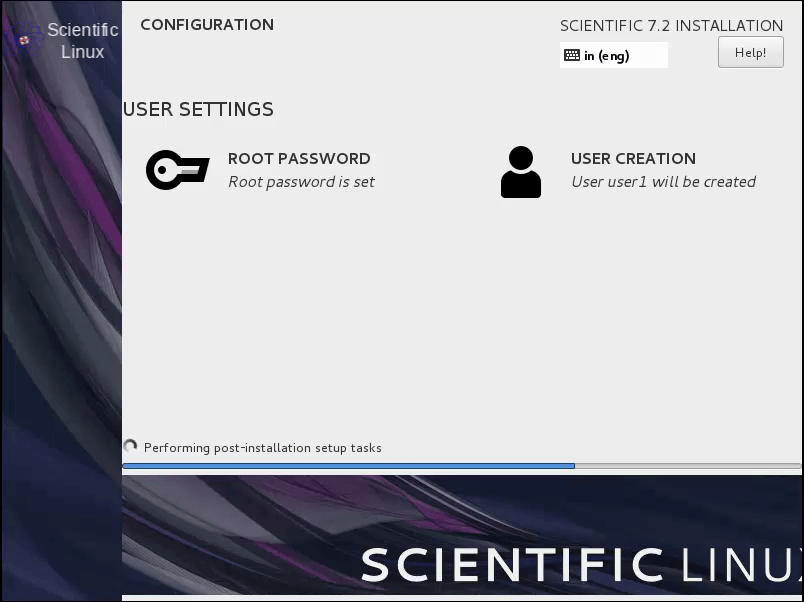
After configuration setup is done the installation is continued.

config setup

Once the installation is completed select Reboot option to reboot the system.
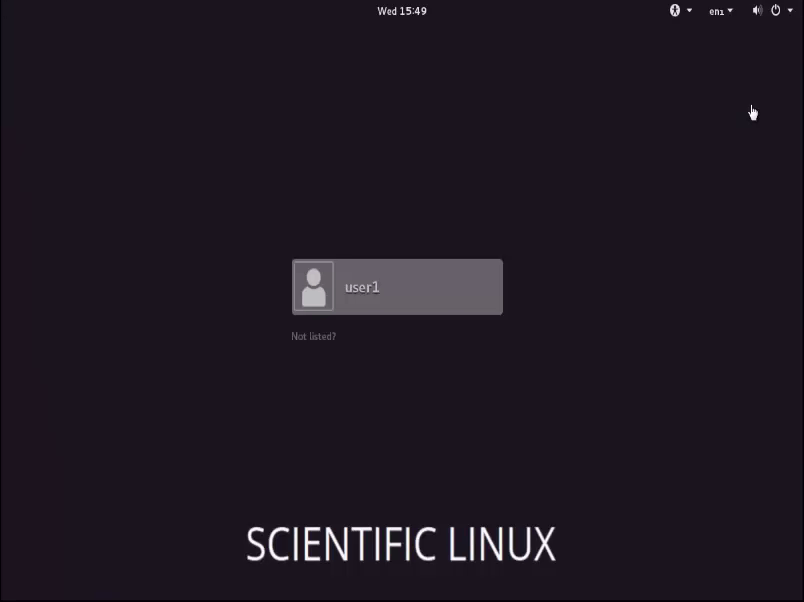
reboot

User login

After reboot you get user login page.

user login

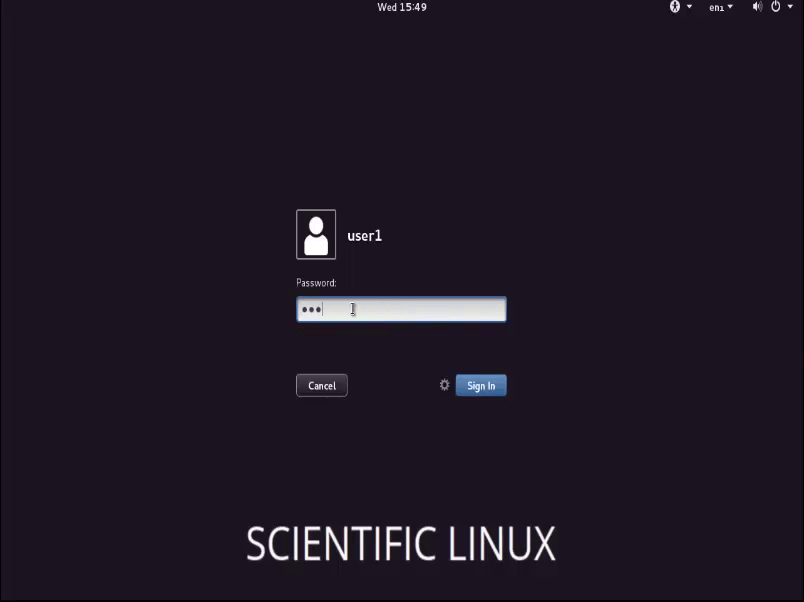
Then enter your user password and click login or press enter key.

user login password

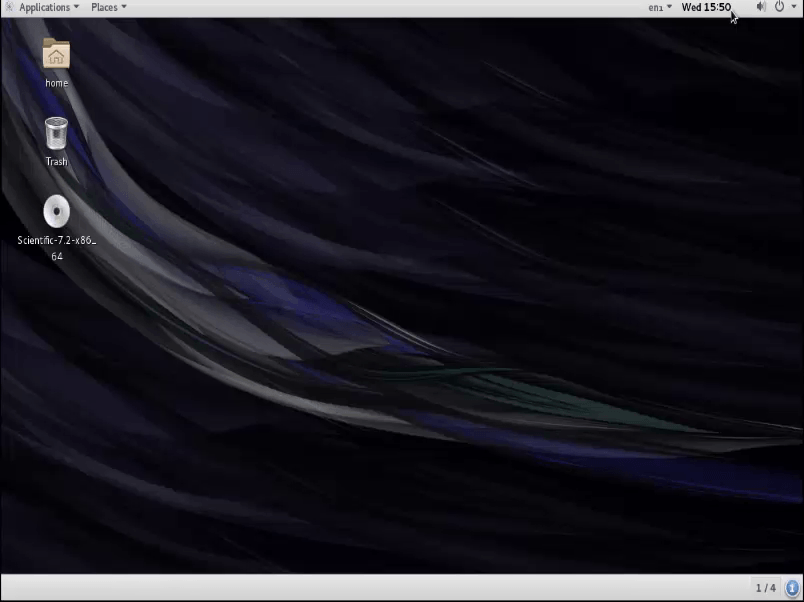
Now you can able to see your desktop window.

desktop window

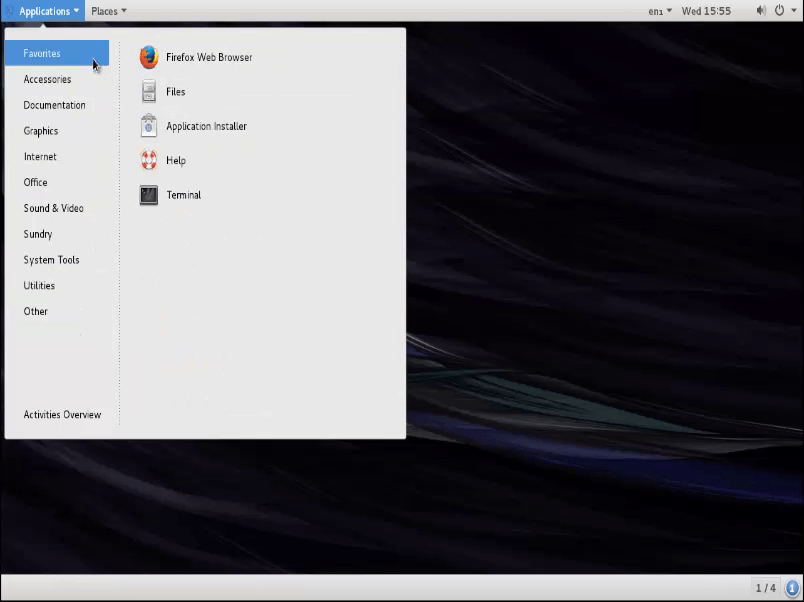
Here you can select your default applications from Applications option in task bar.

application

Tags:
gabriel
Author: 

Comments ( 0 )

No comments available

Add a comment
{{postCtrl.cmtErrMsg}}

Frequently asked questions ( 5 )

Q

The "Scientific Linux" operating system is which based distro?

A

The "Scientific Linux" is "RPM" based Linux operating system.

Q

How much amount of memory will be allocated for "swap" memory while the installation of "Scientific Linux"?

A

You should give the amount of memory for "swap" partition which will be the double amount for the size of existing the physical RAM memory has been installed on the system.

For Ex: If the RAM is 4GB => SWAP 8GB.

Q

What the purpose of make the "boot" partition for every installation of an Operating system for Linux?

A

The boot segment is an essential parcel that contains the bootloader, a bit of programming in charge of booting the working framework. For instance, in the standard Linux index design (Filesystem Hierarchy Standard), boot records, (for example, the part, initrd, and bootloader GRUB) are mounted at/boot/. In spite of Microsoft's drastically unique definition (see underneath), System Information, a utility application incorporated into Windows NT group of working frameworks, alludes to it as "boot gadget".


The framework segment is the plate segment that contains the working framework envelope, known as the framework root. Of course, in Linux, working framework records are mounted at/(the root catalog).

Q

How can I create the "sudo user" in Scientific Linux?

A

Initially, you need to create the user usually. After the user creation, you have to follow the step as below,
1. run the following command to add the certain user into "sudo" group as "usermod -aG sudo username"
2. Then you can log in with your new sudo user into your Linux system
"su - username"

Q

How Do update the password for the certain user in Linux?

A

You can use the following syntax to update the password for the certain user in Linux. For syntax: "passwd username"

Back To Top!
Rank
User
Points

Top Contributers

userNamenaveelansari
135850

Top Contributers

userNameayanbhatti
92510

Top Contributers

userNamehamzaahmed
32150

Top Contributers

1
userNamelinuxhelp
31040

Top Contributers

userNamemuhammadali
24500
Can you help Luk Van De Looverbosch ?
How to create a root ?

Hello,
How to create root@linuxhelp in Linux Mint 20.1 64-bit ?
Thanks in advance for your reply.
Best regards.

Networking
  • Routing
  • trunk
  • Netmask
  • Packet Capture
  • domain
  • HTTP Proxy
Server Setup
  • NFS
  • KVM
  • Memory
  • Sendmail
  • WebDAV
  • LXC
Shell Commands
  • Cloud commander
  • Command line archive tools
  • last command
  • Shell
  • terminal
  • Throttle
Desktop Application
  • Linux app
  • Pithos
  • Retrospect
  • Scribe
  • TortoiseHg
  • 4Images
Monitoring Tool
  • Monit
  • Apache Server Monitoring
  • EtherApe 
  • Arpwatch Tool
  • Auditd
  • Barman
Web Application
  • Nutch
  • Amazon VPC
  • FarmWarDeployer
  • Rukovoditel
  • Mirror site
  • Chef
Contact Us | Terms of Use| Privacy Policy| Disclaimer
© 2025 LinuxHelp.com All rights reserved. Linux™ is the registered trademark of Linus Torvalds. This site is not affiliated with linus torvalds in any way.