How to install Ubuntu 17.04
How to install Ubuntu 17.04
The Ubuntu 17.04 Zesty Zapus is the new version of Ubuntu released recently which will be supported for nine months until January month. The Ubuntu 17.04 contains features that are mostly used in the cloud and servers.This tutorial covers the installation procedure of installing Ubuntu 17.04.
Installation procedure
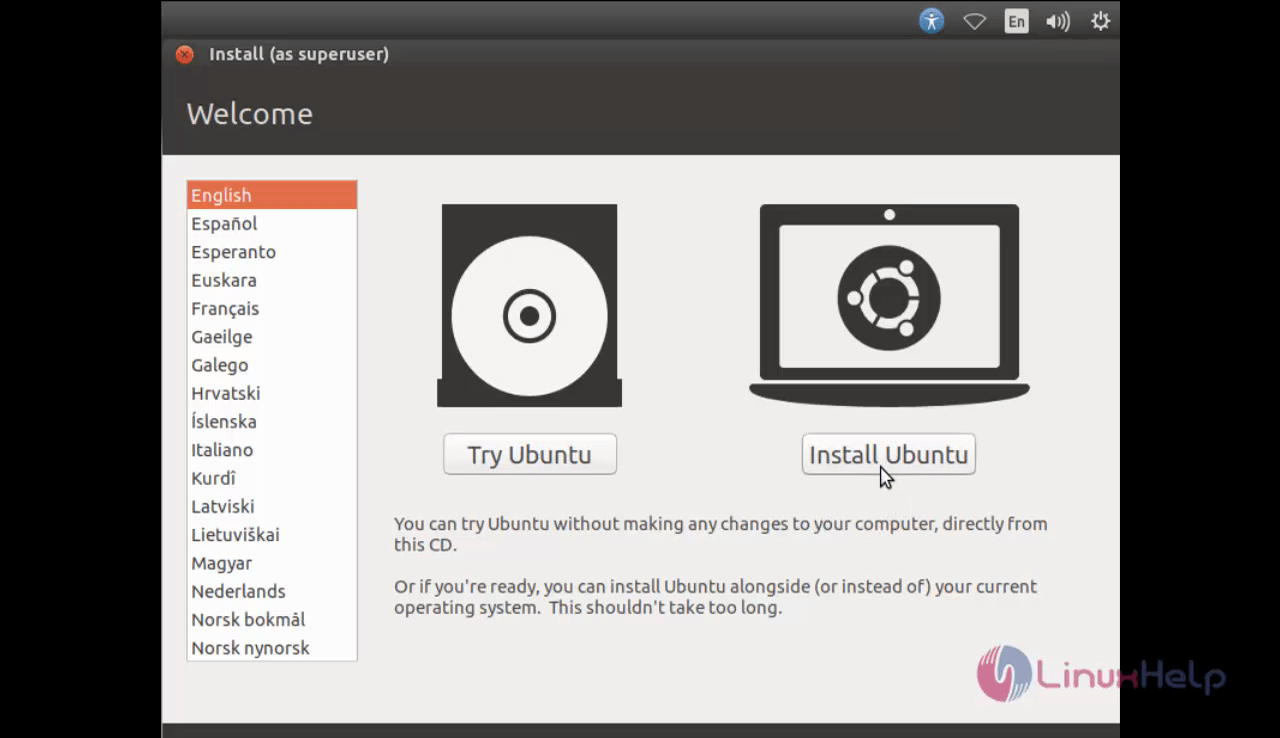
To install the Ubuntu 17.04, go to Ubuntu’ s official site and download the ISO and burn it into DVD or USB. Boot it into the target machine and it will lead to the installation page as shown below.
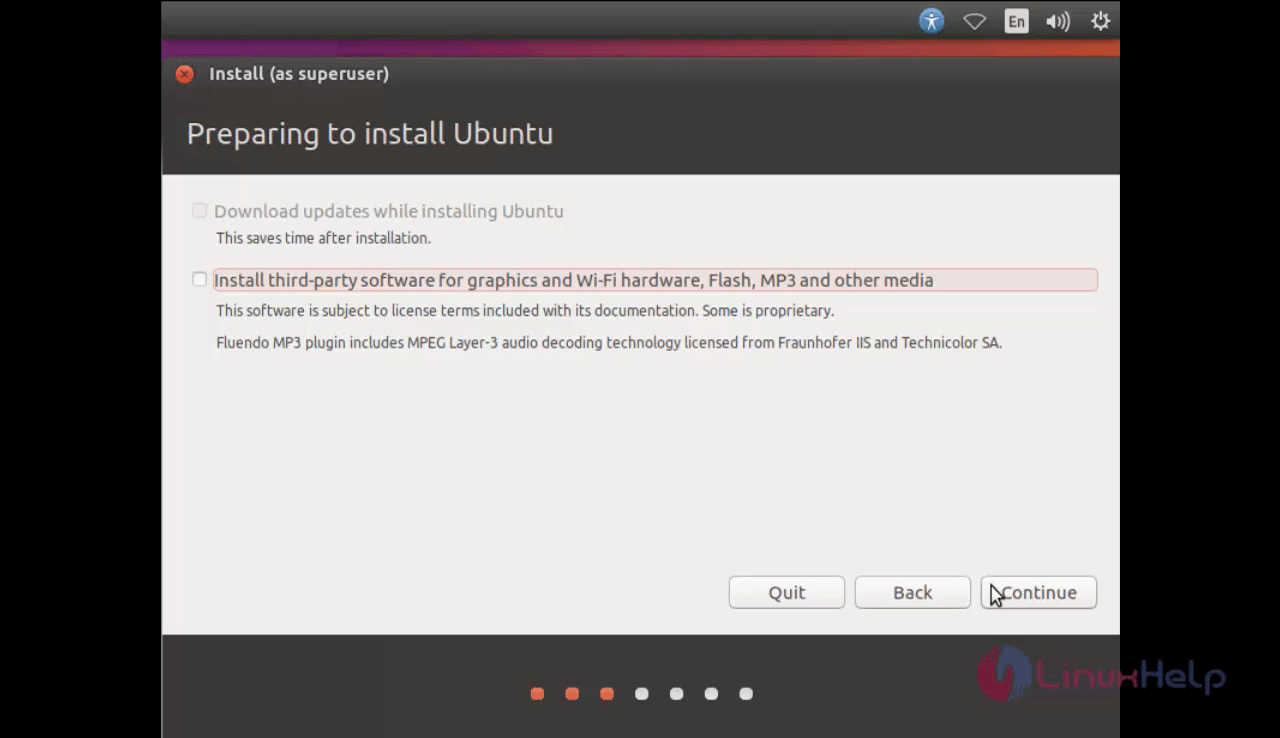
Select the install Ubuntu option and click next to ignore the third party software installation that can be installed along with Ubuntu 17.04.
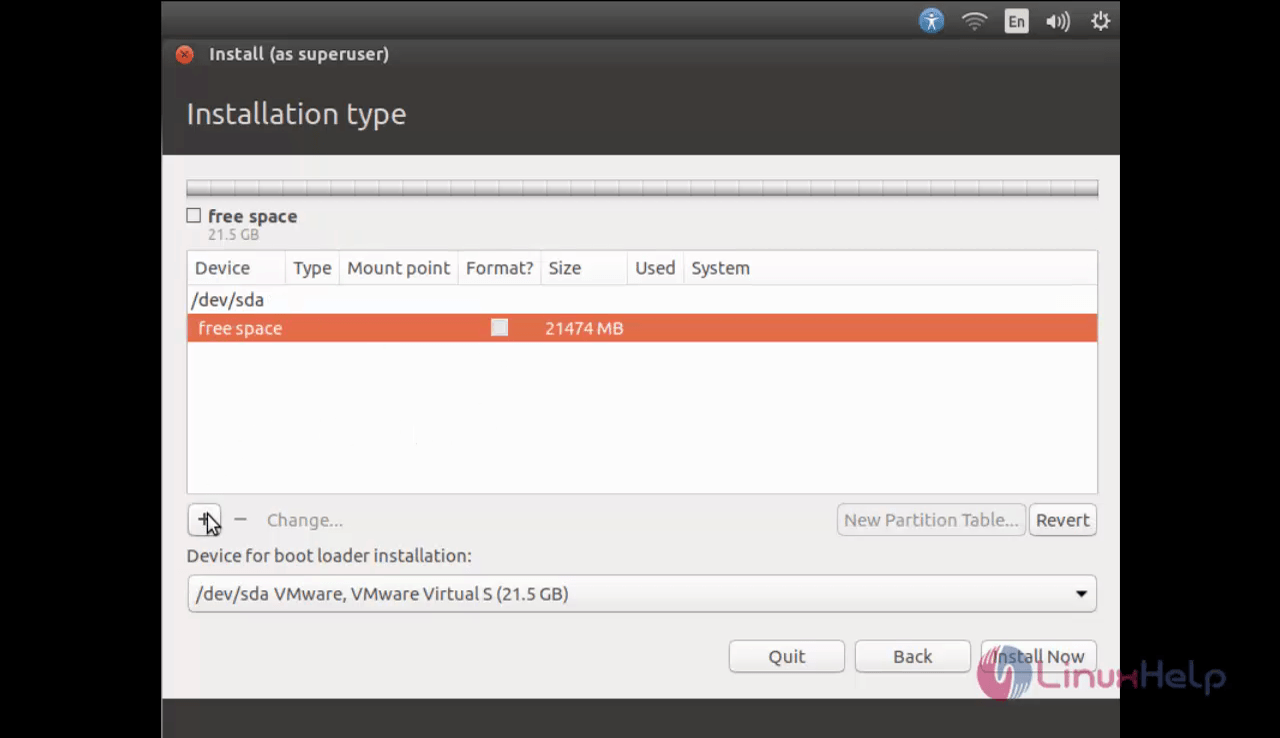
Choose Something else for configuring the manual partitioning for Ubuntu. And click continue button.

Create New partition table option to manually configure the partition table.

To create three partitions like boot, swap and root partition. Click the “ +” symbol to create new partition.
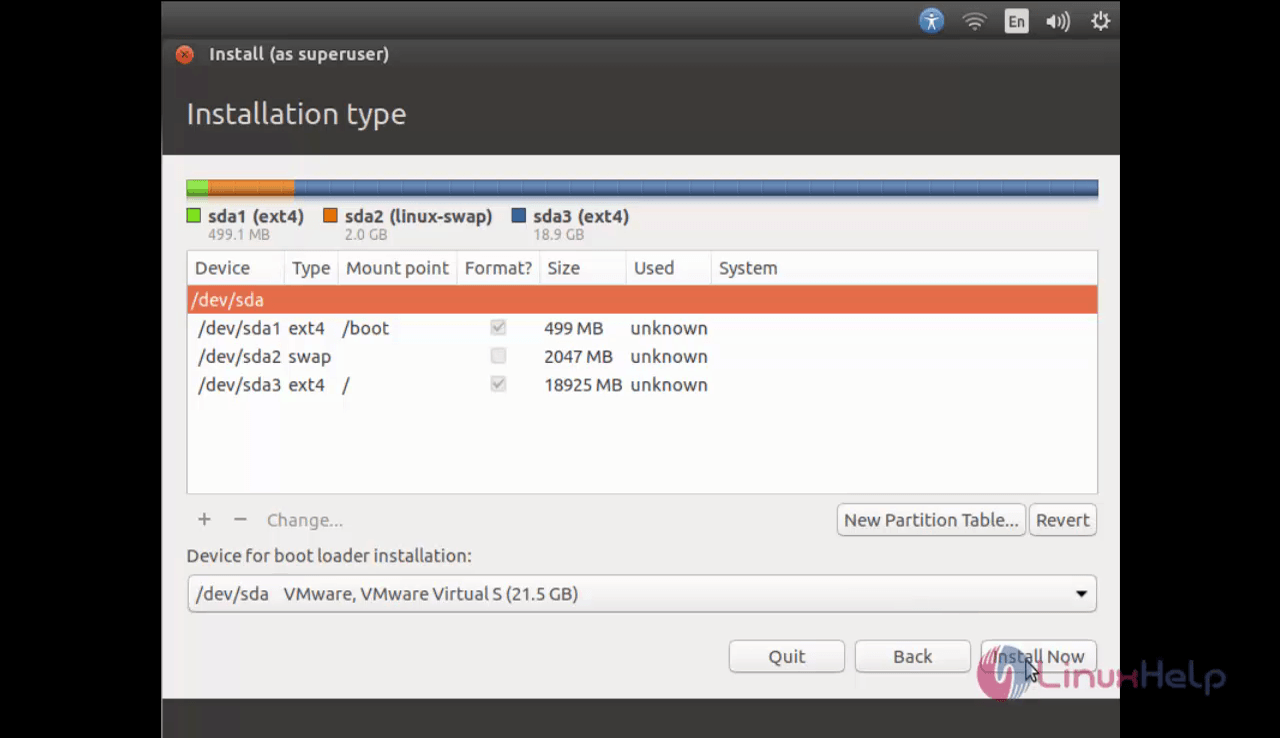
Now create boot partition with mount point /boot and enter the size of the partition.

Next create the swap partition which should be the twice the size of the physical memory present in the system.

Finally create the root partition with mount point / and enter the remaining space to the root partition.

Click Install Now option.
Choose the required location and click continue option.

Choose the required keyboard layout.

Create username and password for Ubuntu along with the other credentials and click continue option to continue with the installation.

The installation of Ubuntu is in progress and it may take up some time.

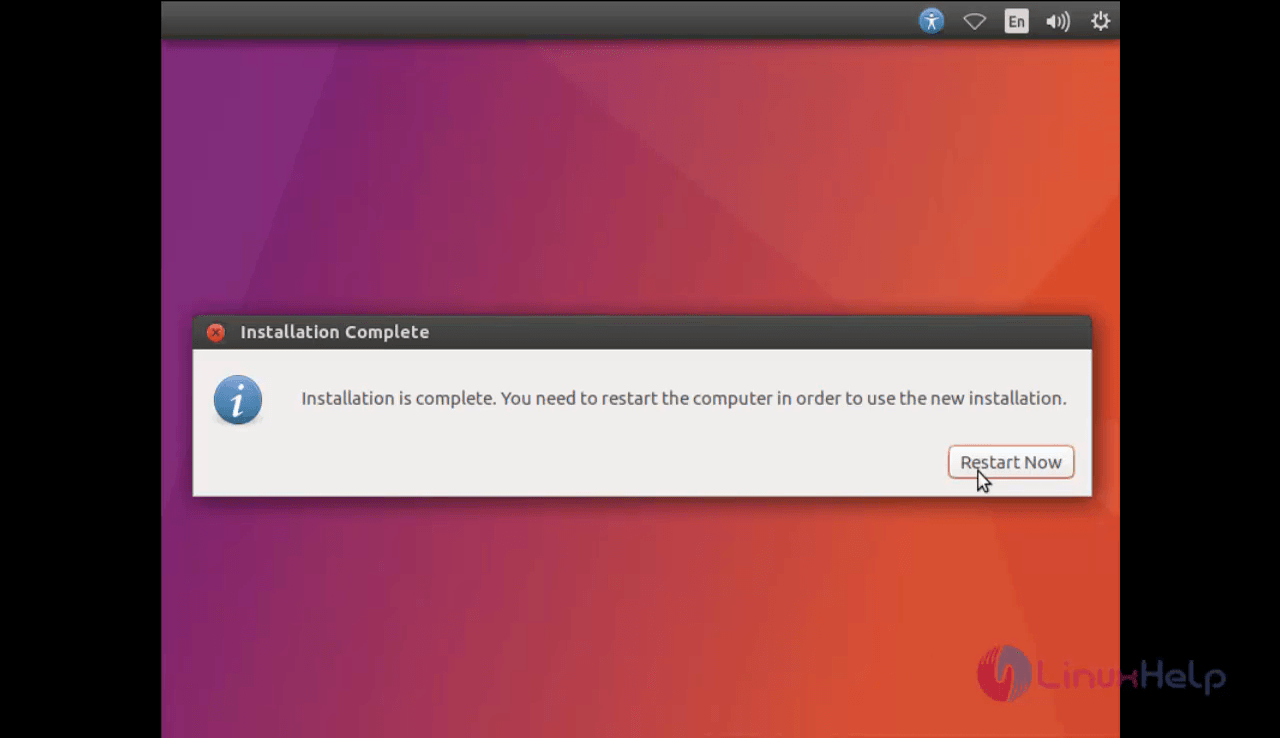
After completing the installation restart the target system.
The system is restarted now. Login to the ubuntu desktop using the username and password.

Wasn' t that an easy installation procedure? The Ubuntu 17.04 also offers a complete container support with snaps for single apps in IoT, networking, desktop and cloud/server.
Comments ( 0 )
No comments available