How to install vTiger CRM in CentOS 7
How to install vTiger CRM in Centos 7
A Customer Relationship Management application that are designed to compile information on customer and the company respectively. In Linux based systems, vTiger CRM is a cross-platform, web based, modular,open Source customer relationship management system for sales force automation, customer support & service and marketing automation. vTiger can be connected to other enterprise resource planning (ERP) systems to integrate already existing data. This article explains the installation procedure of vTiger CRM in CentOS 7.
Installation Procedure
Before installing vTiger CRM, you need to have LAMP stack installed in your system. After installing the LAMP environment, login into MySQL server and create database as follows.
[root@localhost Desktop]# mysql -u root -p
Enter password:
Welcome to the MariaDB monitor.  Commands end with   or g.
Your MariaDB connection id is 10
Server version: 5.5.52-MariaDB MariaDB Server
Copyright (c) 2000, 2016, Oracle, MariaDB Corporation Ab and others.
Type ' help '  or ' h'  for help. Type ' c'  to clear the current input statement.

MariaDB [(none)]>  CREATE DATABASE vtigerdb
Query OK, 1 row affected (0.00 sec)

MariaDB [(none)]>  CREATE USER ' vtigeruser' @' localhost'  IDENTIFIED BY
' password'
Query OK, 0 rows affected (0.00 sec)

MariaDB [(none)]>  grant all privileges on `vtigerdb`.* to
' vtigeruser' @' localhost'
Query OK, 0 rows affected (0.00 sec)

MariaDB [(none)]>   FLUSH PRIVILEGES
Query OK, 0 rows affected (0.00 sec)

MariaDB [(none)]>  exit
Bye
The database configuration is done successfully. Now download the installation package using the wget command.
[root@localhost Desktop]# wget https://excellmedia.dl.sourceforge.net/project/vtigercrm/vtiger%20CRM
%207.0.1/Core%20Product/vtigercrm7.0.1.tar.gz
--2017-07-26 12:10:55--
https://excellmedia.dl.sourceforge.net/project/vtigercrm/vtiger%20CRM
%207.0.1/Core%20Product/vtigercrm7.0.1.tar.gz
...
...
...
Saving to: ‘ vtigercrm7.0.1.tar.gz’
100%[===============================================================================================================================================> ]
6,25,34,069  933KB/s   in 1m 42s
2017-07-26 12:12:37 (600 KB/s) - ‘ vtigercrm7.0.1.tar.gz’  saved
[62534069/62534069]
Extract the package by executing the tar command as follows.
[root@localhost Desktop]# tar -xvf vtigercrm7.0.1.tar.gz
vtigercrm/libraries/jquery/jquery-ui/third-party/jQuery-UI-FileInput/
vtigercrm/libraries/jquery/jquery-ui/third-party/jQuery-UI-FileInput/css/
vtigercrm/libraries/jquery/jquery-ui/third-party/jQuery-UI-
FileInput/css/enhanced.css
vtigercrm/libraries/jquery/jquery-ui/third-party/jQuery-UI-FileInput/js/
...
...
...
vtigercrm/storage/.htaccess
vtigercrm/vtigerversion.php
vtigercrm/schema/
vtigercrm/schema/DatabaseSchema.xml
Move the extracted directory to /var/www/html/ path by triggering the following command.
[root@localhost Desktop]# mv vtigercrm /var/www/html/
Next, change the ownership for the vtigercrm directory.
[root@localhost Desktop]# chown apache: -R /var/www/html/vtigercrm
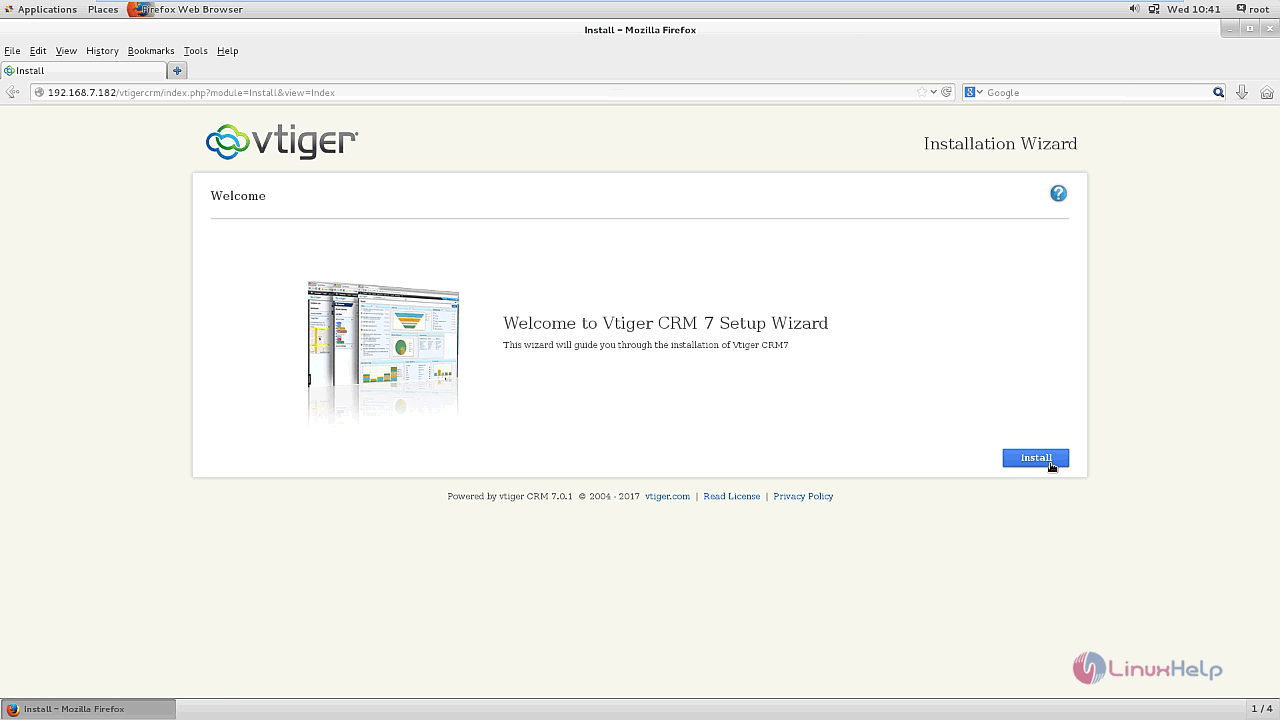
Open the web browser and navigate to http://192.168.7.182/vtigercrm link and run it. A installation wizard appears on the screen as follows.
If you get any error when accessing the above URL, restart the machine and try again it will work fine.
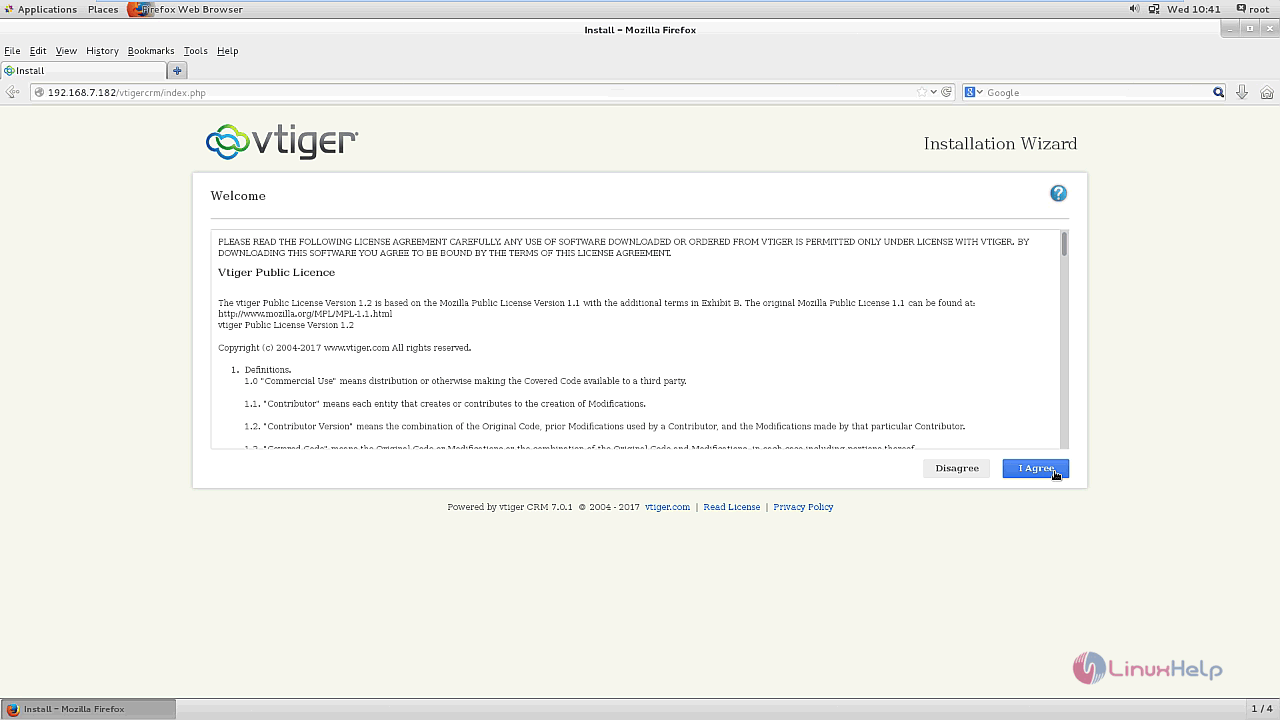
Select I Agree option on the license agreement to navigate to the next page.
Check for the installation pre-requisites and click next option.

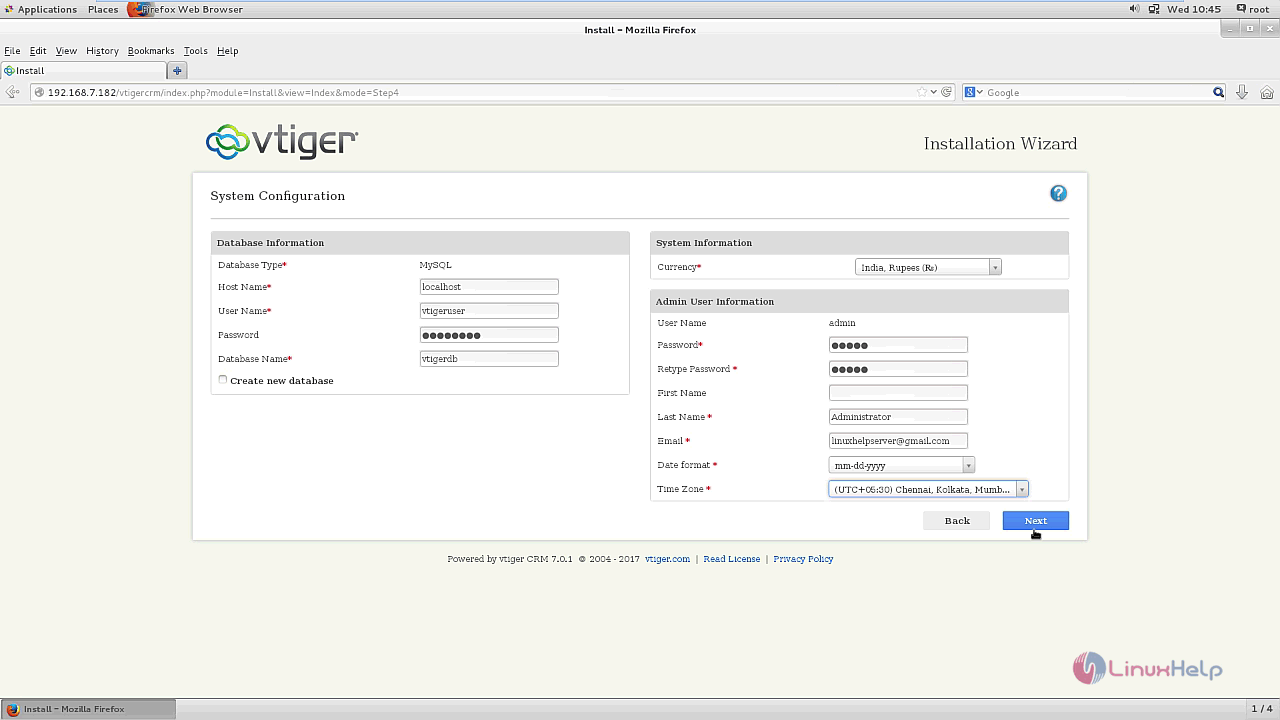
This page contains the System configuration of vTiger. Enter your database details and other information needed and click next.
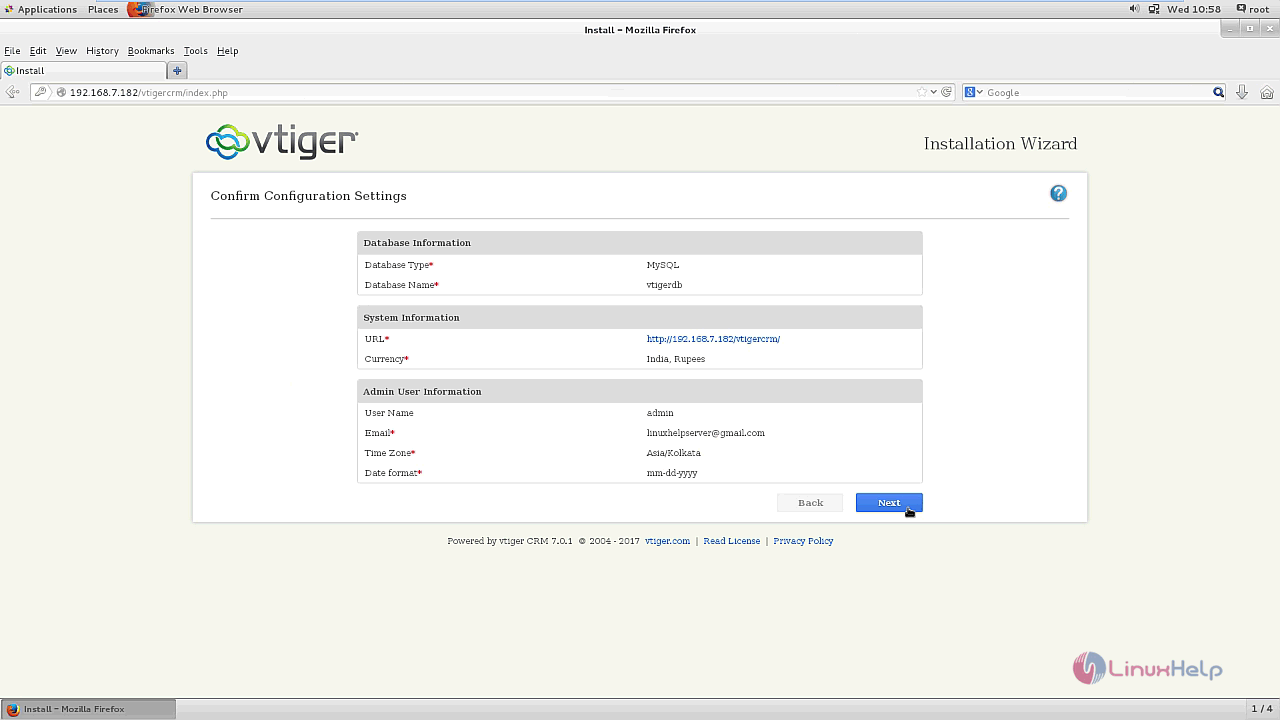
Confirm the configuration settings and click next.
Select your industry type as computer software and click next to go to next page.

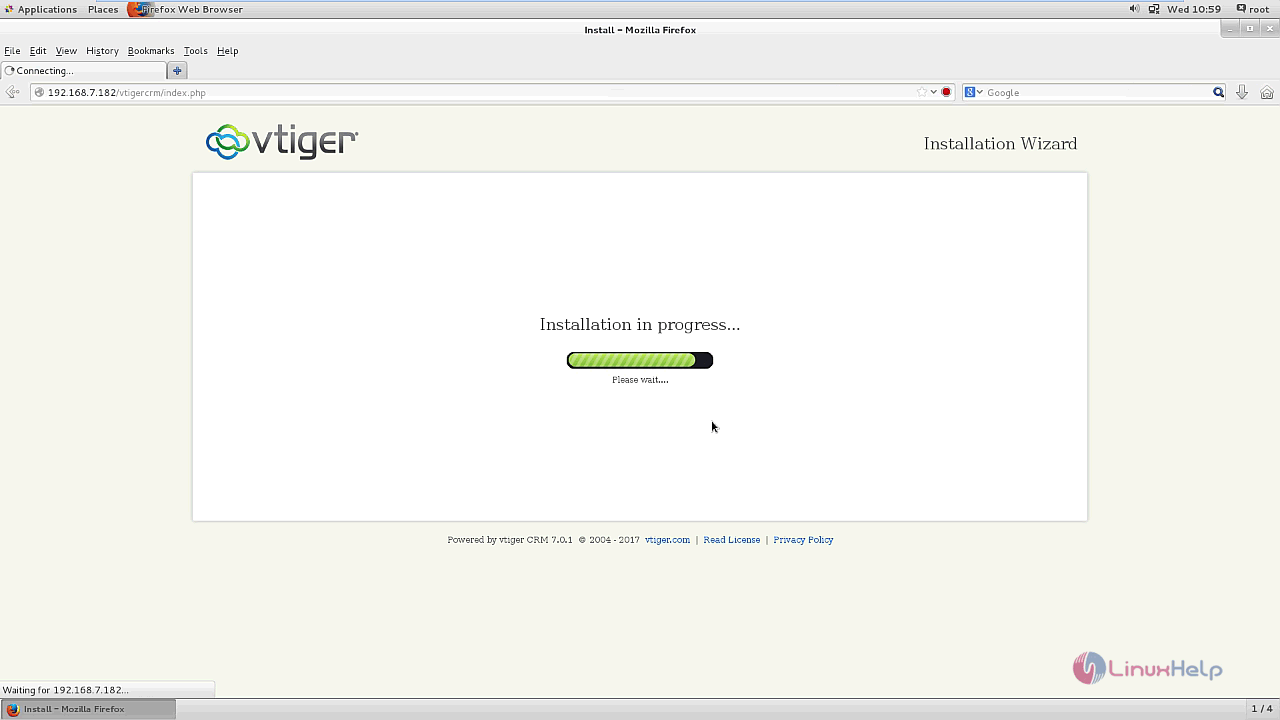
The installation of vTiger is in progress as shown below.
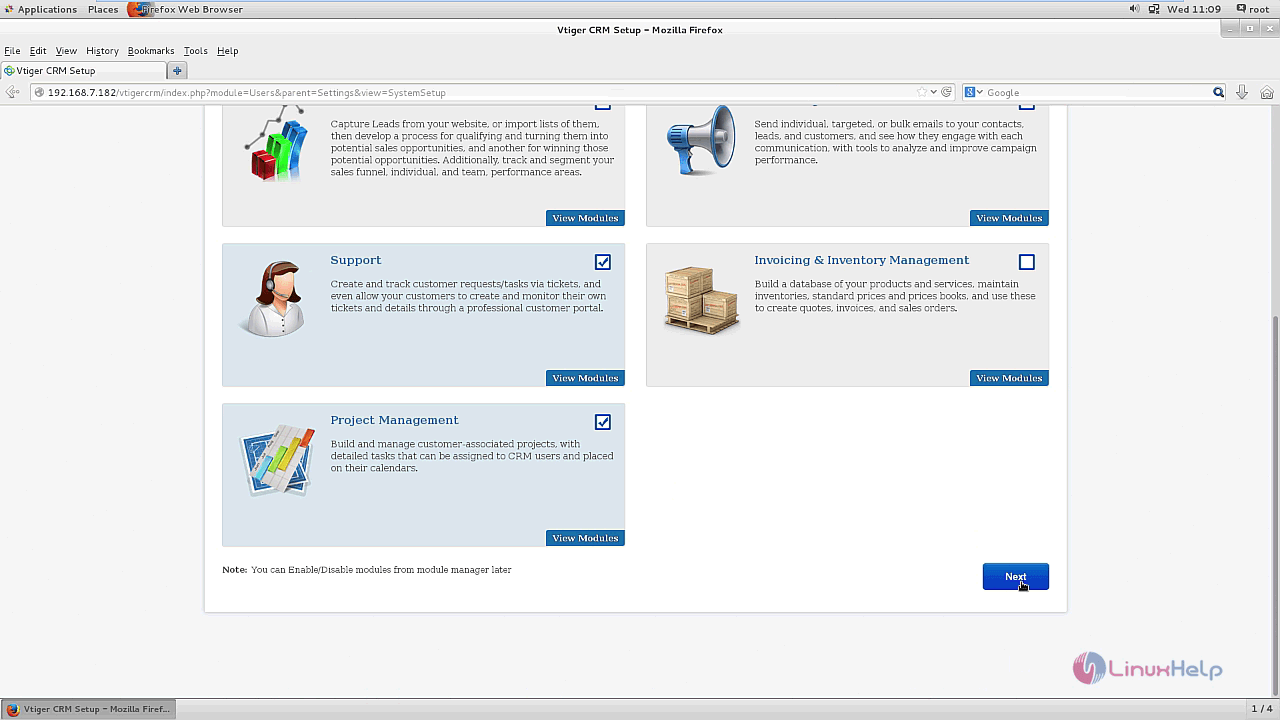
Select the features to be enabled and click next.
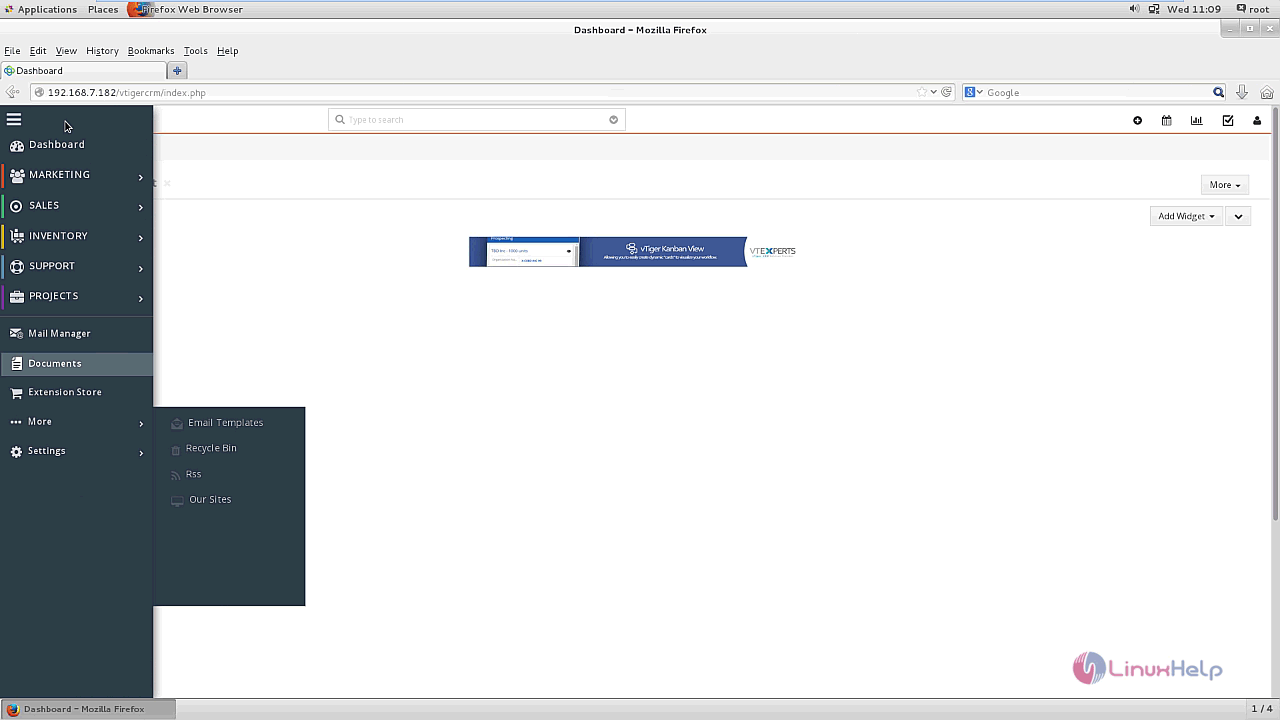
Now the vTiger CRM dashboard is appeared on the screen. You can use the vTIger CRM from this dashboard for various functions.
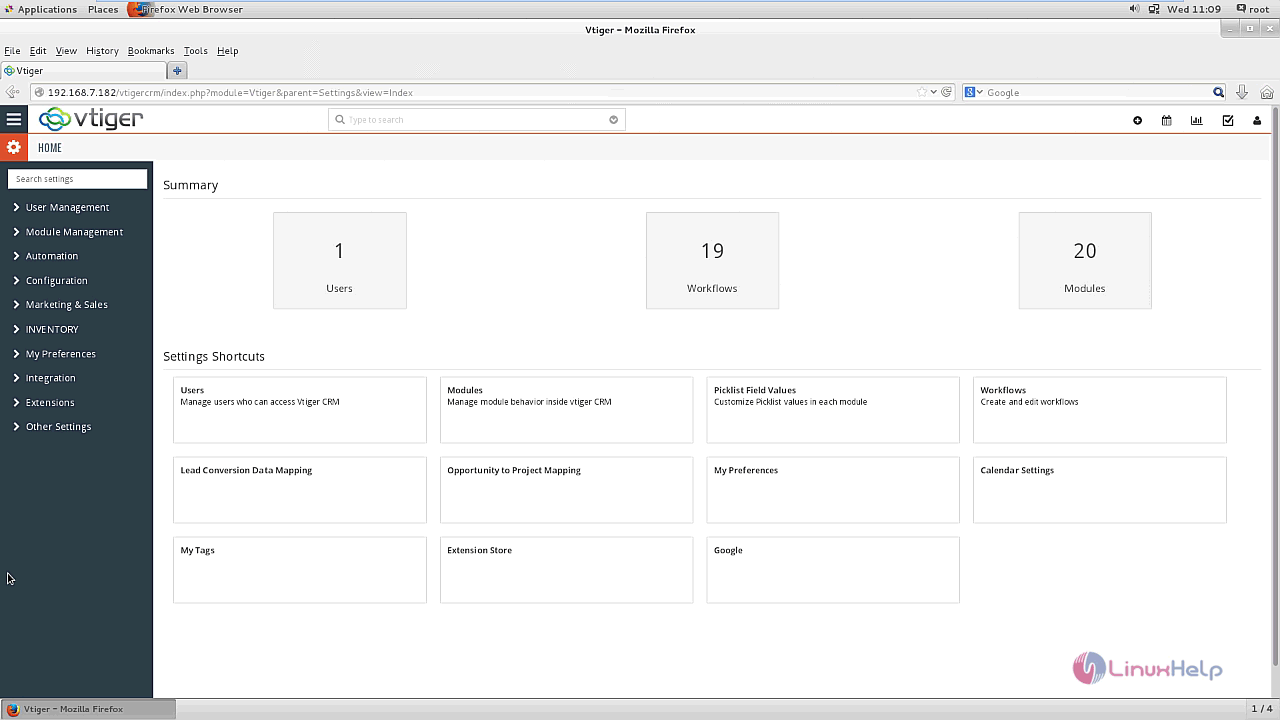
This page contains the CRM settings to be used in vTiger CRM.
The vTiger CRM is installed successfully. The vTiger CRM can schedule appointments painlessly with built-in automated scheduling tools.
Comments ( 0 )
No comments available