How to install Wolf CMS in CentOS 7
To install Wolf CMS in CentOS 7
Wolf CMS is a free and open-source content management system which has a simple and elegant user interface. Wolf CMS is written in PHP programming language and it is light-weight, fast, simple CMS tool. It also contains features such as archiving, comment section, file manager, markdown, statistics, and SQLite 3. This tutorial explains the installation of Wolf CMS in CentOS 7.
Pre-Requisite
Before starting the installation process, check whether the system has been installed with LAMP stack environment for the Wolf CMS to run in.
Installation procedure
To proceed with the installation procedure, configure the MySQL database for Wolf CMS by executing the following set of commands.
[root@localhost ~]# mysql -u root -p
Enter password:
Welcome to the MariaDB monitor.  Commands end with   or g.
Your MariaDB connection id is 2
Server version: 5.5.56-MariaDB MariaDB Server
Copyright (c) 2000, 2017, Oracle, MariaDB Corporation Ab and others.
Type ' help '  or ' h'  for help. Type ' c'  to clear the current input statement.

MariaDB [(none)]>  CREATE DATABASE wolfcms
Query OK, 1 row affected (0.00 sec)

MariaDB [(none)]>  CREATE USER ' wolfcmsuser' @' localhost'  IDENTIFIED BY ' password'
Query OK, 0 rows affected (0.00 sec)

MariaDB [(none)]>  GRANT ALL PRIVILEGES ON `wolfcms`.* TO ' wolfcmsuser' @' localhost'
Query OK, 0 rows affected (0.00 sec)

MariaDB [(none)]>  FLUSH PRIVILEGES
Query OK, 0 rows affected (0.00 sec)

MariaDB [(none)]>  exit
Bye
Next download the Wolf CMS package by executing the wget command followed by the download link.
[root@localhost Desktop]# wget https://bitbucket.org/wolfcms/wolf-cms-downloads/downloads/wolfcms-0.8.3.1.zip
--2017-10-21 10:15:21--  https://bitbucket.org/wolfcms/wolf-cms-downloads/downloads/wolfcms-0.8.3.1.zip
Resolving bitbucket.org (bitbucket.org)... 104.192.143.2, 104.192.143.1, 104.192.143.3, ...
Connecting to bitbucket.org (bitbucket.org)|104.192.143.2|:443... connected.
HTTP request sent, awaiting response... 302 Found
Location: https://bbuseruploads.s3.amazonaws.com/8b72fc9a-0352-4a62-b1a6-f641e4ea775f/downloads/98cc755f-37e8-43d2-acfe-781006743ce9/wolfcms-0.8.3.1.zip?Signature=EaBFDY3gSKZBsbOMC1Xc05%2BRSVk%3D& Expires=1508562962& AWSAccessKeyId=AKIAIQWXW6WLXMB5QZAQ& versionId=null& response-content-disposition=attachment%3B%20filename%3D%22wolfcms-0.8.3.1.zip%22 [following]
--2017-10-21 10:15:23--  https://bbuseruploads.s3.amazonaws.com/8b72fc9a-0352-4a62-b1a6-f641e4ea775f/downloads/98cc755f-37e8-43d2-acfe-781006743ce9/wolfcms-0.8.3.1.zip?Signature=EaBFDY3gSKZBsbOMC1Xc05%2BRSVk%3D& Expires=1508562962& AWSAccessKeyId=AKIAIQWXW6WLXMB5QZAQ& versionId=null& response-content-disposition=attachment%3B%20filename%3D%22wolfcms-0.8.3.1.zip%22
Resolving bbuseruploads.s3.amazonaws.com (bbuseruploads.s3.amazonaws.com)... 52.216.82.80
Connecting to bbuseruploads.s3.amazonaws.com (bbuseruploads.s3.amazonaws.com)|52.216.82.80|:443... connected.
HTTP request sent, awaiting response... 200 OK
Length: 1278487 (1.2M) [application/zip]
Saving to: ‘ wolfcms-0.8.3.1.zip’
100%[===========================================================================================================================================> ] 12,78,487    255KB/s   in 4.9s
2017-10-21 10:15:29 (255 KB/s) - ‘ wolfcms-0.8.3.1.zip’  saved [1278487/1278487]
Extract the downloaded package to /var/www/html/ directory path.
[root@localhost Desktop]# unzip wolfcms-0.8.3.1.zip -d /var/www/html/
Archive:  wolfcms-0.8.3.1.zip
1b5a6c701b781a632e1364d6865946ee94a9002a
   creating: /var/www/html/wolfcms/
  inflating: /var/www/html/wolfcms/CONTRIBUTING.md
&hellip
&hellip
&hellip
inflating: /var/www/html/wolfcms/wolf/plugins/textile/readme.txt
  inflating: /var/www/html/wolfcms/wolf/plugins/textile/textile.css
  inflating: /var/www/html/wolfcms/wolf/plugins/textile/textile.php
  inflating: /var/www/html/wolfcms/wolf/utils.php
Change the ownership for Wolf CMS directory by running the following command.
[root@localhost Desktop]# chown -R apache.apache /var/www/html/wolfcms
Rename the _.htaccess file to .htaccess by executing the following command.
[root@localhost wolfcms]# mv _.htaccess .htaccess
Next configure the Apache virtual host for wolf CMS and enter the following content in the file. Save and exit the file.
[root@localhost wolfcms]# vim /etc/httpd/conf.d/vhosts.conf
IncludeOptional vhosts.d/*.conf
Create a directory for Wolf CMS named vhosts and execute the following command.
[root@localhost wolfcms]# mkdir /etc/httpd/vhosts.d
Create the virtual host configuration file named linuxhelp1.com.conf and enter the following content in the file. Save and exit the file.
[root@localhost wolfcms]# vim /etc/httpd/vhosts.d/test.linuxhelp1.com.conf
< VirtualHost 192.168.7.203:80>
DocumentRoot " /var/www/html/wolfcms"
ServerName test.linuxhelp1.com
ServerAlias www.test.linuxhelp1.com
ErrorLog " /var/log/httpd/test-error_log"
CustomLog " /var/log/httpd/test-access_log"  combined

< Directory " /var/www/html/wolfcms/" >
DirectoryIndex index.html index.php
Options FollowSymLinks
AllowOverride All
Require all granted
< /Directory>
< /VirtualHost>
Restart the Apache web server.
[root@localhost wolfcms]# systemctl restart httpd
Switch over to the browser and enter the Machine IP. The installation page of Wolf CMS appears on the screen. Click Continue to install option to start the installation process.

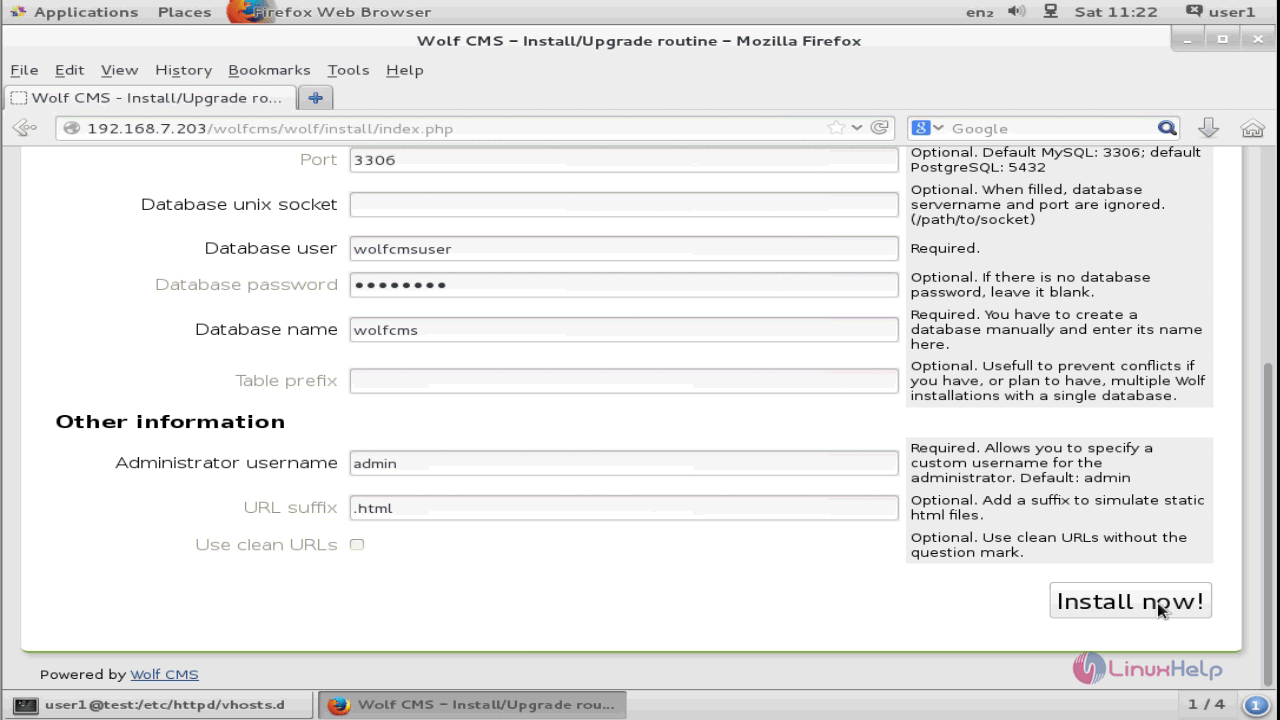
Enter the database information and administrator details.
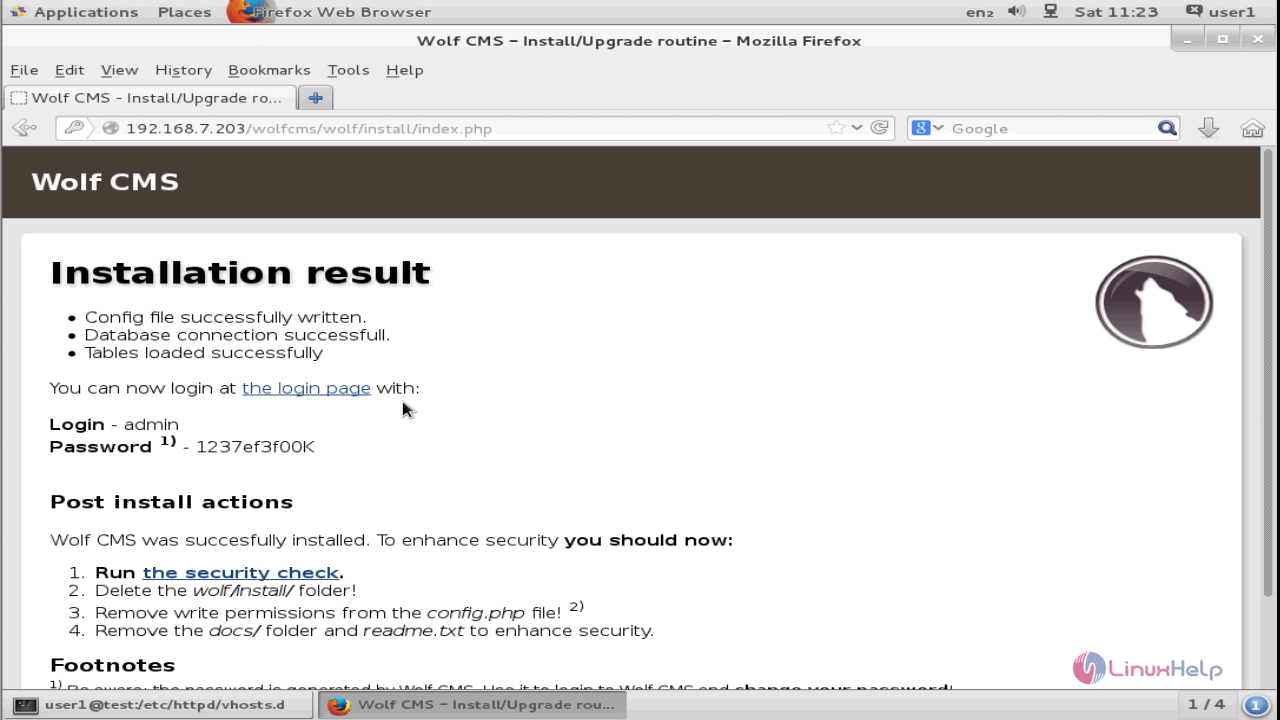
The installation is now completed. Click the login page option to navigate to admin login page.
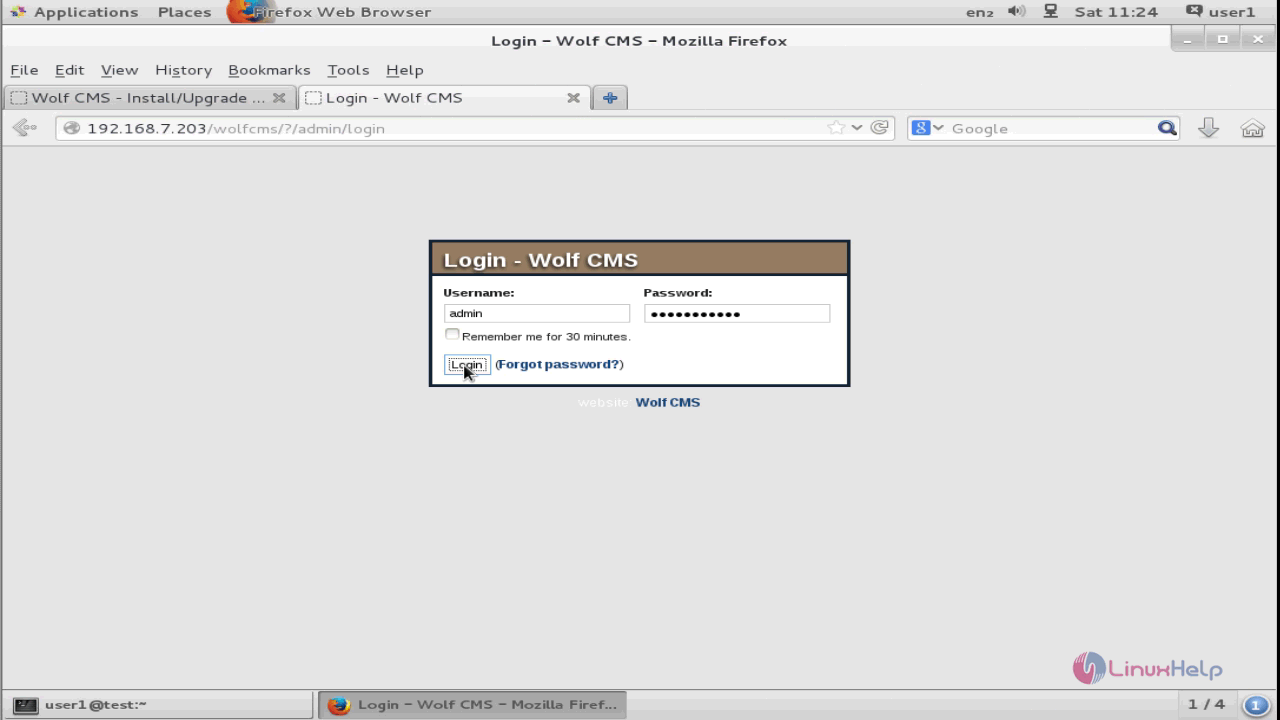
The Wolf CMS login page appears on the screen. Enter the required credentials and click Login.
To continue with the post installation details, remove the installation directory in /var/www/html/wolfcms/wolf directory path and run the following command.
[root@test wolf]# rm -rf install
Next remove the write permission for config.php file.
[root@test wolfcms]# chmod -w config.php
Now remove the docs directory and README file in /var/www/html/wolfcms directory
[root@test wolfcms]# rm -rf docs README.md
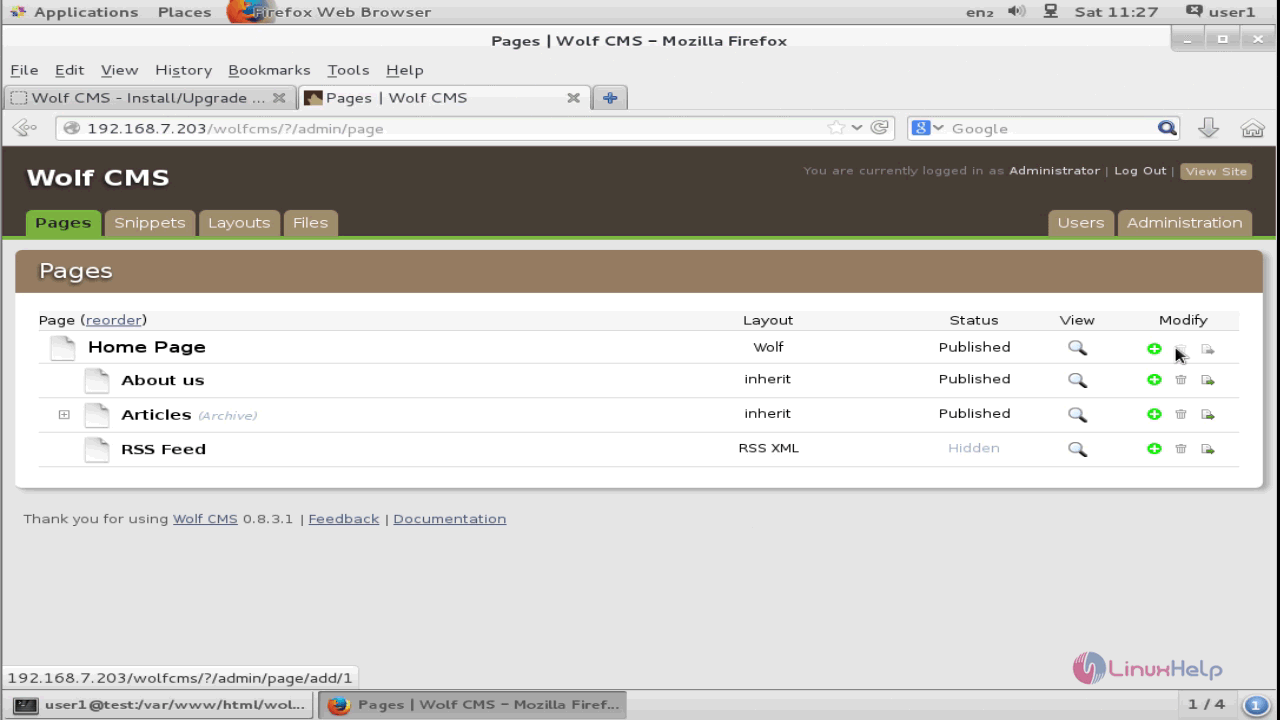
To Add or modify pages in the Wolf CMS, choose any of the option displayed in the menu bar.
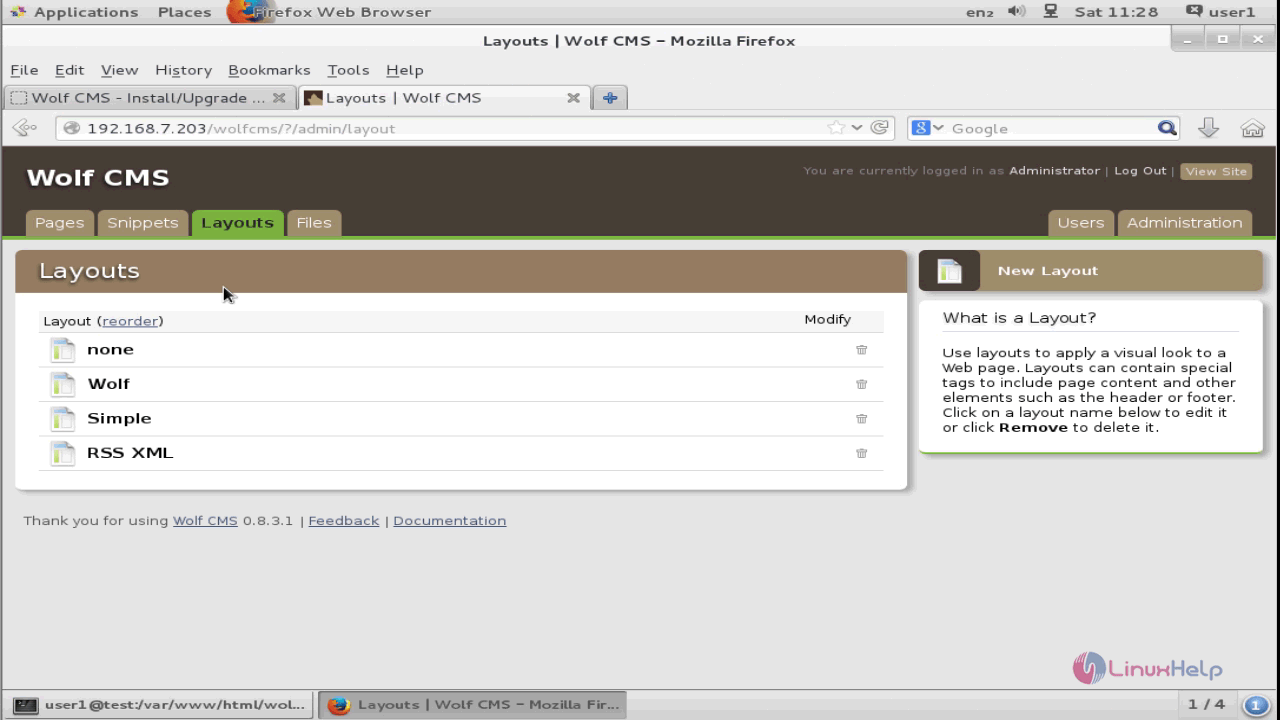
Next add the layouts pertaining to the Wolf CMS. These layouts contains the page contents and other elements of the site.
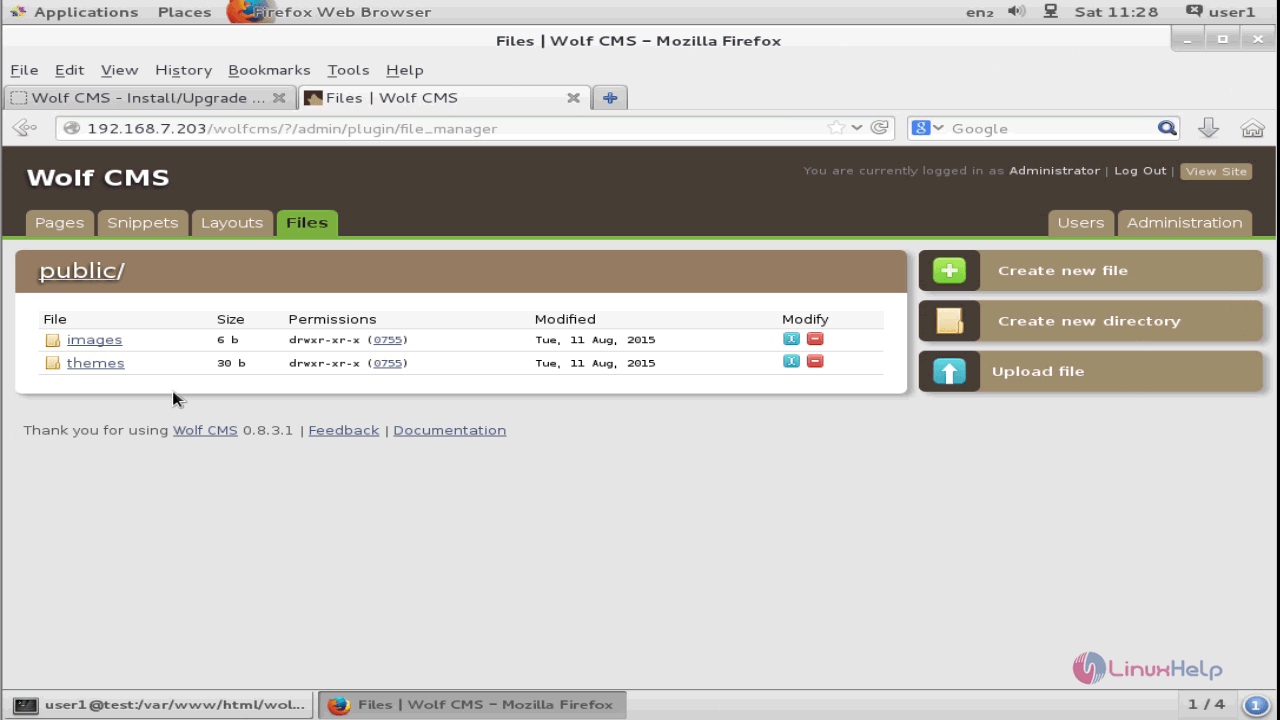
To upload files in the site, choose the upload file option or the files displayed on the screen.
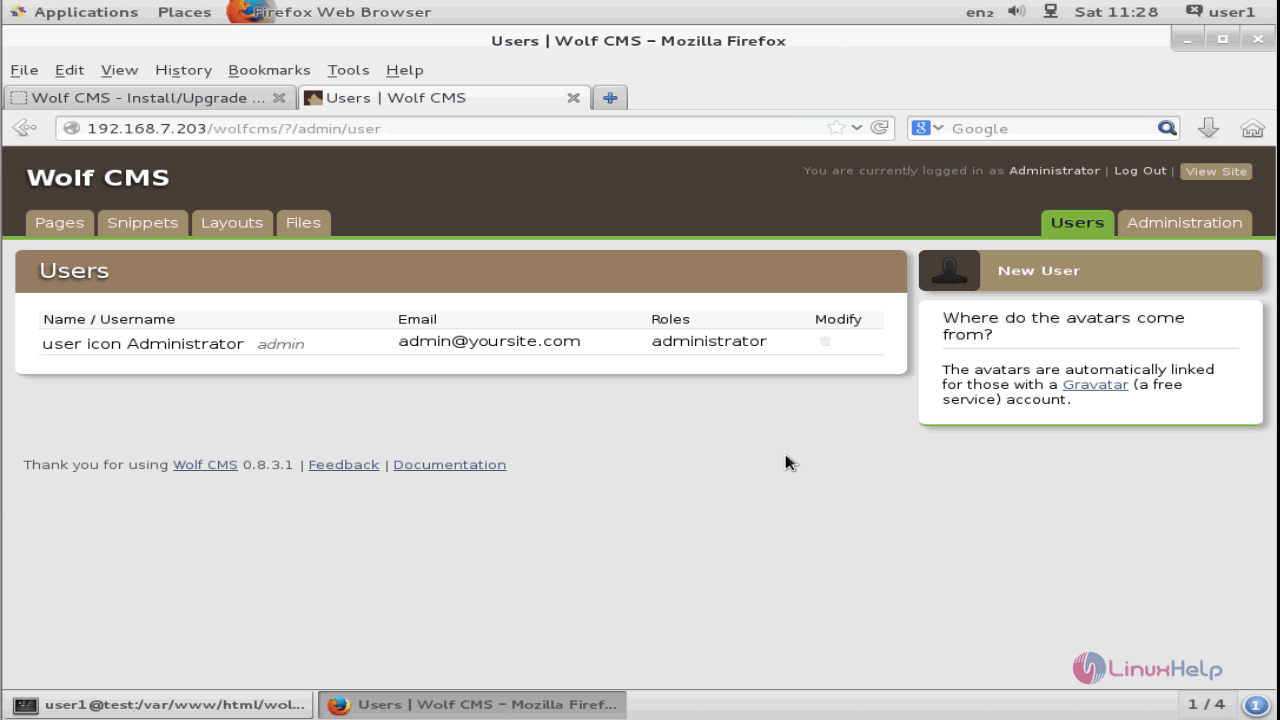
For adding new users in the site, choose the New User option in the right side menu pane.
Thus we conclude the installation procedure of Wolf CMS in CentOS 7.

Comments ( 0 )
No comments available