How to install XOOPS in CentOS
How to install XOOPS in Centos
XOOPS is a popular and easy to use CMS written in PHP. It uses a modular architecture and it is an ideal tool for developing small to large dynamic community websites, weblogs etc.To install xoops,you need to have lamp server installed in your system.
To install XOOPS
First download the installation package by using the following command.
[root@linuxhelp ~]#wget http://sourceforge.net/projects/xoops/files/XOOPS%20Core%20%28stable%20releases%29/XOOPS_2.5.7/xoops-2.5.7.zip/download -O xoops-2.5.7.zip
Saving to: “ xoops-2.5.7.zip”
100%[================================================================> ] 7,305,924    681K/s   in 15s
2017-01-04 05:46:14 (486 KB/s) - “ xoops-2.5.7.zip”  saved [7305924/7305924]
Extract the downloaded package by invoking the following command.
[root@linuxhelp ~]#unzip xoops-2.5.7.zip
  inflating: xoops-2.5.7/upgrade/upd-2.4.x-to-2.5.0/index.php
   creating: xoops-2.5.7/upgrade/upd-2.5.4-to-2.5.5/
  inflating: xoops-2.5.7/upgrade/upd-2.5.4-to-2.5.5/index.php
..
&hellip
&hellip
   creating: xoops-2.5.7/upgrade/upd-2.5.5-to-2.5.6/
  inflating: xoops-2.5.7/upgrade/upd-2.5.5-to-2.5.6/index.php
  inflating: xoops-2.5.7/upgrade/upgrade_tpl.php
Now move the htdocs contents as follows.
[root@linuxhelp ~]# mv xoops-2.5.7/htdocs/ /var/www/html/xoops/
Create a new MySQL database for XOOPS CMS.
[root@linuxhelp ~]# mysql -u root -p
Enter password:
Welcome to the MySQL monitor.  Commands end with   or \g.
Your MySQL connection id is 10
Server version: 5.1.73 Source distribution
Copyright (c) 2000, 2013, Oracle and/or its affiliates. All rights reserved.
Oracle is a registered trademark of Oracle Corporation and/or its
affiliates. Other names may be trademarks of their respective
owners.
Type ' help '  or ' \h'  for help. Type ' \c'  to clear the current input statement.
mysql>  create database xoopsdb
Query OK, 1 row affected (0.00 sec)
mysql>  GRANT ALL PRIVILEGES ON xoopsdb.* TO ' xoopsuser' @' localhost'  IDENTIFIED BY ' password'  WITH GRANT OPTION
Query OK, 0 rows affected (0.00 sec)
mysql>  flush privileges
Query OK, 0 rows affected (0.00 sec)
mysql>  exit
Bye
Create a new virtual host directive in Apache. For example, edit your Apache configuration file (/etc/httpd/conf/httpd.conf by default) and uncomment the following line.
#NameVirtualHost *:80
then, add the following lines at the end of the file.
< VirtualHost *:80>
ServerAdmin [email protected]
DocumentRoot /var/www/html/xoops/
ServerName linuxhelp
ServerAlias www.your-domain.com
< Directory /var/www/html/xoops/>
    Options FollowSymLinks
    AllowOverride All
< /Directory>
ErrorLog logs/your-domain.com-error_log
CustomLog logs/your-domain.com-access_log common
< /VirtualHost>
Restart the Apache web server for the changes to take effect.
[root@linuxhelp ~]# service httpd restart
Stopping httpd:                                            [  OK  ]
Starting httpd:                                            [  OK  ]
Rename the ‘ xoops_lib’ and ‘ xoops_data’ directories and move them out of document root.
[root@linuxhelp ~]# mv /var/www/html/xoops/xoops_lib /var/www/xoops/x00ps_lib
[root@linuxhelp ~]# mv /var/www/html/xoops/xoops_data/ /var/www/xoops/x00ps_data
Change ownership for the xoops directory.
[root@linuxhelp ~]# chown -R apache:apache /var/www/html/xoops/
[root@linuxhelp ~]# chown -R apache:apache /var/www/xoops/
Restart the Apache web server.
[root@linuxhelp ~]# service httpd restart
Stopping httpd:                                            [  OK  ]
Starting httpd:                                            [  OK  ]
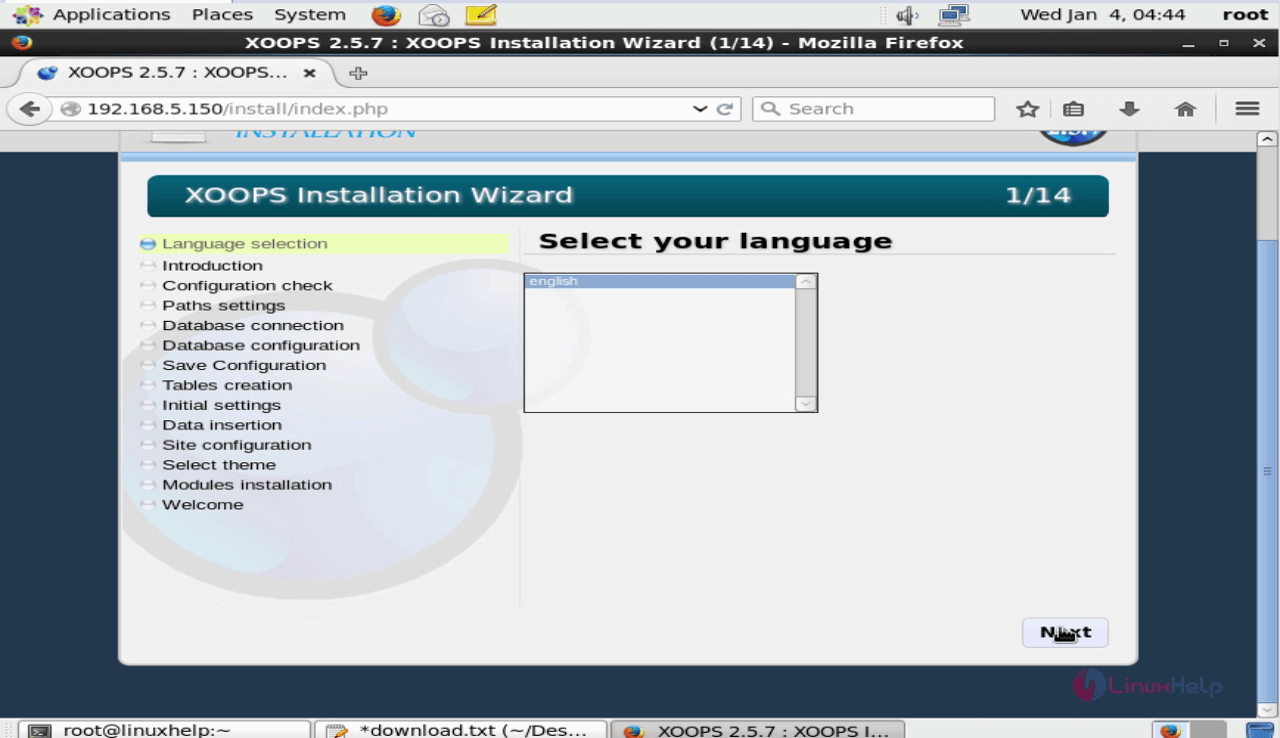
Open the web browser and navigate to http://192.168.5.150. The installation page appears as shown below. Select your language.
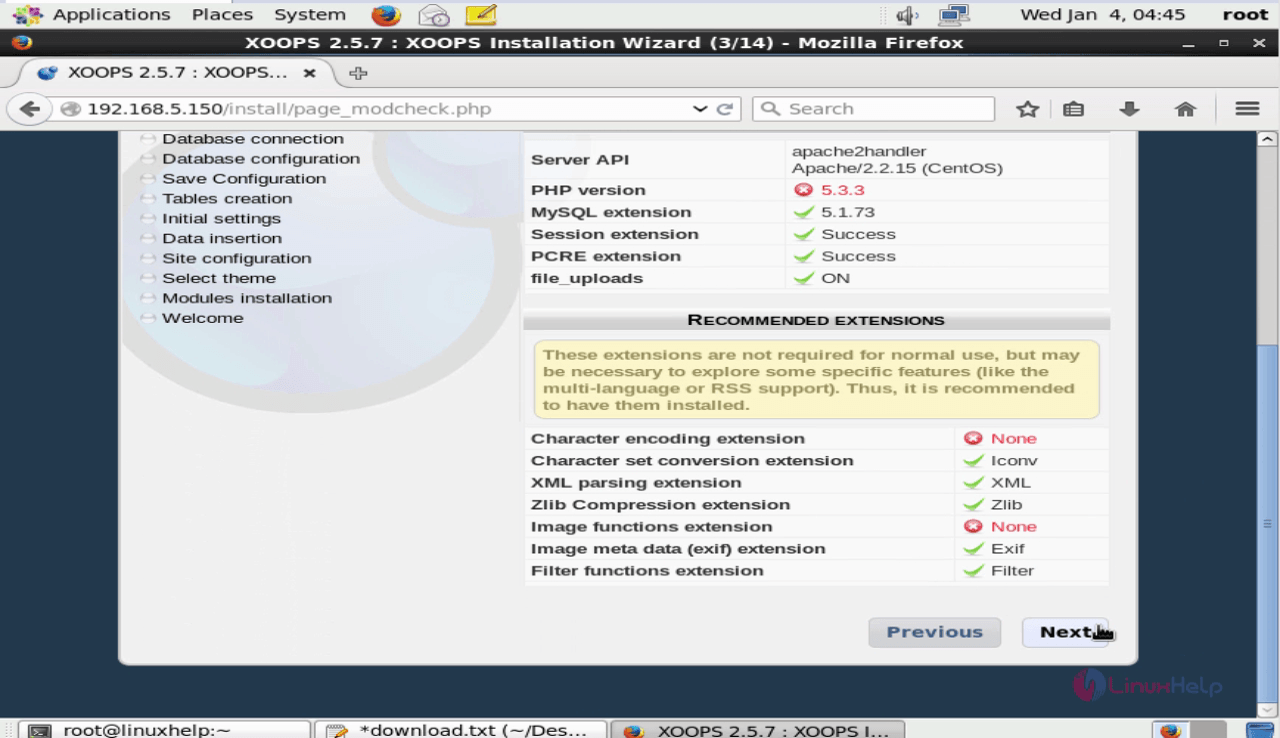
Check the Configuration and click Next.
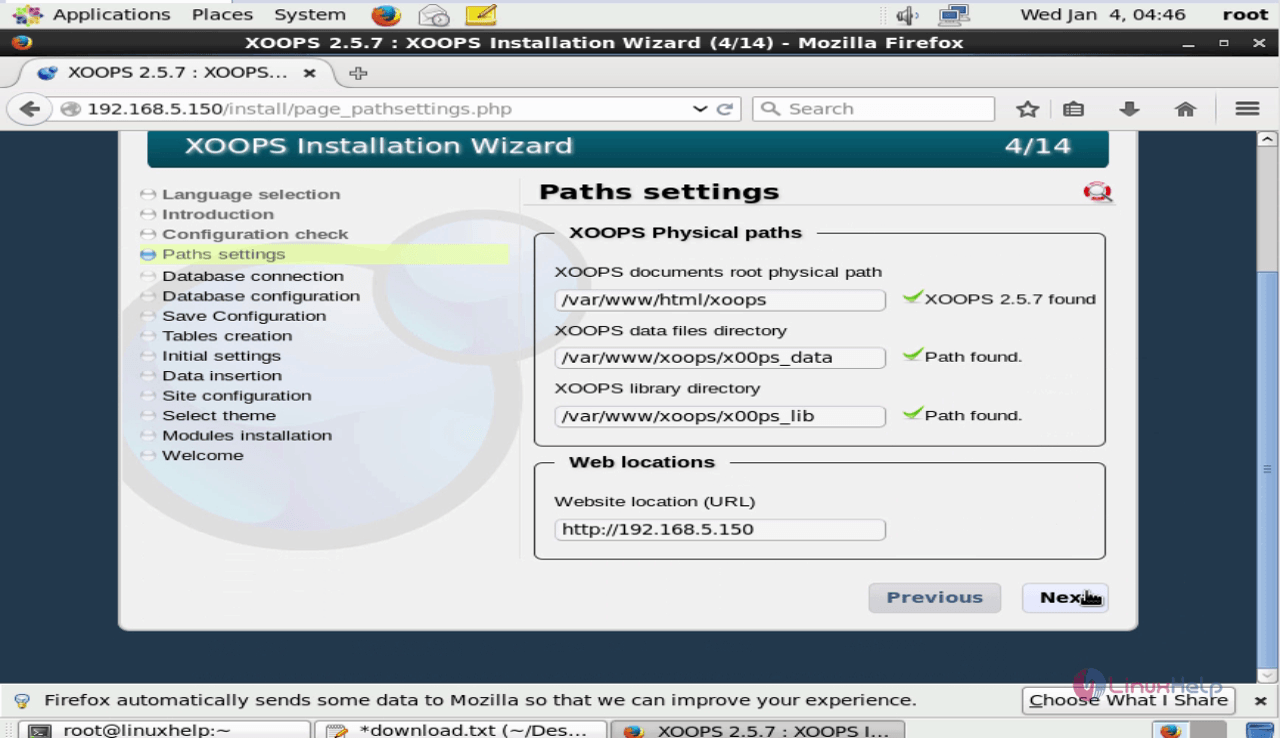
Click on the Path Settings option and make the required changes.
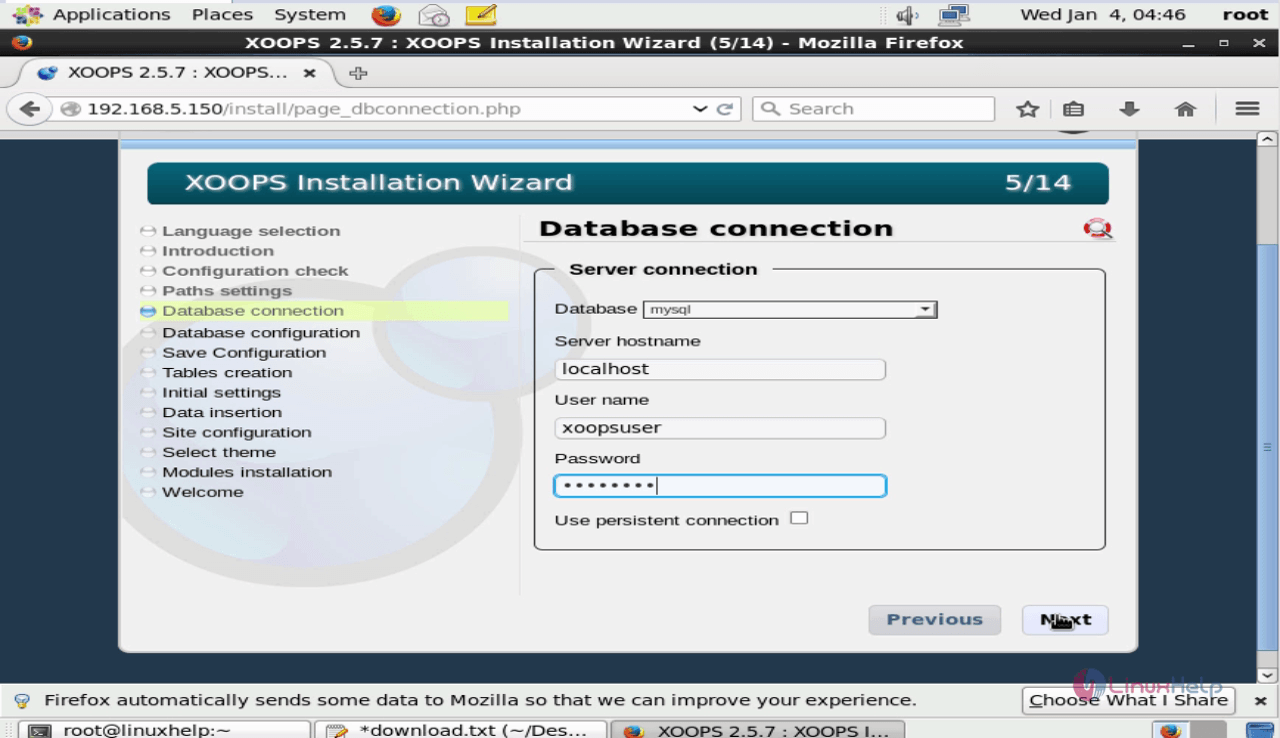
Make the Database configuration.
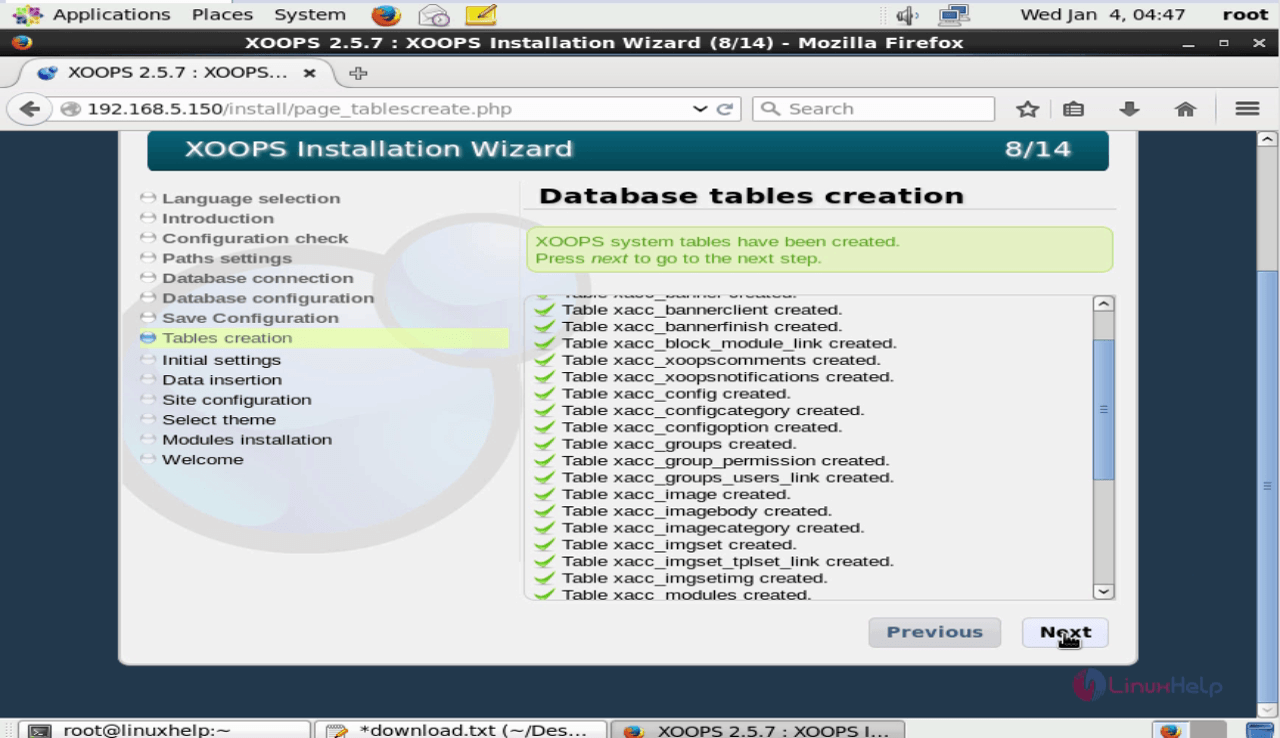
Click on the Tables creation option as follows.
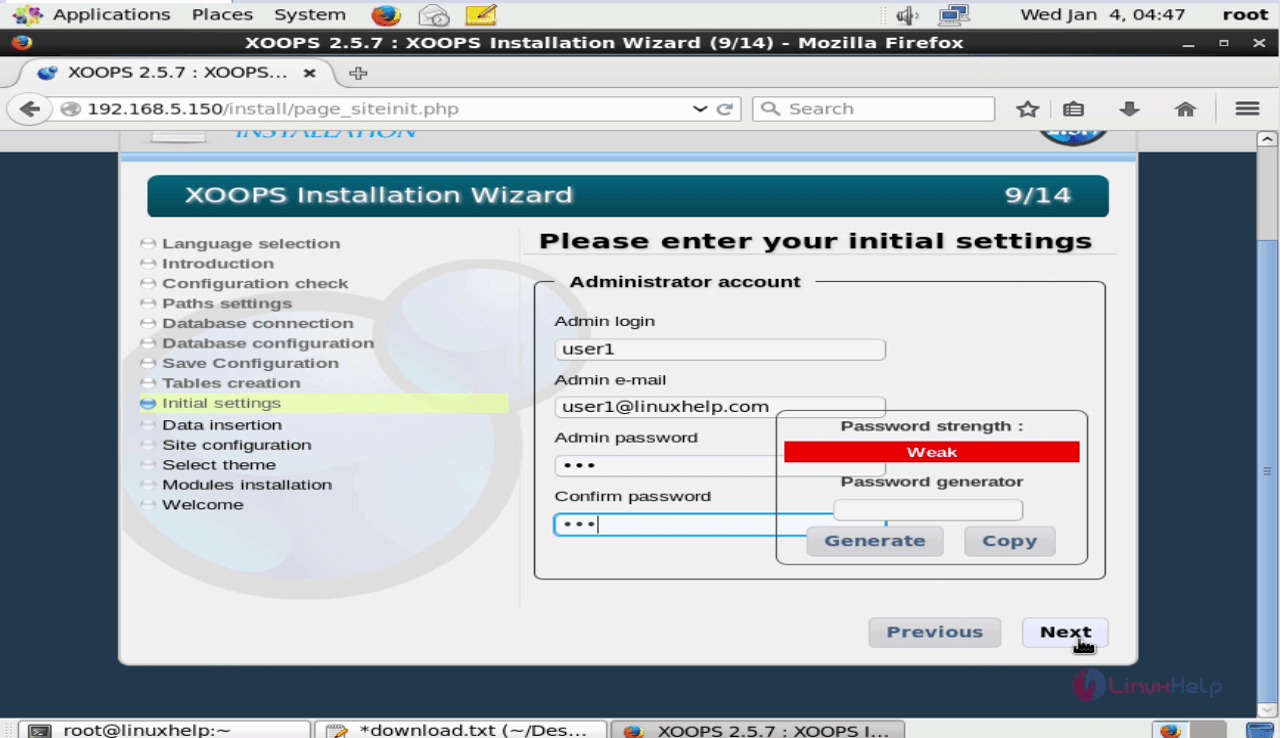
Enter the required details in the Initial settings tab
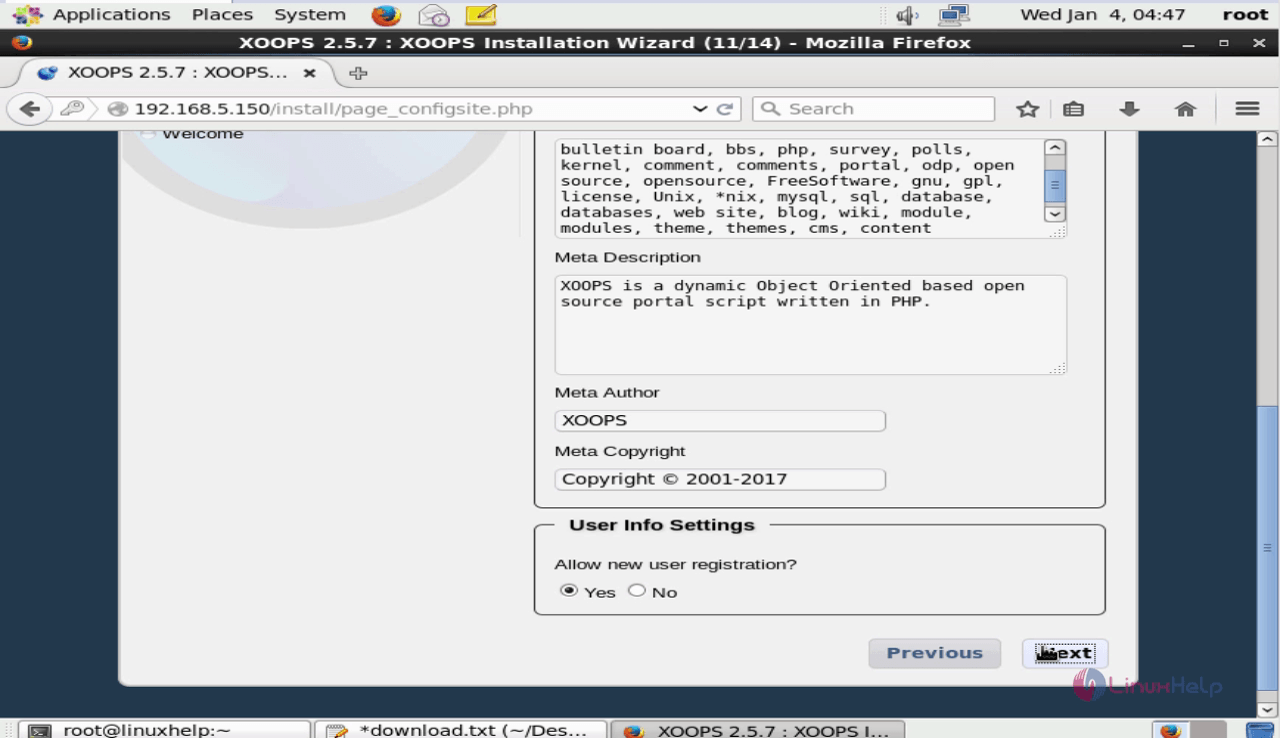
Make the needed Site configuration.
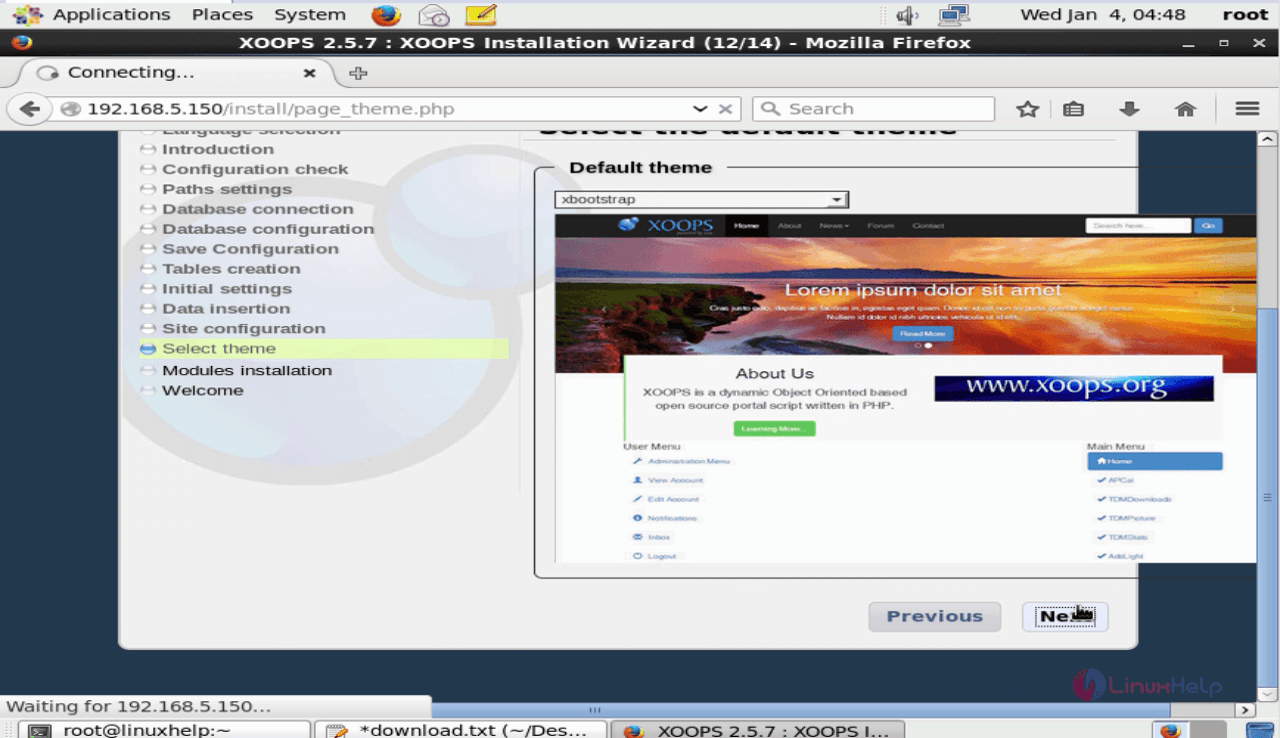
Select your desired theme from the select theme option.
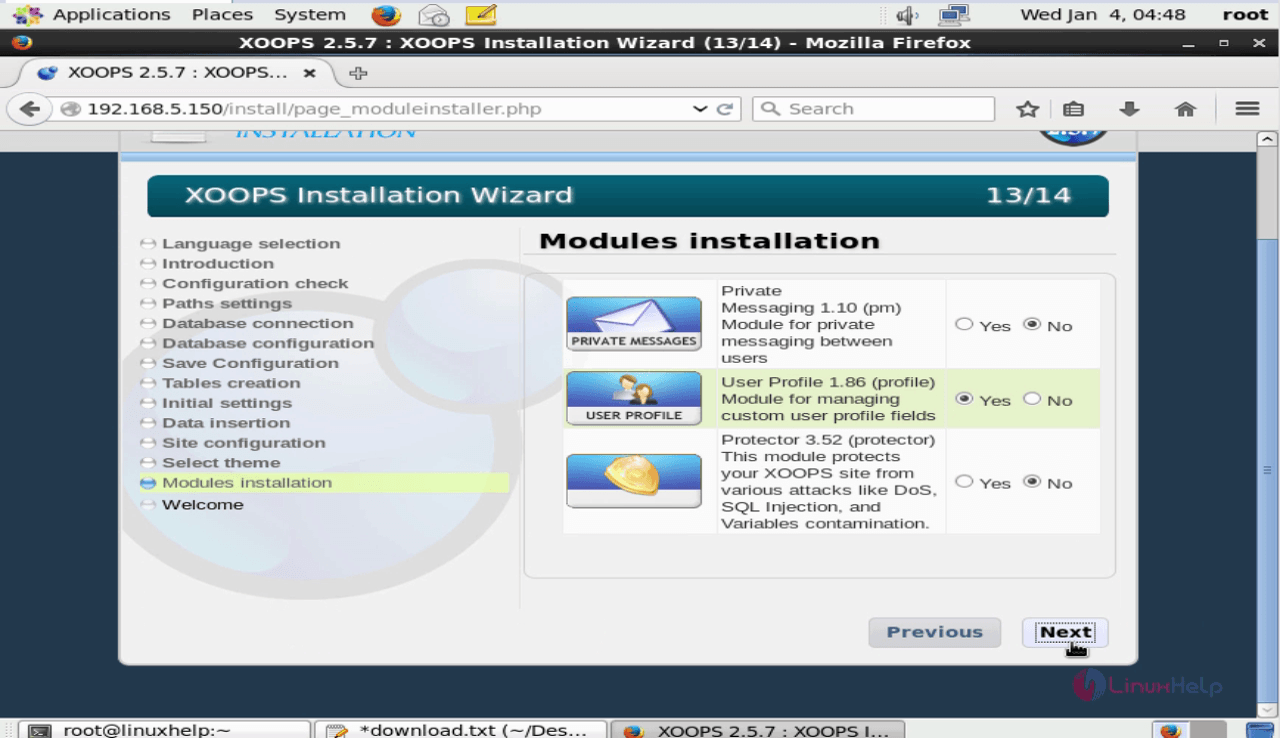
Choose the Next option in the Modules installation tab.
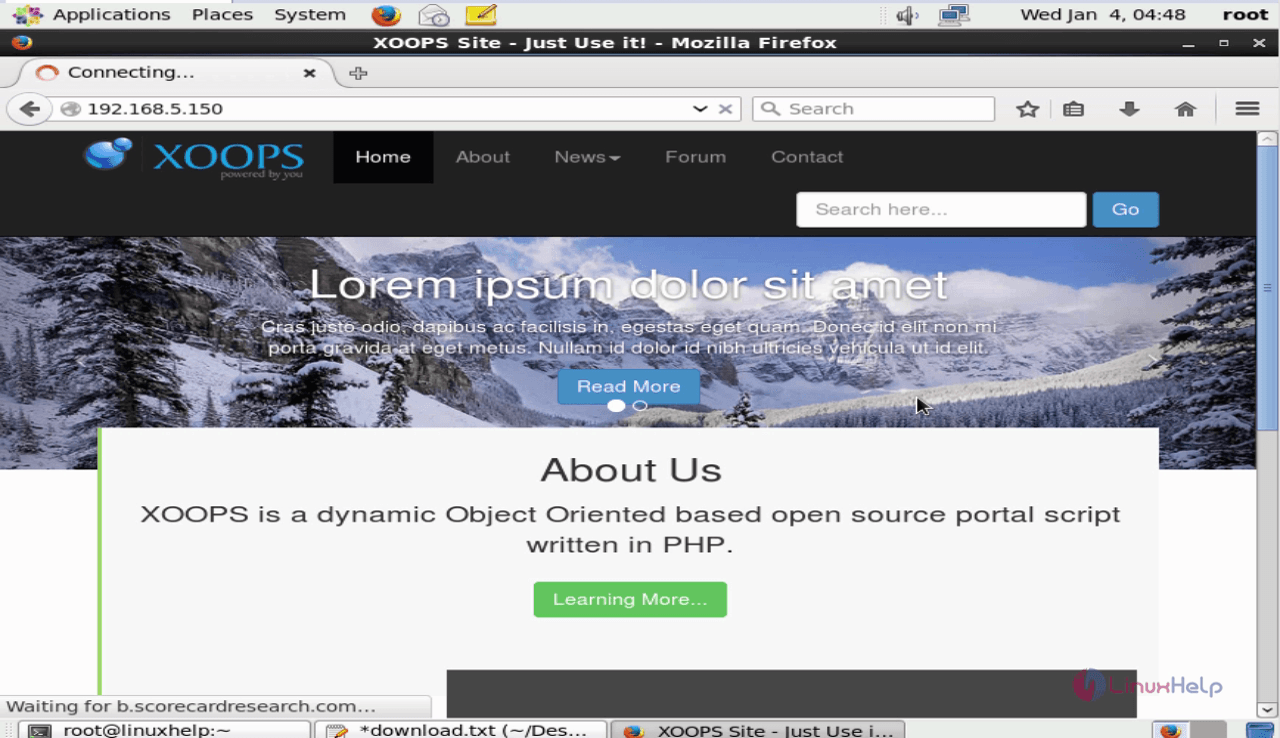
Xoops Default site looks as below.

Comments ( 0 )
No comments available