How to Subsonic on Ubuntu 16.04
To Install Subsonic on Ubuntu 16.04
Subsonic is a free, multi-platform web media streamer. Subsonic is a media server for Streaming Media files over Network. It is a web based music streamer, podcast receiver and jukebox that is used to enjoy music from anywhere. It also provides facility to share music files and folders. It works supports for MP3 streaming, AAC, OGG etc. In this article, you will be briefed about the method to install Subsonic on Ubuntu 16.04.
Installing Subsonic
In order to install Subsonic, you need to add the key for the repository, and for that, you need to run the following command.
root@linuxhelp11:~#  wget -q -O - http://archive.getdeb.net/getdeb-archive.key | sudo apt-key add -
OK
And then, make sure you add that respective repository by making use of the following command.
root@linuxhelp11:~# sh -c ' echo " deb http://archive.getdeb.net/ubuntu wily-getdeb apps" > > /etc/apt/sources.list.d/getdeb.list'
Later, you need to update the repository as follows.
root@linuxhelp11:~# apt-get update
Hit:1 http://in.archive.ubuntu.com/ubuntu xenial InRelease
Hit:2 http://in.archive.ubuntu.com/ubuntu xenial-updates InRelease
Get:4 http://security.ubuntu.com/ubuntu xenial-security InRelease [102 kB]
Get:5 http://in.archive.ubuntu.com/ubuntu xenial-backports InRelease [102 kB]
Get:3 http://screenshots.getdeb.net wily-getdeb InRelease [8,141 B]
Get:6 http://screenshots.getdeb.net wily-getdeb/apps amd64 Packages [66.6 kB]
Get:7 http://screenshots.getdeb.net wily-getdeb/apps i386 Packages [67.4 kB]
Fetched 346 kB in 3s (114 kB/s)
Reading package lists... Done
You shall now proceed with the installation of Subsonic by executing the following command which triggers the installation process.
root@linuxhelp11:~# apt-get install subsonic
Reading package lists... Done
Building dependency tree
Reading state information... Done
The following packages were automatically installed and are no longer required:
  gnome-software-common libgtkspell3-3-0
Use ' sudo apt autoremove'  to remove them.
The following additional packages will be installed:
  ca-certificates-java faad ffmpeg flac fonts-dejavu-extra i965-va-driver
  java-common lame libaacs0 libass5 libav-tools libavcodec-ffmpeg56
  libavdevice-ffmpeg56 libavfilter-ffmpeg5 libavformat-ffmpeg56
  libavresample-ffmpeg2 libavutil-ffmpeg54 libbdplus0 libbluray1 libbs2b0
  libcrystalhd3 libdc1394-22 libfaad2 libflite1 libgif7 libgme0 libgsm1
.
.
.
Setting up subsonic (5.3-1~getdeb1) ...
Processing triggers for libc-bin (2.23-0ubuntu3) ...
Processing triggers for ureadahead (0.100.0-19) ...
Processing triggers for systemd (229-4ubuntu4) ...
Once installed, you shall start the Subsonic service by making use of the following command.
root@linuxhelp11:~# systemctl start subsonic
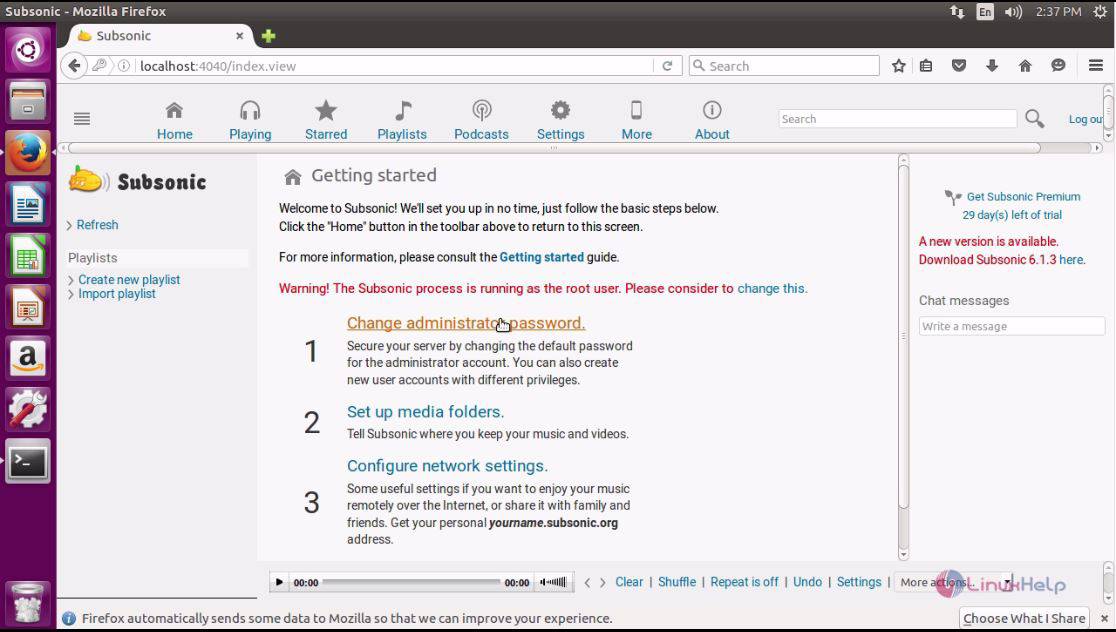
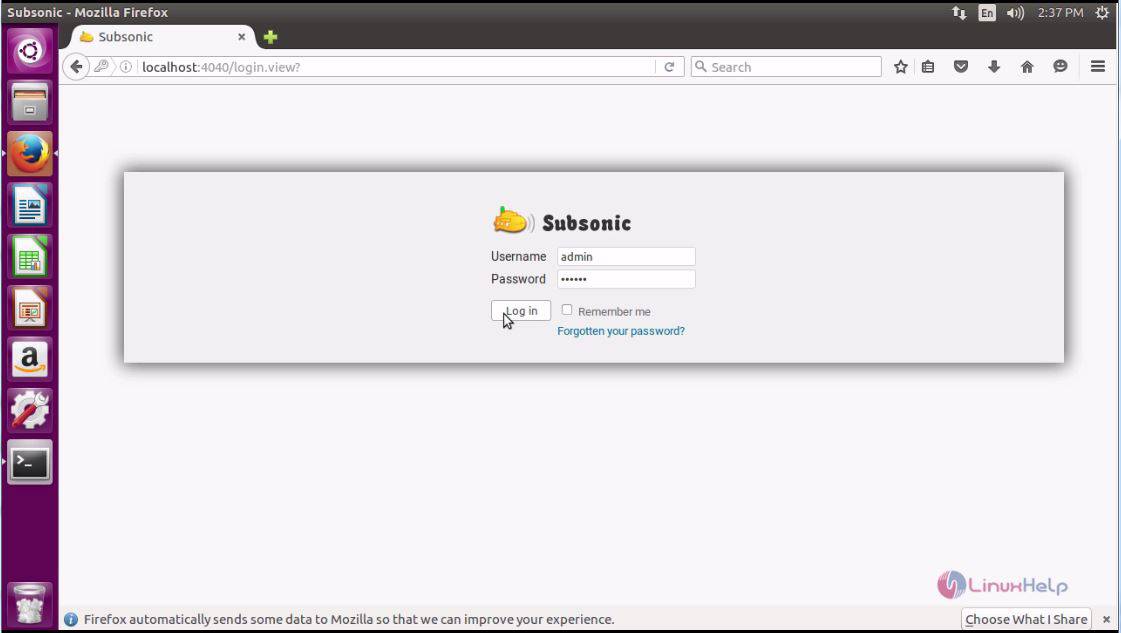
And then, open your browser and give http://yourdomain:4040 as your URL. The login page of Subsonic gets opened. By default, the login credentials for both username and password is admin. Enter it and click login.

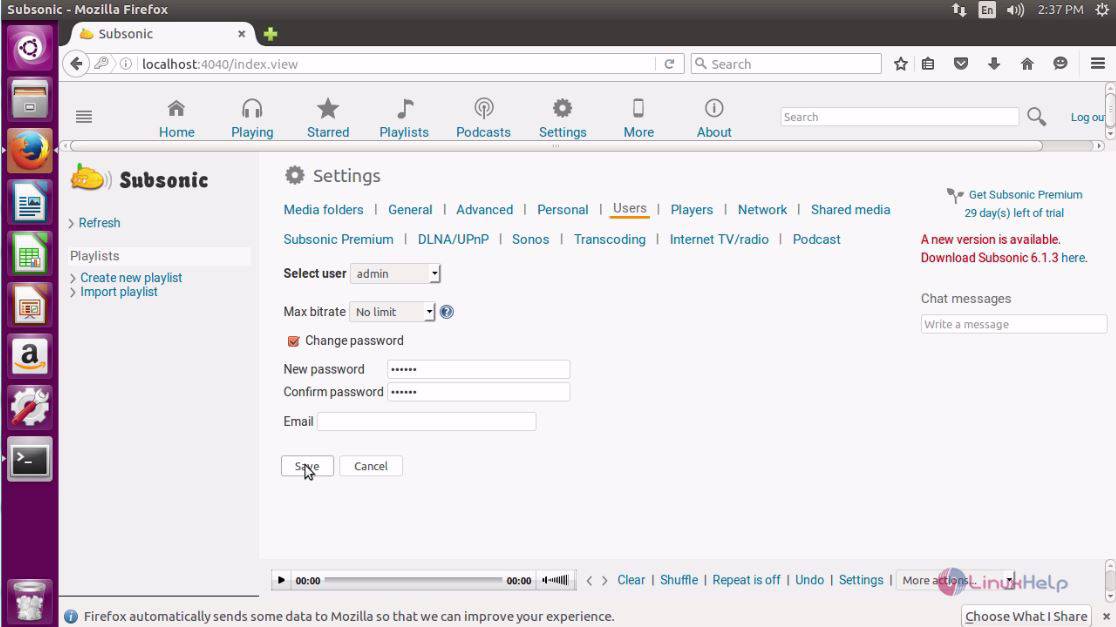
Once you are inside, change the admin password.
Choose the option change password and give password and click save.
Now, you shall login with your created created credentials.
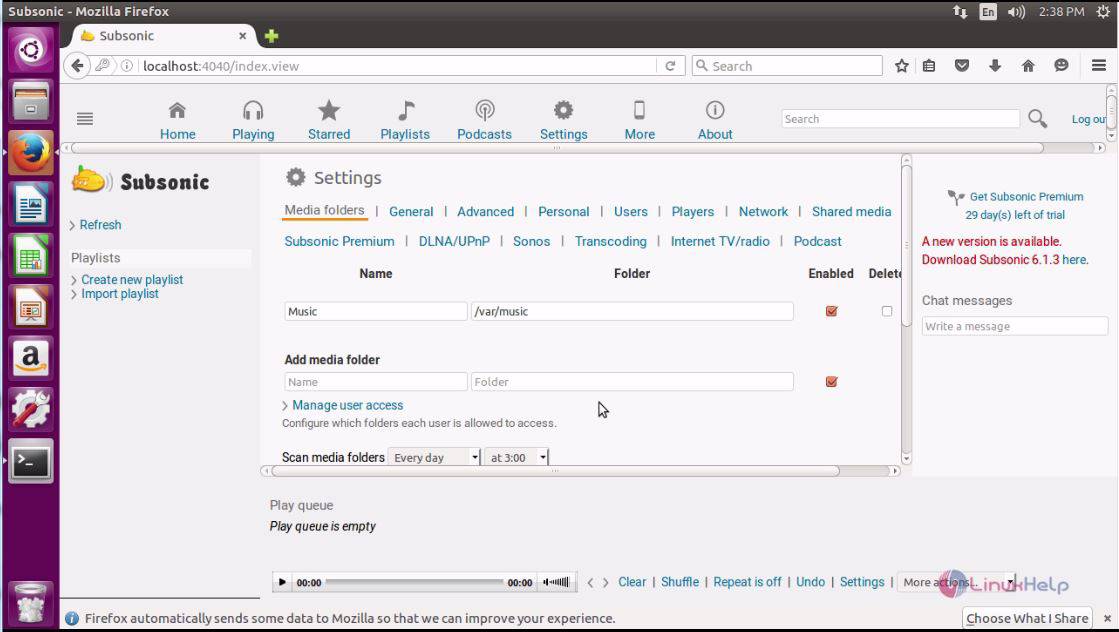
And then, you need to setup media folder in the following manner.
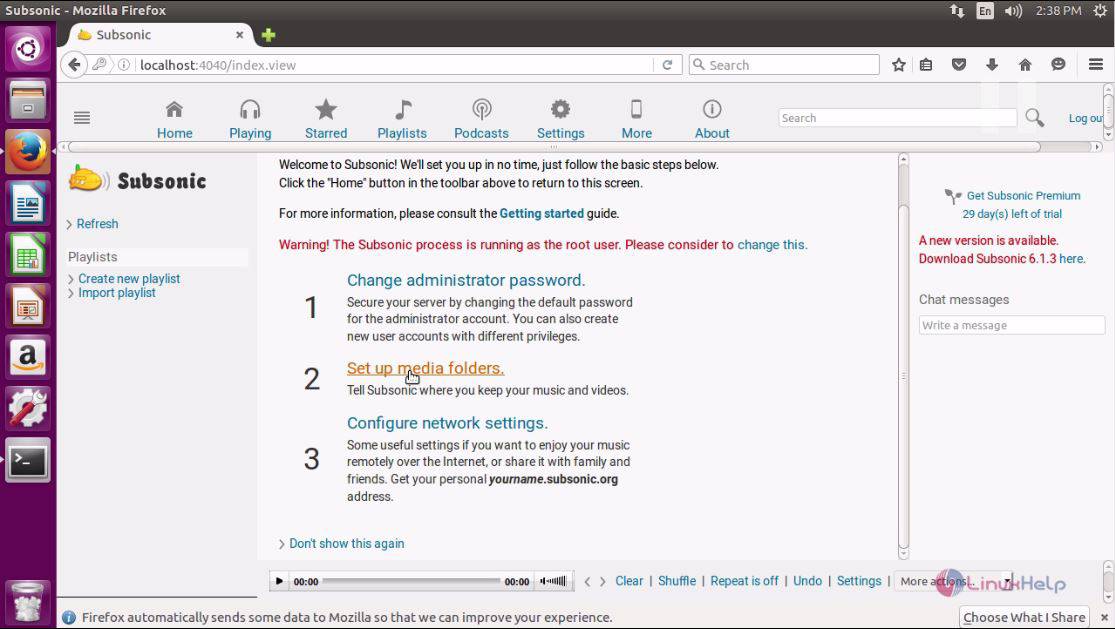
Next choose the media folder and click save to proceed further with the settings.

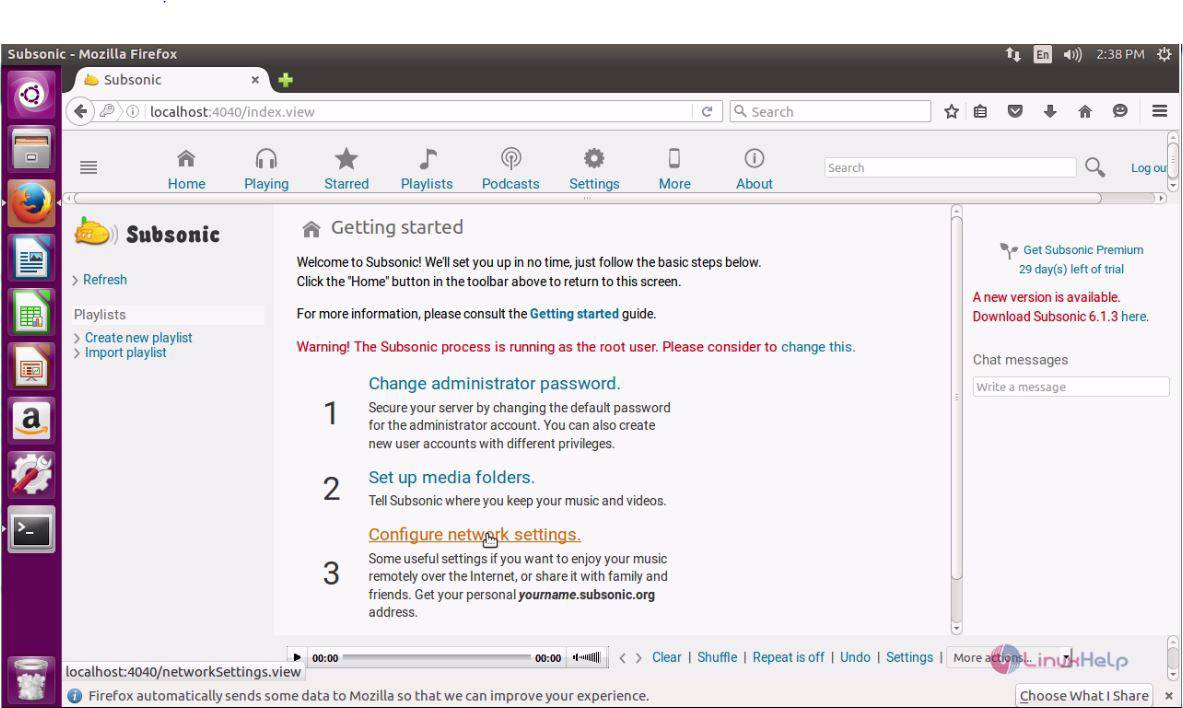
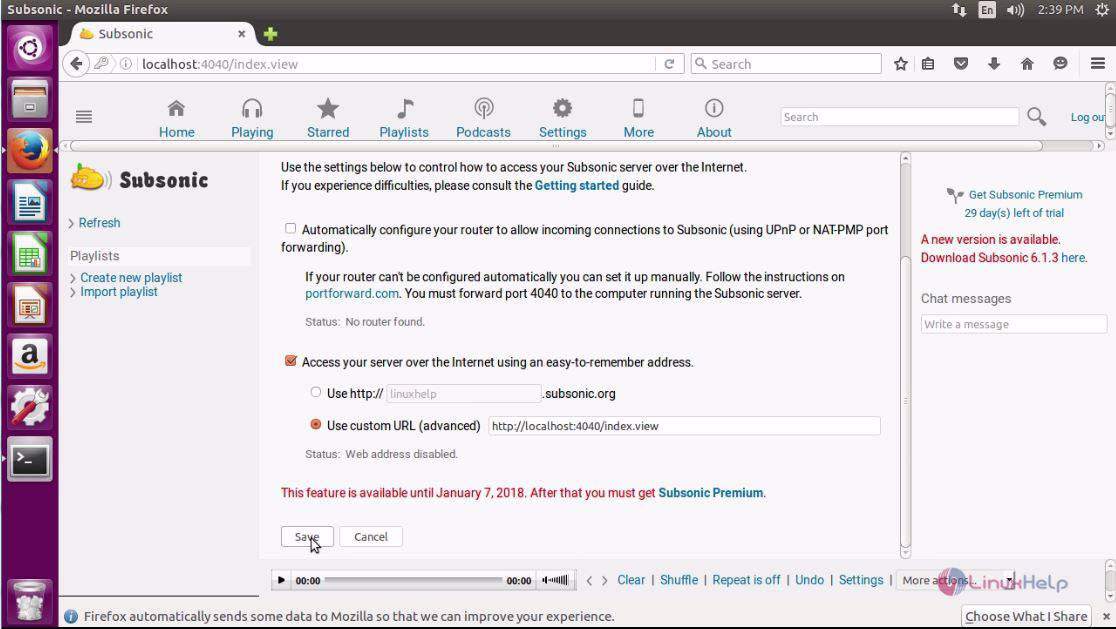
Here, you need to configure network settings.
And then give the URL and click save.
Once you are done with that, you will be taken to the Welcome page of Subsonic.
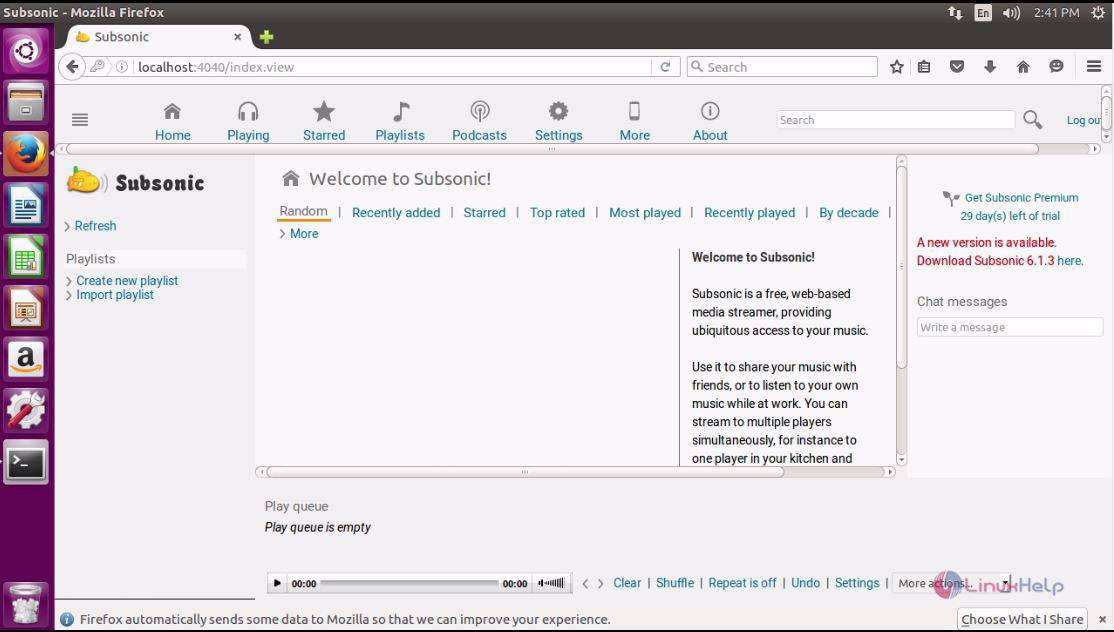
With this, the installation of Subsonic on Ubuntu 16.04 comes to an end.
Comments ( 0 )
No comments available